
wooly sheep nursery mobile
As an Amazon Associate I earn from qualifying purchases.

Oh how we love today’s guest, Alicia from La Famille. Not only is she a master decorator, organizer, repurposer, party planner and family tradition maker, she is one of those rare blog friends that has transitioned into a real life friend (yep, we text her pictures when we’re party prepping- ha!). She is genuine and true and a great mama and a sweet friend… we count ourselves blessed to know her.
 Hey everybody, I’m Alicia. I write a blog over at La Famille and lately I’ve been writing a lot about the little Bebe we’re expecting in April. He (or she) will be our fourth. Fourth! I’m getting ready as much as I can…but if you read my blog, you also might know that our current living situation is about to expire in April as well. So, big change and babies…let’s just deal with this by doing a little needle felting, shall we? Ok.
We don’t know what the gender of this baby is and I think sheep are A.dorable, so sheep it is for the soon-to-be nursery. I’ve been gathering little accents in white and cream and grey for a while and I’ve been wanting to make a mobile forever. So when Kirsten asked me to do a project for her Winter White series I know right away what I wanted to do.
Let’s get started.
Needle felting is sooo addicting. I got turned onto it about a year or so ago. It’s so fun. It’s sort of hard to explain with just pictures, but there are tons of good YouTube videos out there. Here’s the supplies you’ll need:
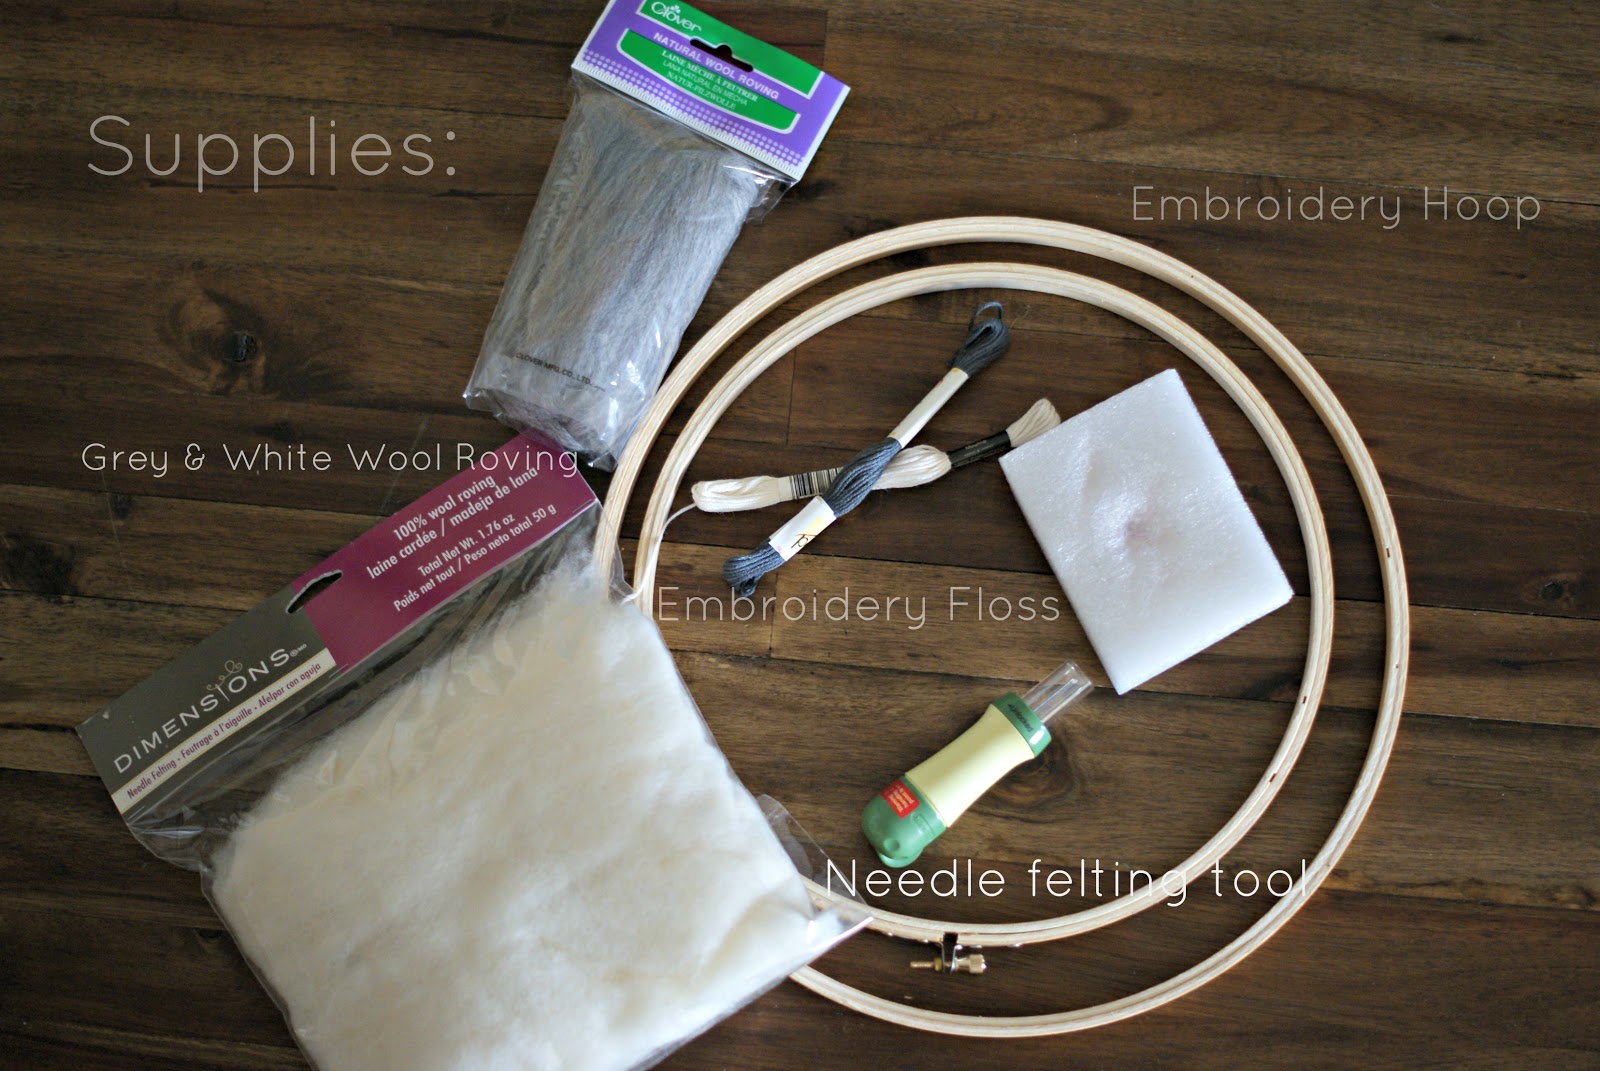
You’ll also need some vintage book paper, black paint, toothpicks, grey felt, and a felting mat.
You can use a single needle tool or a multi-needle tool, which is much easier for this particular project. The one I’m using came in a package that looked like this. Most craft stores should carry them.

We’re going to start by making four little sheep. Take a chunk of your wool roving and roll it up into a roll like so:
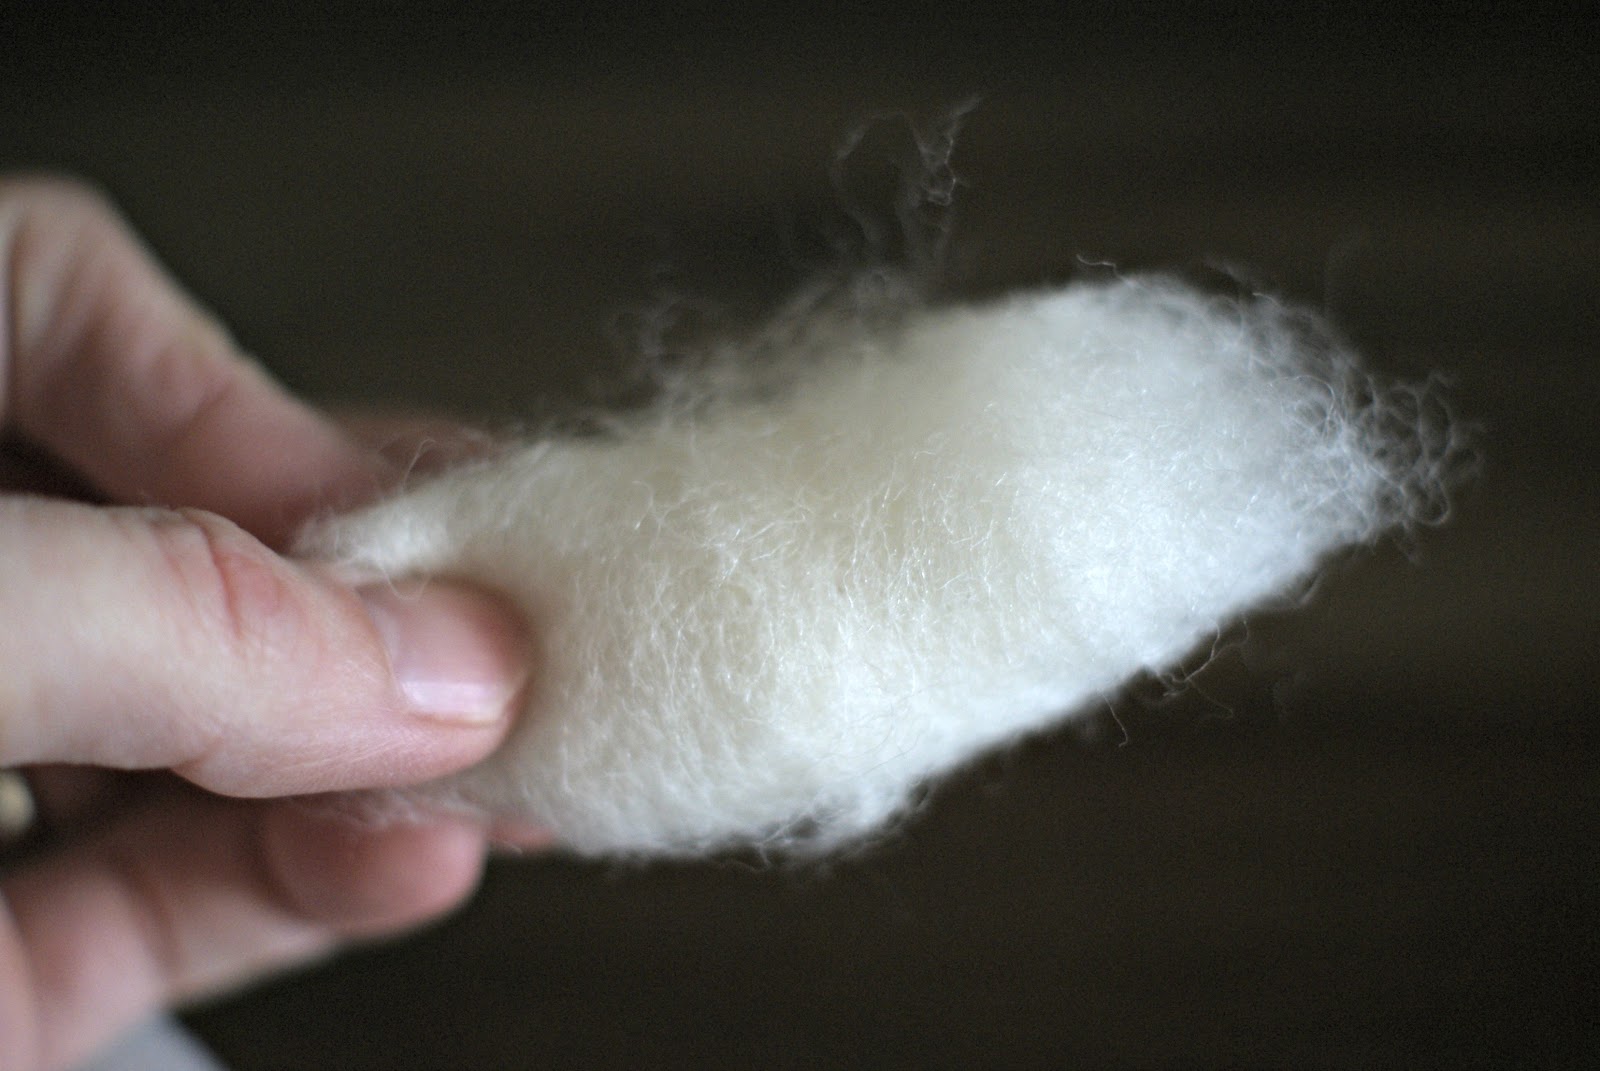
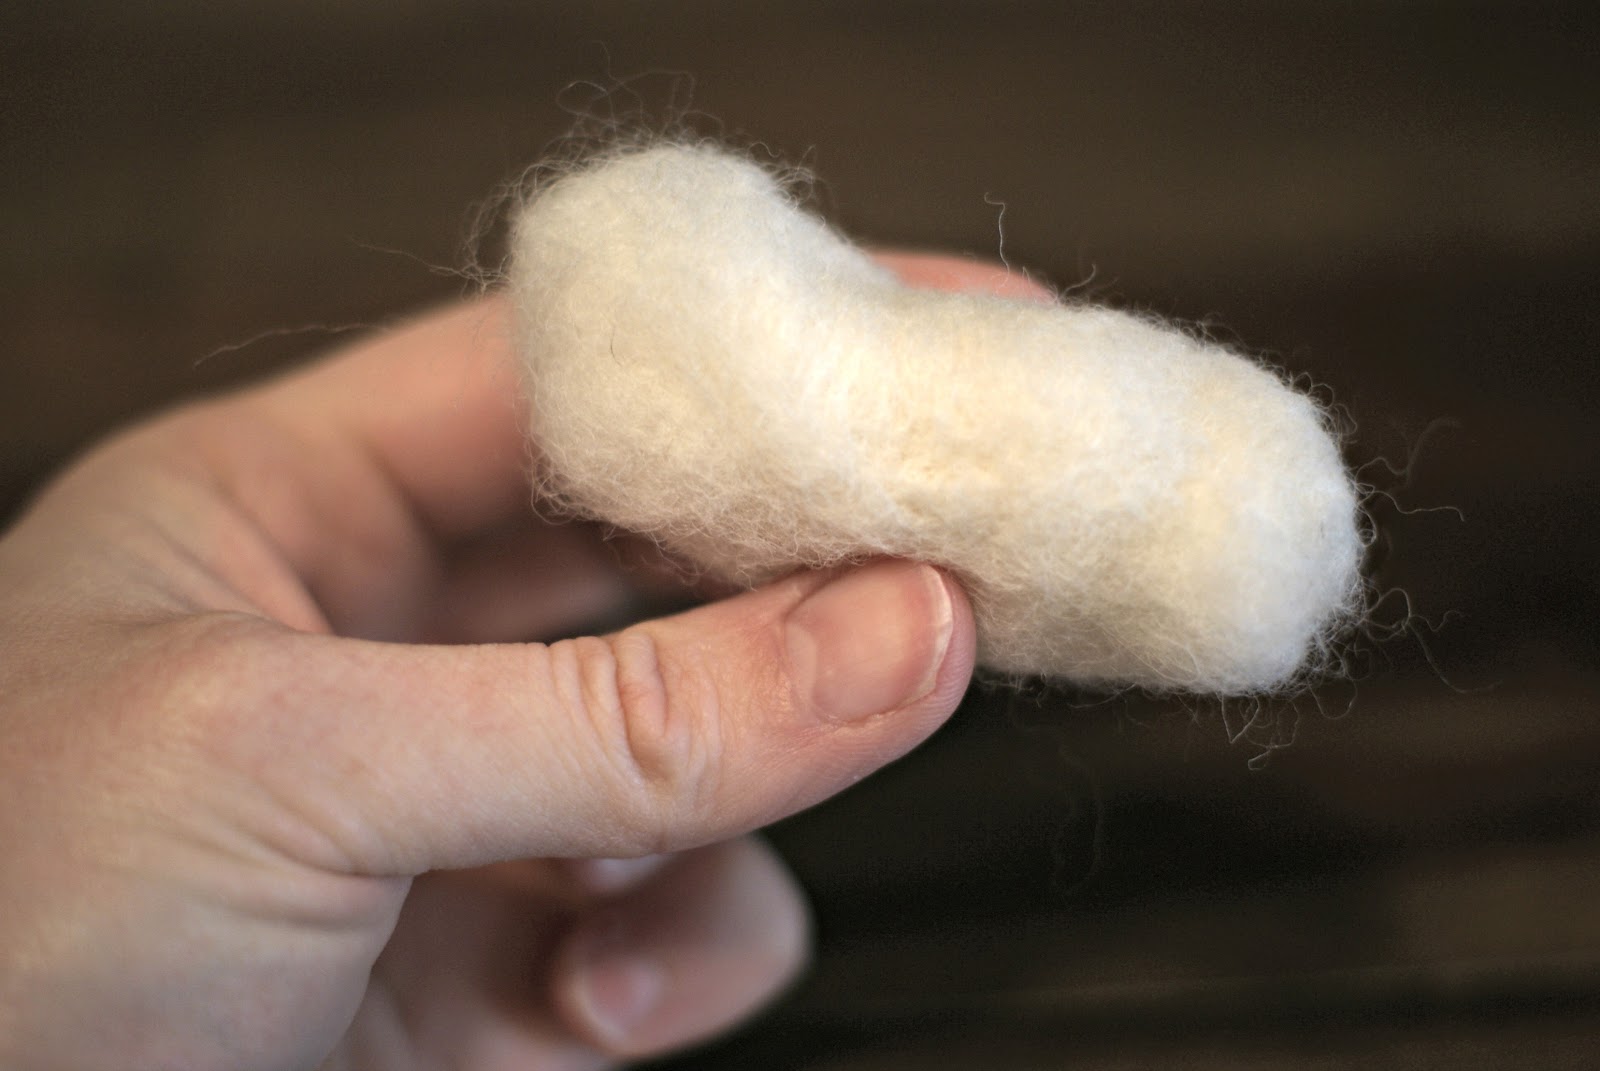
Now, depending on how chubby you want your sheep, you can keep adding and adding after you felt. But working around your roll of roving, just use your needle tool to felt the wool. You are essentially pressing those fibers together to make them more solid and shapely. Just keep rolling and pressing with your tool until you get the desired shape.

You should end up with a little nugget like this. Don’t worry if your sheep are not all the same size…they won’t be. That’s ok.
Now add the face and ears. You don’t need much. This is about all you need for the face:
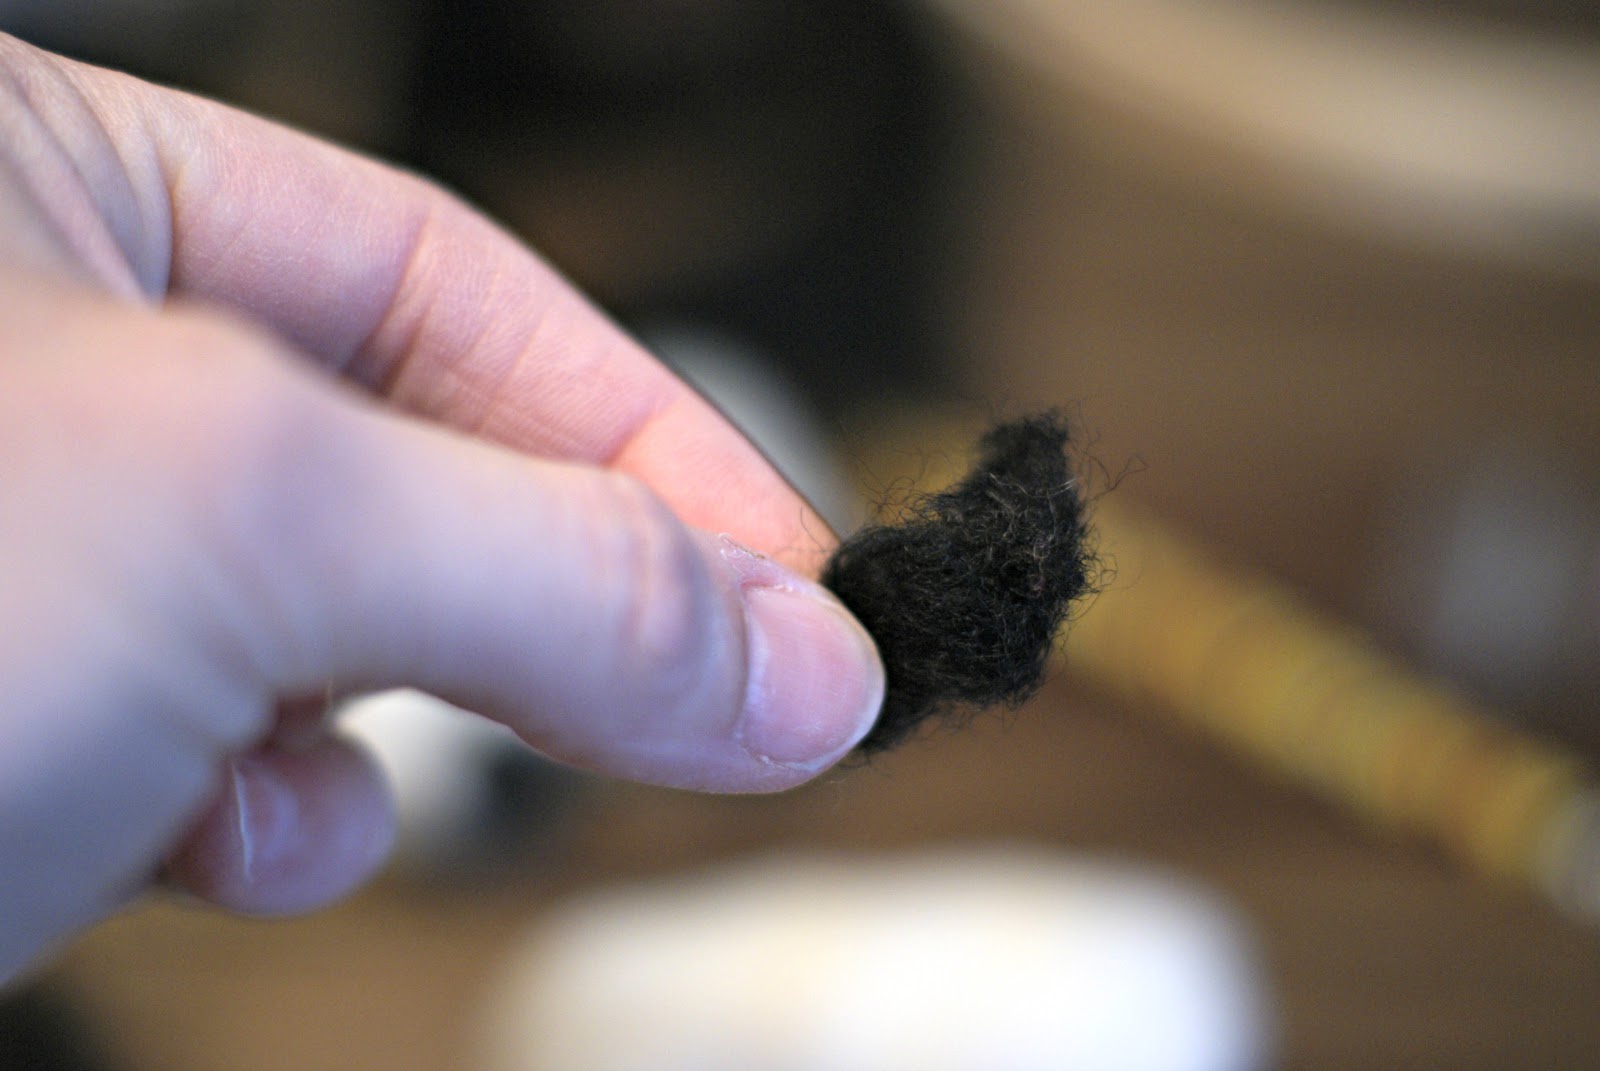
Just roll up your black piece and lay over the end of your white roll. Use your felting tool again to fix your face onto your sheep’s body. Do the same thing with less black wool for the ears.

The legs are just toothpicks painted black. I used a piece of styrofoam to hold the legs for me. I also chose to exaggerate the length of my sheeps’ legs for fun.

After your legs are dry, just use a needle to make little holes in the underside of your sheep where the legs will go. I used a dot of Tacky Glue on the end of my legs before I stuck them in the holes just in case.
And here’s your little herd:

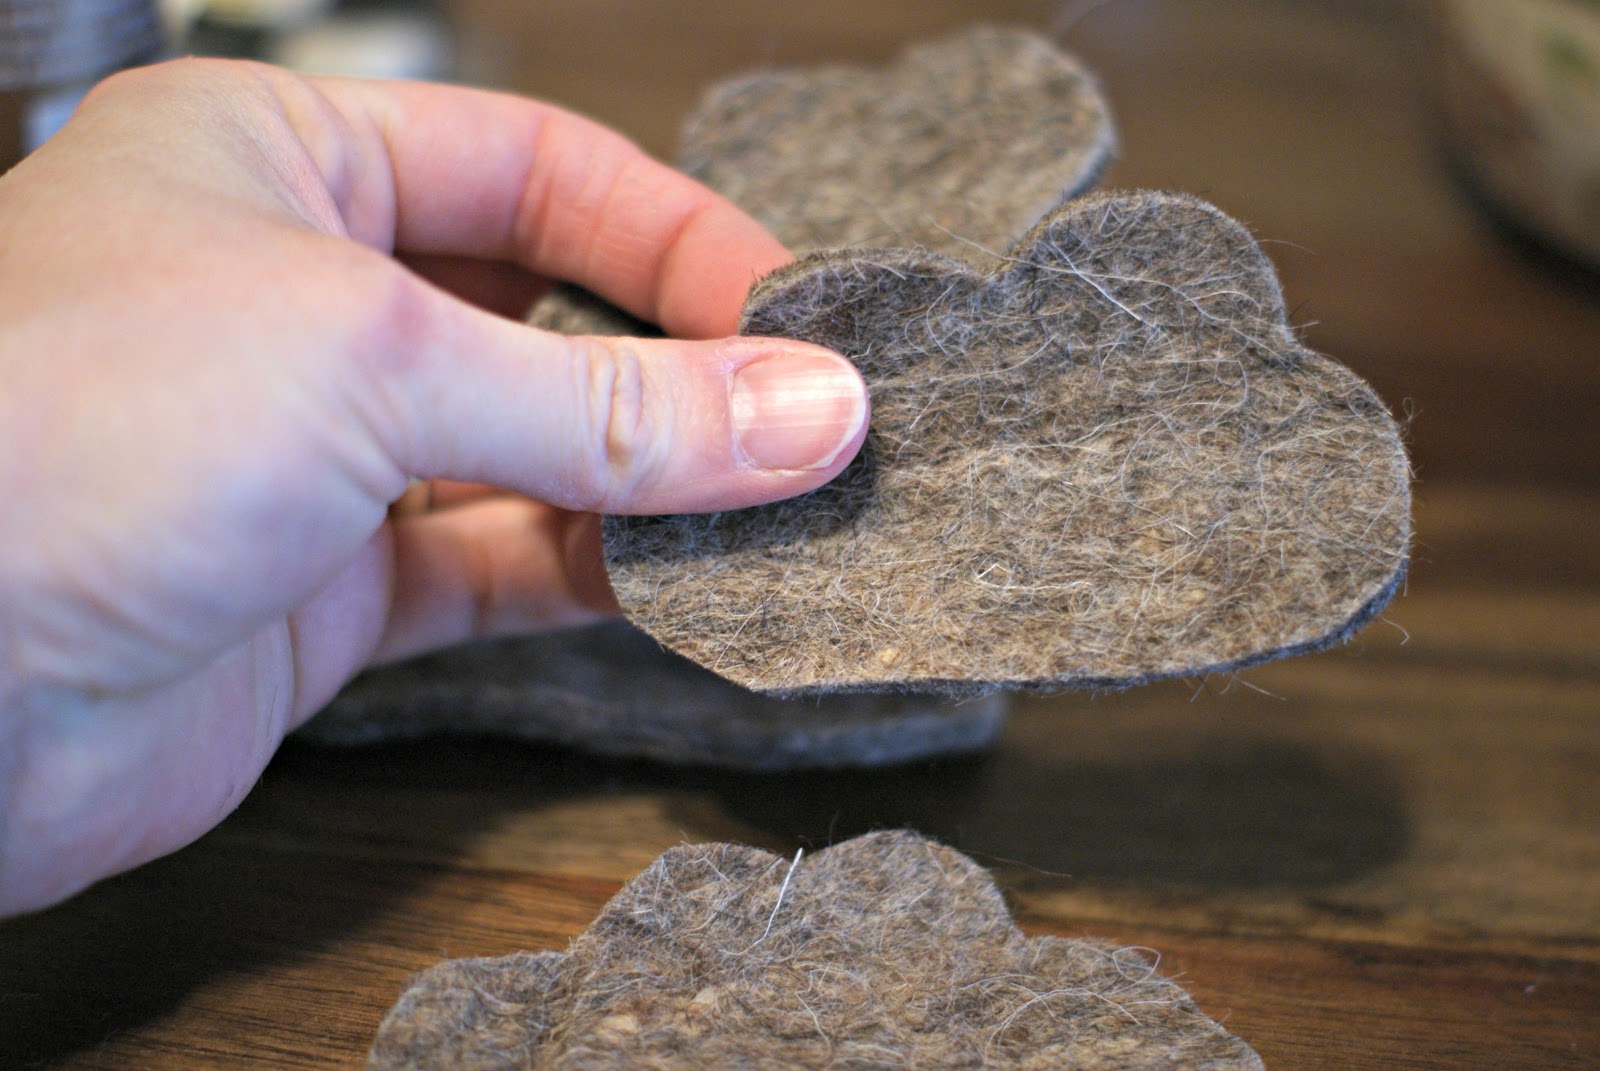
Next, let’s make some clouds. First I took some grey felt and free handed some cloud shapes. They’re all different…that’s ok:
I used my needle tool again to press some white roving into my cloud shape.
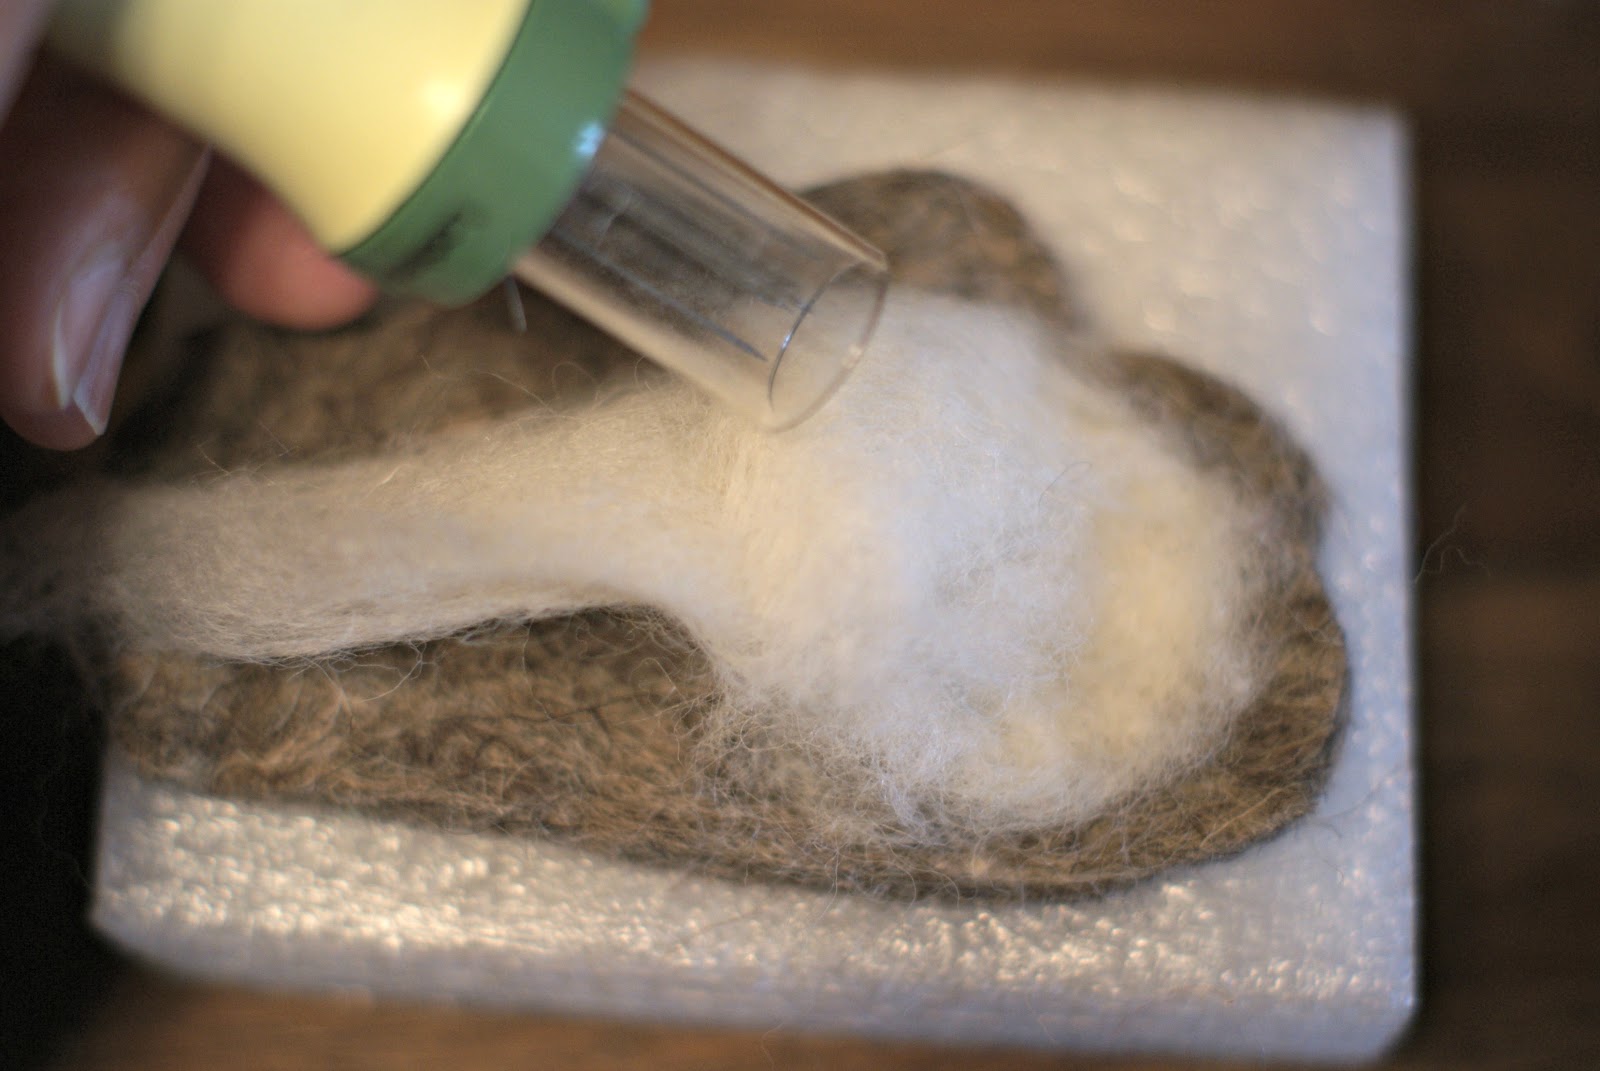
Here’s the finished cloud…

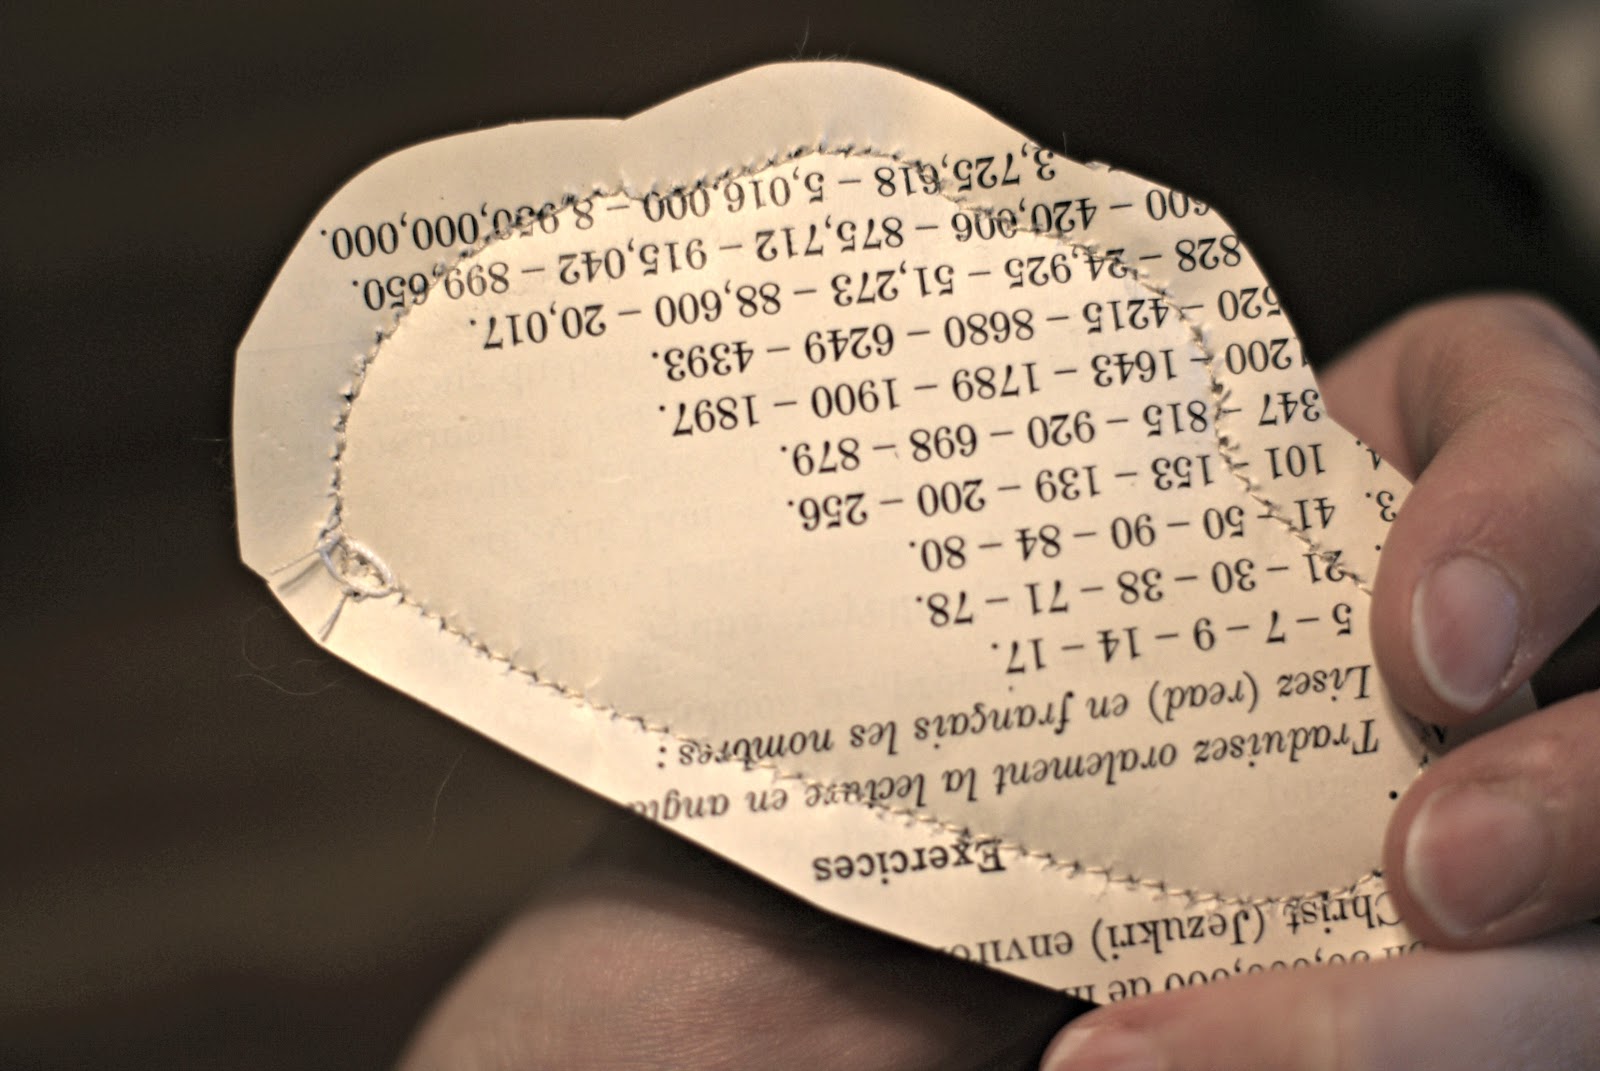
I knew this mobile would be moving and I didn’t want there to be a lot of grey showing, so I covered the backs of the clouds with vintage paper and sewed it on:
Now all that’s left is tying your clouds and sheep onto your embroidery hoop! I used a 10″ hoop for mine, but you could make it as big or small as you want.


I’m kinda loving my little Spring Chick’s mobile. Thanks for hanging out with me today! And thanks for having me, Ms. K!
Have a great day, crafty people!
xo,
 Also, be sure to go check out the Gray Day Tulle Skirts that are up for Winter Whites at delia creates today!
your sweet intro made my day, sweet thing 🙂 so happy to be part of your amazingness!!
xo,
a
Very cute! I have never tried needle felting really want to. Best wishes to you and your new baby Alicia!
This is quite possible the cutest mobile ever! Pinning!
This is absolutely precious!! What is it about tiny fluffy sheep and clouds? So gorgeous. 🙂
Congrats on your little one!
So cute, right? LOVE the sheep. 🙂