
embroidery 101- how to hand embroider a onesie
As an Amazon Associate I earn from qualifying purchases.
 When I shared the custom embroidered onesie that I made for my niece Josie, I promised an embroidery primer. Today is the day, friends.
This little primer truly is pretty basic- enough to help you embroider onesies and pillows and home decor projects.
 Before you get started, trace the name/design you’ll be embroidering onto your onesie (or other fabric) with a fabric pen. If your fabric is stretchy (like jersey t-shirt/onesie material), also pin interfacing onto the back side of where you’ll be stitching (it acts as a stabilizer).
 Thread your needle with embroidery thread. The kind I use is six strands thick (I think that’s pretty standard) and I leave all six strands intact (sometimes for embroidery, you pull apart the strands for precision, but not for this project). Pull you needle and thread through your fabric at your beginning mark (if you’re embroidering a name, it’s the place where you would start your pen).
 Follow the line you’ve traced for your first stitch, pulling the thread back through the fabric. This will be your only ‘forward’ stitch.
 From this point on, each stitch will be a ‘back stitch.’ You’ll choose a spot a little bit in front of your last stitch, pull your needle and thread through that spot, and then stitch backwards to meet up with your last stitch/hole.
 Continue back stitching along your traced patch, always bringing your needle just a little bit ahead on your tracing and then stitching back to your last stitch.
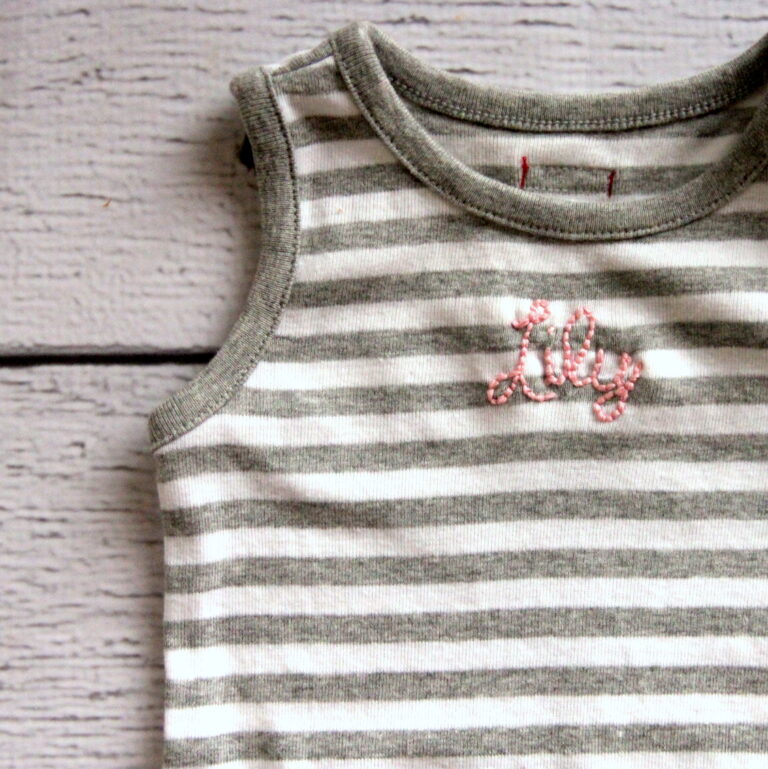
 In no time, your entire embroidered name or project will be finished and ready to gift (or hang, or wear!).


GIRL! i love these!! and if i knew what the heck type of baby i was having, i’d hire you to embroider my a whole drawer-full! sooo cute! i’m sharing this with my friend that just started embroidery. adorable.
Haha- coming soon to a mailbox near you (as soon as you know the name of course). 🙂
Oh snap, here it is. 🙂 I’ve been waiting on you embroidery primer. This is happening, asap.
Can’t wait to see what you make for Miss Hannah! 🙂
Thanks, I like this. Question, how do you trim the stabilizer. Concerned about being scratchy for baby?
2 things that seem to help-
1- there is a softer stabilizer that washes well and isn’t scratchy- I use that kind.
2- you can trim the stabilizer to the edges of the embroidery.
Hopefully that helps!
Hope that helps!
PS-I don’t say “Oh snap” in real life. Just mostly on Pinterest, and now here. 🙂
hahahahaha
Love this idea so, so much! Thanks for sharing! I made one this weekend for a new little guy we’re waiting to meet!
Sarah, that’s so fun! I need to make a couple more as well- thanks for the reminder. 🙂
I’ve never worked with stabilizer before…any tips? Do you just trim around the design when you’re done stitching?
Hey Paige- yep! Just trim!
What type of interfacing did you use for the onesie? I looked on Amazon and wow, so many options!
Oh boy, Mel, I don’t know. It is fairly thin and pliable, and not the iron on kind. Hope that helps. 😉
Any laundry care instructions? Should I worry about the thread bleeding?
Hey Bonnie- these hold up great in the wash (the stabilizer helps a ton with that). One time a few years ago I had some thread bleed, but haven’t ever had that effect again. 🙂
Thank you so much for this. Attempting a daisy soon!
FUN! I love that!
Any idea if the thread and knots irritate baby’s skin??
Hey Mikki, sometimes I iron adhesive backing on top of the stitching so that they don’t feel any of the knots. But honestly, I think it’s probably not necessary (which is why I only do that once in awhile). 😉
Can you show a picture of the finished product from the inside? Thanks!
Hey Linda! I don’t know if I have any embroidered onesies on hand, but I will try to find one and take a pic of the inside! (It’s kind of a mess of yarn, but then covered by the interfacing, so not sure a picture will be super helpful, but I’ll try!)
Do you mind sharing the kind of pen you use? I am just learning how to hand embroidery and I bought one but it’s not working very well. Thank you.
Hey Stacy- fun that you’re getting started! I have several embroidery projects I’ve been wanting to do lately. 😉 I love this pen-
https://amzn.to/30tDHK6
The blue washes off with water and the purple fades with time/air. It’s my favorite for these projects. Hope that helps!
Thank you for this info, it’s so helpful! I’d love to know what font you used on the Lily onesie – it’s so pretty! Thank you!!
What kind of stabilizer did you use?
It’s called “iron on stabilizer” (I think I googled “stabilizer for hand embroidery” and several came up).