
kojo tutorial- how to make sprinkle covered accessories
As an Amazon Associate I earn from qualifying purchases.
 I might’ve mentioned once or twice that Miss Piper Jane has quite the sweet tooth (maybe it’s a good thing that her dad’s a dentist?). I have to admit, I share her sweet tooth tendencies and even her affection for sprinkles. Of course, my Sprinkle Princess required some sprinkled accessories for her Sprinkle Party.
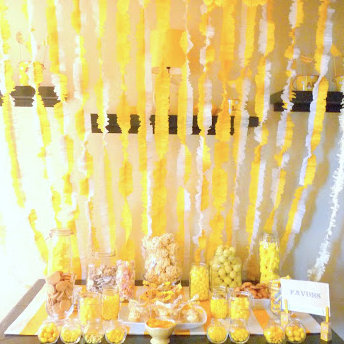
 A word of caution before this tutorial- first, if you attempt ‘sprinkle-ing’ any signs or accessories and have little ones, I’d keep a watchful eye on both the sprinkled accessory and the little one. At Piper’s party, I spotted several little guests eyeing the sprinkled “FAVORS” sign like prey. Since the sprinkles are attached with spray adhesive, these accessories are not safe to eat.
With that warning, I should say that once I put the barrette in Piper’s hair and the pin on her dress, she didn’t seem to notice that she was wearing sprinkles (and thus, didn’t attempt to eat them). If you don’t think your little one would be similarly ambivalent, probably stick to the sprinkled frame and keep it up high.
 To make the sprinkled accessories-
 Collect a pile of buttons, spray adhesive, a jar of sprinkles, and clear nail polish.
 Add a couple of layers of spray adhesive to the top of the button.
 Pour sprinkles onto the button (put a dish below the buttons to catch the extra sprinkles). Let the adhesive dry for several hours (or even overnight).
 Add several layers of clear nail polish on top of the sprinkles.* Make sure you cover all of the sprinkles. Knock off any extras- ensure that there aren’t any extra outliers that could fall off.

*To make the sprinkle covered frame, skip the nail polish step (just spray liberally with spray adhesive and pour sprinkles on top of the frame).


 Sew the button onto a barrette cover (there is a great barrette cover tutorial at angry chicken), or in the middle of a pin.
 The finished product? Perfectly sprinkled (but, one more time, not edible) accessories!
Looking for more perfectly sprinkled goodness? Here is the Sprinkled with Love party, the confetti filled sprinkle balloons, and the sprinkle covered cake topper.


Sooo fun! How wonderful, love this little gem and the party! I need to catch up now that I have the internet again, looks like you’ve been busy! Happy birthday Piper!!
Erin, love seeing your name on here! Are you moved? How was the flight??? Are you ready for visitors?
Thanks for the birthday wishes!
yeah, i’m probably going to *ahem* borrow this idea. so fun.
i’m impressed that no one tried to take a bite out of that frame…it does look tempting! i feel like my johannah would have it in her mouth for sure. and seriously, just put your sprinkle signs in your etsy shop. 😉
Haha- there were a bunch of grown ups around- maybe that’s why no one tried anything fishy. 🙂
And took your advice- the signage is in the shop. 🙂
I might have tried to eat them! They’re all so cute and I am a sprinkle fiend! I’ve pinned your party to keep in mind for my little miss next year!
Michaela- DO IT! She’ll love it (well, if she’s anything like Pi). And then send me pictures, ok??? 🙂
Hahaha did you see me inspecting them at the party? I was looking closely, smelling them, trying to figure out if they would melt if they got wet. Kalena asked, “Are these real sprinkles? Can I east this?”
Didn’t catch that, but I’d do the same. 🙂 I *think* they could get wet without melting. The layer of clear nail polish is thicker on some of the buttons than others, but I think you’d be ok. That was the hope at least. 🙂
And NO! Kalena can’t eat them. 🙂
I am literally dying at the cuteness of this party! You are amazing. My daughter is turning 2 next weekend and I have been scrambling to think of what I want to do… I like to come up with original ideas, but this is so dang cute, I might just have to copy it! Can you tell me where you got the sprinkle buttons? Those are darling!
oh hahaha! I just realized that those were actual sprinkles you used! I thought they were some kind of mini beads you found that looked like sprinkes 🙂 Nevermind 🙂
Holly- so fun to *see* you on here! 🙂 Our baby girls are almost the exact same age- that’s so fun. 🙂 And this party is pretty easy to pull of if you’re needing simple (I bought almost all of the food- just trolled through the grocery store looking for sprinkles- haha!). 🙂
And glad you saw that the buttons are just covered in sprinkles… 🙂
Love this party theme! How did you do the sprinkle balloons? Love them!!
Hey Heather- the balloon tutorial is here- http://www.kojo-designs.com/2012/09/how-to-make-confetti-filled-sprinkle-balloons/
What kind of spray adhesive did you use?
Hmmm, it was an aerosol (sp?) can of spray glue. Blue label, I think. We ran out after all of the ‘sprinkling’ or I’d check the tag for you.
I am so glad I found this amazing birthday party post!! I am going to use this for inspiration and purchase the printables on etsy right away! Would you mind sharing your source for where you got the sprinkle table cloth? 🙂
Hey Tiffany- I got the sprinkled tablecloth at Target. 🙂 Thanks for all of the compliments about the party.
so you are actually using edible sprinkles here? okay, yeah, sure, i guess that could work… maybe i could use the longer straight sprinkles too… i’ll try it out.
yep, just the actual sprinkles… 🙂
Love loved your ideas!!
I am planning to do the sprinkle theme for my 3 year old and was wanting to make the picture frames. A few questions
– Did u use a wooden photo frame? Is there a specific type I have to choose?
– I believe you used the regular sprinkles that we use for baking rite?
Thanx a million!! Keep up the good work.
Hey Karishma! Love it that you’re doing a sprinkle party- isn’t it such a fun theme? And there isn’t any specific type of picture frame or wood that you have to choose. And I totally used regular baking sprinkles. Hope that helps!