• Skip to primary navigation
  • Skip to main content
  • HOME
  • DIY PROJECTS
    • baby
    • bags, totes & purses
    • gifts
    • harry potter
    • kids
    • printables
    • women
    • SEASONAL & HOLIDAY
      • winter
      • spring
      • summer
      • fall
      • gifts
    • HOUSE
      • decor
      • furniture
      • house projects
      • knock offs
      • rooms & tours
    • GIFTS
      • gift ideas
      • gift basket
  • PARTIES
    • pretty parties
    • pretty showers
    • party bars, buffets & stations
    • party DIYs
    • grazing platters
  • RECIPES
    • brunch
    • dessert & treats
    • drink recipes
    • main dishes
    • paleo recipes
    • salads
    • sides, dips & sauces
    • FREEZER MEALS
  • ABOUT
    • about us
    • contact us
    • disclosures
  • Sponsors

kojodesigns

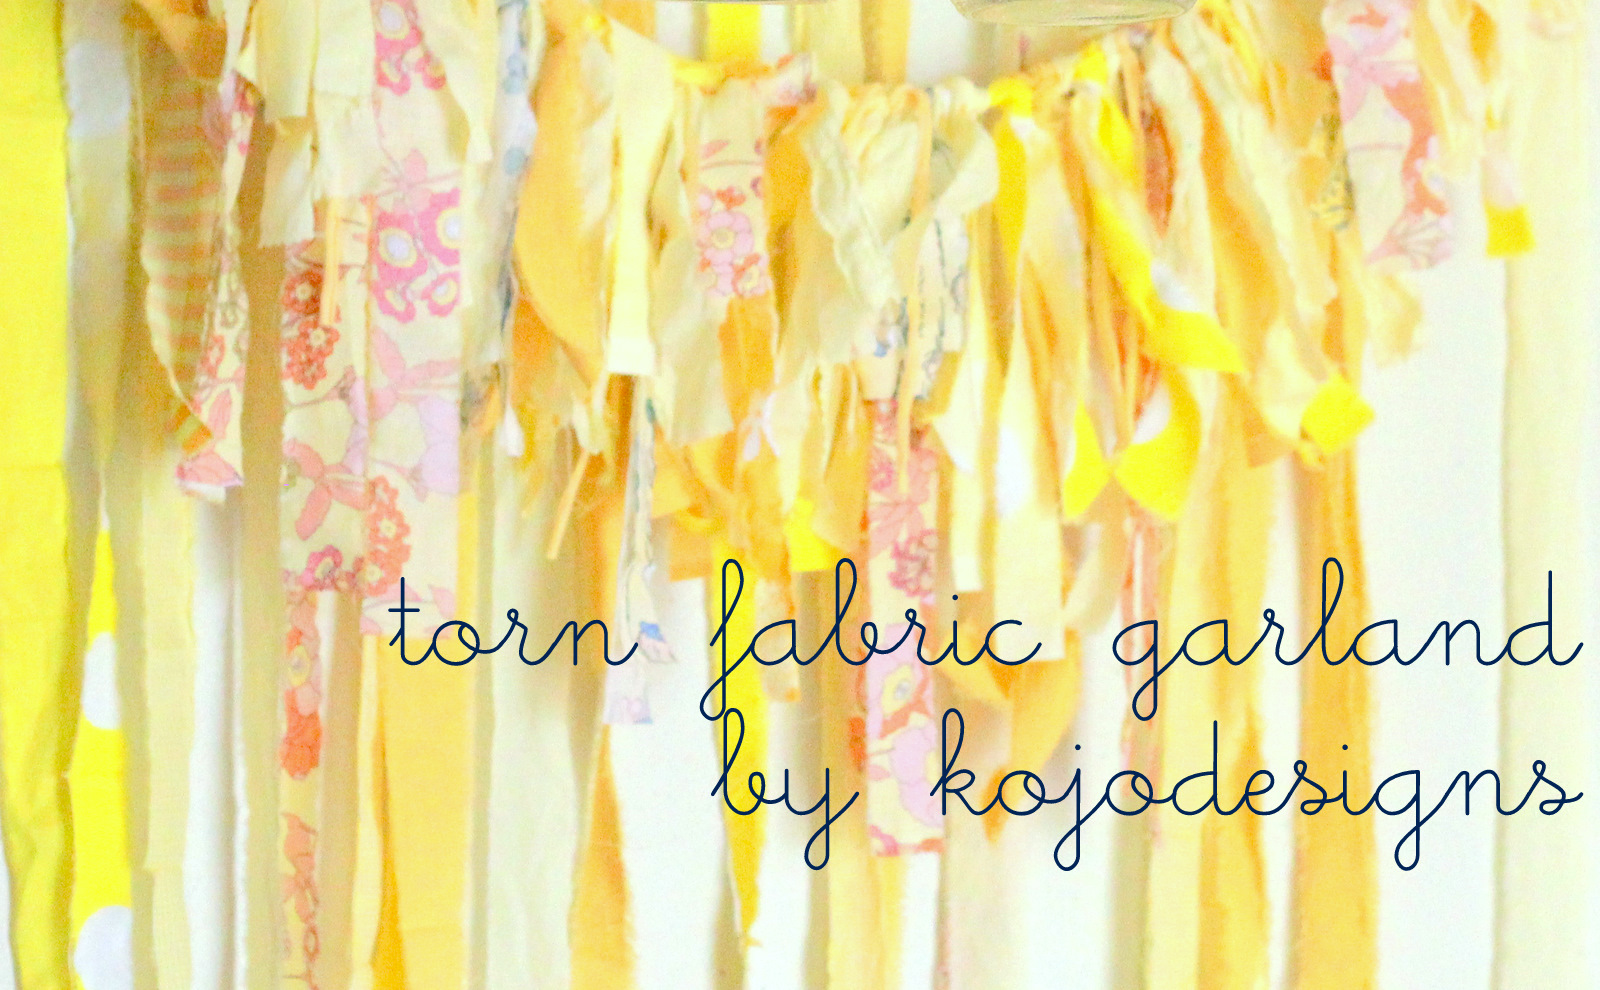
torn fabric garland tutorial

September 22, 2011

As an Amazon Associate I earn from qualifying purchases.

There are lovely examples of these fabric garlands all over the internet. They’re just so gorgeous.

To make one of these lovelies yourself, you’ll need
-fabric
-a ribbon or strip of fabric for the base
-scissors

1. Tear thin strips of fabric (mine were about 2″ wide). You can make these as long as you’d like (I’ve seen really long ones!), but mine were about three feet long.

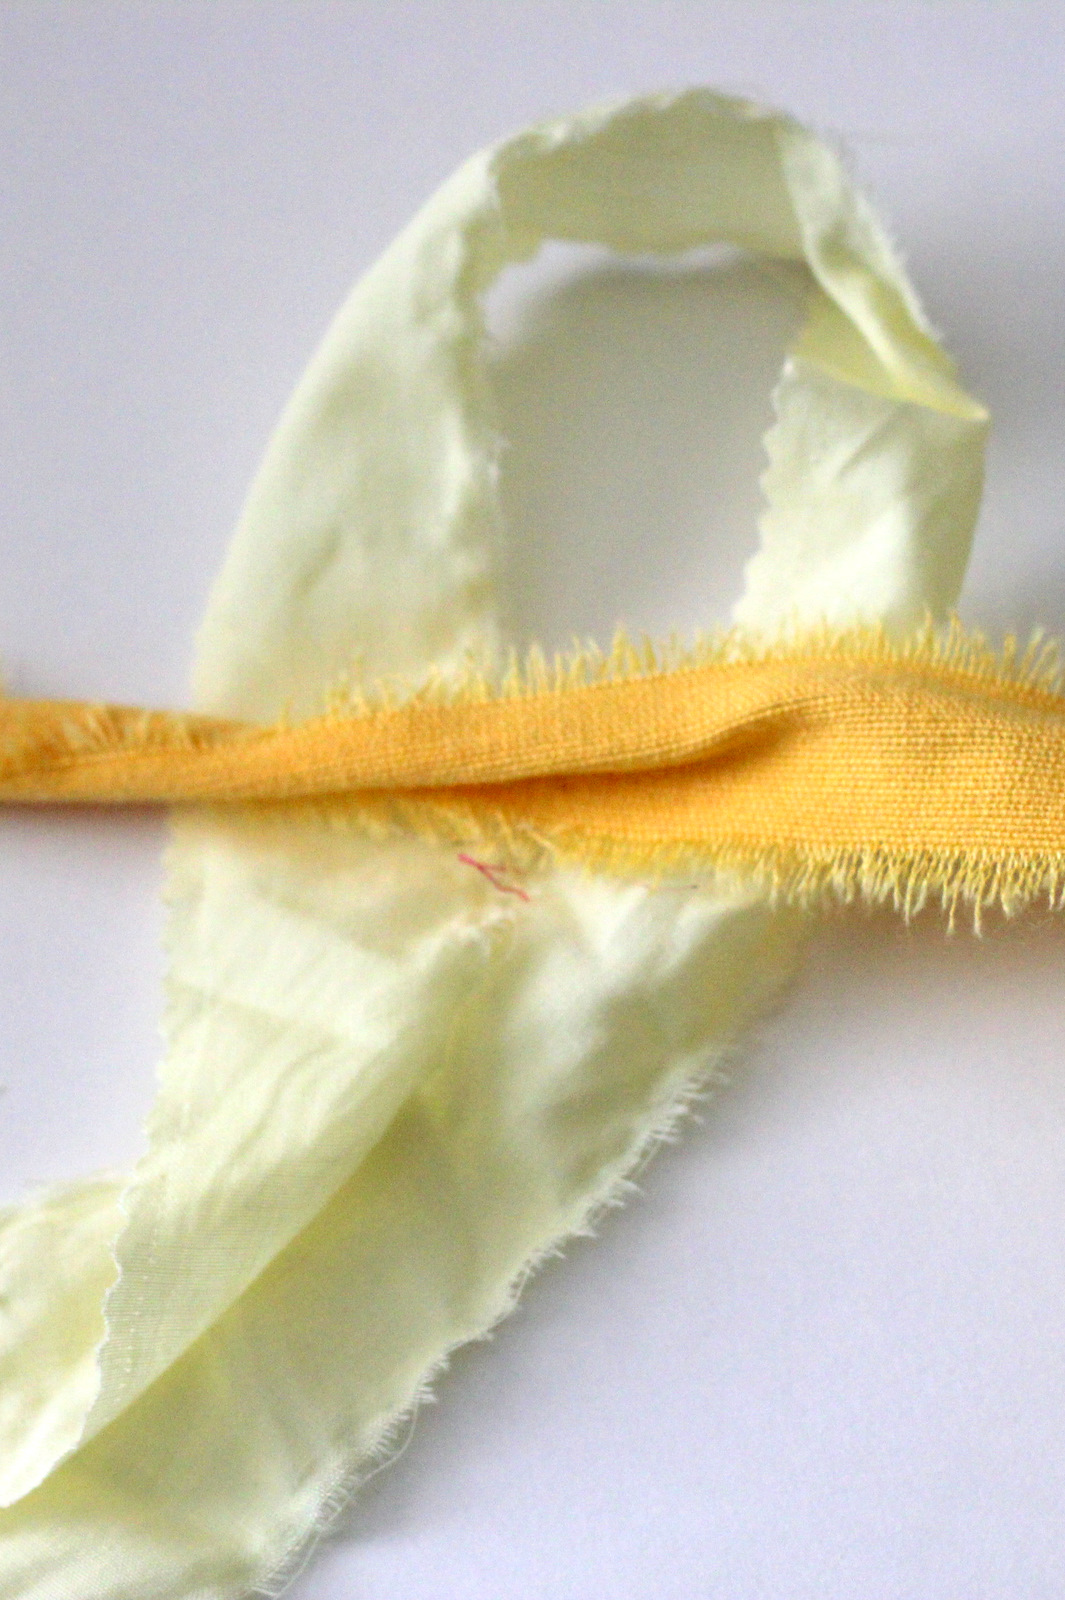
2. Take one strip of fabric, fold at the center. Put the center loop one side of your base fabric/ribbon (I used another length of torn fabric).

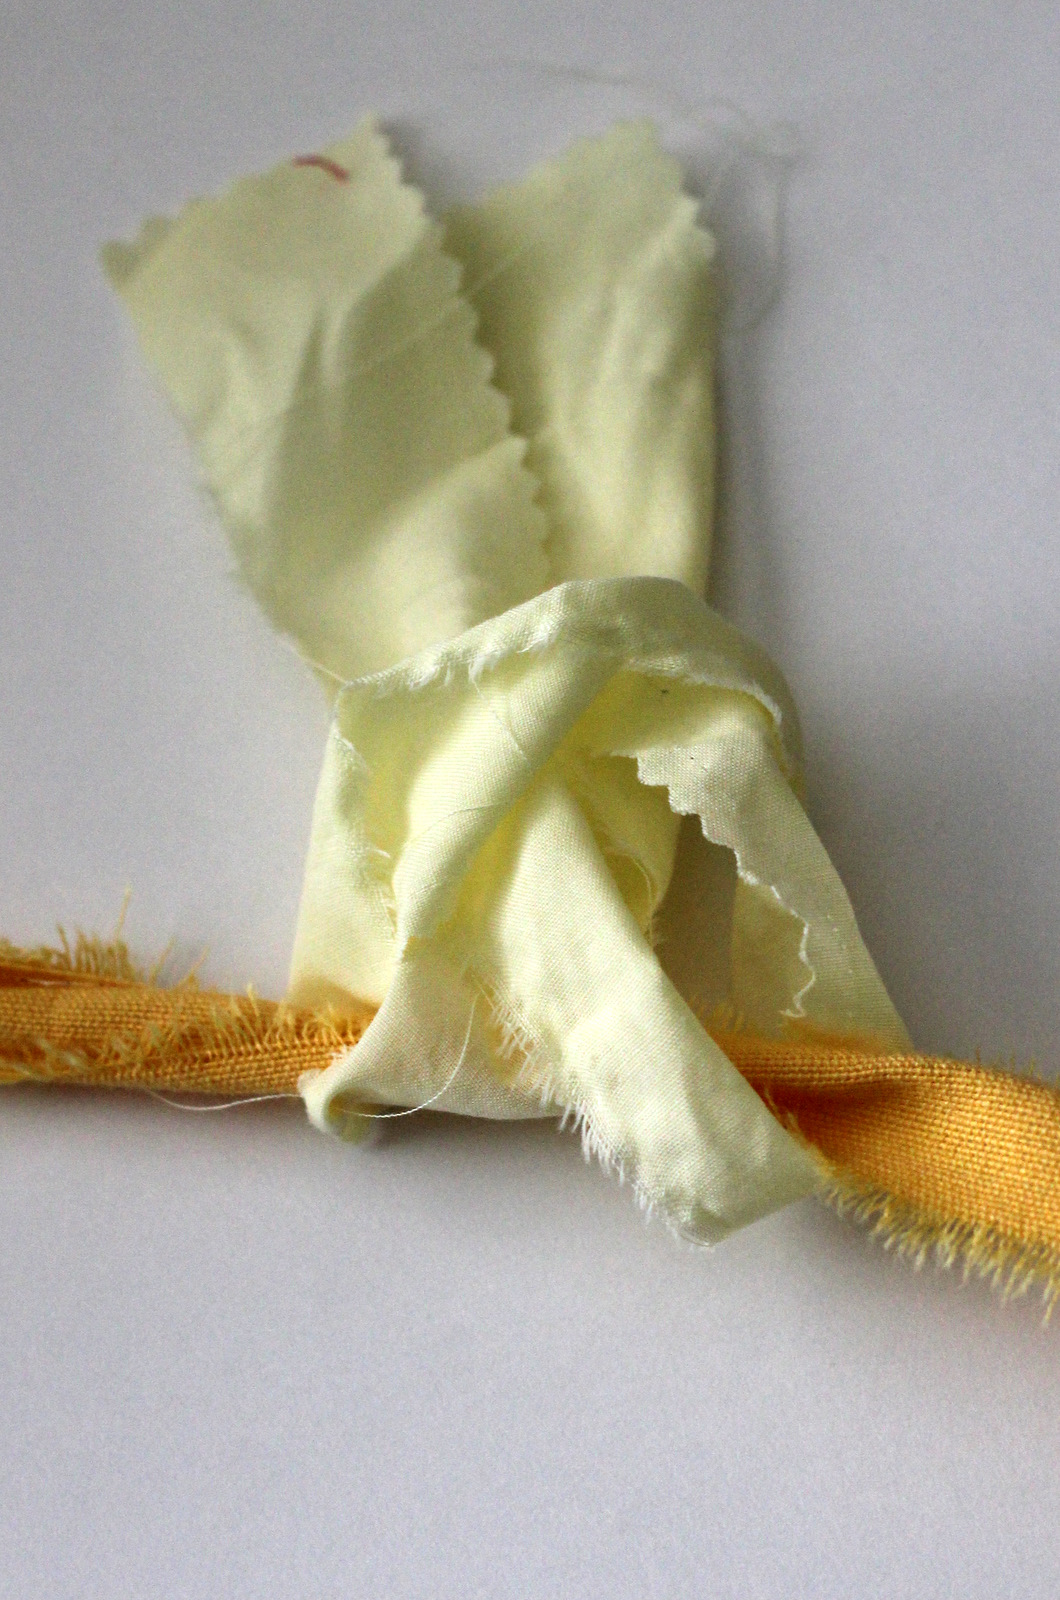
3. Take the two ends and tuck them back through the loop.

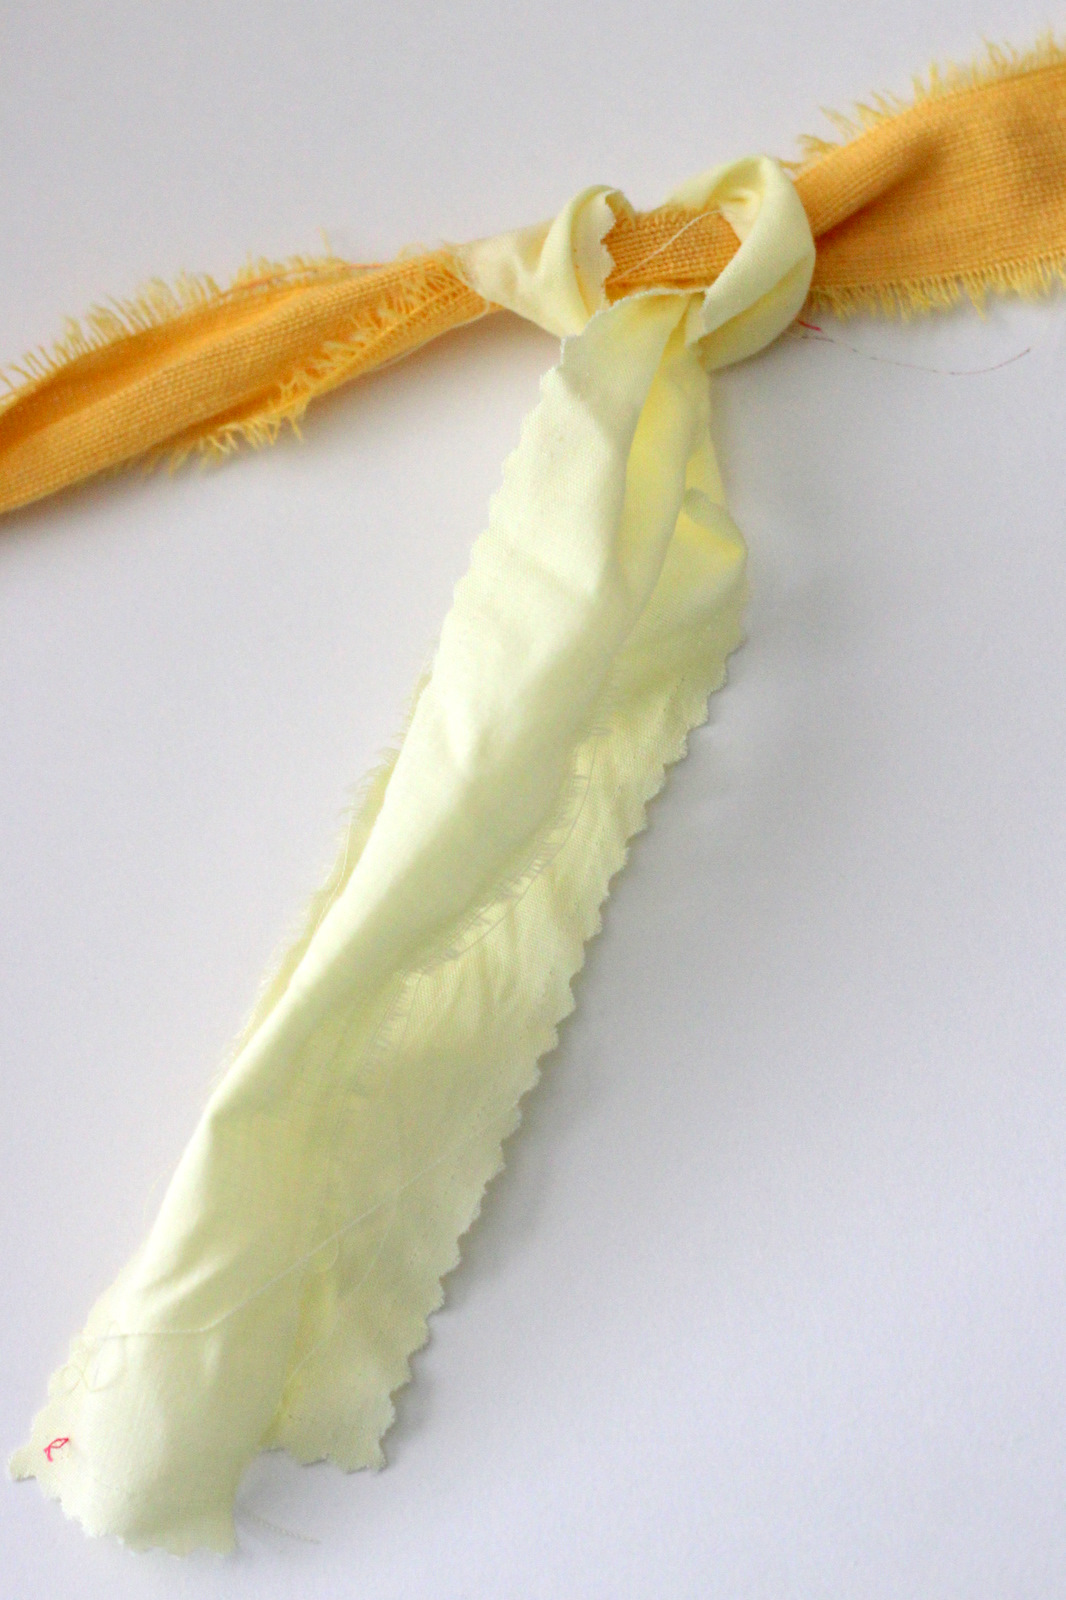
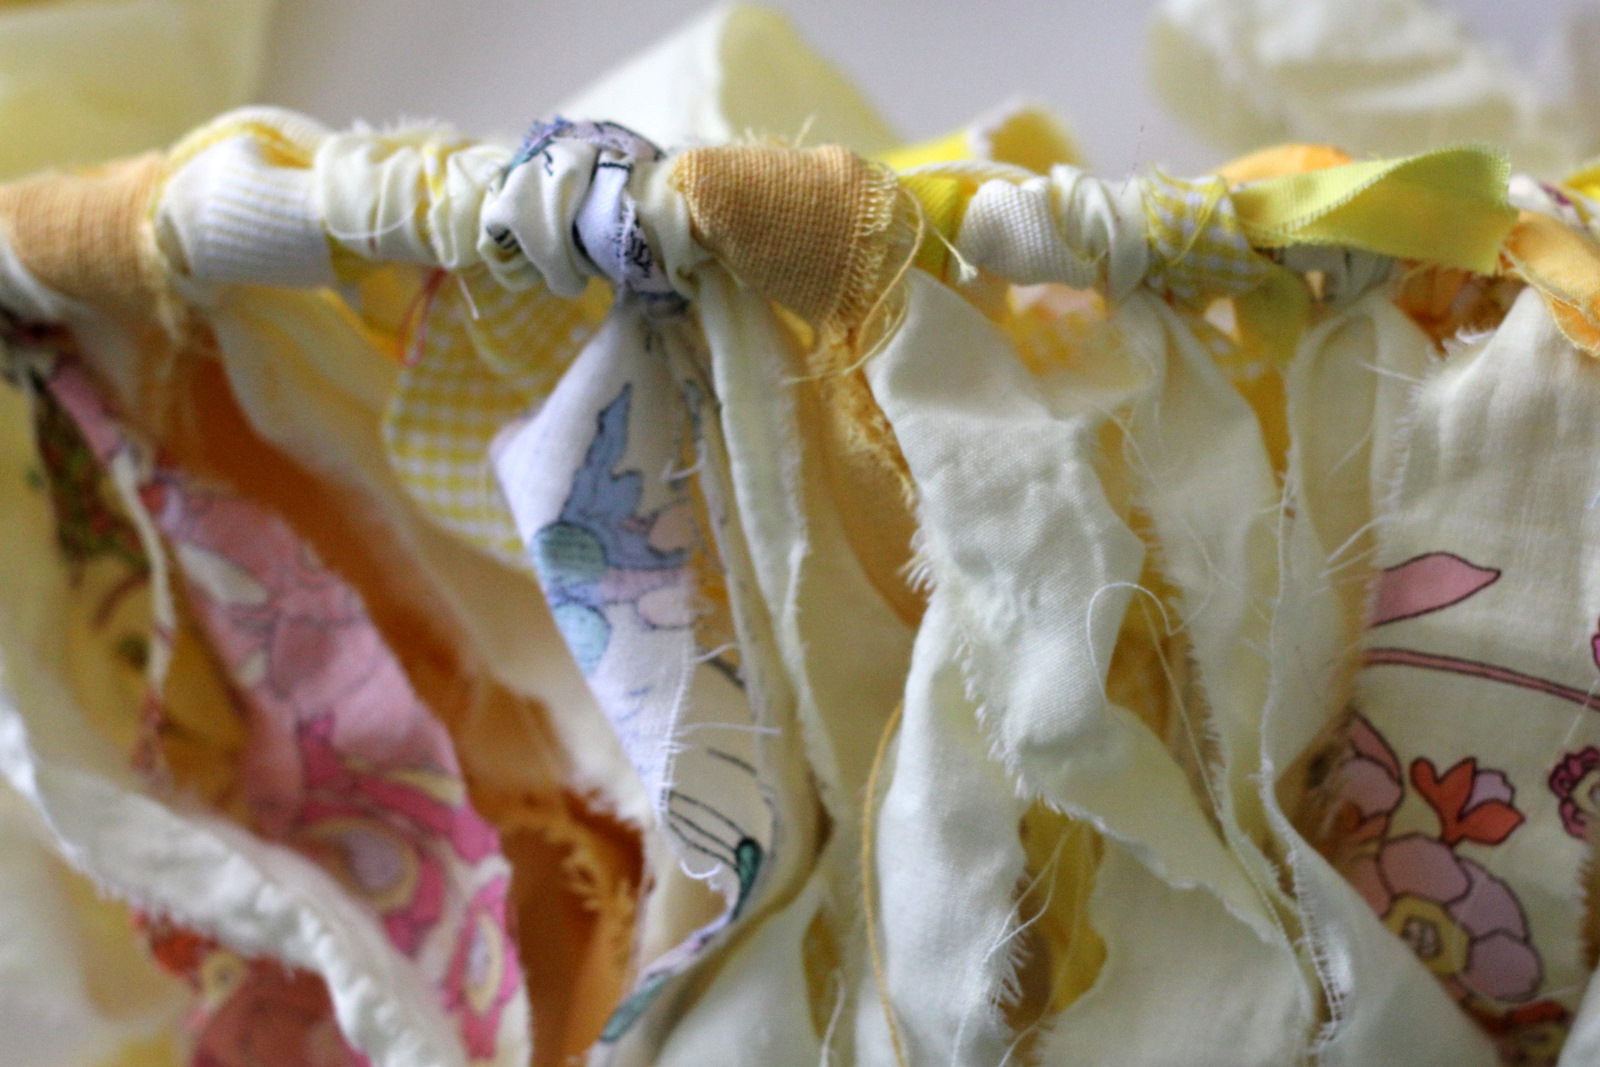
4. Pull tight. Add to each side with lengths of coordinating torn fabric (as a side note, I can not think of a palette that wouldn’t be gorgeous for this… all white? Coral, aqua and yellow for Piper Jane’s room? Kelly green, black and white? Sunny shades of orange, yellow and red? Lovelovelove!).


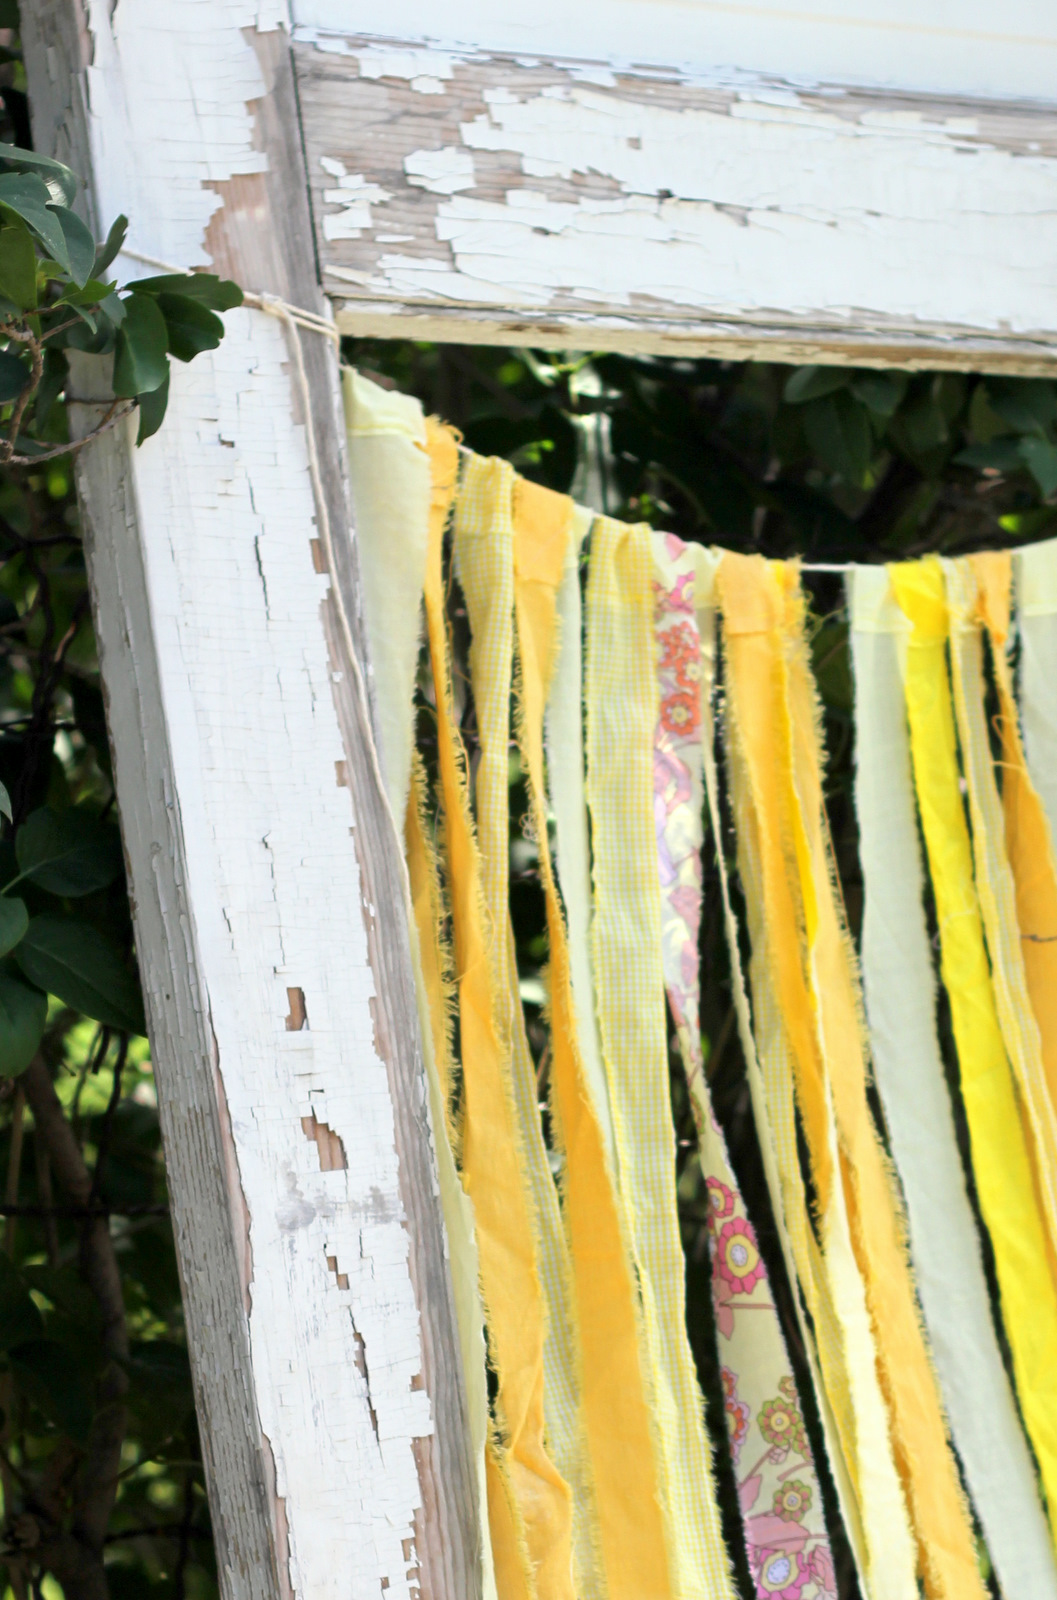
5. When your garland is nice and thick, use it to decorate lemonade bars and birthday parties and baby showers. I think they’d even be gorgeous as home decor!

decor 8 Comments

Reader Interactions

Comments

  1. Jules says

    September 22, 2011 at 7:50 pm

    so cute!! i kinda want to make one now.

    Reply
  2. Vanessa says

    September 23, 2011 at 2:22 am

    I love this idea! It's super easy and just so girly! Love the colors too.

    Vanessa

    Reply
  3. mindy starr cone says

    September 25, 2011 at 11:08 pm

    cute! thanks for the tutorial!
    mindy from CREATIVE JUICE
    http://getcreativejuice.blogspot.com

    Reply
  4. Denise says

    November 3, 2011 at 4:41 pm

    Saw something like this, but with smaller strips, at a craft fair the other day. They tied the strips on a string of lights. So cute! That's what I will be doing this weekend. I have some scraps that match a wreath I made for Christmas. Can't wait to see it!

    stonemedic76@hotmail.com

    Reply
  5. Penetavai says

    September 27, 2012 at 12:05 am

    Love the colors you used! Can’t believe how simple it was! Thanks for sharing.
    Adding you to my G+

    Reply
    • Kirstin says

      September 27, 2012 at 1:53 pm

      Thank you!

      Reply
  6. Morgan says

    January 10, 2014 at 9:30 am

    LOVE this, just beautiful! Making it today! Thanks for sharing!

    Reply

Trackbacks

  1. Jellyroll Party Banner says:
    March 19, 2012 at 9:56 pm

    […] Courtney O'Dell · Leave a CommentA while ago, Kirstin from KoJo Designs posted this adorable torn fabric garland. I have been mentally bookmarking it for baby B’s nursery and her upcoming See ‘n Sip […]

    Reply

Leave a Reply Cancel reply

Your email address will not be published. Required fields are marked *

Copyright © 2023 · kojodesigns · Design by Bloom

Copyright © 2023 · Darling on Genesis Framework · WordPress · Log in