
sun shades dress tutorial
As an Amazon Associate I earn from qualifying purchases.
 Hey all! Happy weekend! Just thought we’d publish our Sun Shades tutorial over here as well (we shared it at Craftiness is Not Optional during the Sincerest Form of Flattery).

Our inspiration for this little stripe-y number was Anthropologie’s Sun Shades dress… the sunny yellow stripes, the preppy grosgrain, and the darling bell shaped skirt scream summer, don’t they? So, of course, Piper Jane needed a mini version for her wardrobe!
To make a little Sun Shades Knock Off, you’ll need:
-a yard of white cotton fabric- on the thicker, not see-through side
-a yellow tshirt or rectangle of yellow jersey
-coordinating yellow ribbon (it’s more ‘marigold’ than yellow, really)
-sewing supplies
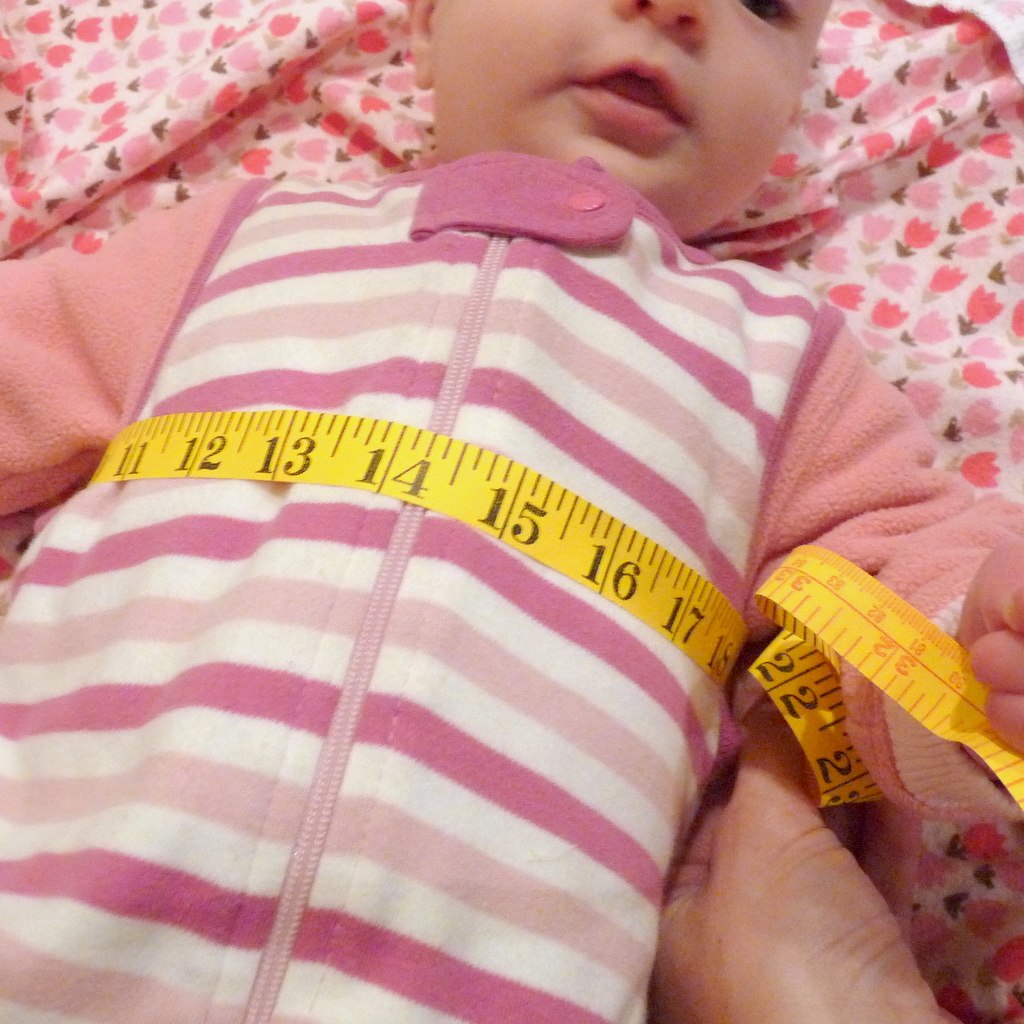
1. Measure your little one’s chest (right under her armpits). Double this number to figure out the width for the skirt portion of the dress. Measure from her sternum to her shins to determine the length of the skirt portion. Add an inch to both measurements and you have your dimensions for your ‘skirt’ rectangle. Cut from white fabric.

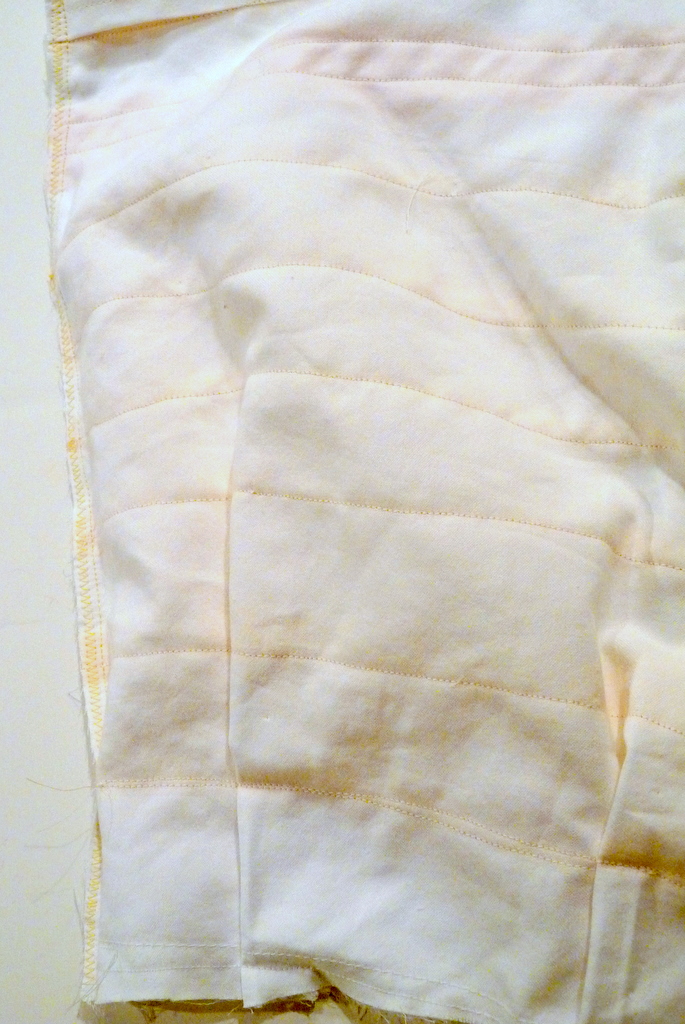
2. Double roll the bottom edge and press in place (this will become your bottom hem later).
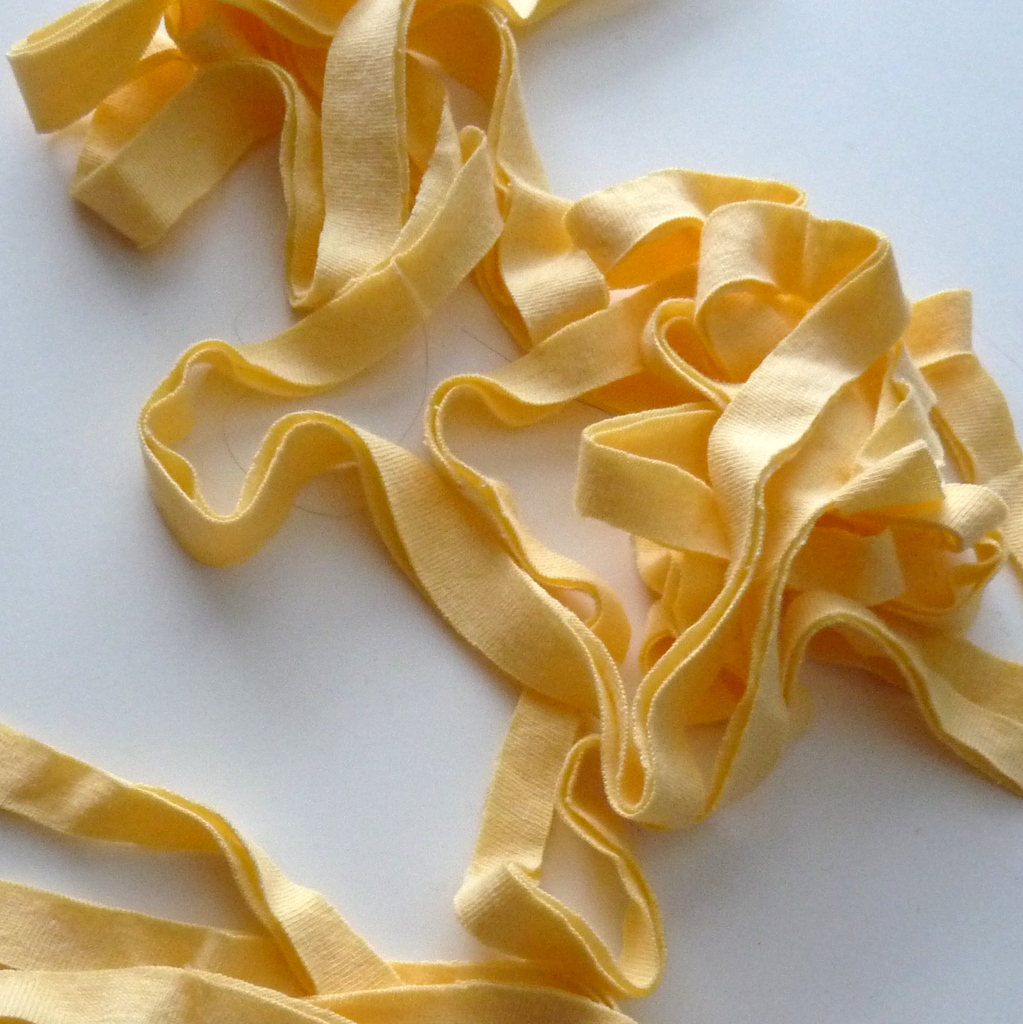
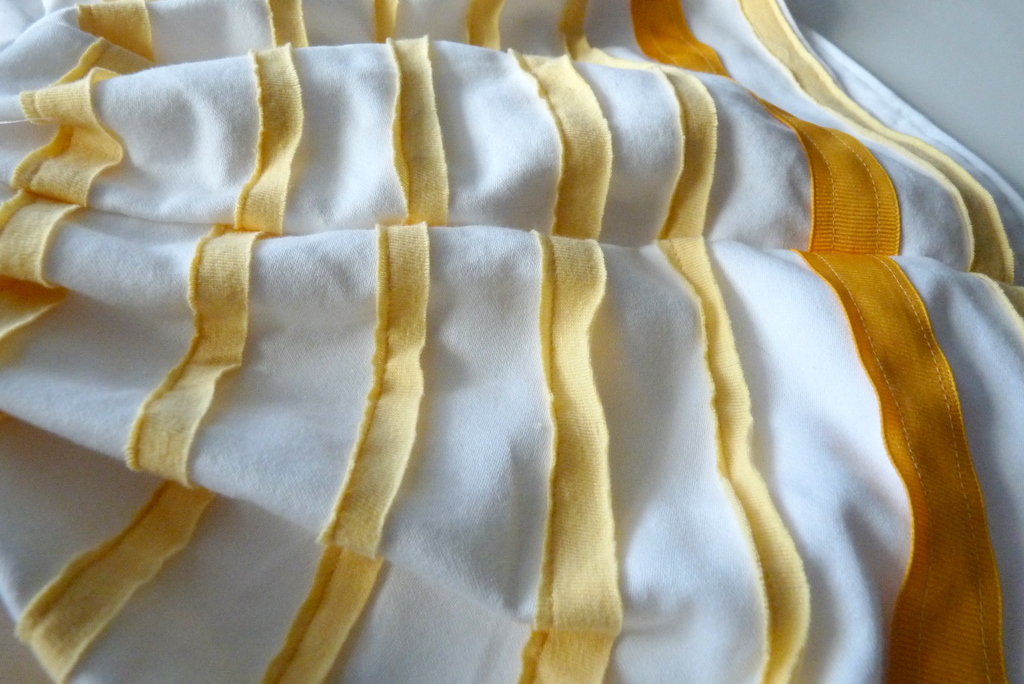
3. Cut a whole pile of 1/2″ lengths of yellow jersey (make sure they’re as long as the width of your skirt rectangle).
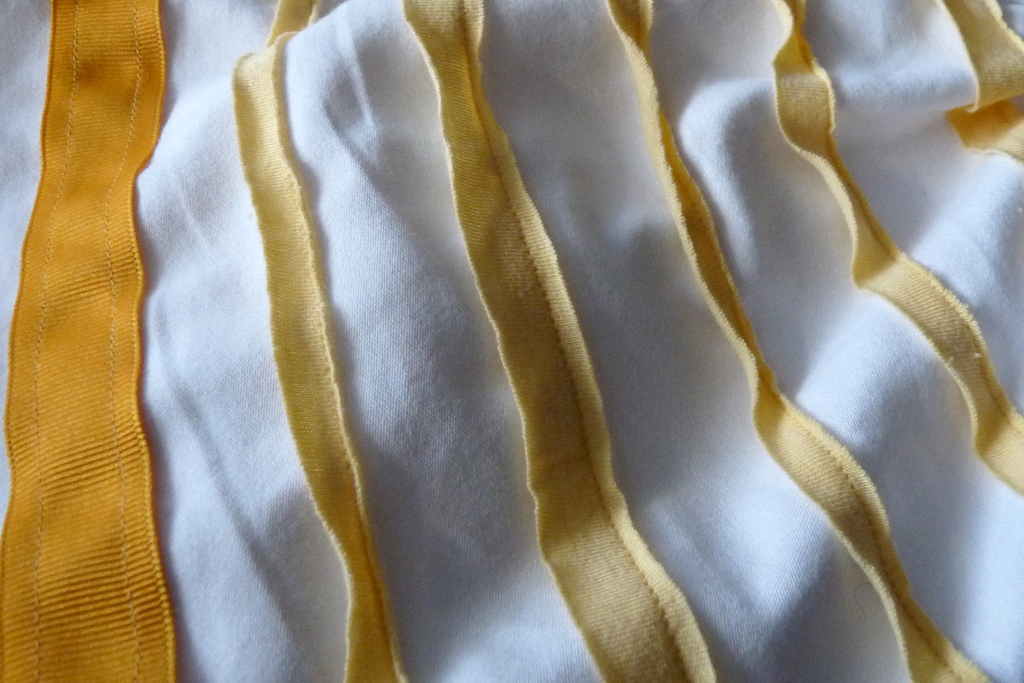
4. Pin the yellow jersey every three inches or so onto the white cotton. Near the bottom, throw a row of yellow grosgrain ribbon in there as well. Stitch in place (for the yellow jersey, just sew in place with one line of stitching, for the ribbon, sew near the top edge and near the bottom edge to secure in place).

5. Add three inches to your chest measurement to determine the width of the bodice (an extra inch for seam allowances and two inches for overlap). I determined the bodice length by using a similar dress from Piper Jane’s wardrobe (for reference, it was about seven inches tall, which includes a seam allowance on the bottom edge). Sew lines of jersey along the bodice (similar to the way you stitched them onto the skirt). Cut another, same sized, white cotton rectangle (this will be the bodice lining).
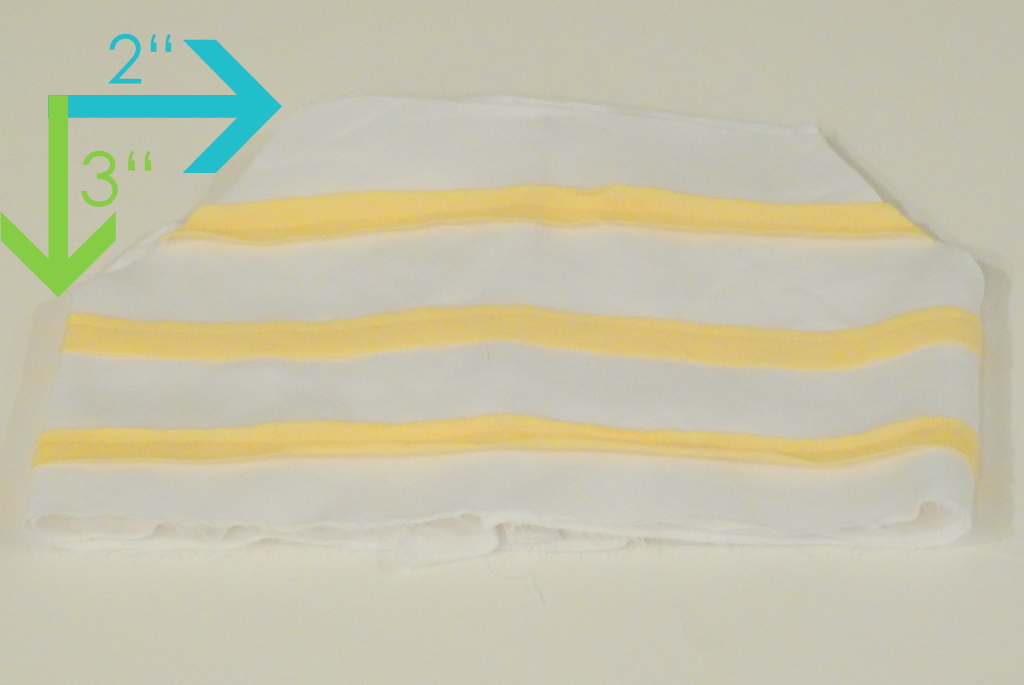
6. Stack the two bodice rectangle, and fold into a tube slightly larger than your chest measurement, with a two inches of overlap down the center of the back of the tube. Cut triangular armholes 3″ down and 2″ in on each side.

7. When you unfold your double layered tube, this is what it’ll look like. Pin the two pieces together, right sides facing in. Pin grosgrain ‘sleeves’ to the top of each armhole (tuck the grosgrain in between the right sides so that the sleeves will be on the outside when this is turned right side in). Remember, you’re pinning sleeves into four places. If you need to make sure the sleeves won’t be twisted, pin in place and turn right side in). Stitch around the perimeter, leaving the entire bottom edge open.

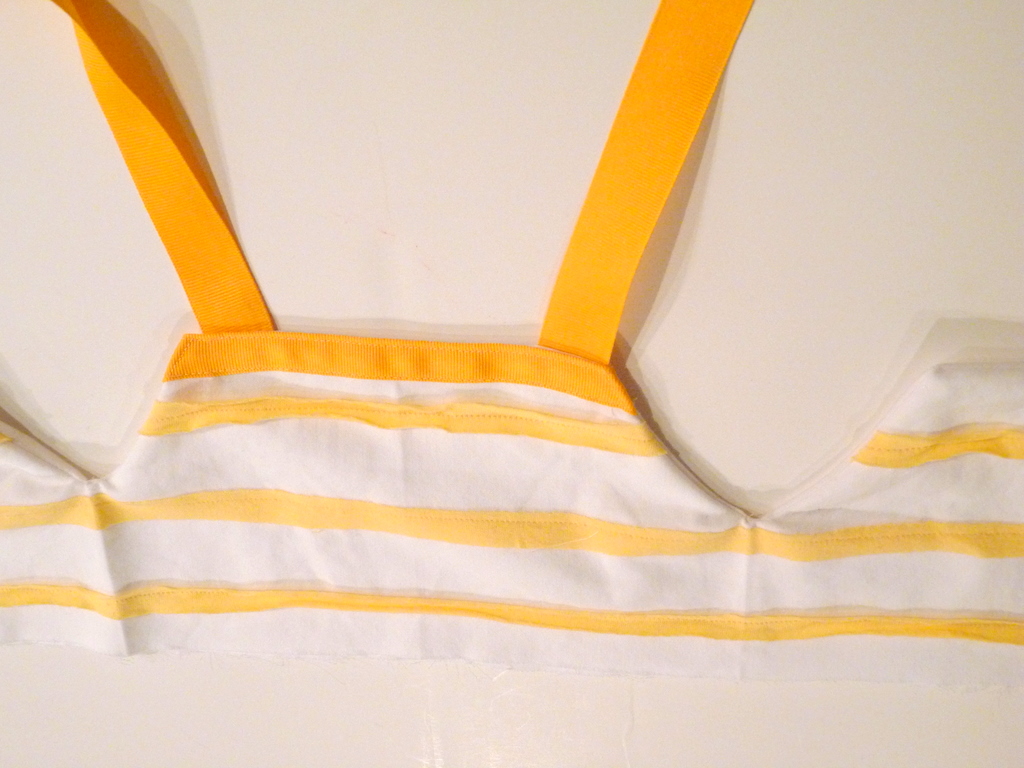
8. Turn bodice right side in, sew a length of grosgrain ribbon across the top of the front. Seam rip the top corners where the ribbon meets up, tuck the ribbon in and top stitch in place.
9. For the ‘skirt’ piece, fold the right sides together, match up so the jersey pieces and ribbon pieces meet exactly. Sew in a tube. Also, hem the bottom at this point.

10. Press pleats around the top of the skirt portion, matching the diameter of the bodice (you’re cutting the width of the skirt top in half, so it’s a lot of pleats).
11. Flip the pleated skirt inside out, tuck the right-side-in bodice into it, pin together and sew in place (it’s hard to show, but the bodice is tucked into the upside down, inside out skirt). Make sure the back of the bodice overlaps until it is just slightly larger than your chest measurement and line your seam up with the place where the bodice meets (the seam will run down the middle of the back of the dress).
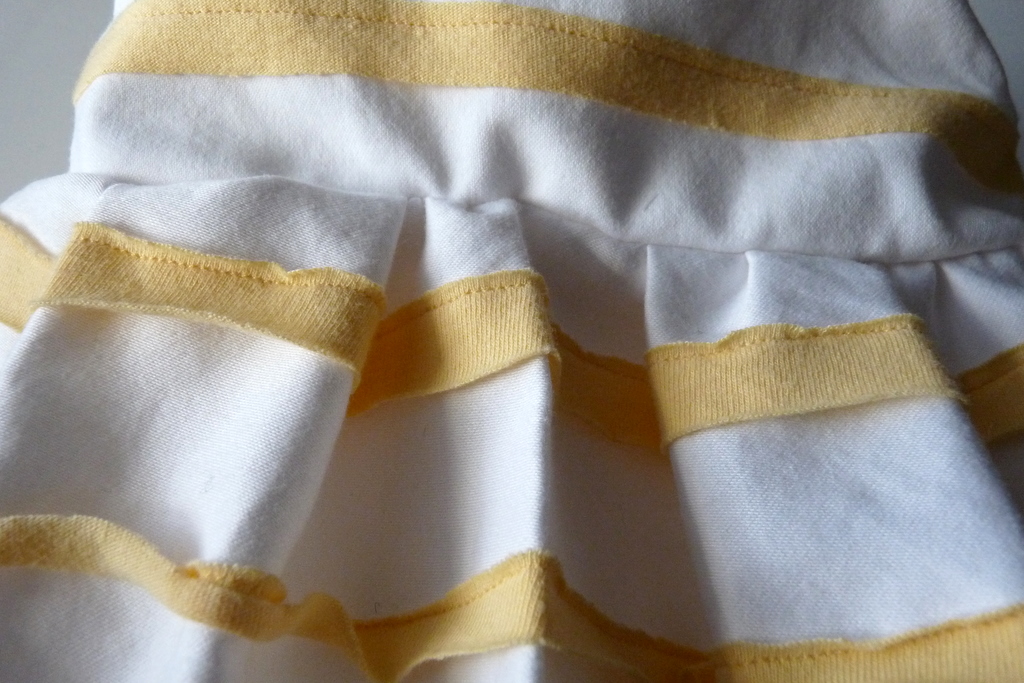
12. Stitch around the entire perimeter. This will secure the pleats in place.

13. Add velcro on both sides of the bodice overlap so that the bodice has closure.

14. Tie another length of grosgrain around the waist as a belt.


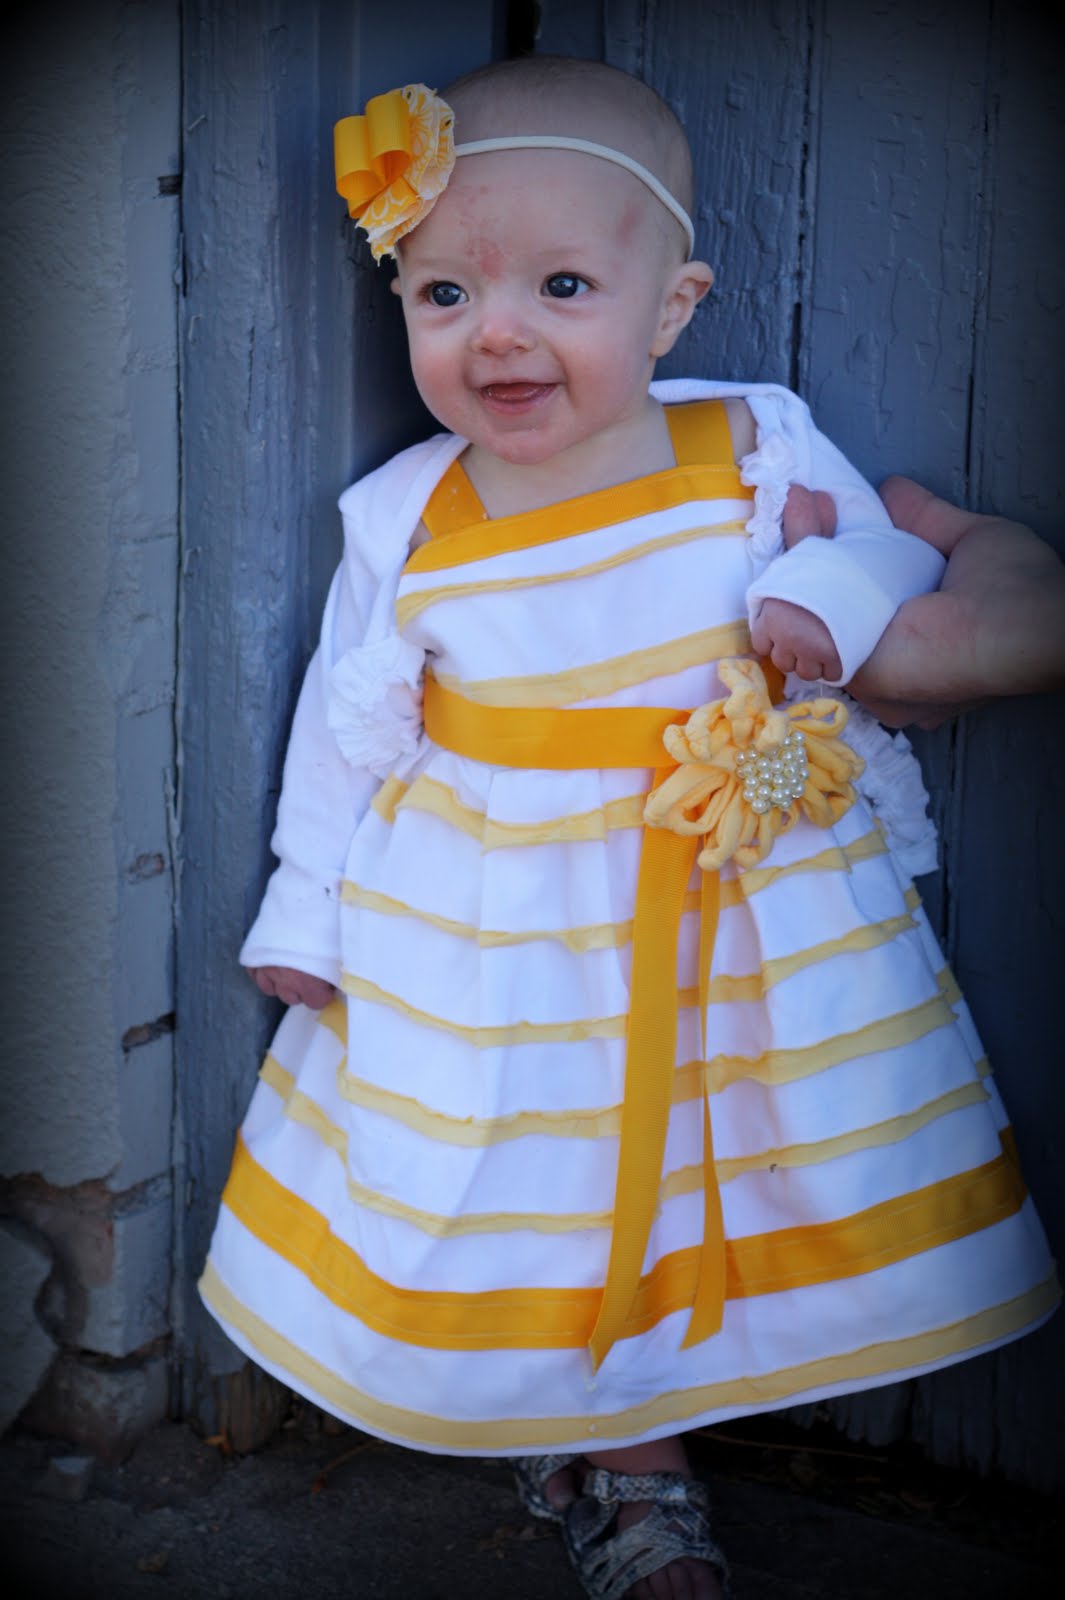

15. Done! A sweet, cheerful, Anthro-y dress for any little ray of sunshine in your life!
ps- Isn’t it funny how quickly babies change? We made this dress for Piper Jane in January (for knock-off week at Project Run and Play). Five months later, she’s already changed so much! The dress still fits, though (she’s such a little peanut that she is still wearing most of her 0-6M clothes!). Too funny!


What a great tutorial!! Thanks so much. I'm pinning this!
"chins" – I giggled on that one. Too cute! {The itty-bitty and the dress.}
..die kleine sieht aus wie eine Prinzessin.Süß.
Schönes Wochenende
Christiane
cute overload!!!!
Wonderful!! I want to use this idea to make a skirt for myself, with stripes on the bottom only.
How darling! Love it and love your little cutie too!!!
The dress is adorable!
Such a sweet dress! It must be nice to have a mom who can create one of a kind cute outfits!
Completely adorable! Thank you for the wonderful tutorial!
that last pic on the left is SO CUTE!! she is so sweet! love the dress! i think I want one..
I like your light and bright version better! I love that yellow!
AHHHH!!!! CUTE CUTE CUTE!!! perfect yellow!
Must make time to do this But the bay is growing up so fast!
Kelly
Just a quick note to let you know that a link to this post will be placed on CraftCrave today [02 Jul 01:00am GMT]. Thanks, Maria
This is fabulous! Thanks for the tutorial. I am going to pin this.