
kojotutorial: stacked paper garlands
As an Amazon Associate I earn from qualifying purchases.

I love garlands. Like lo-ove them. I could make a new garland for every occasion and still not be satisfied. This translates into the decor at my parties being on the garland-heavy side. But y’all already know that about me.
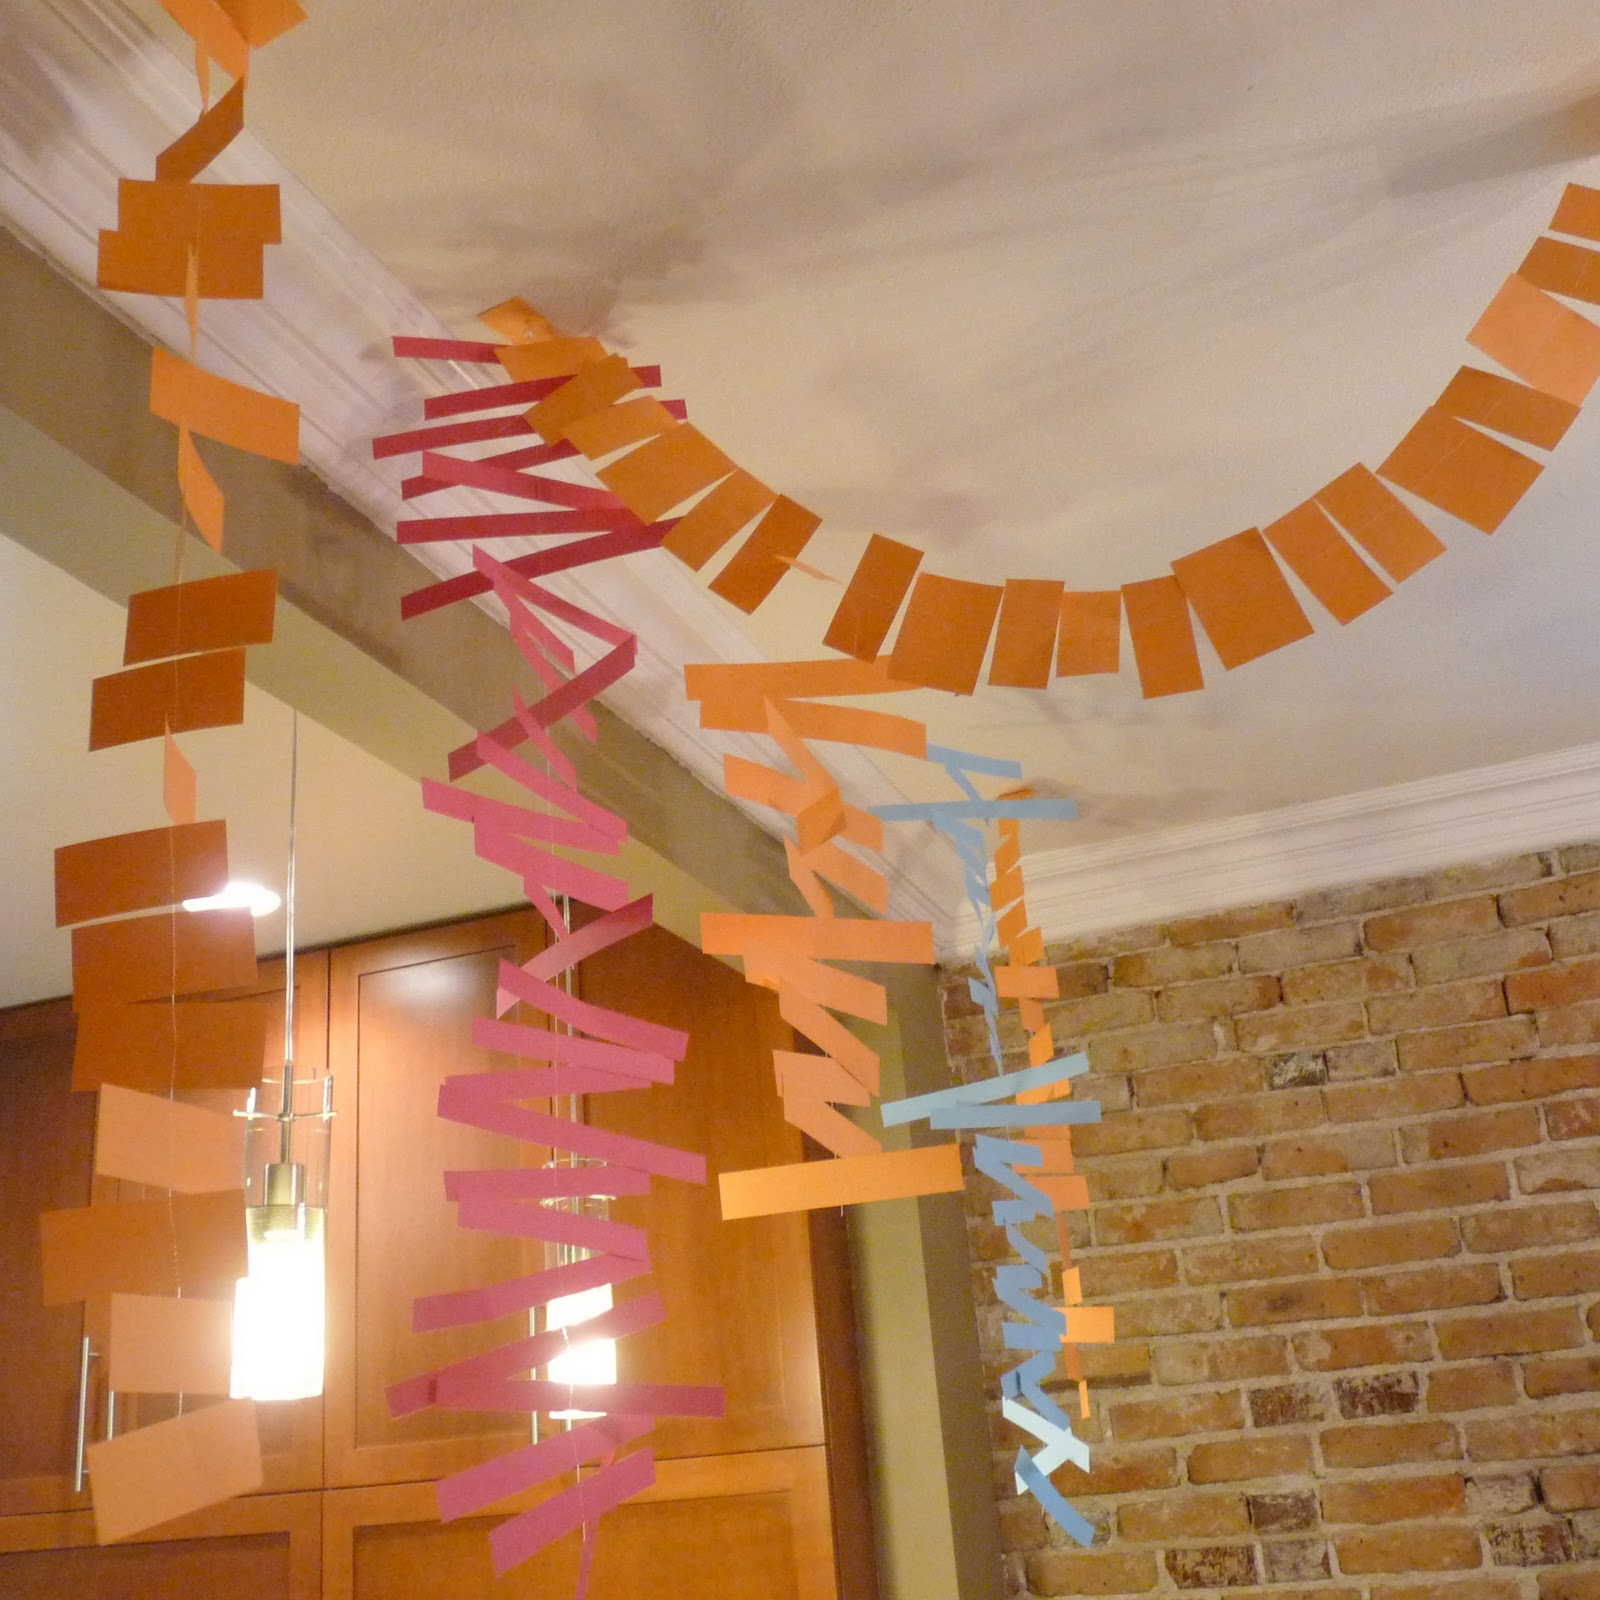

I especially love these stacked paper garlands (or are they mobiles? Either way). In fact, I just keep making them in different colorways, y’all. It’s sort of a problem.
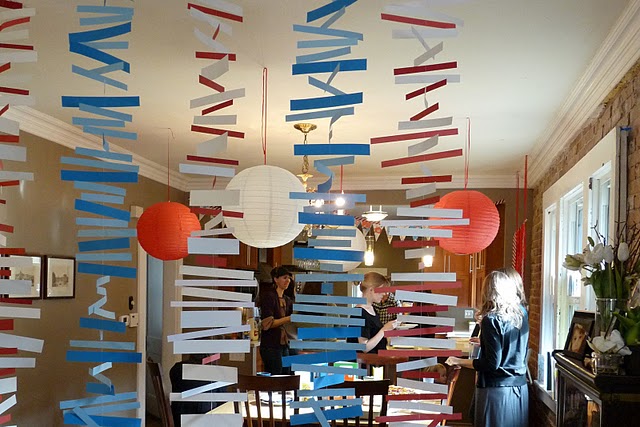
It all started with the Cat in the Hat shower. All that red and white stripe-y goodness was just calling out to be made into a vertical garland. And so stacks of red and white garland-y goodness it was. Of course, I had to make some blue ones too, to balance out the red and white. Actually, then I made some orange and pink stacked paper mobiles (for another shower I was throwing)… and some plain white ones, just to have around. And now I really do believe that every occasion will be better with a stacked paper garland or two. Like I said, it’s a problem.
Anyhow… now that you’ve been warned of their highly addictive nature…
…to make a stacked block garland of your own, you’ll need:
-long thin strips of cardstock in your color scheme (mine were various sizes, but mostly either 12″ or 11″ long and between 1″ and 2″ wide)
-sewing machine and thread
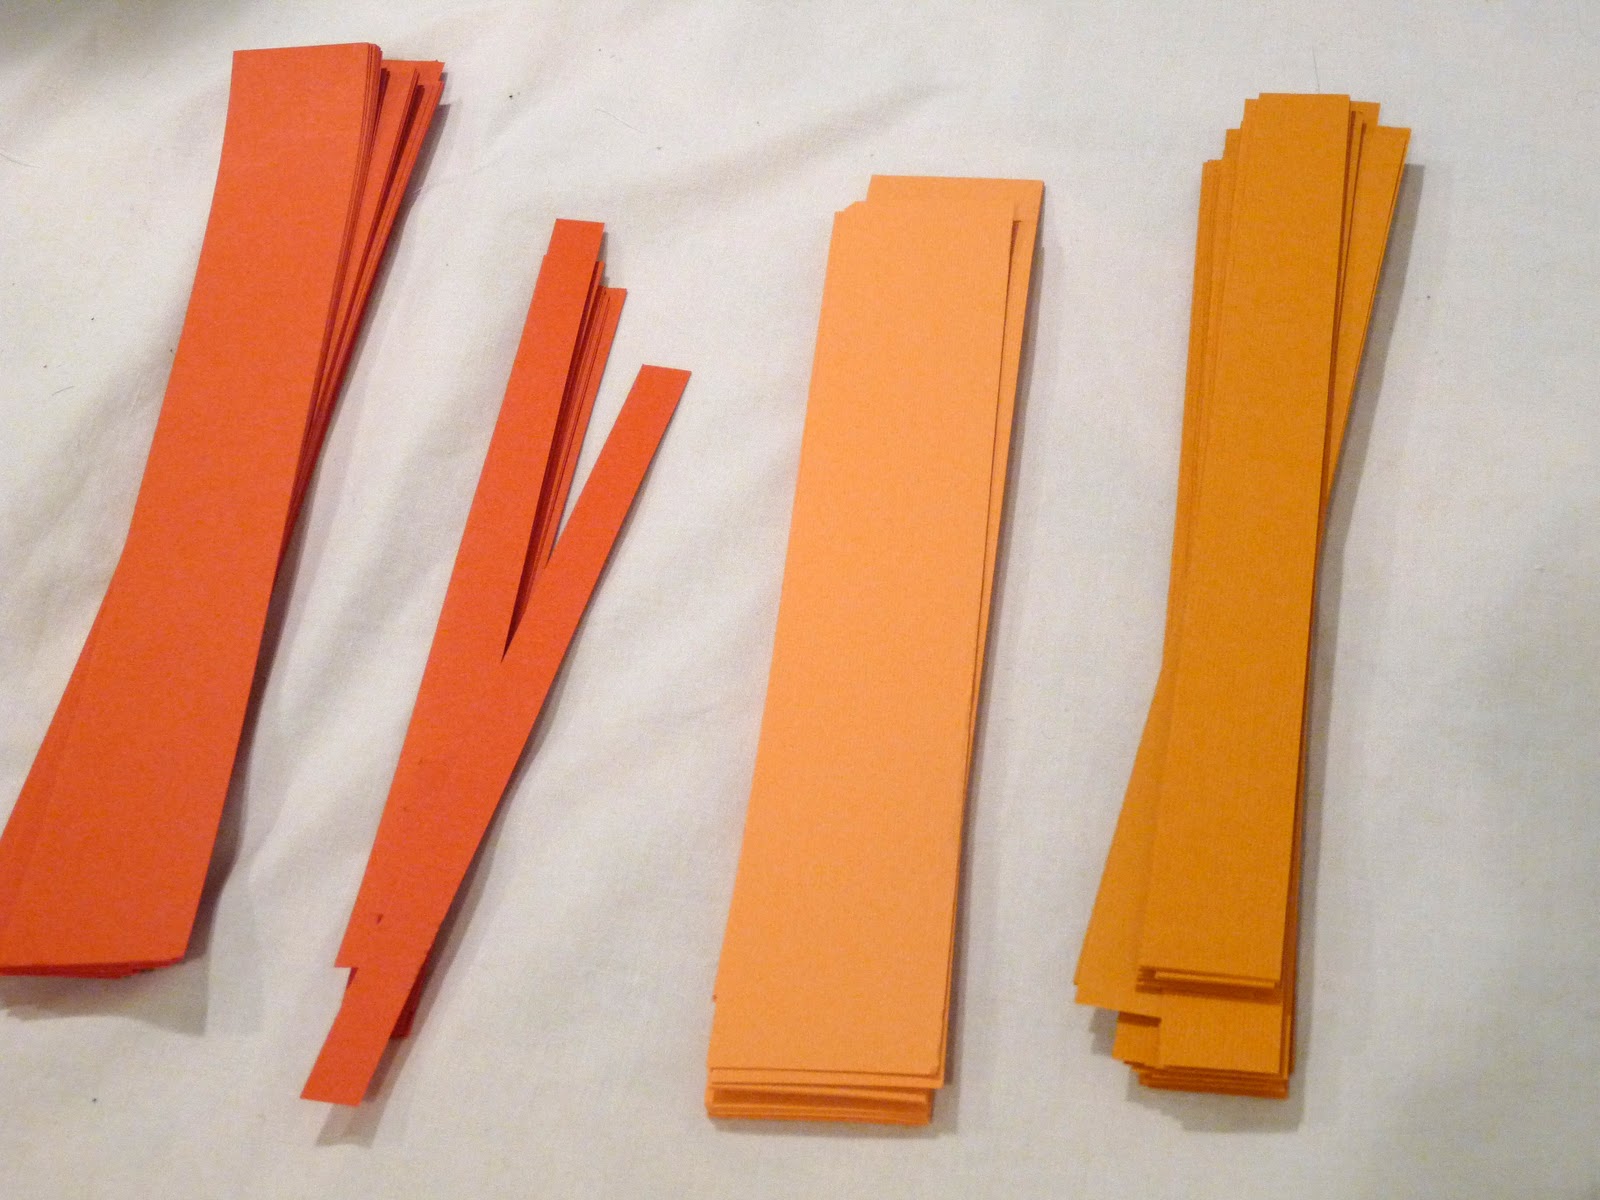
1. Gather long thin strips of cardstock (mine were actually straight out of my paper scrap bags). Use your sewing machine’s slowest speed (this will give you time to collect and feed each strip of paper). Pull out a long ‘tail’ of thread.
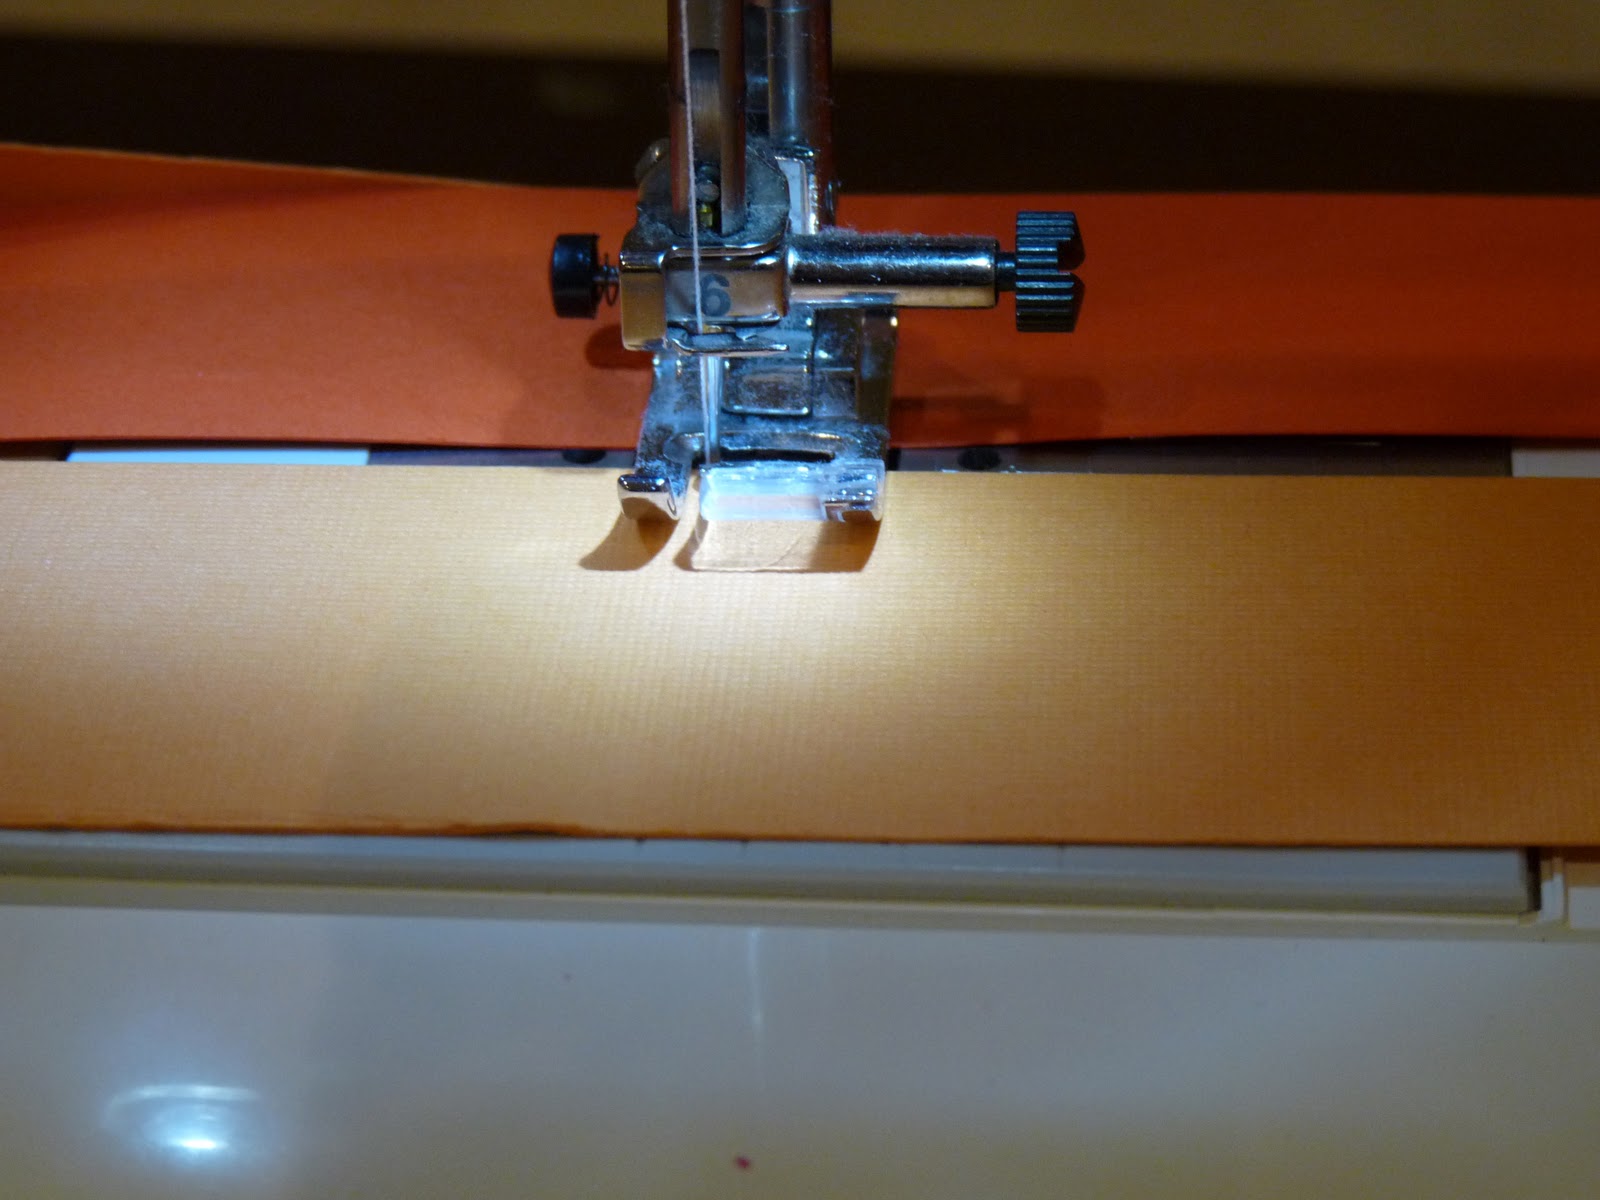
2. Start feeding your strips of paper through your sewing machine one at a time. Make sure you’re sewing close to, but not exactly at, the center of the strip of paper. Switching up the center line is what gives the garland movement. Let the needle stitch a few times between each strip of paper.
3. Once you’ve fed all of your paper strips through the sewing machine (and pulled out another ‘tail’ of thread), you’re finished. Use your stacked paper garlands as party or home decor. Lovely, right?
*If you’re more into readymade garlands than the DIY variety, be sure to check out our sponsors Dimpleprints, Taffie Wishes, Blondies Bits ‘n Bobs and Snowman Central. They have gorgeous (and reasonably priced!) garlands and party decor!
I love garlands too … I think they add so much to the decor. Those stacked paper garlands are so cute!
Oh, I looooove garlands too! And these are just lovely. So simple yet so BIG on impact. You never disappoint! 🙂
Love this! I seriously have been lost on your blog for hours! I just love everything so much!
That is a fantastic way to do a garland. I am going to have to grab some paper and try it out!
~Kimberlee
http://www.TheSpunkyDiva.com
So cute!! I thought I might try these then I saw the darn sewing machine involved!! Do you have any very basic tutorials for a first timer?? You girls are PROS!!!
cheerfull!
Just a quick note to let you know that a link to this post will be placed on CraftCrave today [26 Feb 12:00am GMT]. Thanks, Maria
lovely modern decor!
Wonderful idea. The place I want to have my 2-year-old's birthday party won't allow balloons, so this just might do the trick. How do you attach them to the ceiling or wall?