As an Amazon Associate I earn from qualifying purchases.
We adore today’s guest, Lindsay from The Cottage Home. Not only is she one of the most talented sewists we know (can’t wait for her book to come out in October!), but she is truly such a genuine friend as well. And she’s sharing a rainbow tutorial for Color Your Summer today!
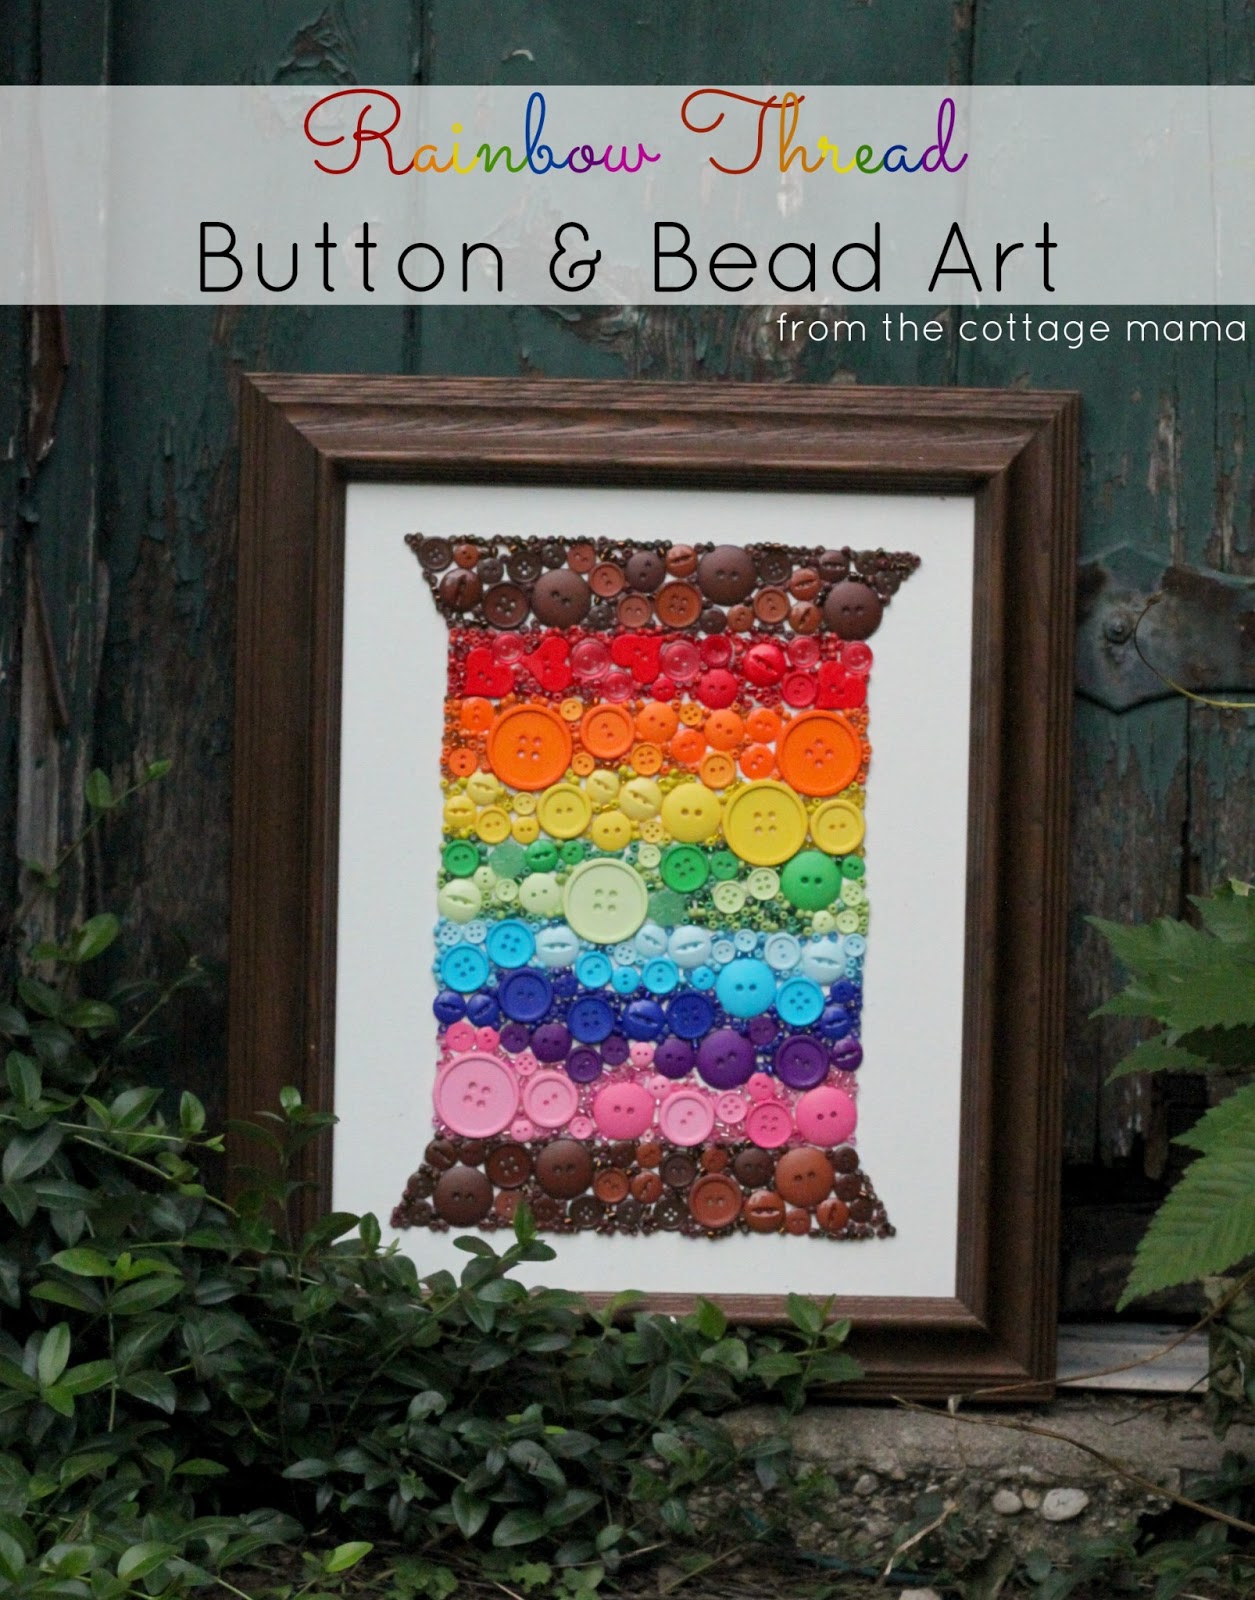
Hi, I’m Lindsay Wilkes from The Cottage Mama and I’m so excited to be back again sharing a project for Color Your Summer. This is one of my favorite series as I am a big fan of color in my sewing in crafting and Kirstin and Delia always do such an incredible job with this series. Usually you can find me sewing over on my blog, but for some reason all my beads and buttons were just begging to be used to create a craft project.
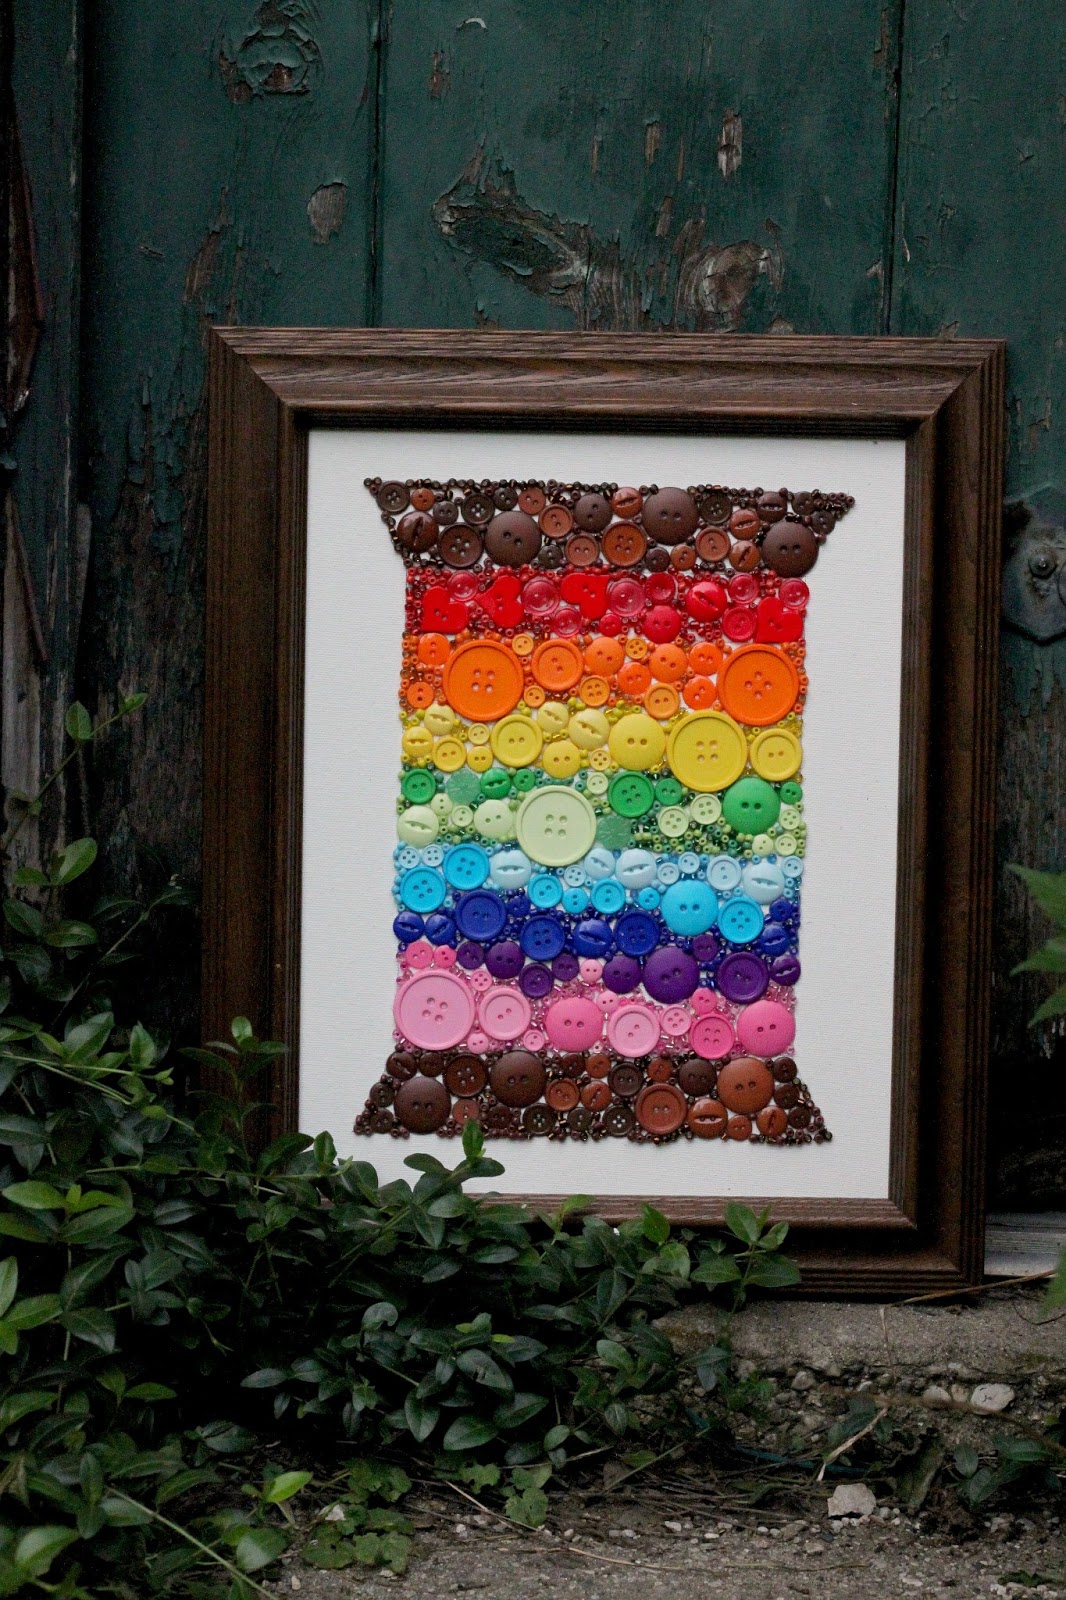
I have been sewing a lot lately and I mean a lot and I needed a little break from my sewing machine. Sometimes in order to get my sewing creativity back, I have to break away and create in a different medium and this project was just what I needed. I live in Chicago and we have very dark and cloudy winters. I wanted to create a piece of artwork for my studio that would bring a little summer rainbow in during those snowy, winter months. And so that’s how I came up with the Rainbow Thread Button and Bead Art.
Since I love sewing, I decided to use buttons and beads to create a rainbow thread spool, but you really can use this tutorial as a jumping off point to create any shape you would like. You could do an actual rainbow, butterfly or flower maybe for your child’s room or you could use all one color and do a family monogram………there are so many options and it’s up to you to get creative and create a one-of-kind piece of art that has meaning for you.
Rainbow Thread Button and Bead Art
Supplies:
1 artist canvas or canvas board
Glue
Buttons (multiple sizes)
Beads
Instructions:
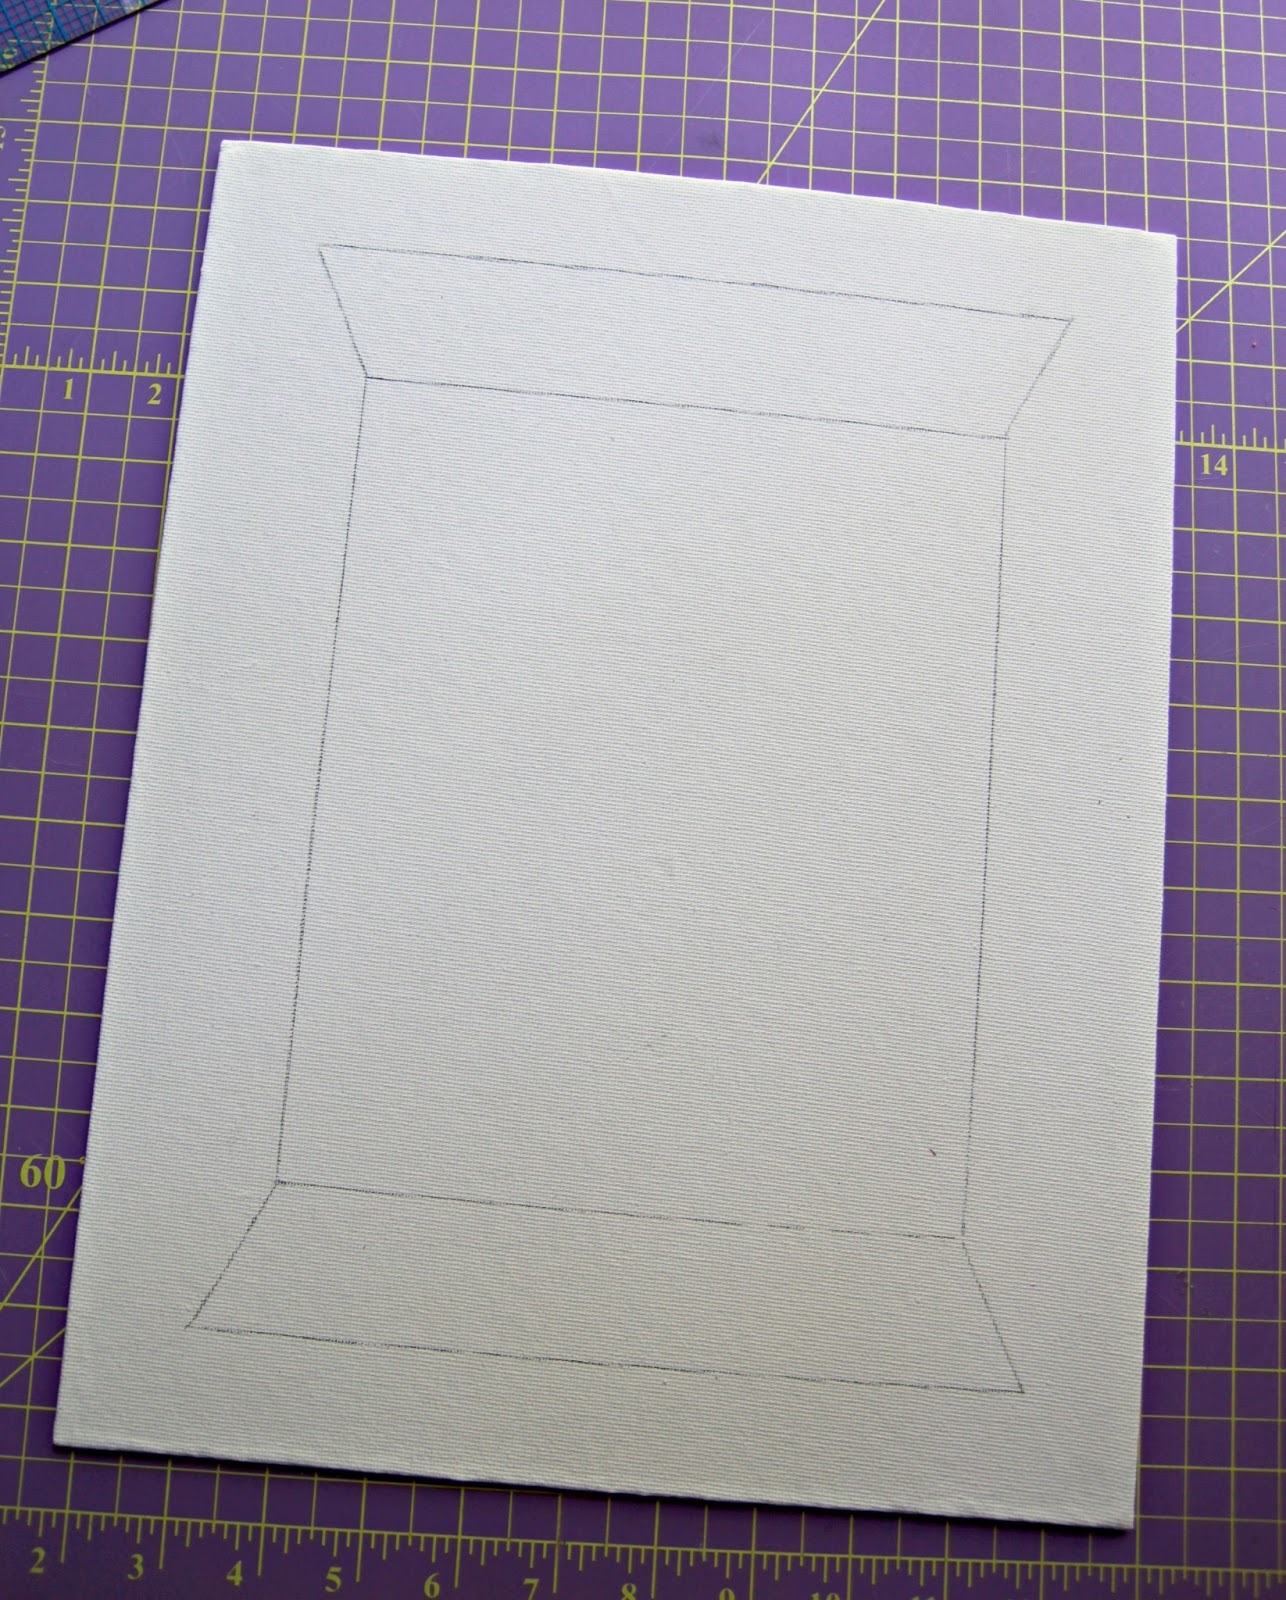
For this project I used a canvas board in size 11” x 14”. You can see in the picture above that this is basically just a thin, hard piece of an artist canvas. You could also use a regular canvas and I thought this project would be really neat on some old, reclaimed wood. Again, it’s totally up to you.
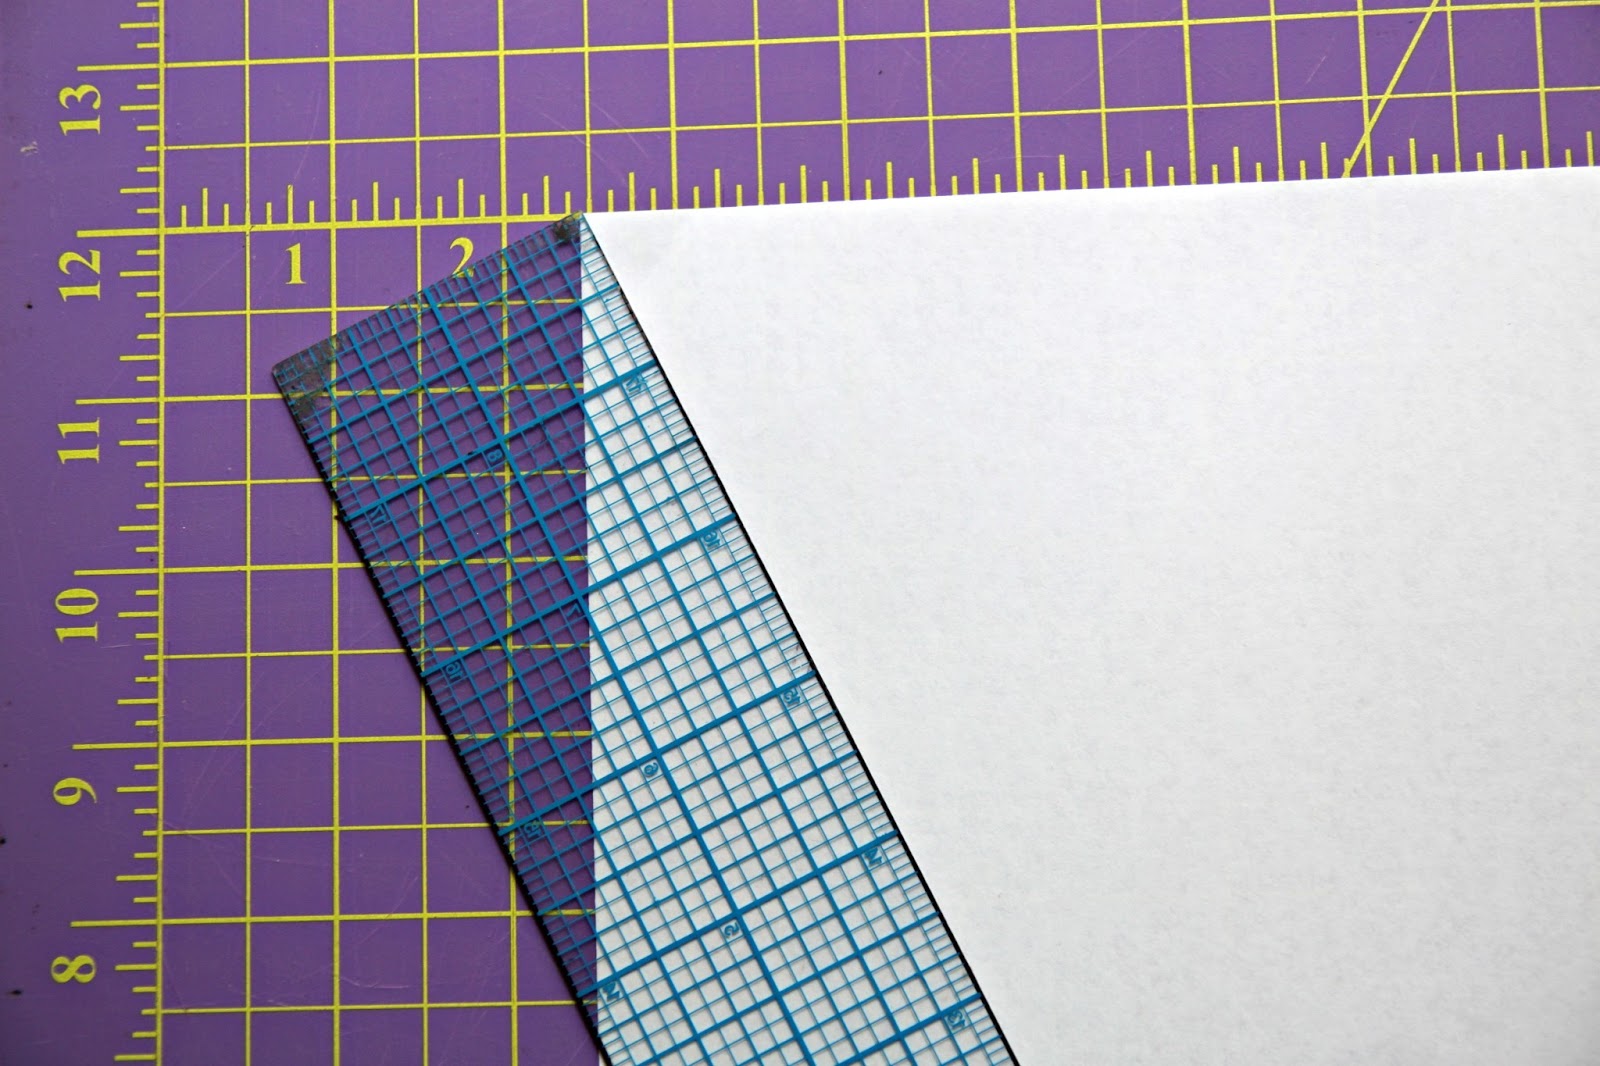
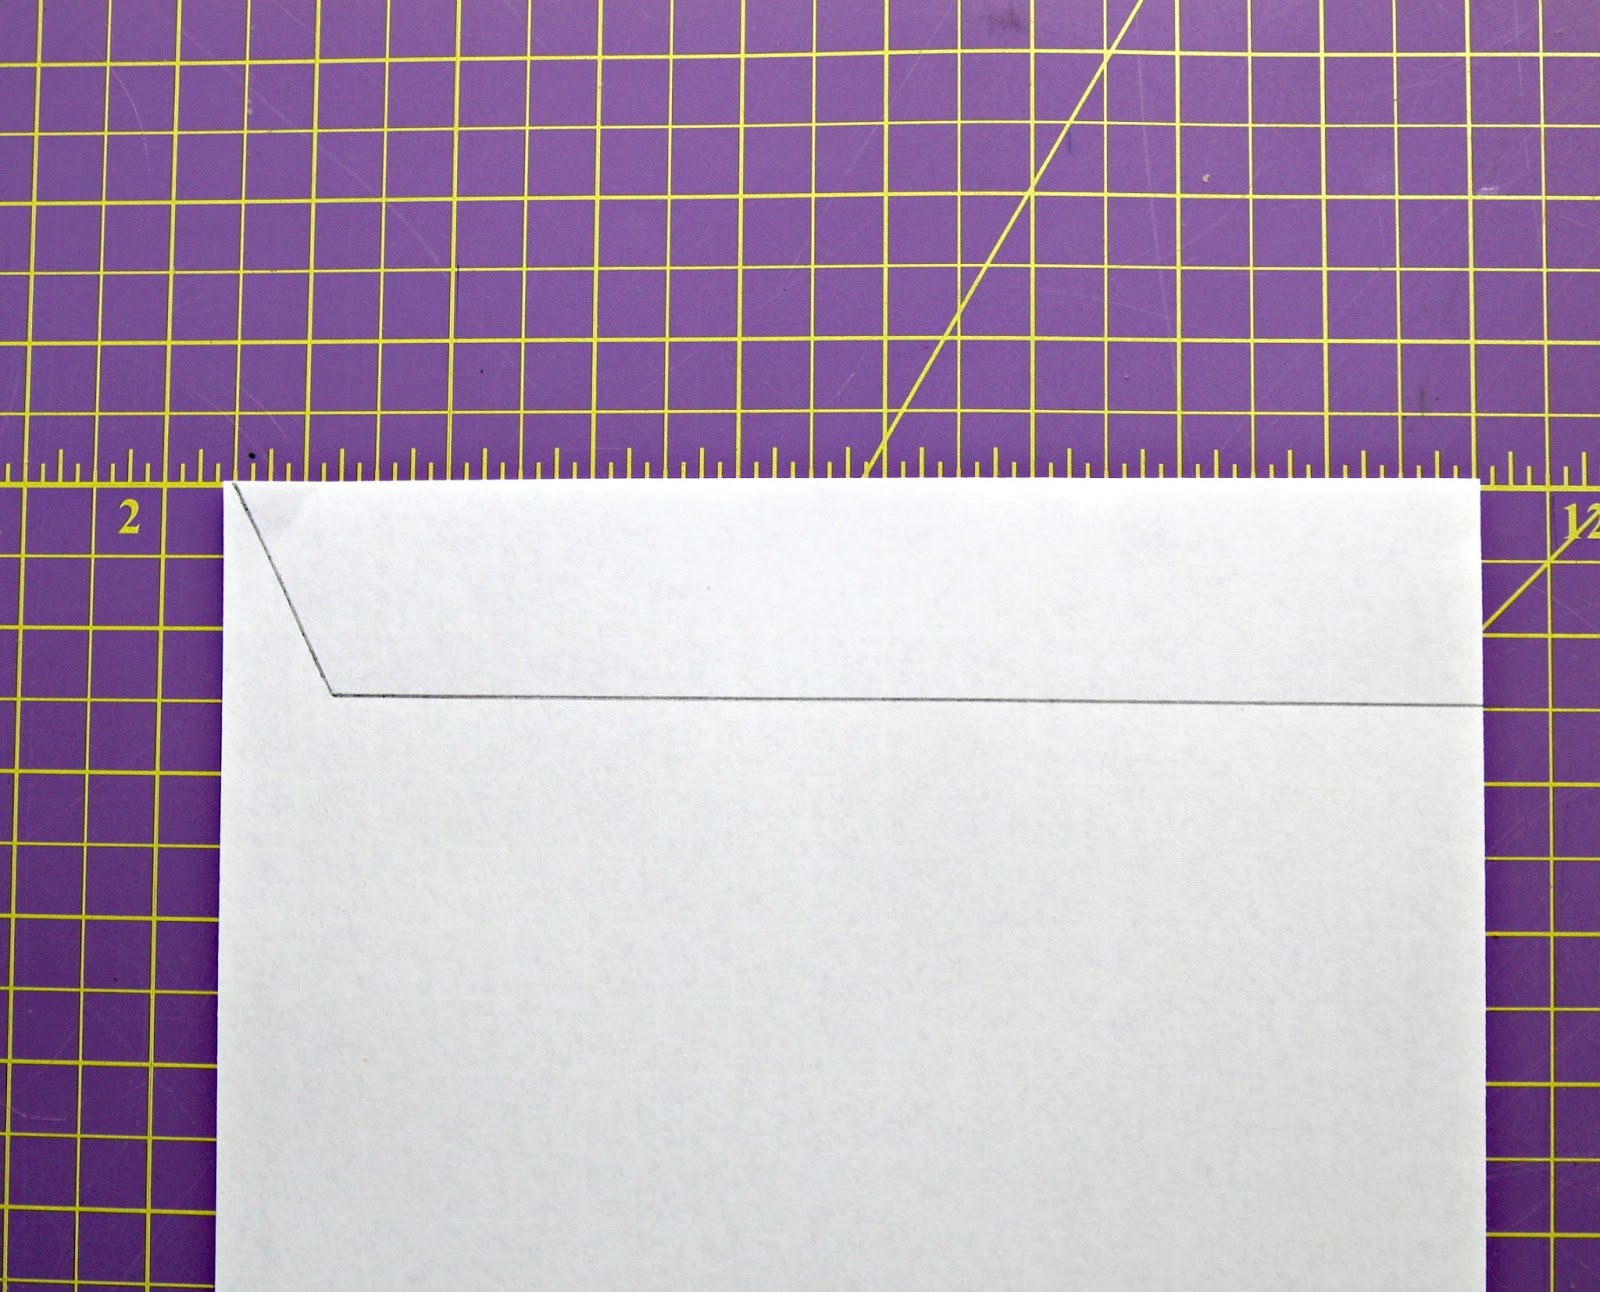
Now you need to draw your template for the spool. This can be as large or small as you would like depending in the size art you are creating. I’m just going to show you how I created my template, but you can adapt this however you would like. I used a piece of printer paper to draw the template. So, for the spool top and button, I wanted it to come out at an angle. I took my ruler and drew an angle about 1.5″ down from the top of my 8.5″ x 11″ paper.
Then I drew a straight line all the way over to the other side of the piece of paper.
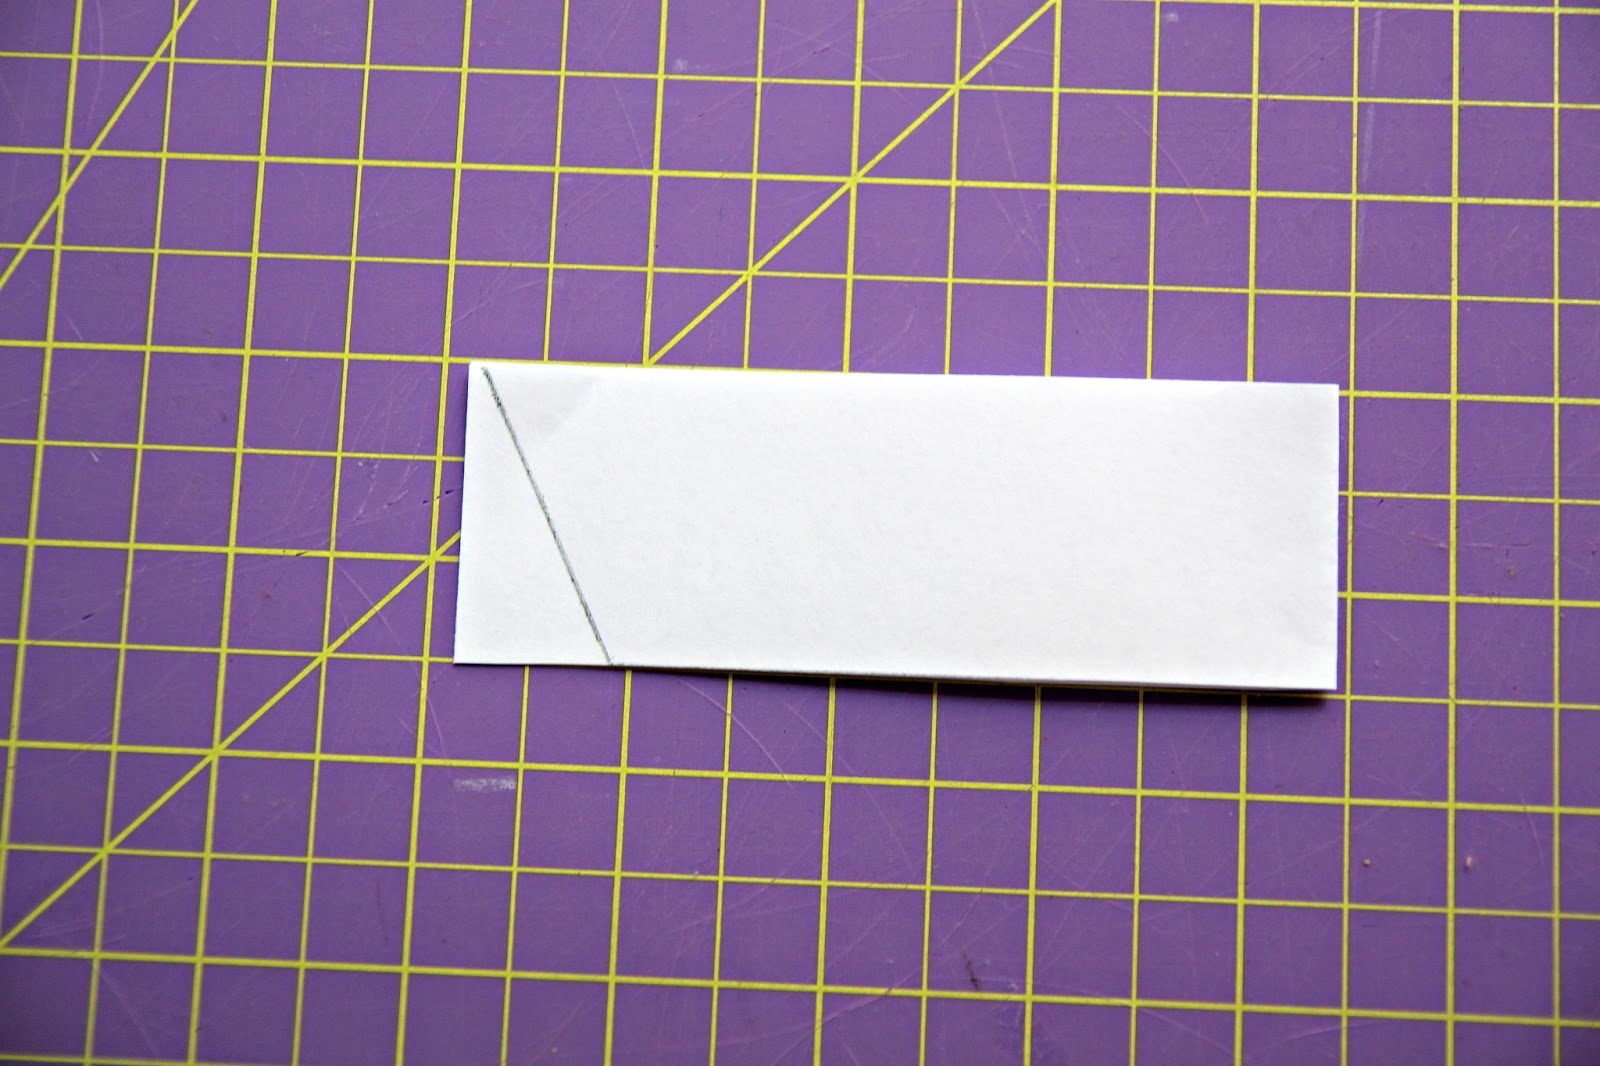
Then I cut along the long, straight line and folded the piece of paper in half so I could see the line that was drawn at an angle. I then cut along the angle to create a symmetrical spool top and bottom template piece.
Here is what you thread top and bottom template piece will look like once you’ve cut it at an angle.
Now you need to make a template for the main spool. Line up the spool top with the top of the paper and draw a line so that the top piece will line up with the main spool. If the spool looks too long to you, take 2″ or so off the length. You will end up with a rectangle.
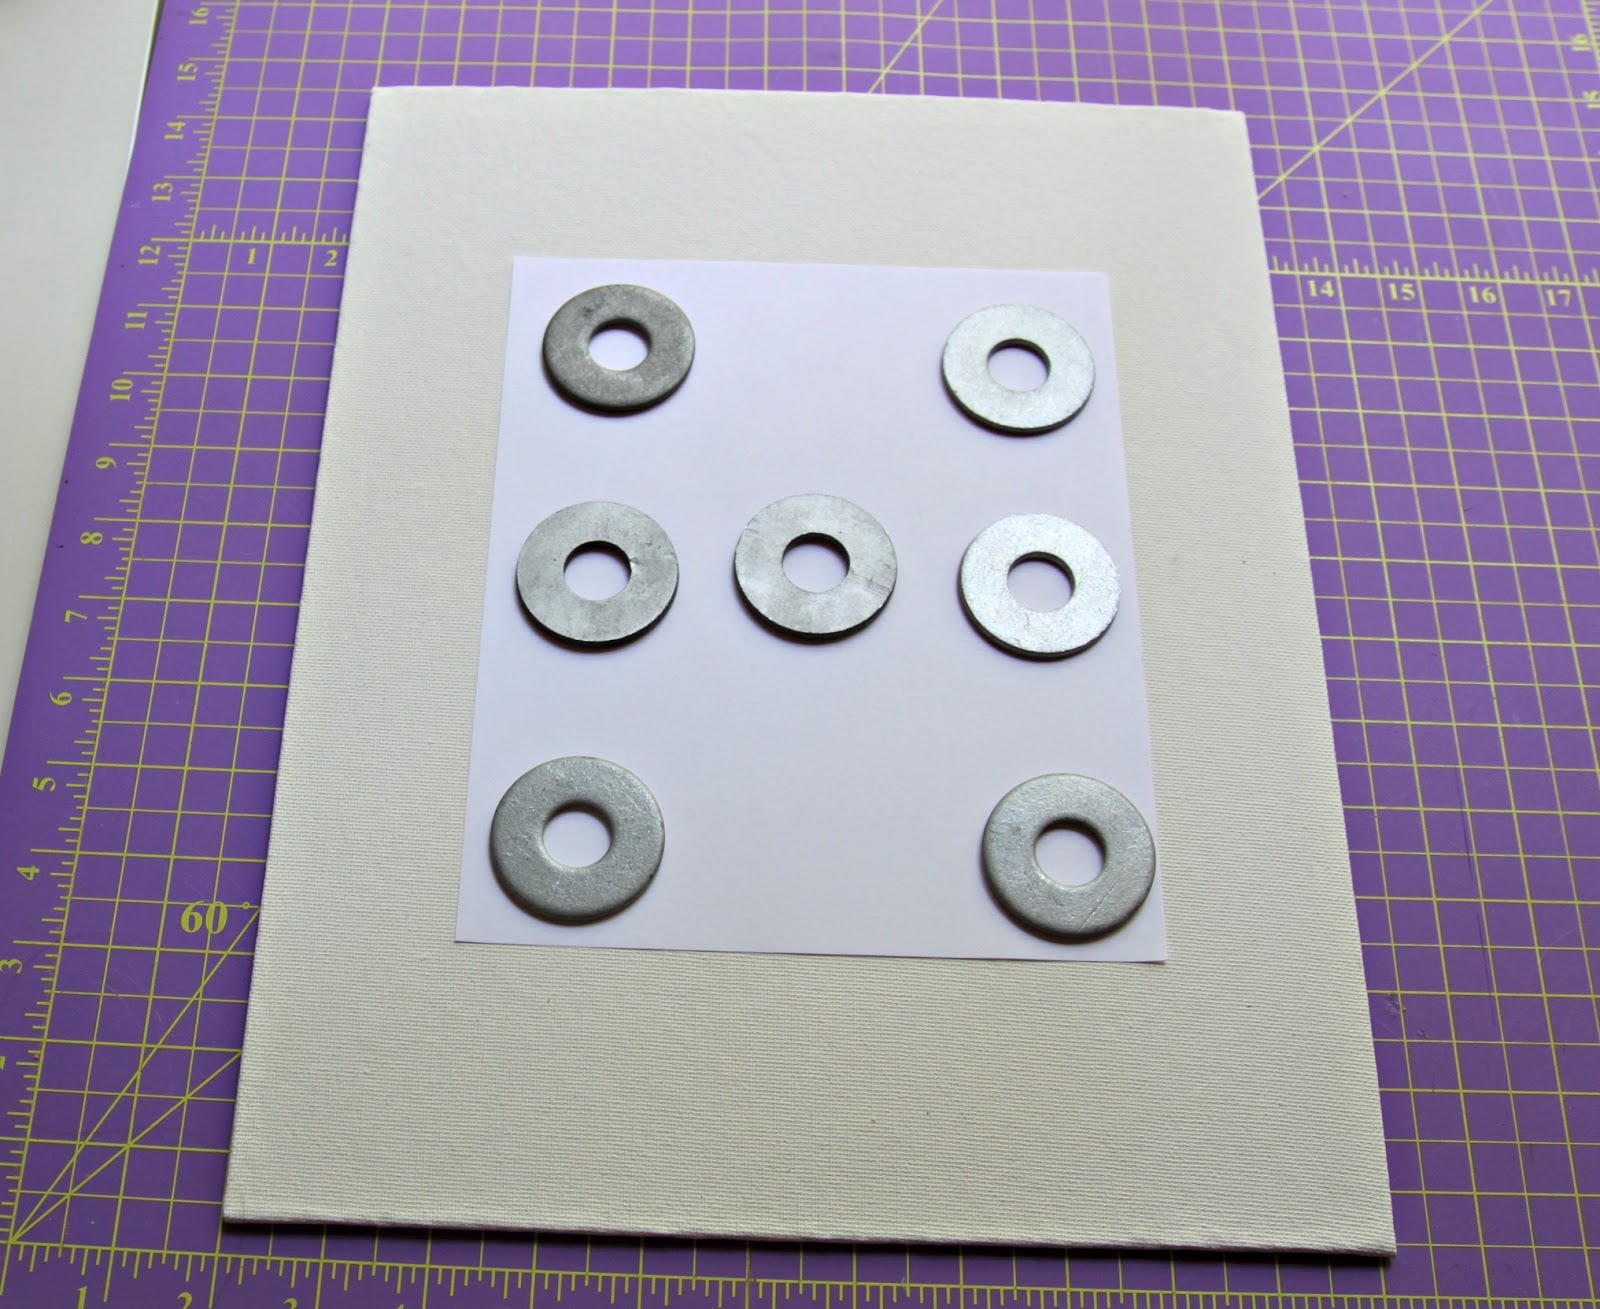
Center the main spool template piece on your canvas and weight it down. I like to use washers from the hardware store for my pattern weights, but any heavy weighted item will do. Trace around your main spool template piece with a pencil.
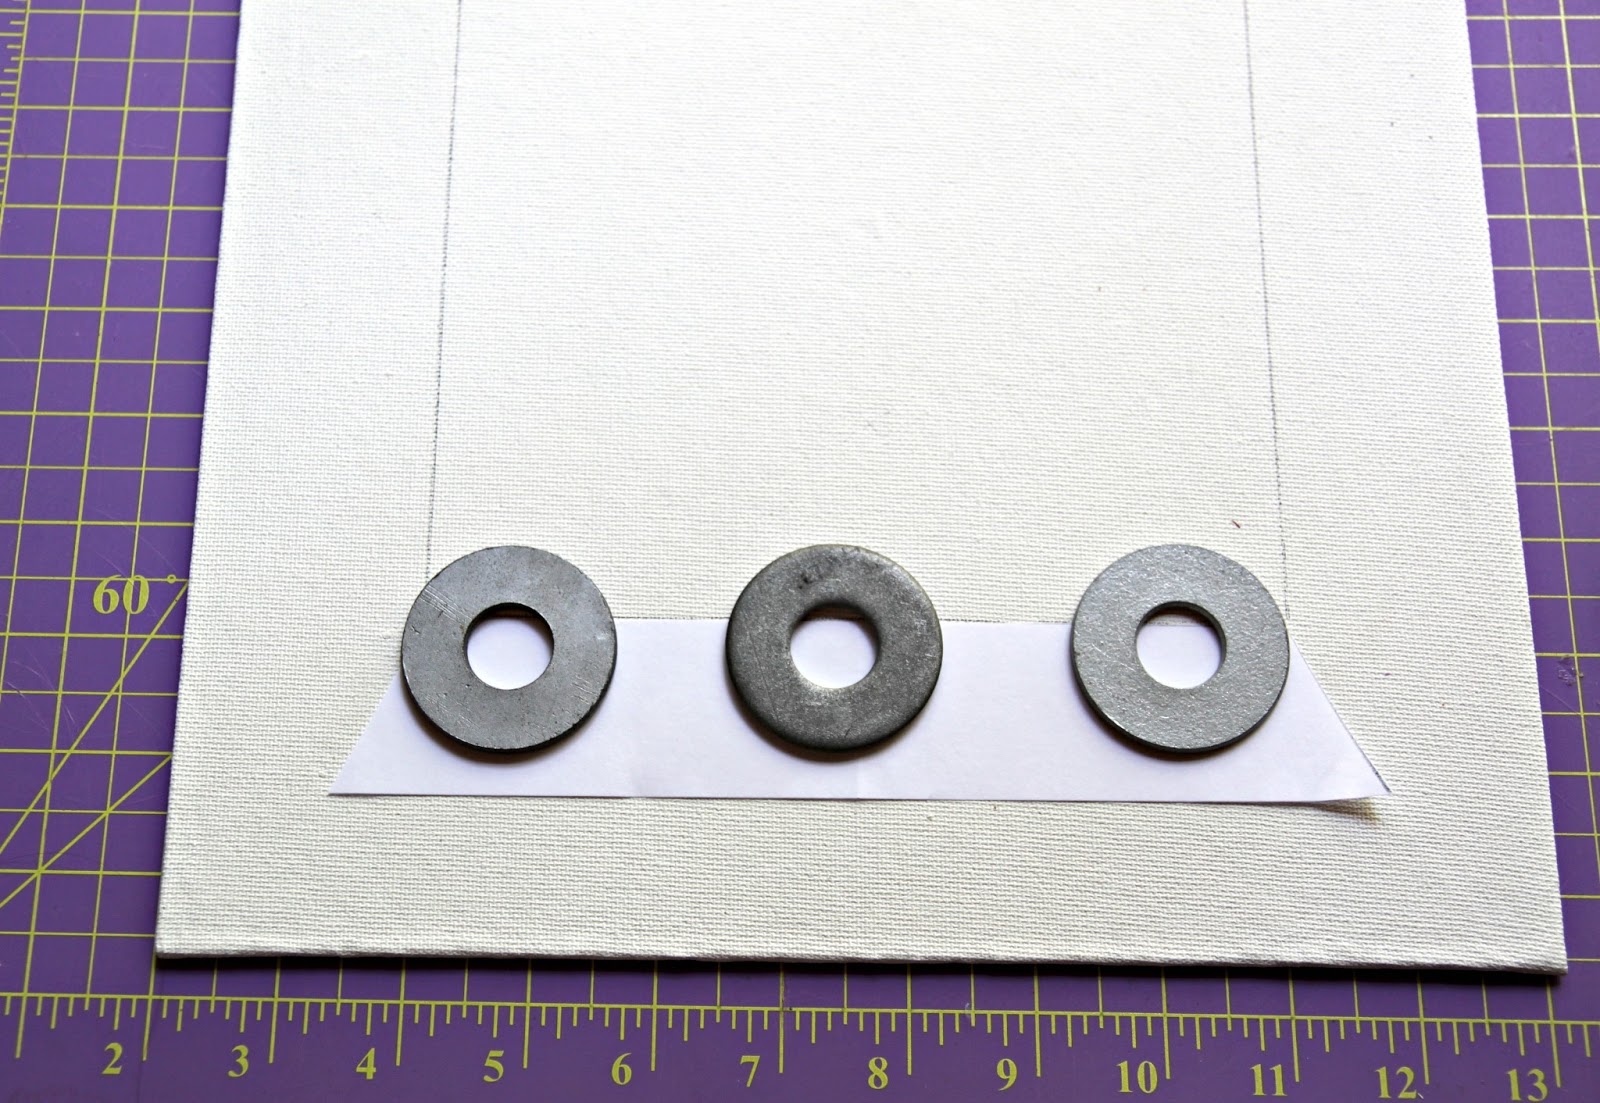
Then line up your thread spool top and bottom template piece, weight it down and trace with a pencil.
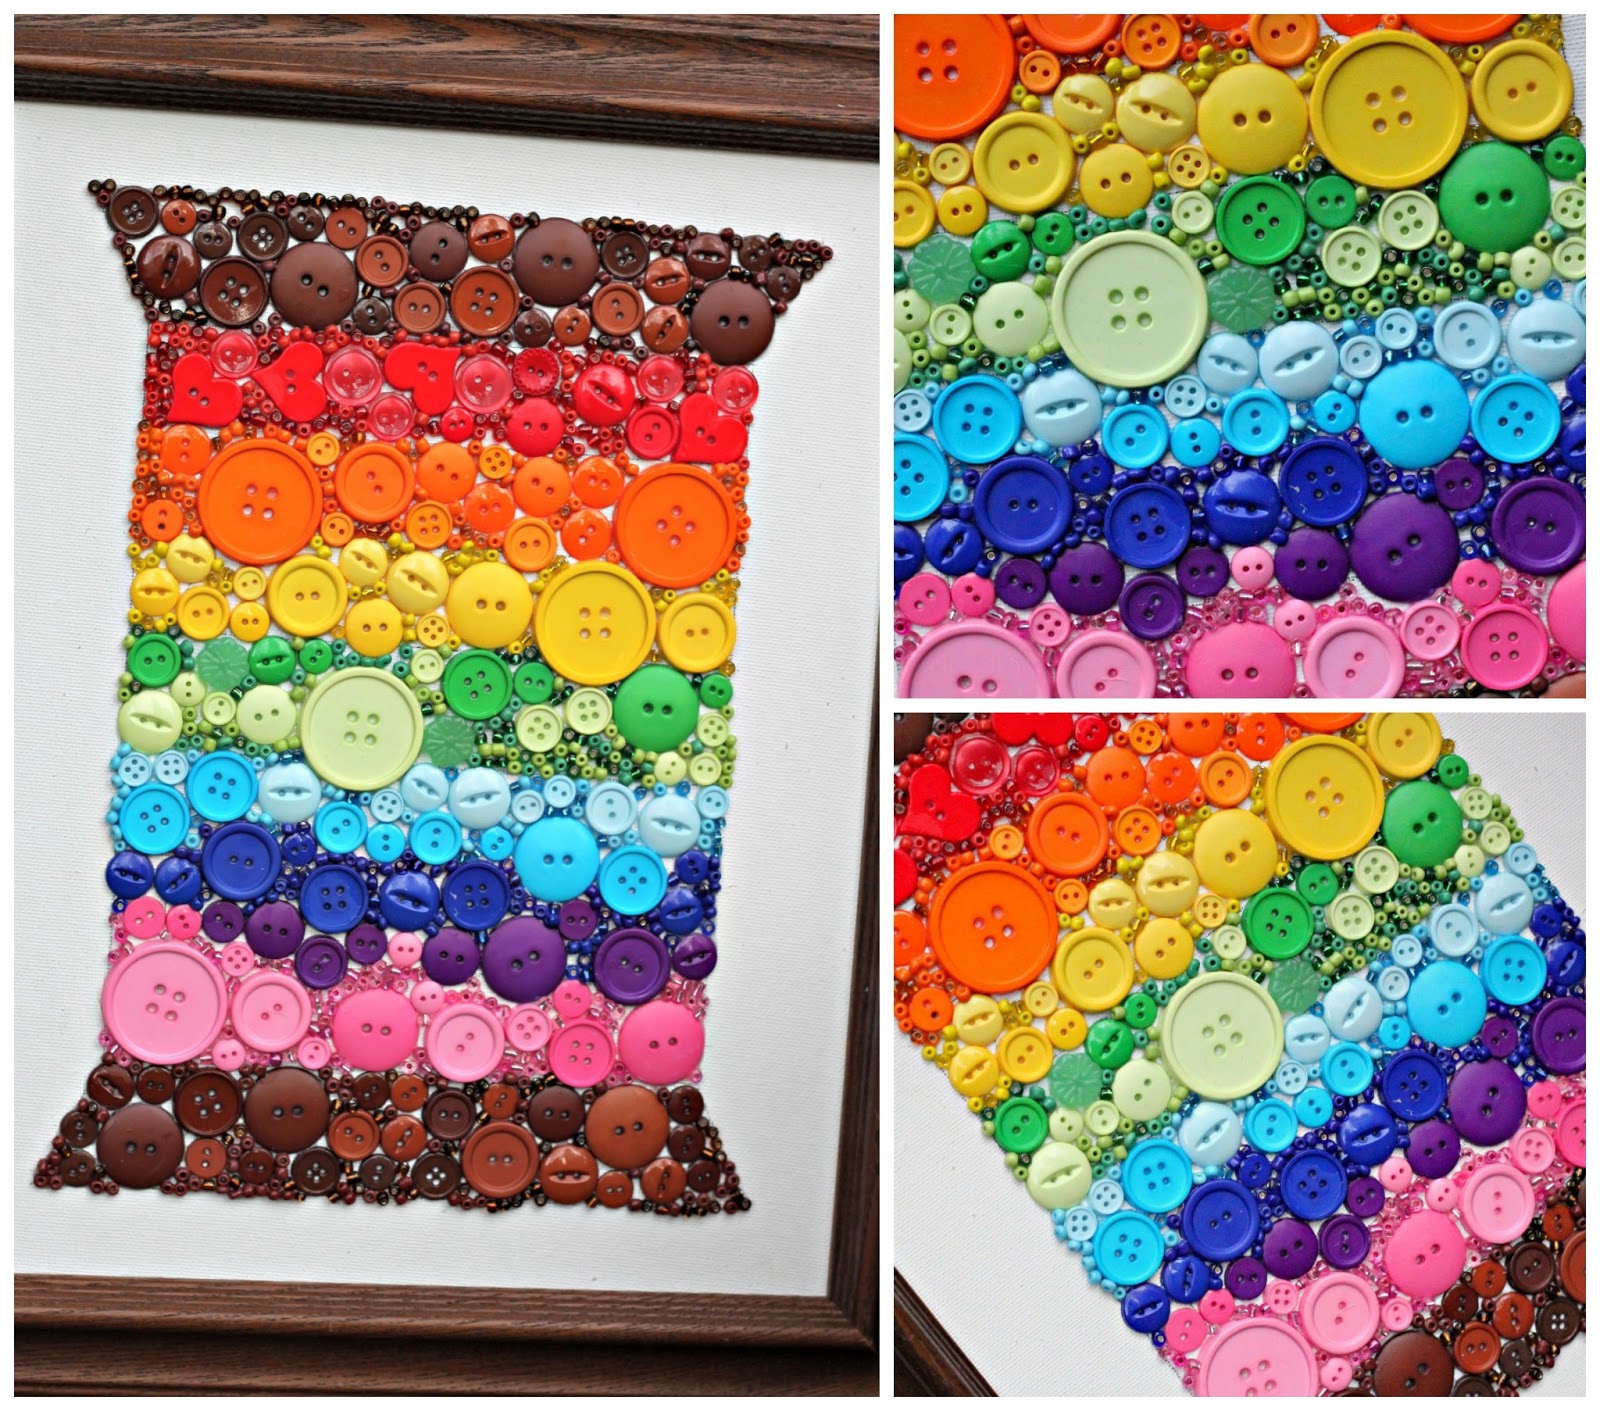
Here is what your traced template will look like once you have it drawn out on your canvas. If you are just going to be doing one color for the spool, you can begin gluing on your buttons and beads. If you are planning to do a rainbow look, see the next step………
If you plan to do a rainbow look, I suggest measuring out some sections so that you know which color goes where. If you don’t do this, by the time you get to the bottom of the spool, you might not have gotten to the end of the rainbow if you used too many of the first colors or vice-versa, you might get to pink before you’ve finishing filling up the main thread template.
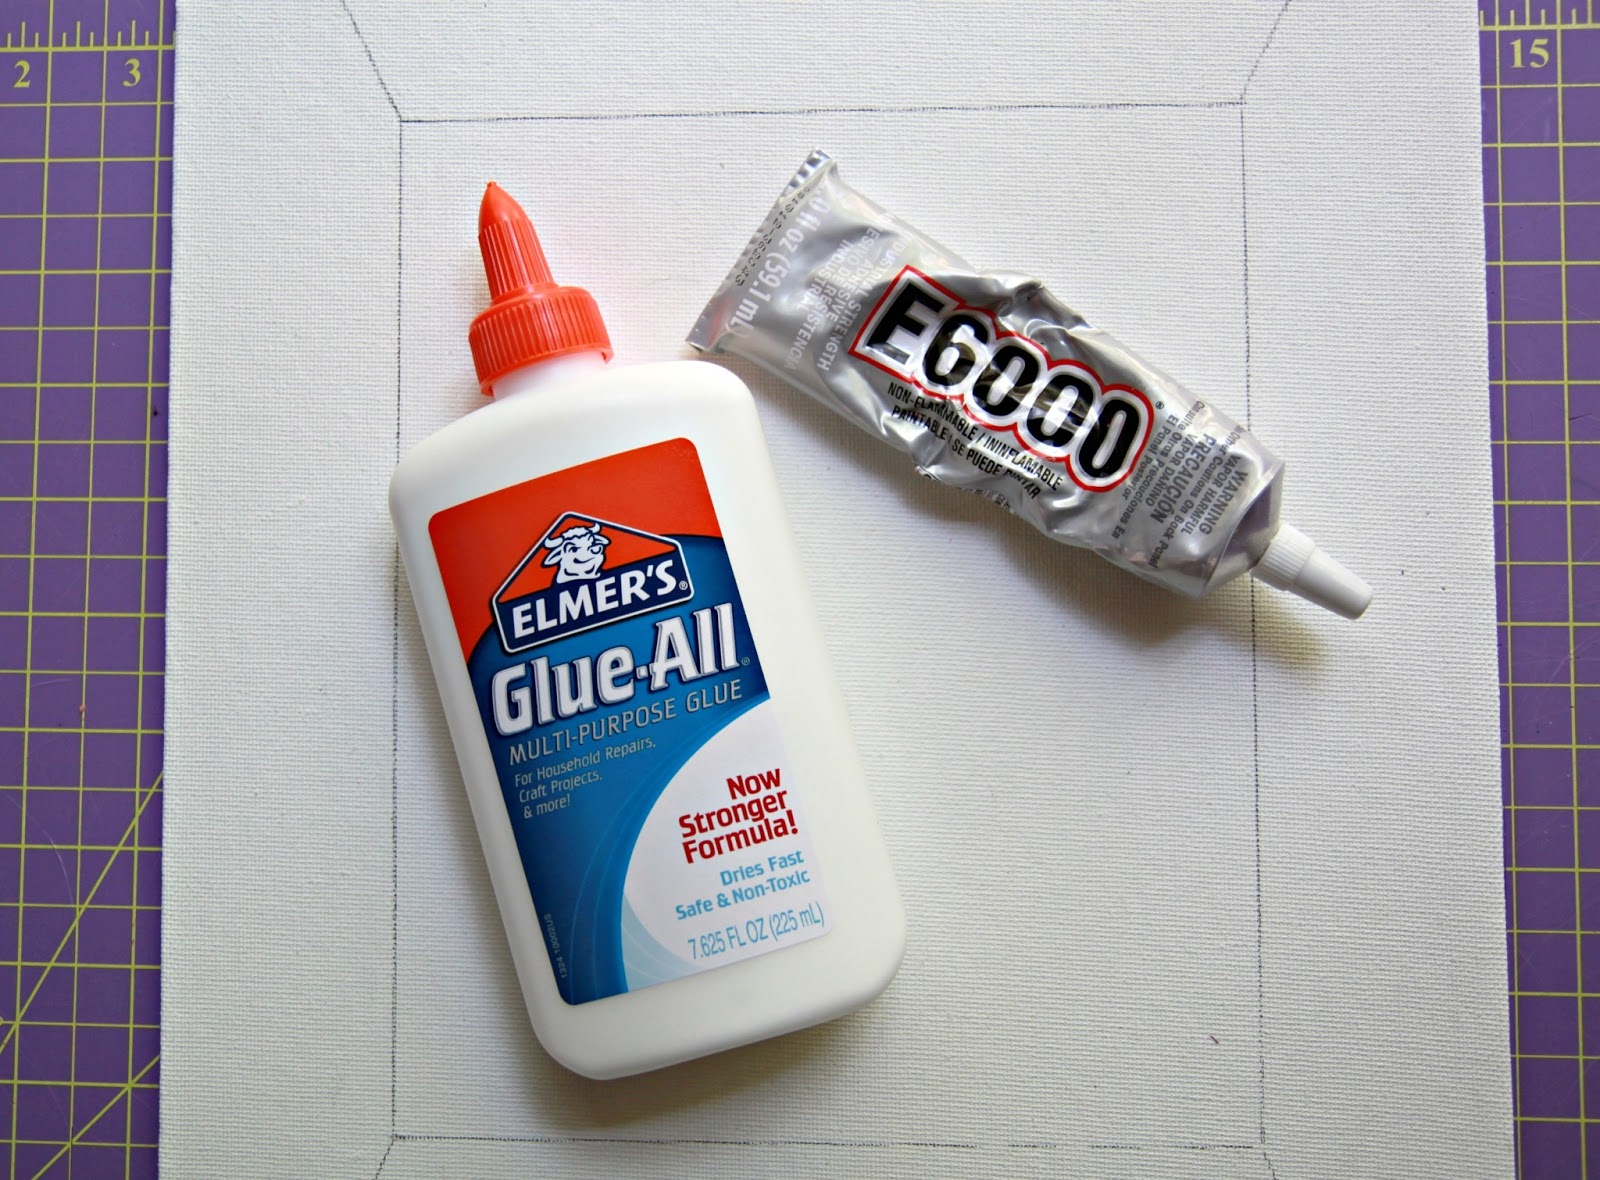
I wasn’t sure which glue I would end up using, so I took a picture of both. I usually use the E6000 when I need a really strong hold, but it can be kind of messy. I actually only ended up using the Elmer’s Glue and the hold is really, really strong (much more than I was thinking). You will have to think about the surface where you are applying your beads and buttons, but for a canvas, you should be safe with good old Elmer’s.
To apply the buttons and beads, glue down the buttons first and then fill in with your beads. Apply a liberal amount of glue. Remember, Elmer’s dries clear, so don’t be alarmed if some of your beads look like they are swimming in a pool of glue. They will look great once it dries!
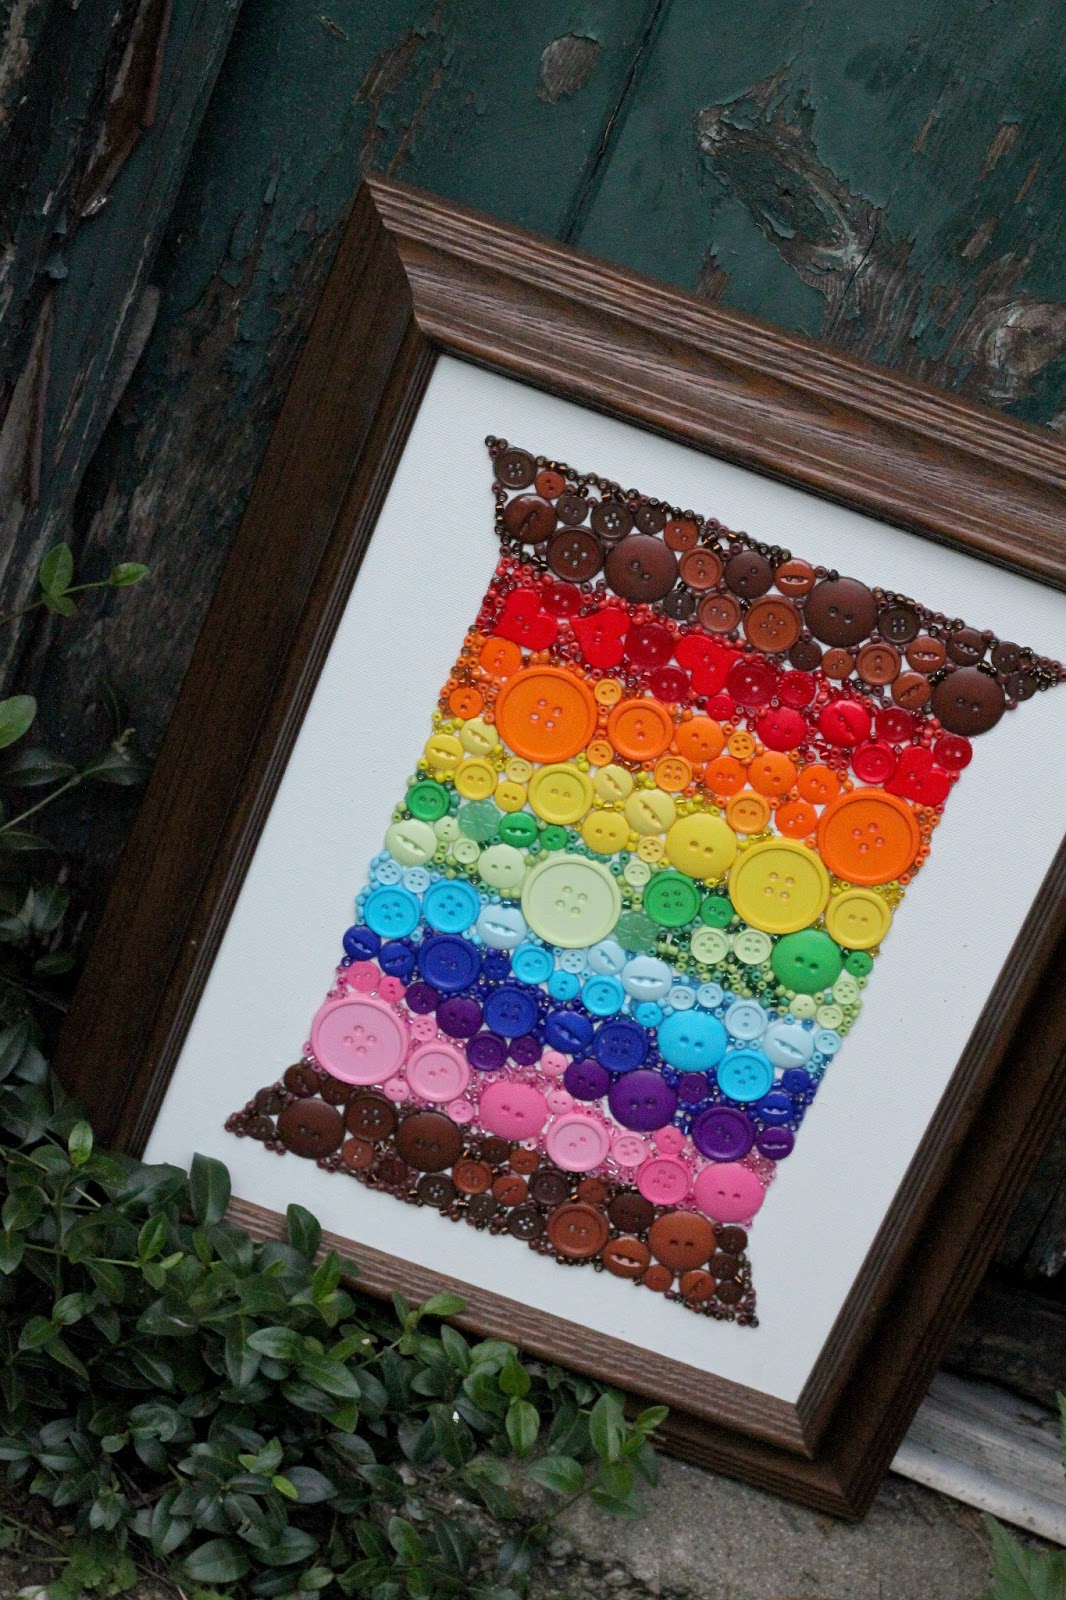
This is an incredibly relaxing project and won’t take you nearly as long as you think. I’m really happy with the result and I think this piece is going to bring a little bit of summer into
my studio all year long!
Thanks so much for having me today…….it has been a pleasure.
For more sewing and crafting tutorials, free patterns, recipes and more, please stop by
The Cottage Mama…….I always love meeting new friends!
And be sure to stop by
Delia Creates for more Color Your Summer goodness today!


 A few of our (recent) Cottage Mama faves? This scalloped envelope clutch tutorial, this double layer twirl skirt (oh how we love seersucker), this lovely party dress pattern, these oh-so-useful potluck bowl covers (first shared as part of the original Color Your Summer!), and this fabulous repurposed picture frame tutorial! Lindsay also makes amazing patterns (one of my all time favorites is a Cottage Mama pattern!)- can’t wait to show you what I’ve been making using a couple of Lindsay’s latest patterns in August!
Lindsay! This is so pretty and I love love the thread spool. Thanks for joining us for CYS!
Delia, isn’t it great? I need one for above my sewing table! 🙂
This is adorable. What a great use for leftovers or for that odd jar of hand-me-down buttons!
I thought the same thing- I have quite the button collection and this is such a great use for them! 🙂
A.dor.able!! Love the rainbow colors!
Me too Dana!!!
Fantastic! I think I may do several – each with a single color in various shades!
Love that idea Becky!
Brilliant idea! The colors are perfect & I like it a lot. Thanks for sharing with us.
Greetings from Los angeles! I’m bored to death at work so I decided to browse your website on my iphone during lunch break.
I enjoy the info you present here and can’t wait to
take a look when I get home. I’m shocked at how fast your blog
loaded on my mobile .. I’m not even using WIFI, just 3G ..
Anyways, good blog!