
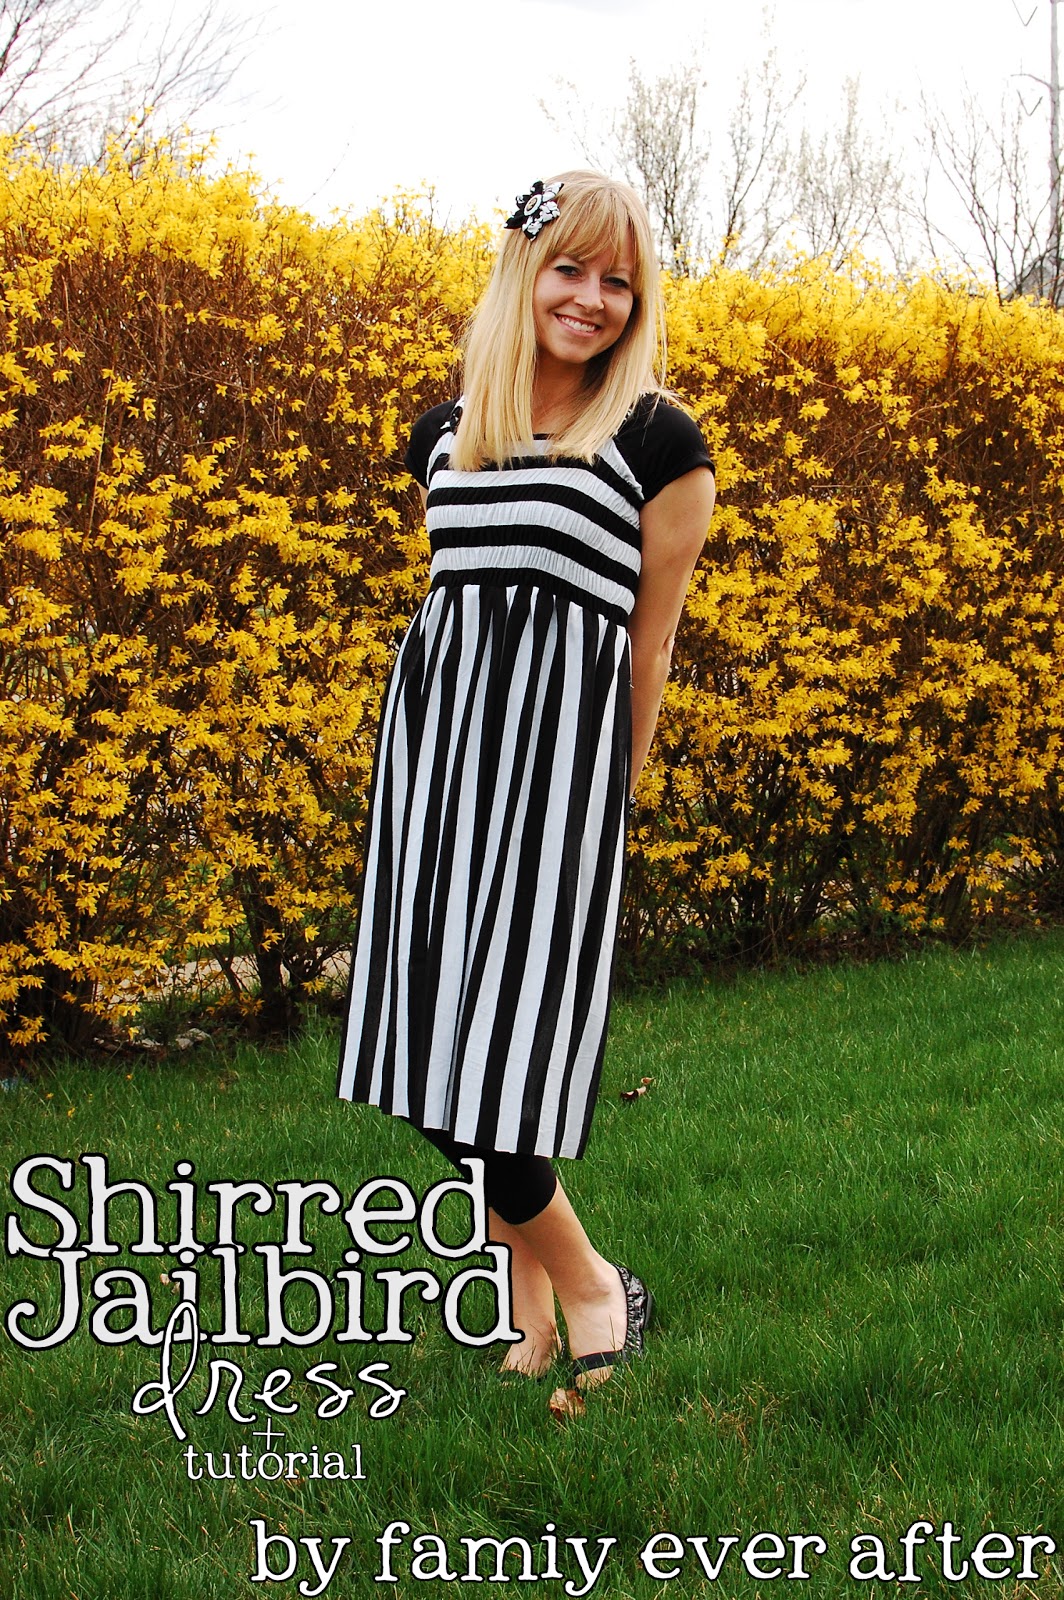
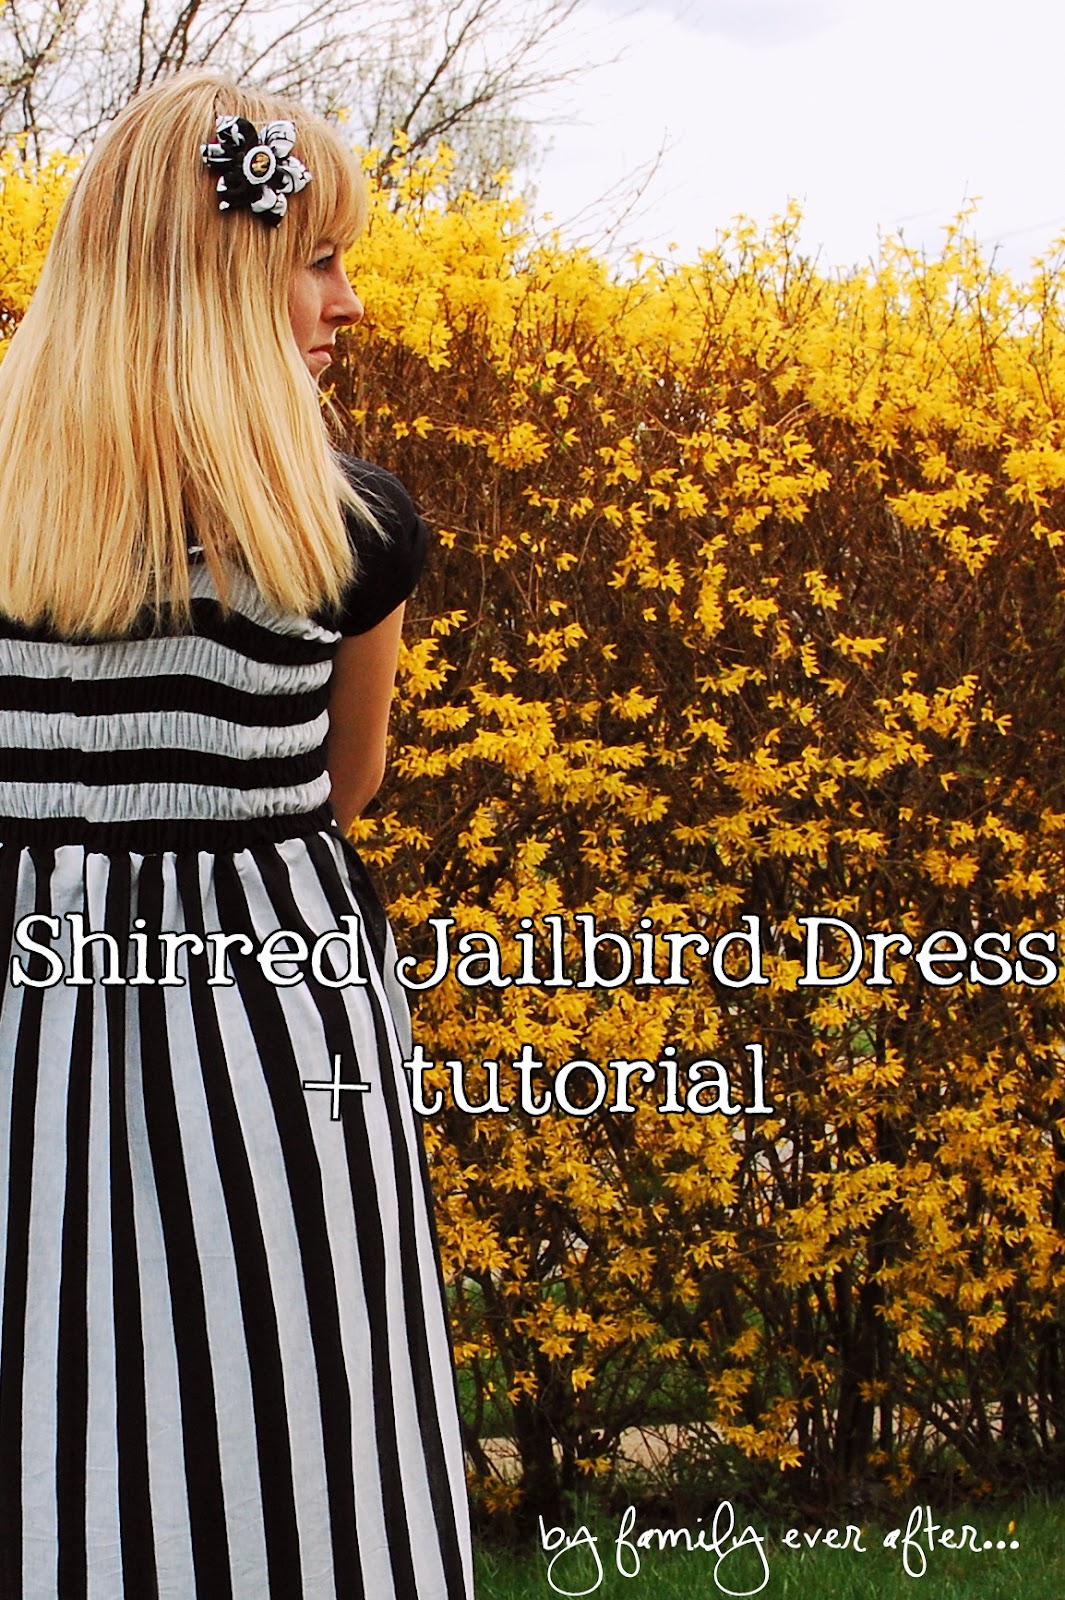
shirred striped dress tutorial by family ever after
As an Amazon Associate I earn from qualifying purchases.

I *met* Rach from Family Ever After earlier this year when I did So You Think You Can Sew (she was a judge) and have been so thankful for a chance to get to know her better over the last couple months. We’re doing all sorts of join projects in April (I’m a contestant in her sewing contest, Sew-vivor) AND we have the chance to meet up in real life at Snap! You’ll get to see some of her fabulous sewing talent in her tutorial- and here are a few other Rach-Projects that I love- the tie skirt, this wedding inspired headband (as a side note, she’s always wearing the greatest hairstyles!) and her Pottery Barn Knock Off Advent Calendar (there’s even a sew-along for this one).

Of course, the fabulous news of the day is that Rach is here to share a Sewing for ME! tutorial with us today-
Hi! I’m Rachel from Family Ever After. It’s been forever since I’ve sewn something for myself! I’m so incredibly excited to have been invited to participate in Sewing for Me! I’m headed to Phoenix for spring break, so I made myself a simple shirred knit sundress to wear. It could double as a swim suit cover as well. I fell in love with the fabric, not realizing that when I put it on, I would feel like a jailbird. Hence the name…

Here’s the tutorial!
Supplies:
knit fabric, 1 or 1.5 yards (depending on your size)
elastic thread, thin
normal sewing supplies

Step 1: Measurements
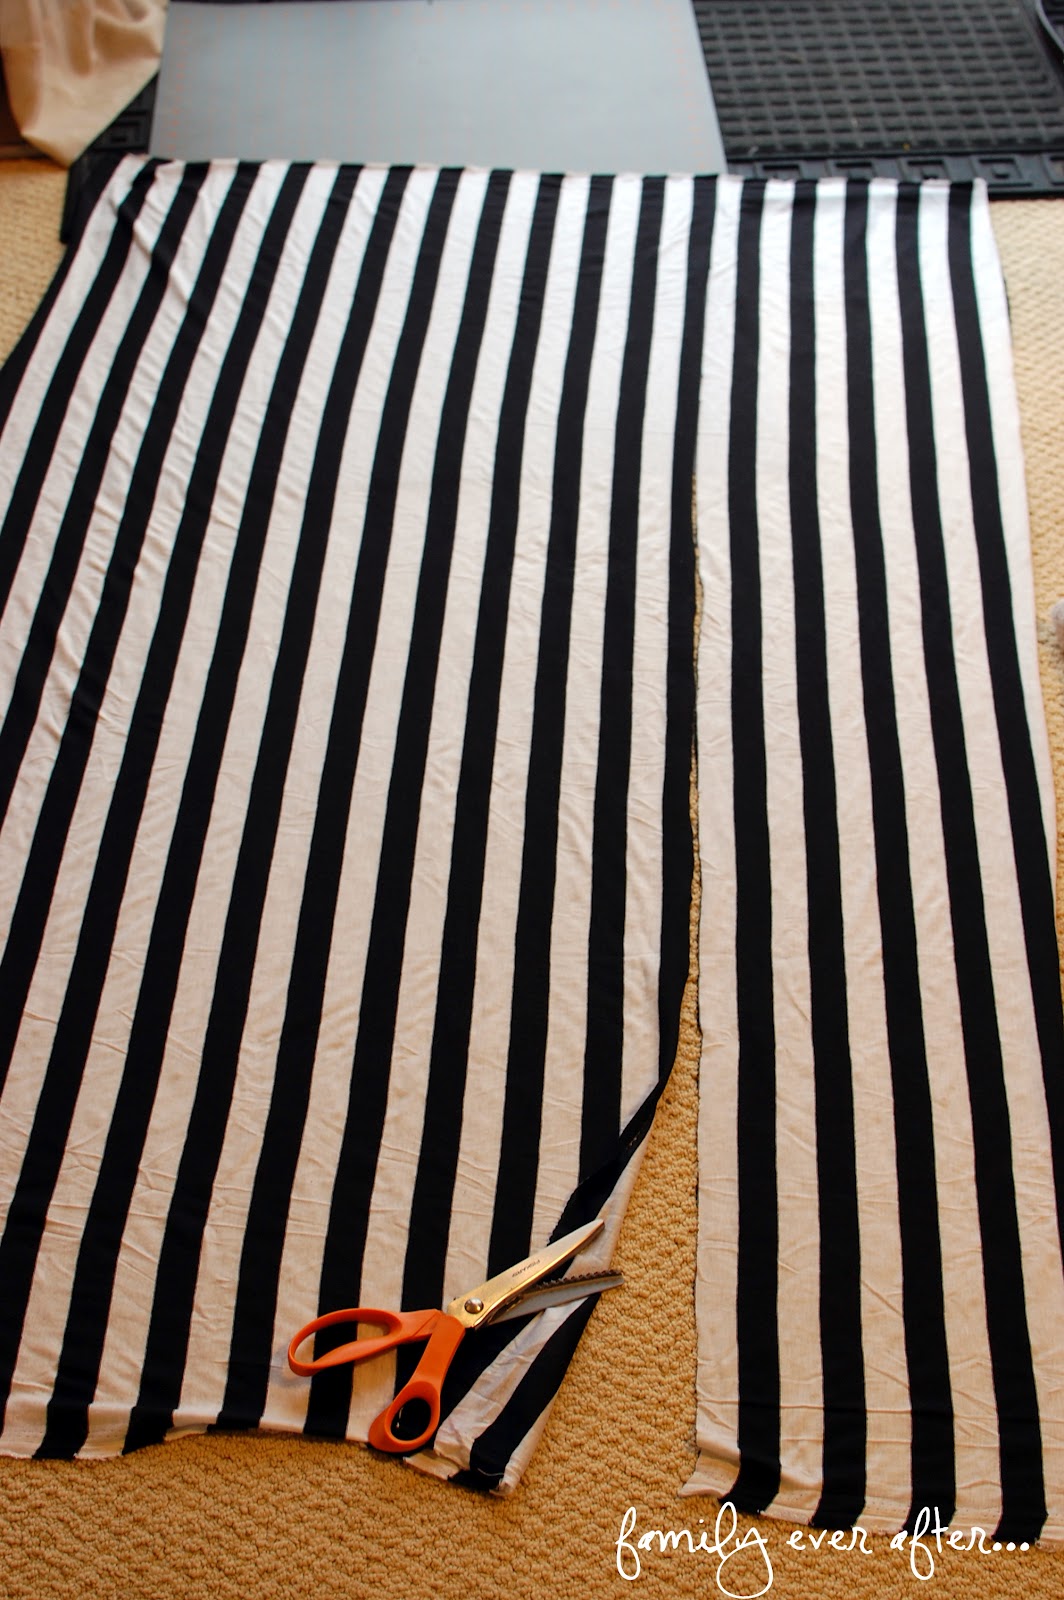
Figure out how much you need/want. (I am about 5’2″). The piece of fabric I bought was 38″ long and 60″ inches wide. I didn’t have to alter it much.
I cut 10 inches off for my shirred empire waist. I shirred the whole thing, and then I held it around my bust to see how much I wanted, and cut off the excess. But a good rule of thumb for shirring purposes is to take your bust measurement and double it.
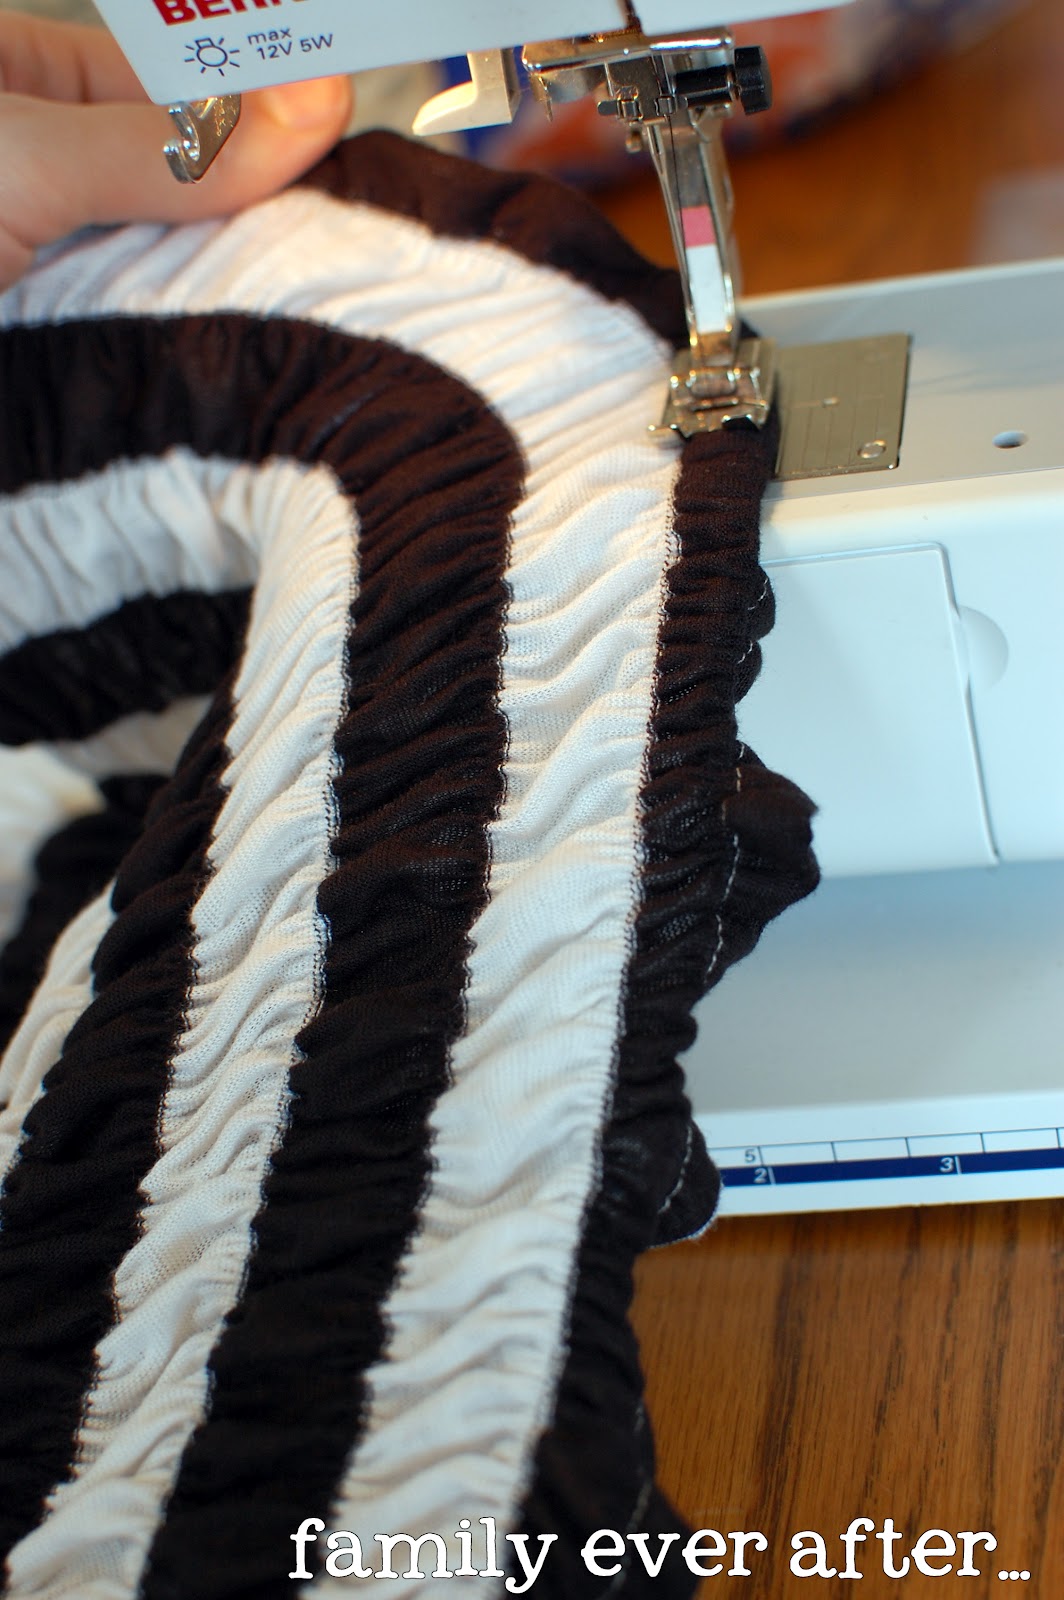
Step 2: Shirring
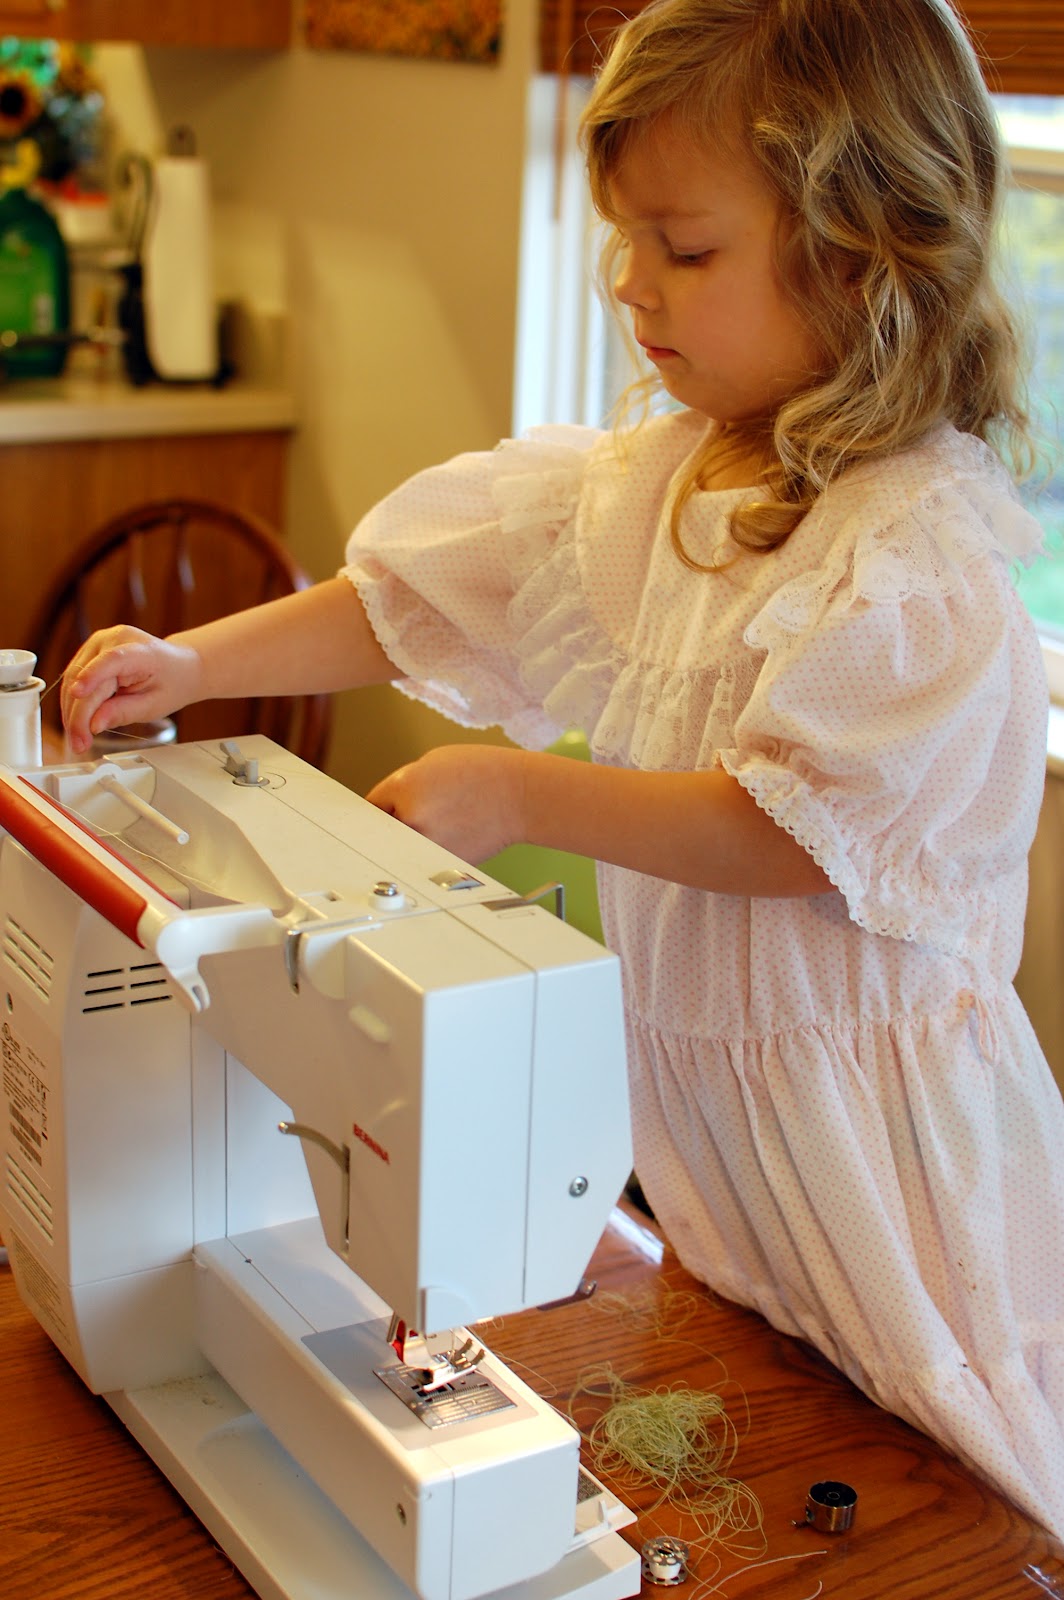
This is such a fun technique! My friend taught me a few years ago how to do it. First, find an empty bobbin. I gave my 4 year old the job of emptying the green thread from a previous project (I always try to involve my kiddos)!
You’re going to wind up the bobbin by hand, with elastic thread. Make SURE you buy the thin kind, not the thick.

Here’s how you wind it up. Just keep it fairly taut, without stretching the elastic as you wind it. If you wind it too tight, your thread will break when you sew. (These pictures use the thick elastic… it was a mistake! Make sure you use the thin kind, or you won’t be able to fit it through the bobbin case)!


All wound up and ready to go.
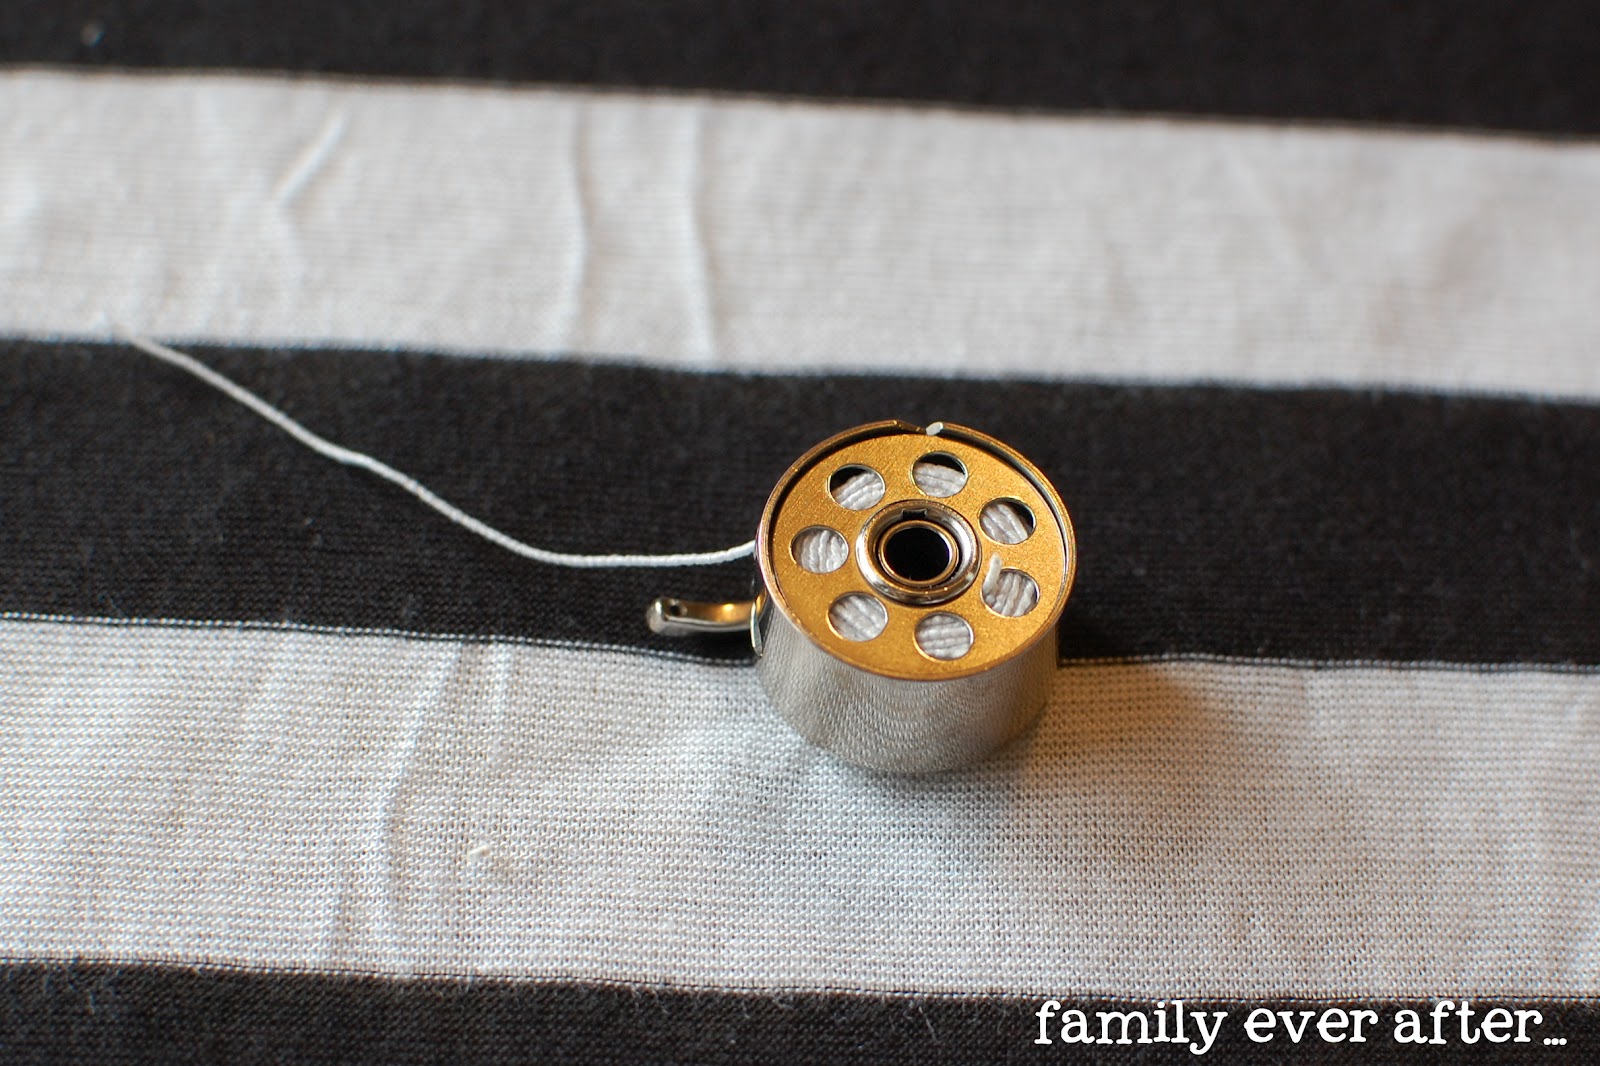
Thread your machine like normal. You’re using regular thread, that matches your fabric, on the top. The elastic thread will come up just like normal thread in a bobbin case.

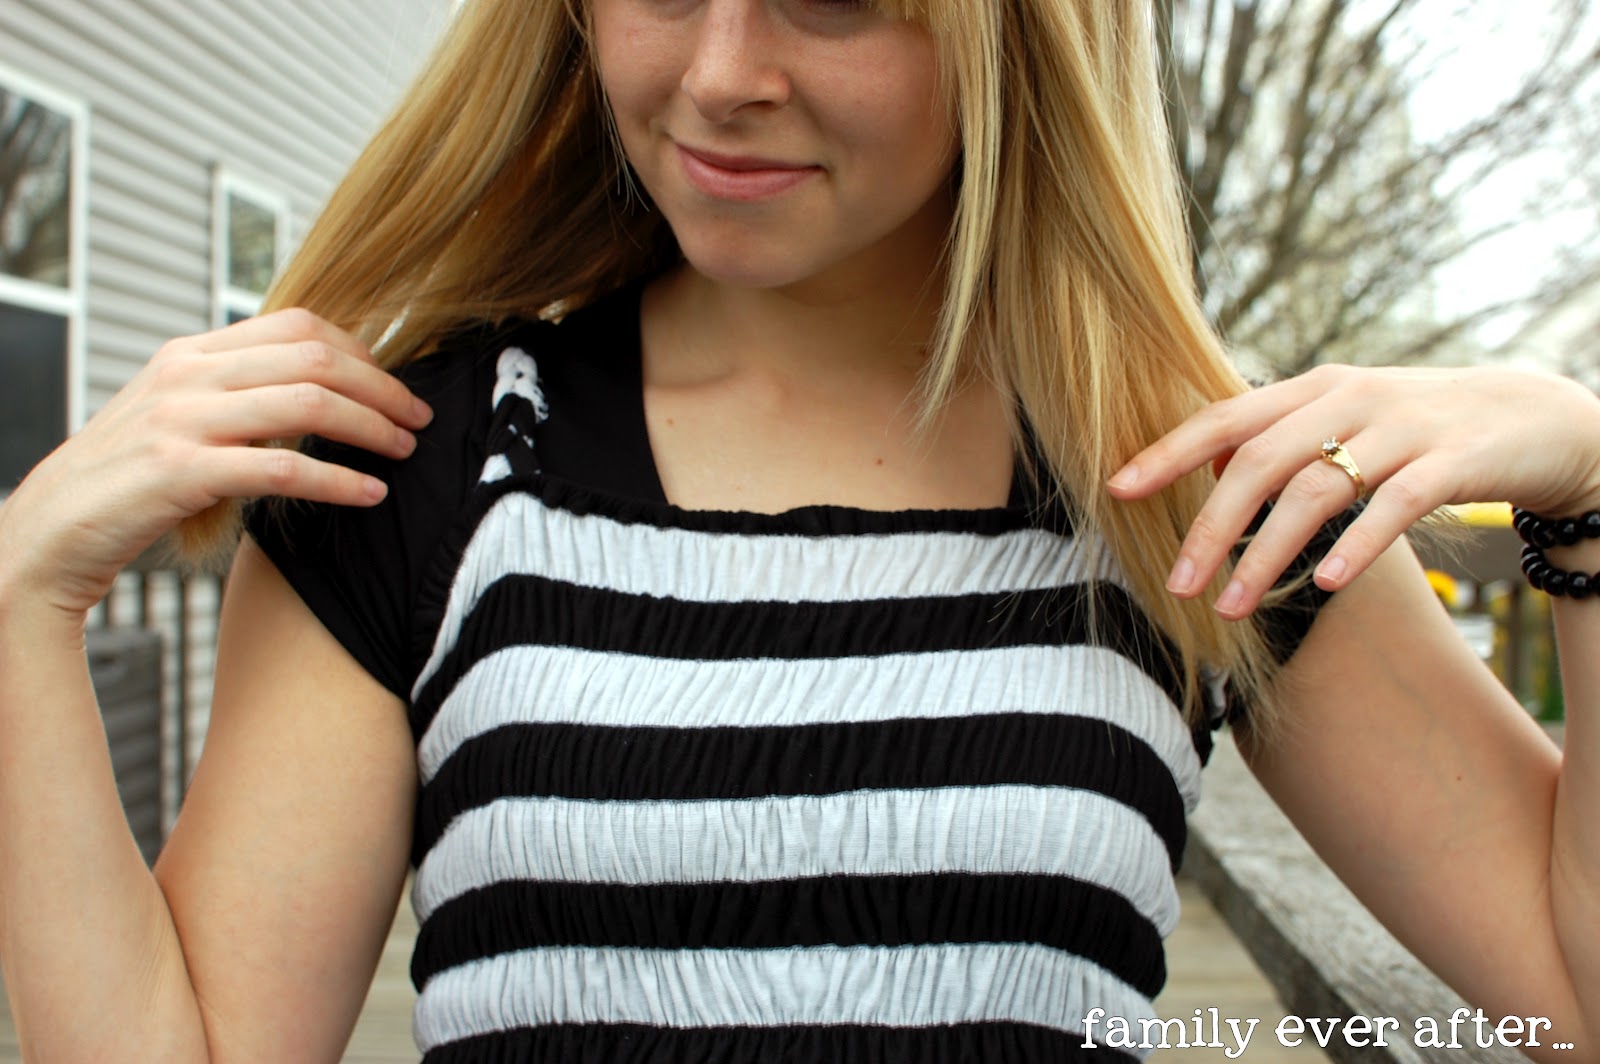
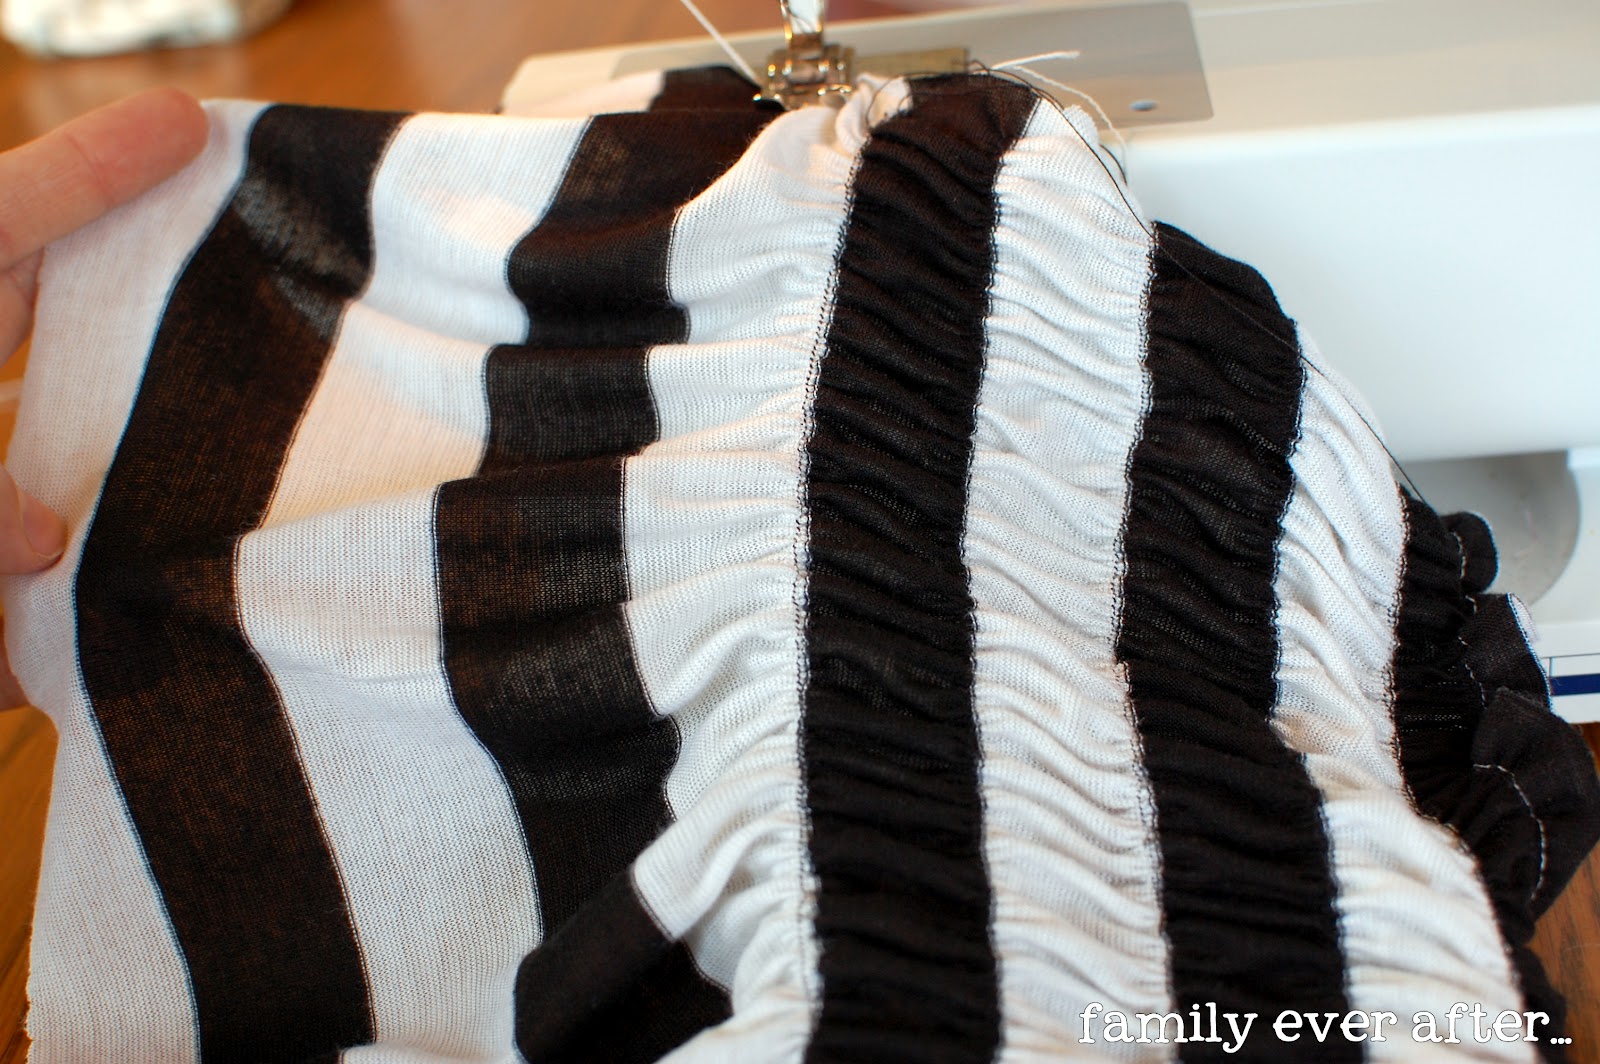
For most shirred projects, you’ll probably want to draw lines to sew on. Typical spacing is either 1/2″ or 1/4″ apart. The closer together your lines, the tighter, and more stretch you’ll have as a result. With this fabric, I just followed the lines, which are about 1″ apart, and that was good enough for me!
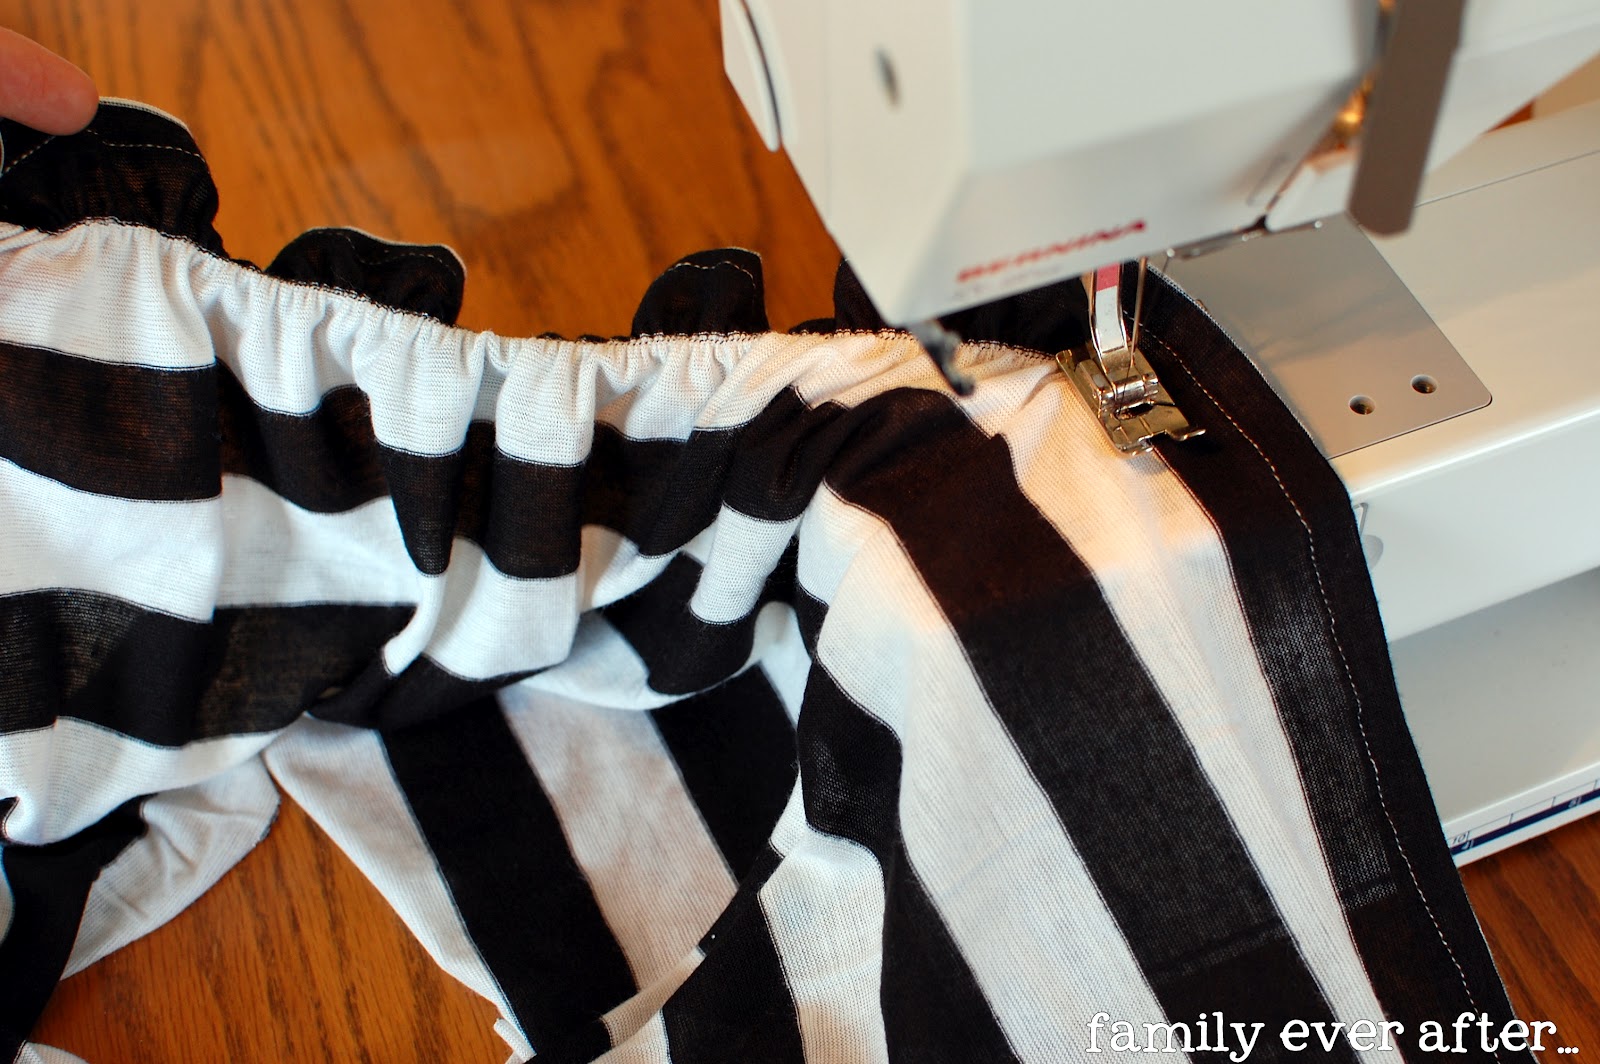
You just sew down each line, backstitching at the beginning and end. I didn’t change the stitch length or tension.

Keep going!
Once you’re all done shirring, spray some water, and place the iron on top (don’t drag it back and forth, just carefully place on top).
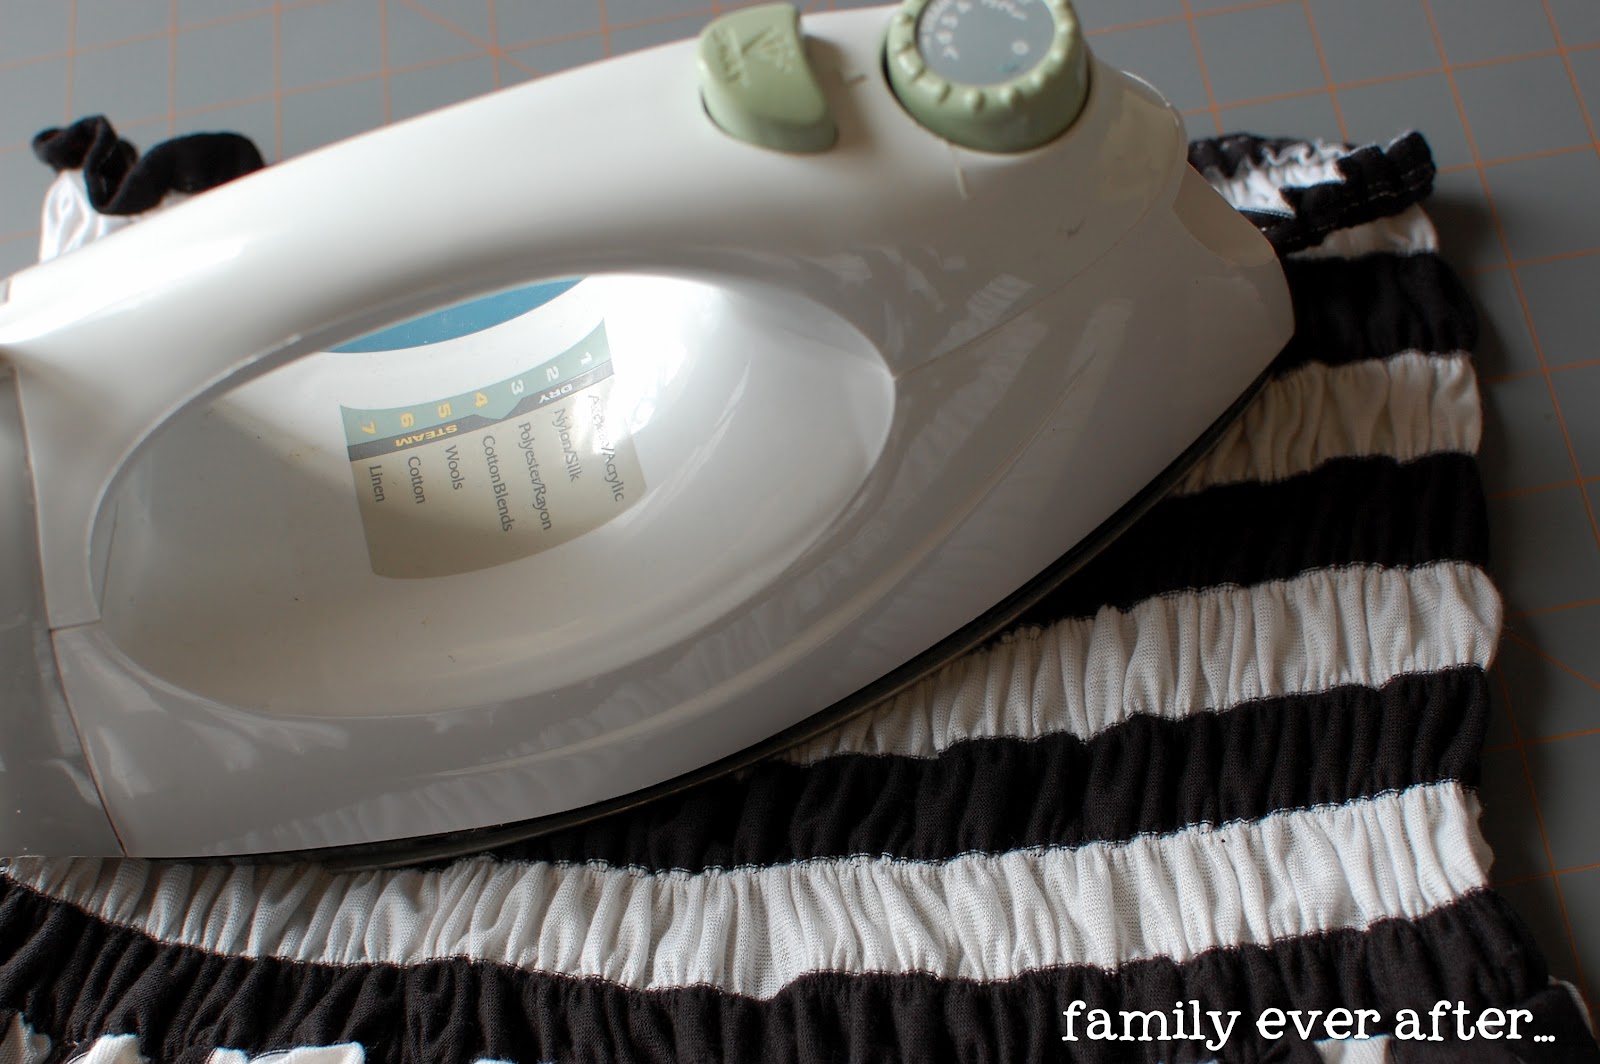
Ta-da! Mine ended up being just the width I wanted, to fit around my bust, and I didn’t trim any excess off.

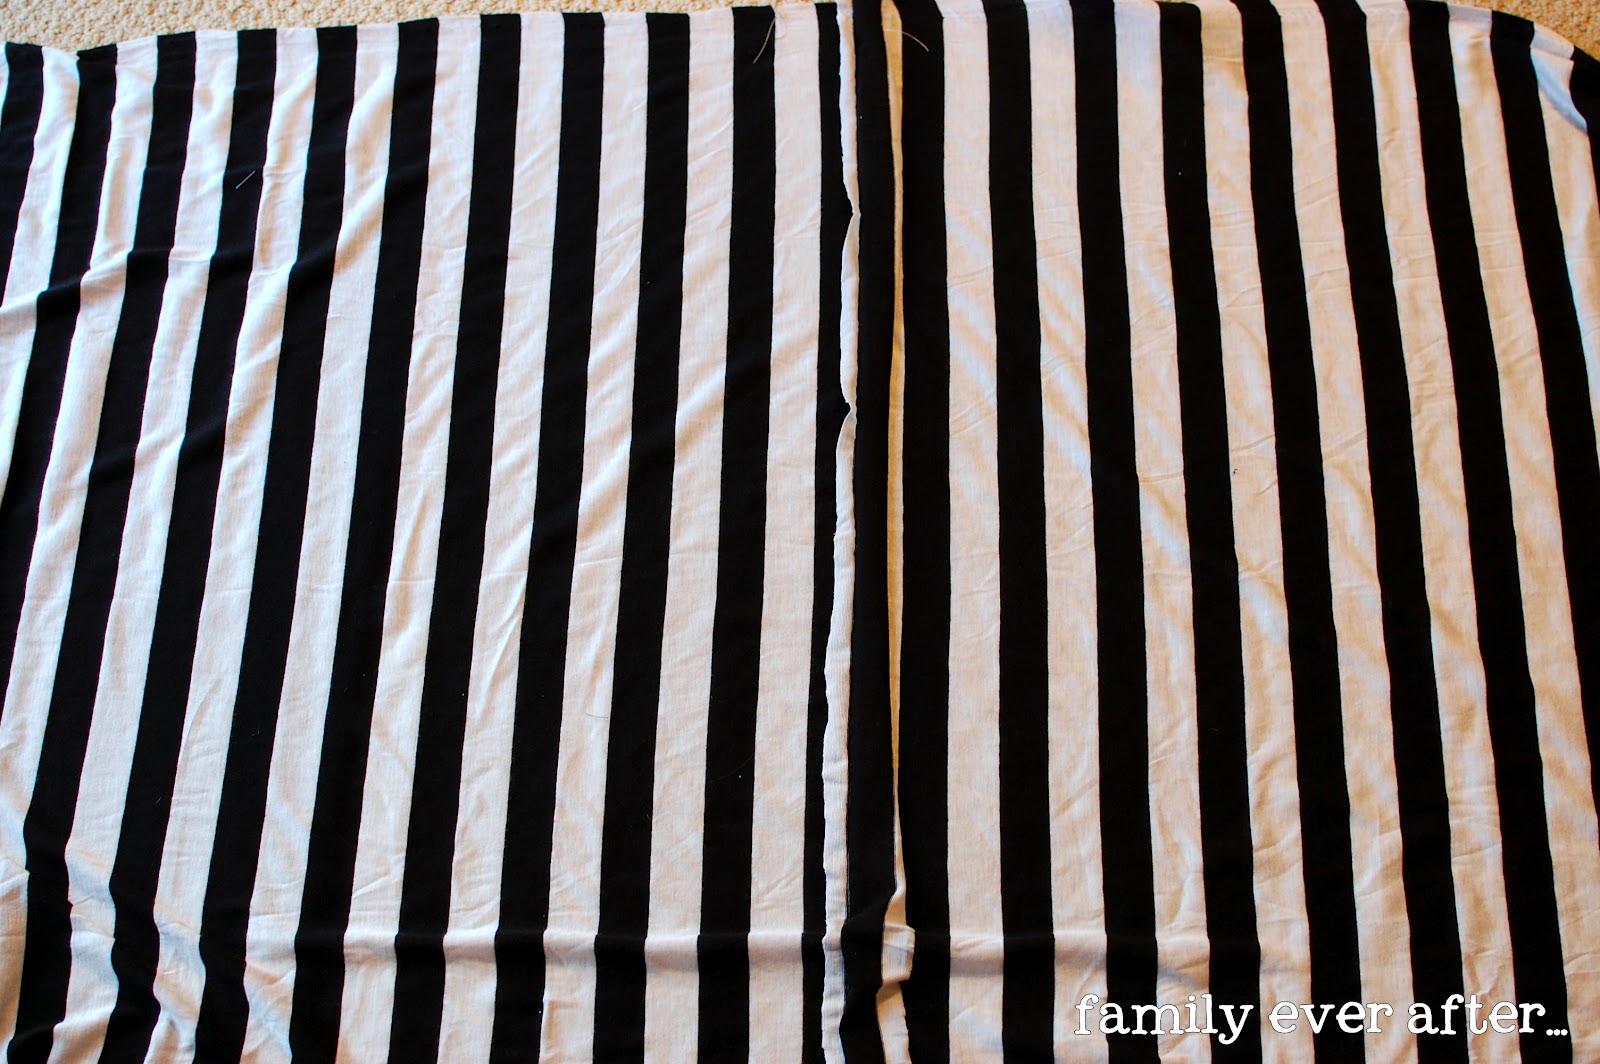
Step 3: Skirt portion
After I cut the 10 inches off the the bodice, I had a piece of fabric sized 28×60 inches. I wanted the stripes to be lengthwise, so I cut it in half, giving me 2 pieces 28×30 inches. Then I sewed them together, making sure the stripes maintained their pattern.
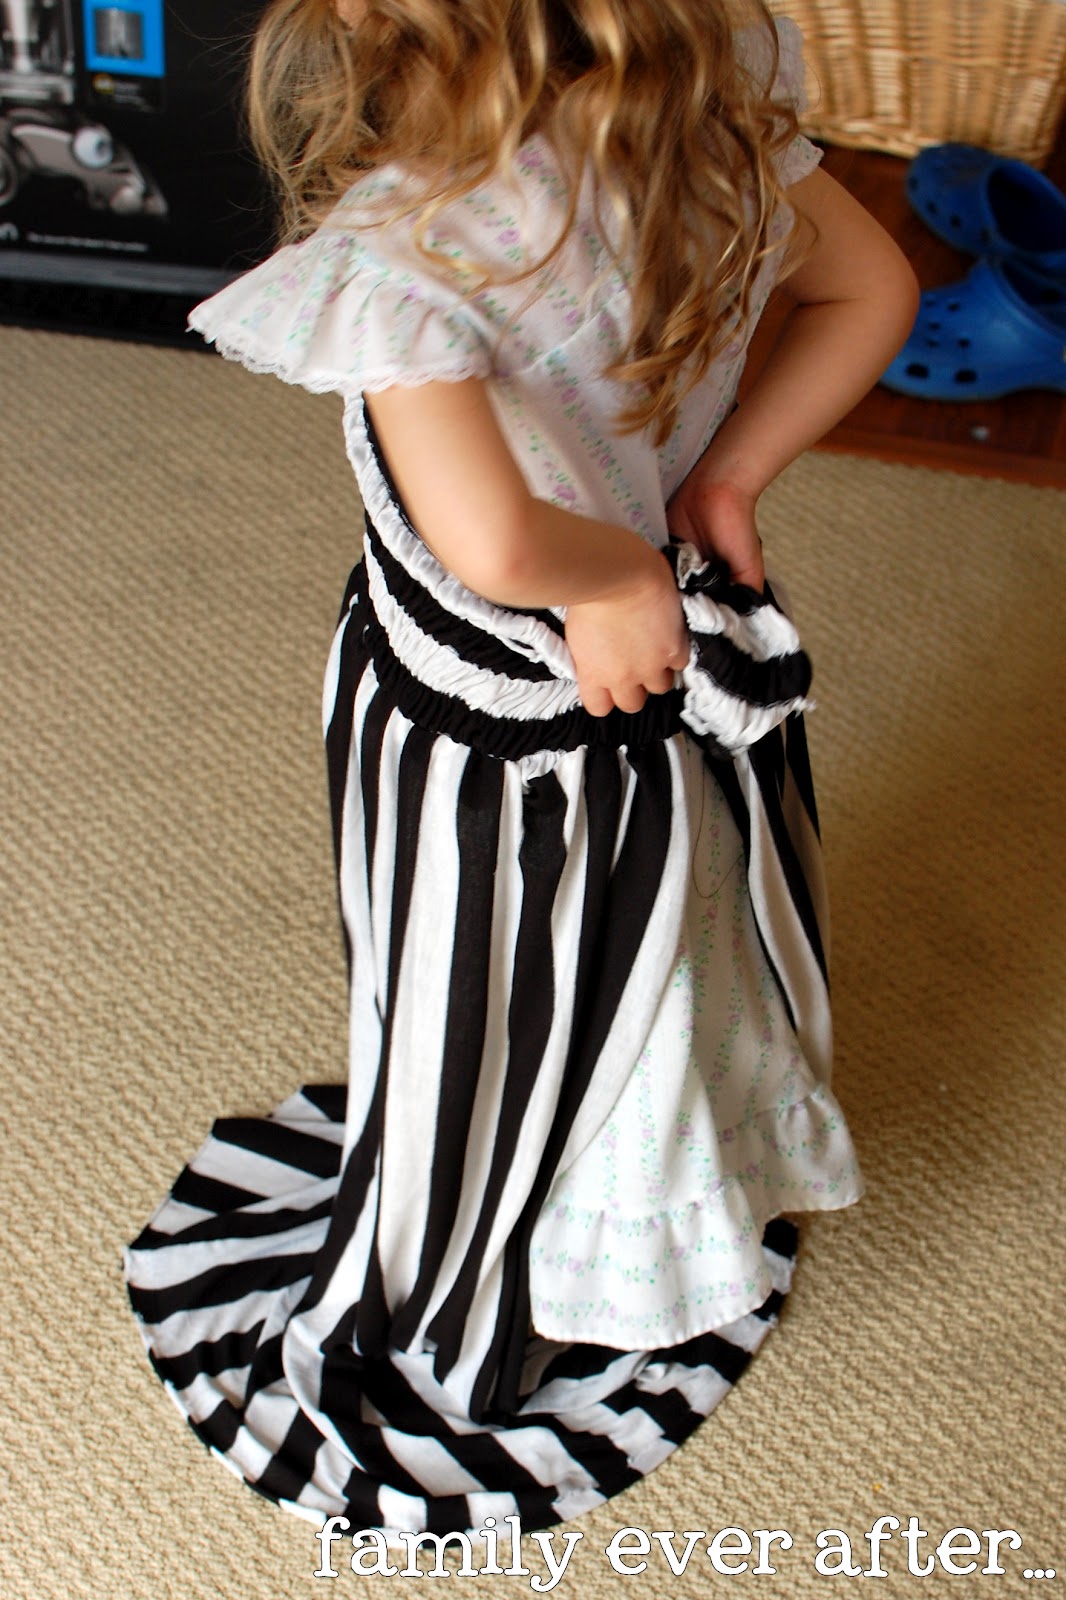
Then I basted a long line across the top, and gathered it up to fit around my ribcage.

Then I pinned the shirred piece to the skirt piece, right sides together, and sewed a straight line.

Here’s my little model, and the progress so far.
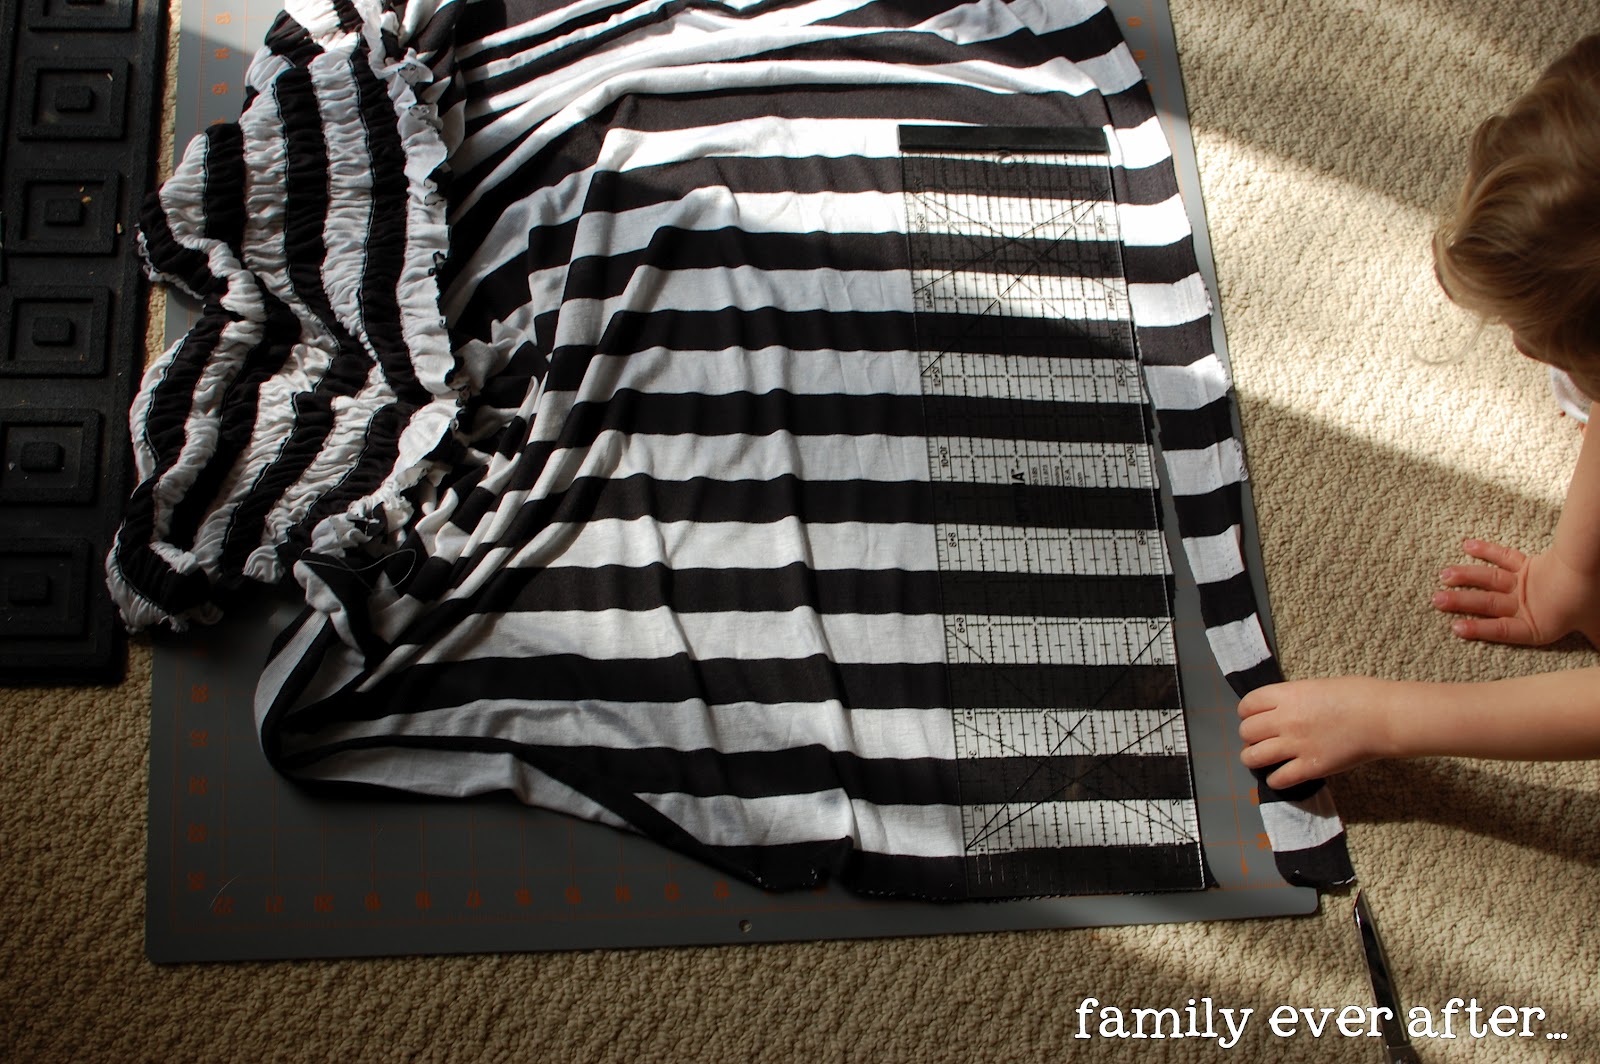
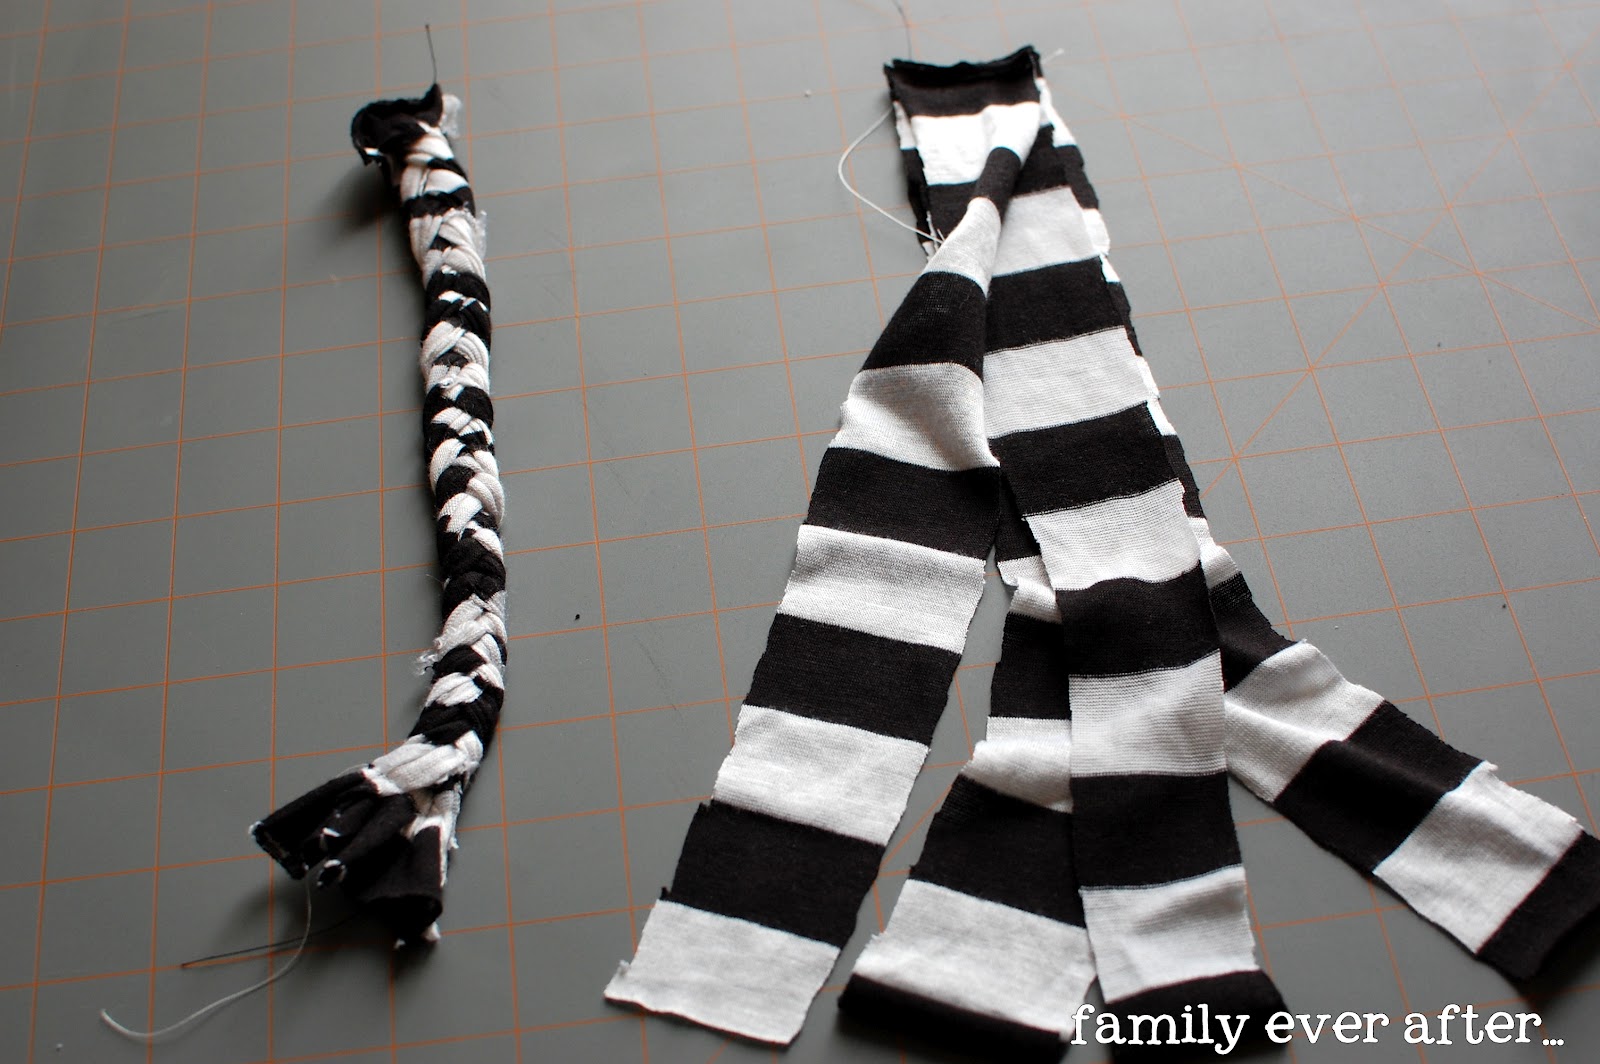
Step 4: Make straps
My dress was just a little too long, so I cut a few inches off the bottom to turn into straps.
For the straps, I used 4 strips and created a 4 stranded braid. I secured it by sewing at the ends. I sewed to my dress after I hemmed the top of the bodice (below).
Step 5: Hemming
The great thing about working with knits, is the edges don’t fray. I didn’t worry about finishing off any of the seams inside, but for the hems, I still wanted a clean finish.
For the top edge of the shirred piece, I folded the raw edge over 1/4″, then 1/4″ again, and sewed it.
For the bottom hem, I folded it up once and sewed!

Step 6: Finish!
To finish, I pinned the dress right sides together, and made one long straight stitch. Then I attached the straps.

The end!
Be sure to head over to Family Ever After and check out Rach’s blog full of goodness today!
You guys, thank you so much for having me here today! It’s a huge honor 🙂
Love the dress, friend! LOVE! Thanks for joining the Sewing for ME fun!
Wow, this is a really impressive dress! Great job Rach!
Thanks Jesse! Isn’t it great?
I love this dress – my daughter is watching as I read and just asked me to make her one – I think we need matching sundresses! Thanks for the inspiration! You rock Rachel!
nice dress, I love it. thanks for all steps!