
how to make a distressed stenciled bike shirt
As an Amazon Associate I earn from qualifying purchases.

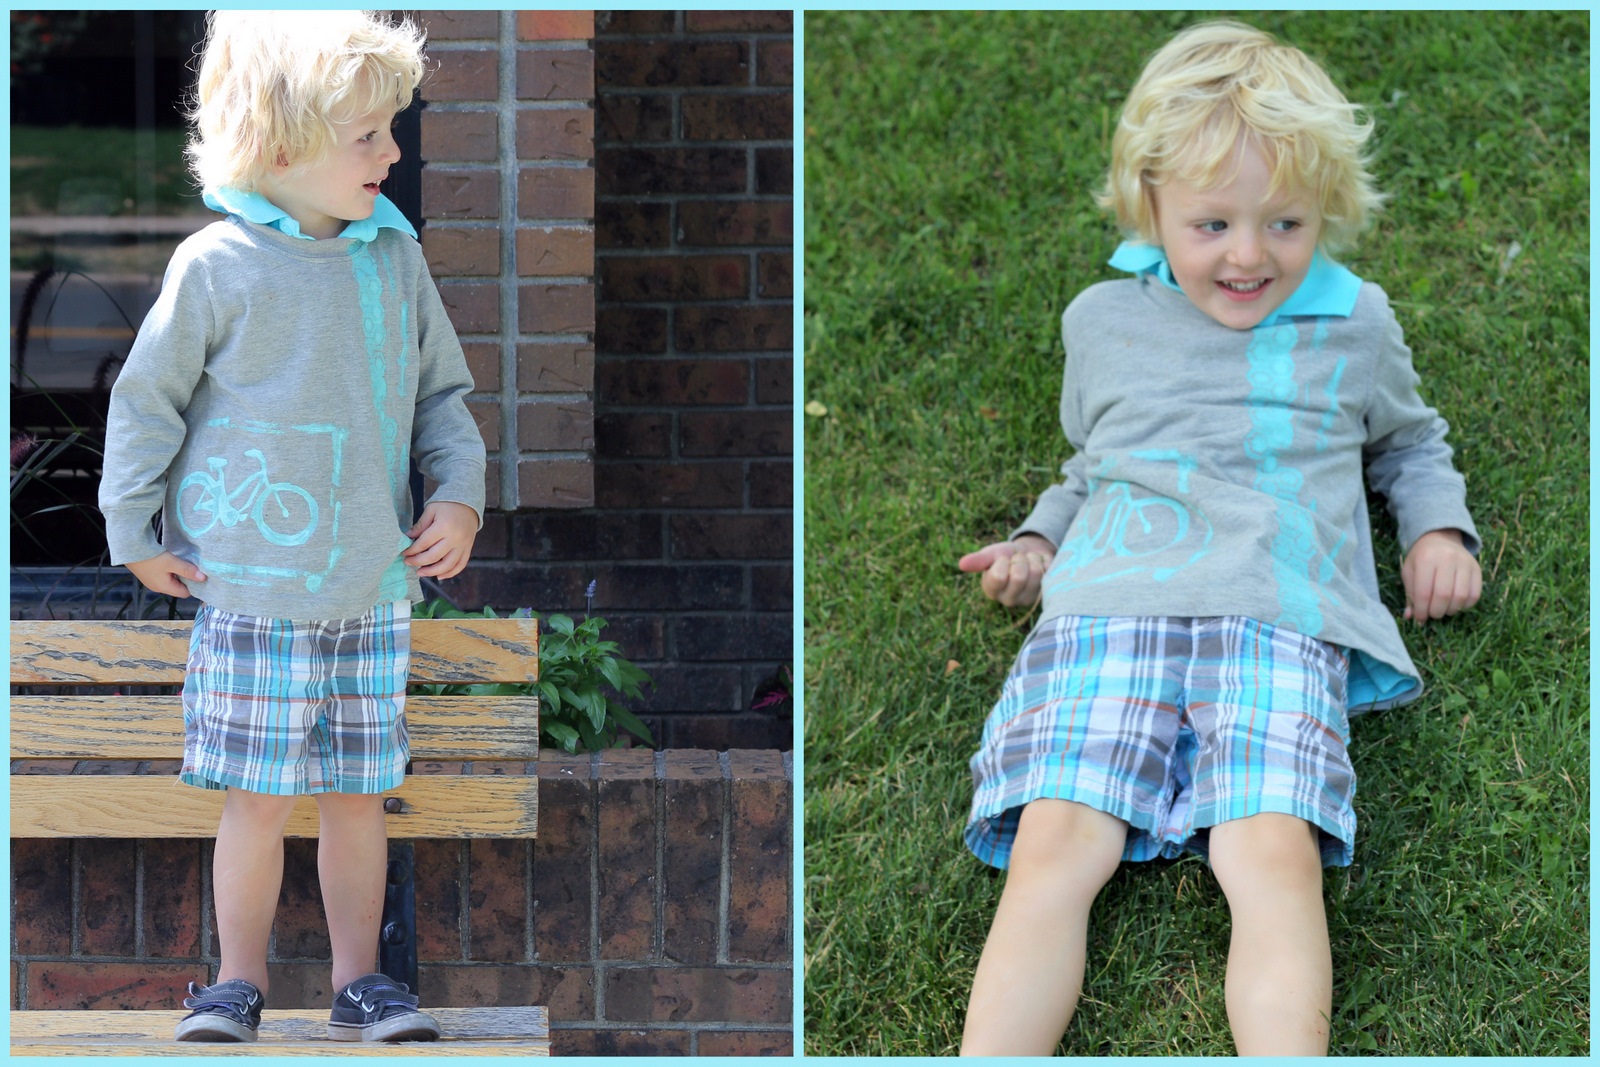
I love the fabulous distressed t-shirts I see in kids boutiques (my favorites are by Axel and Hudson). Of course, Burke needs more of these in his wardrobe!

Want to make one for the little guy in your life? You’ll need:
-a t-shirt
-fabric paint (I used martha stewart’s new paint line- you add “fabric medium” to any of the paint colors and have yourself some fabric paint)
-a paint brush/sponge
-freezer paper (and an iron) or a graphic stencil (I used both)
-a sanding block or steel wool
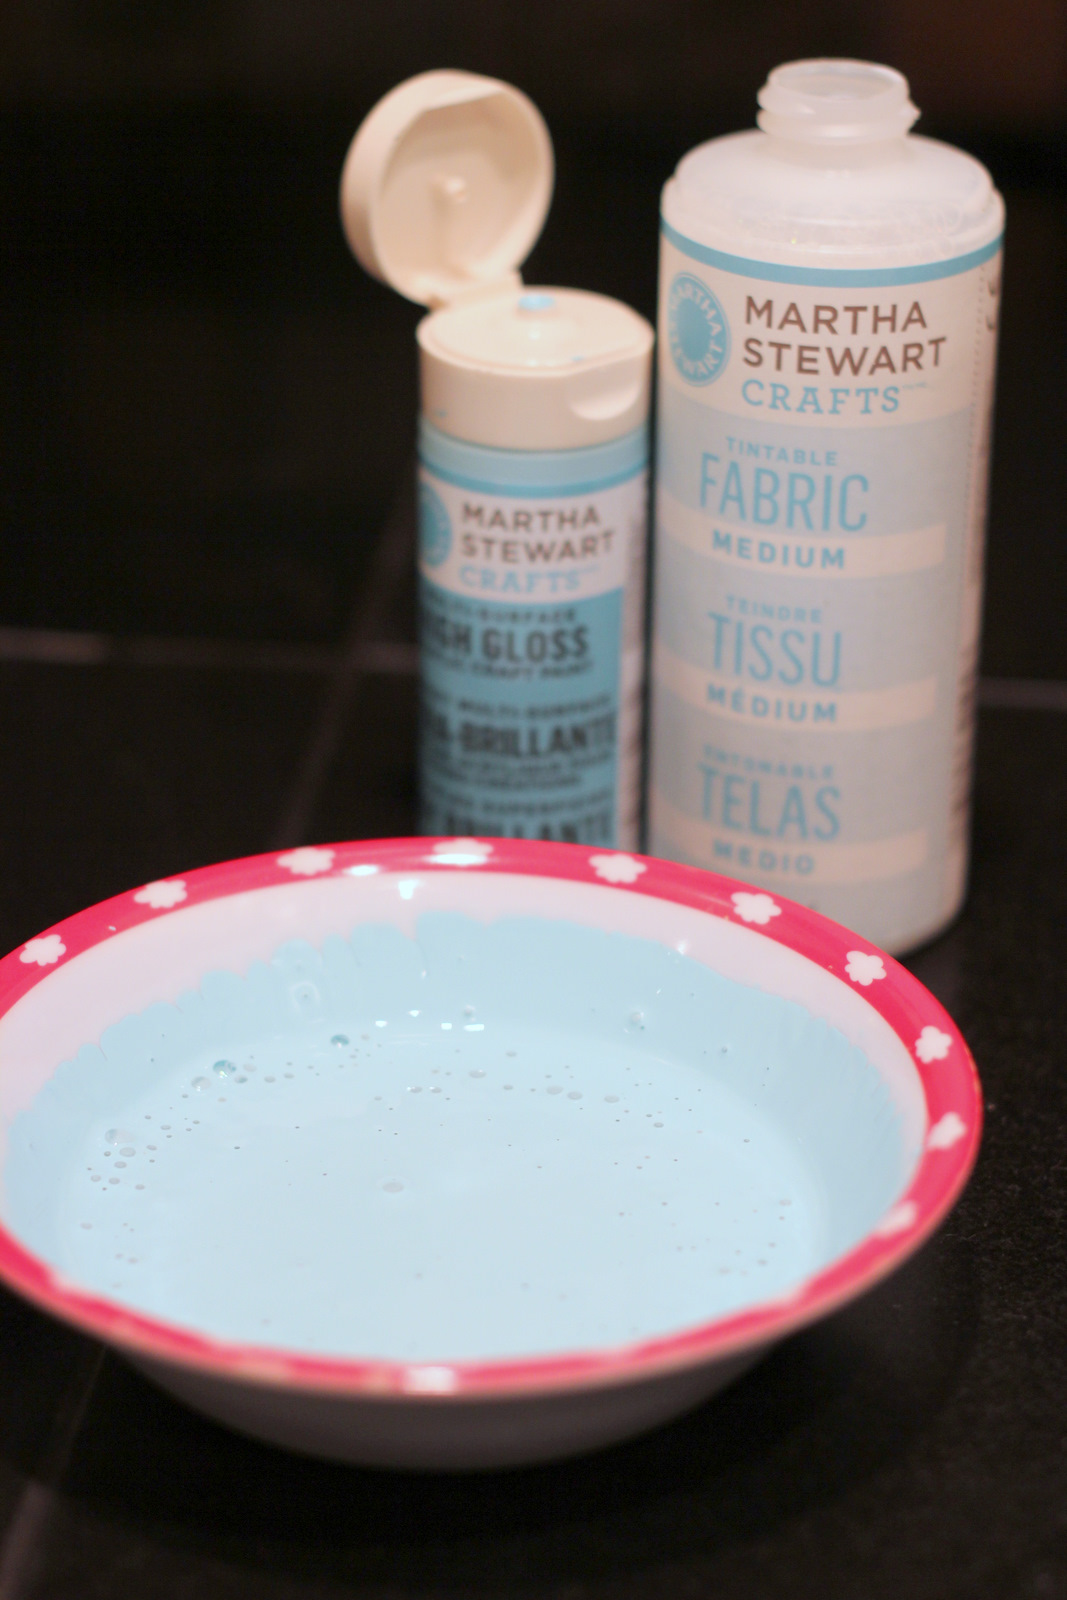
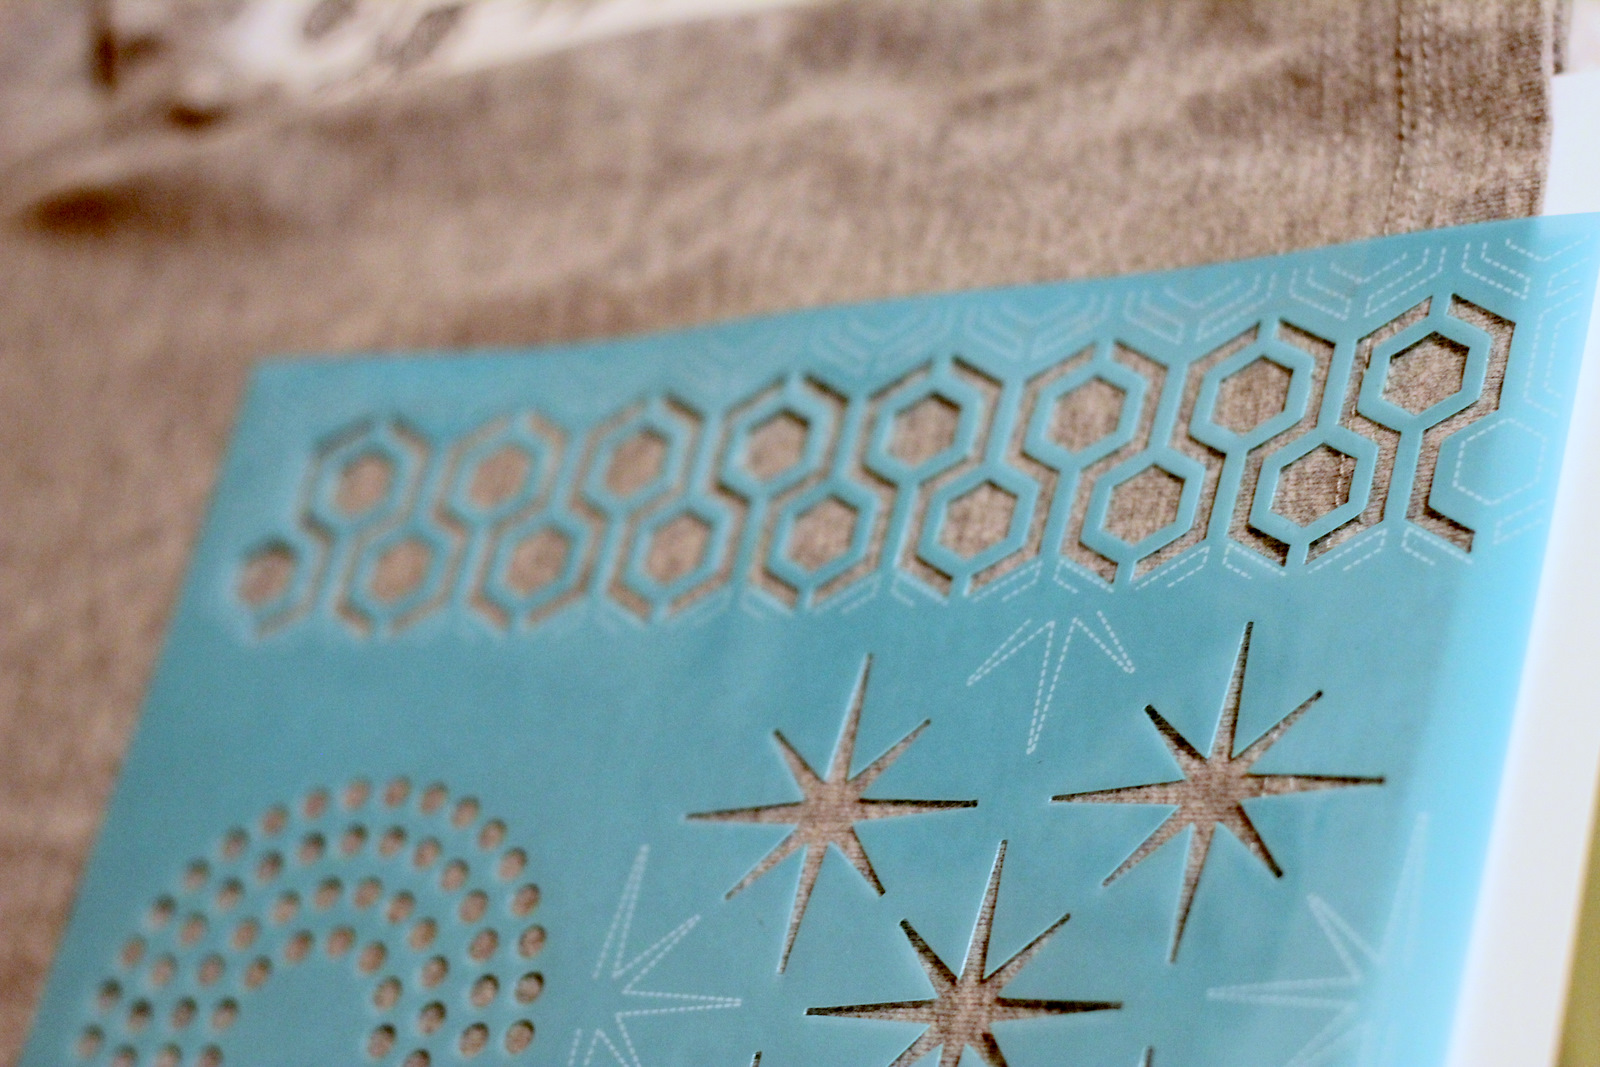
1. Mix up your paint (if you’re mixing) and tape your stencil in place (just tape it right to the shirt). Also add a piece of paper between the front and back layers of your shirt so the paint doesn’t soak through.
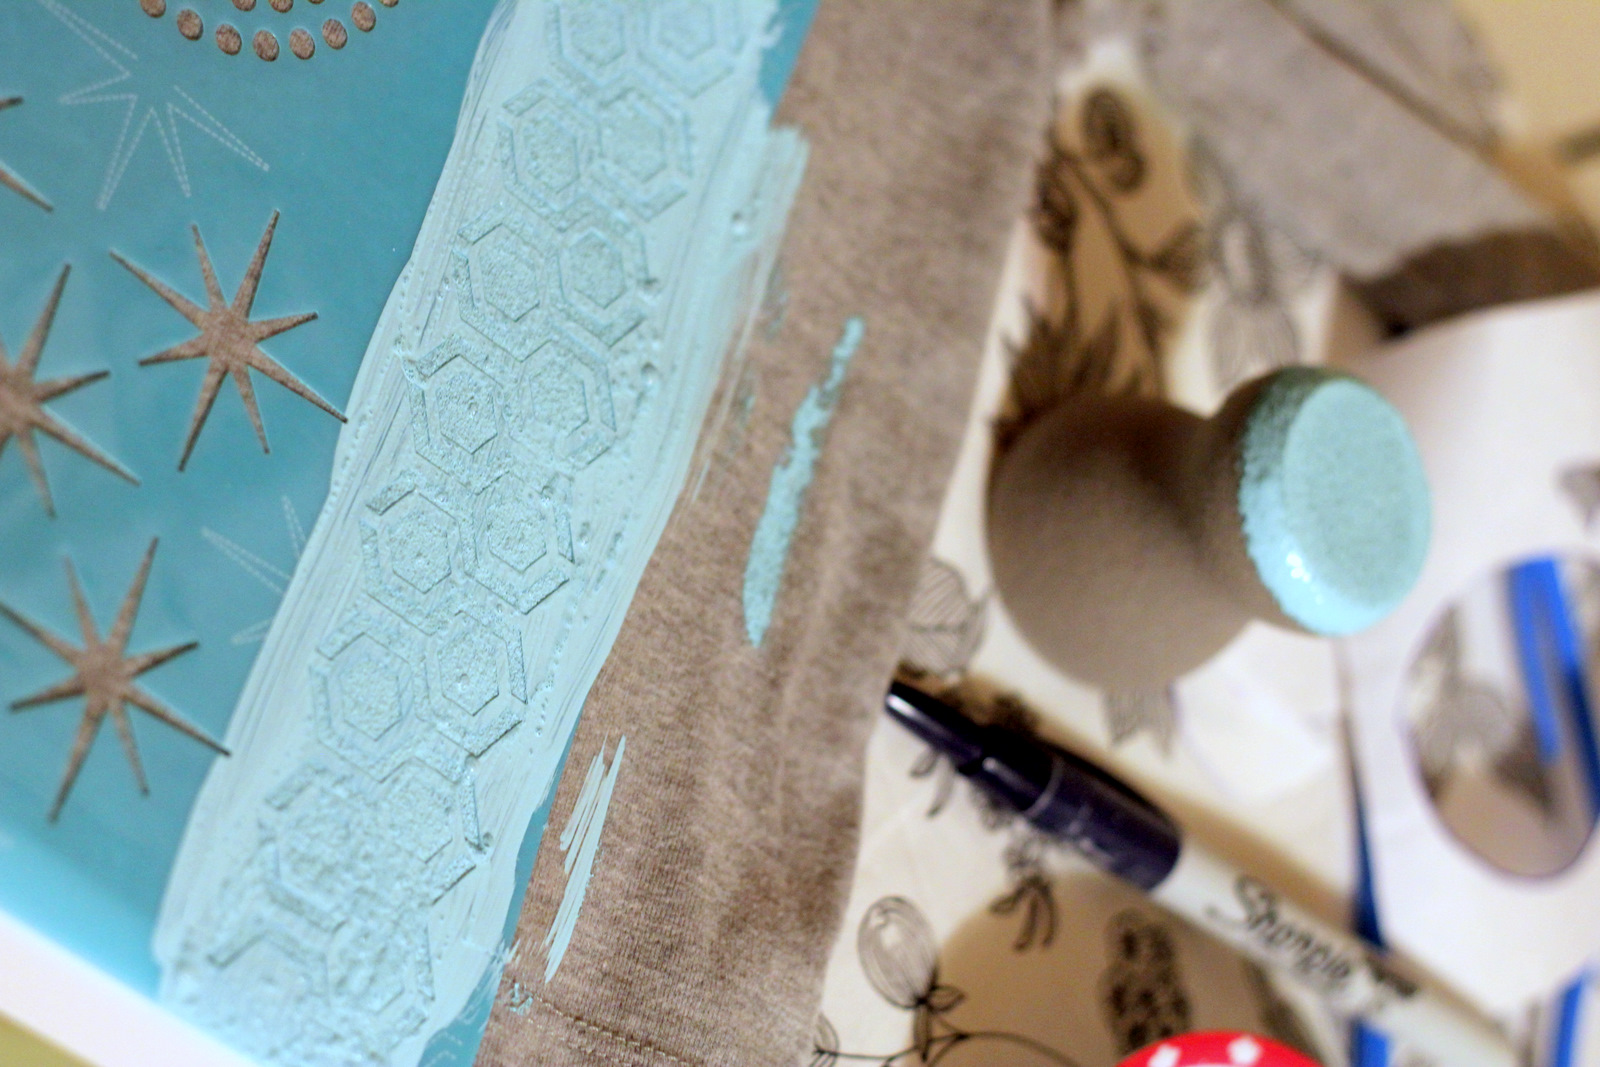
2. Start sponging paint onto your stencil. Since the look we’re going for is messy, this is not an exact science. Also, streak a few lines of paint along the side as you go.
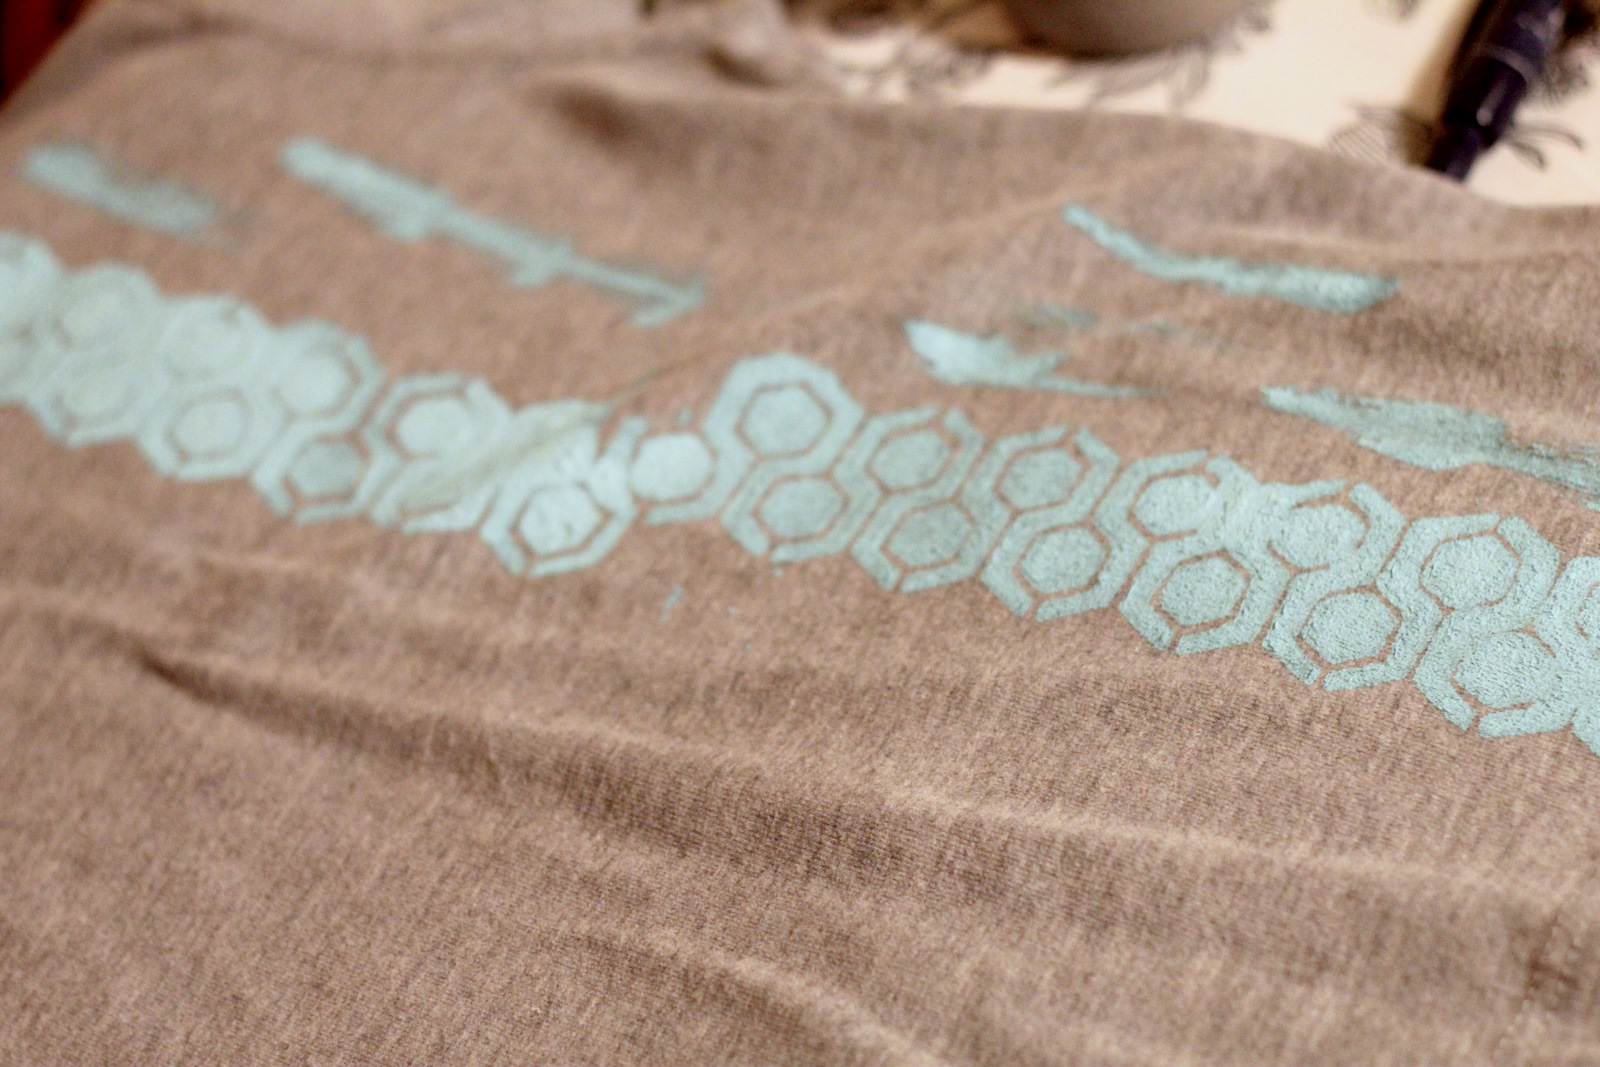
3. Reposition the graphic stencil so that the pattern continues for an entire line. Though, I didn’t line it up exactly, again, to add to the un-preciseness.

4. For the freezer paper stenciled portion, I traced a bike onto freezer paper and cut it out. You could use any kind of graphic your little guy loves. Iron in place, overlapping the side seam of your tshirt (a little of the stenciling will go onto the back of the shirt).
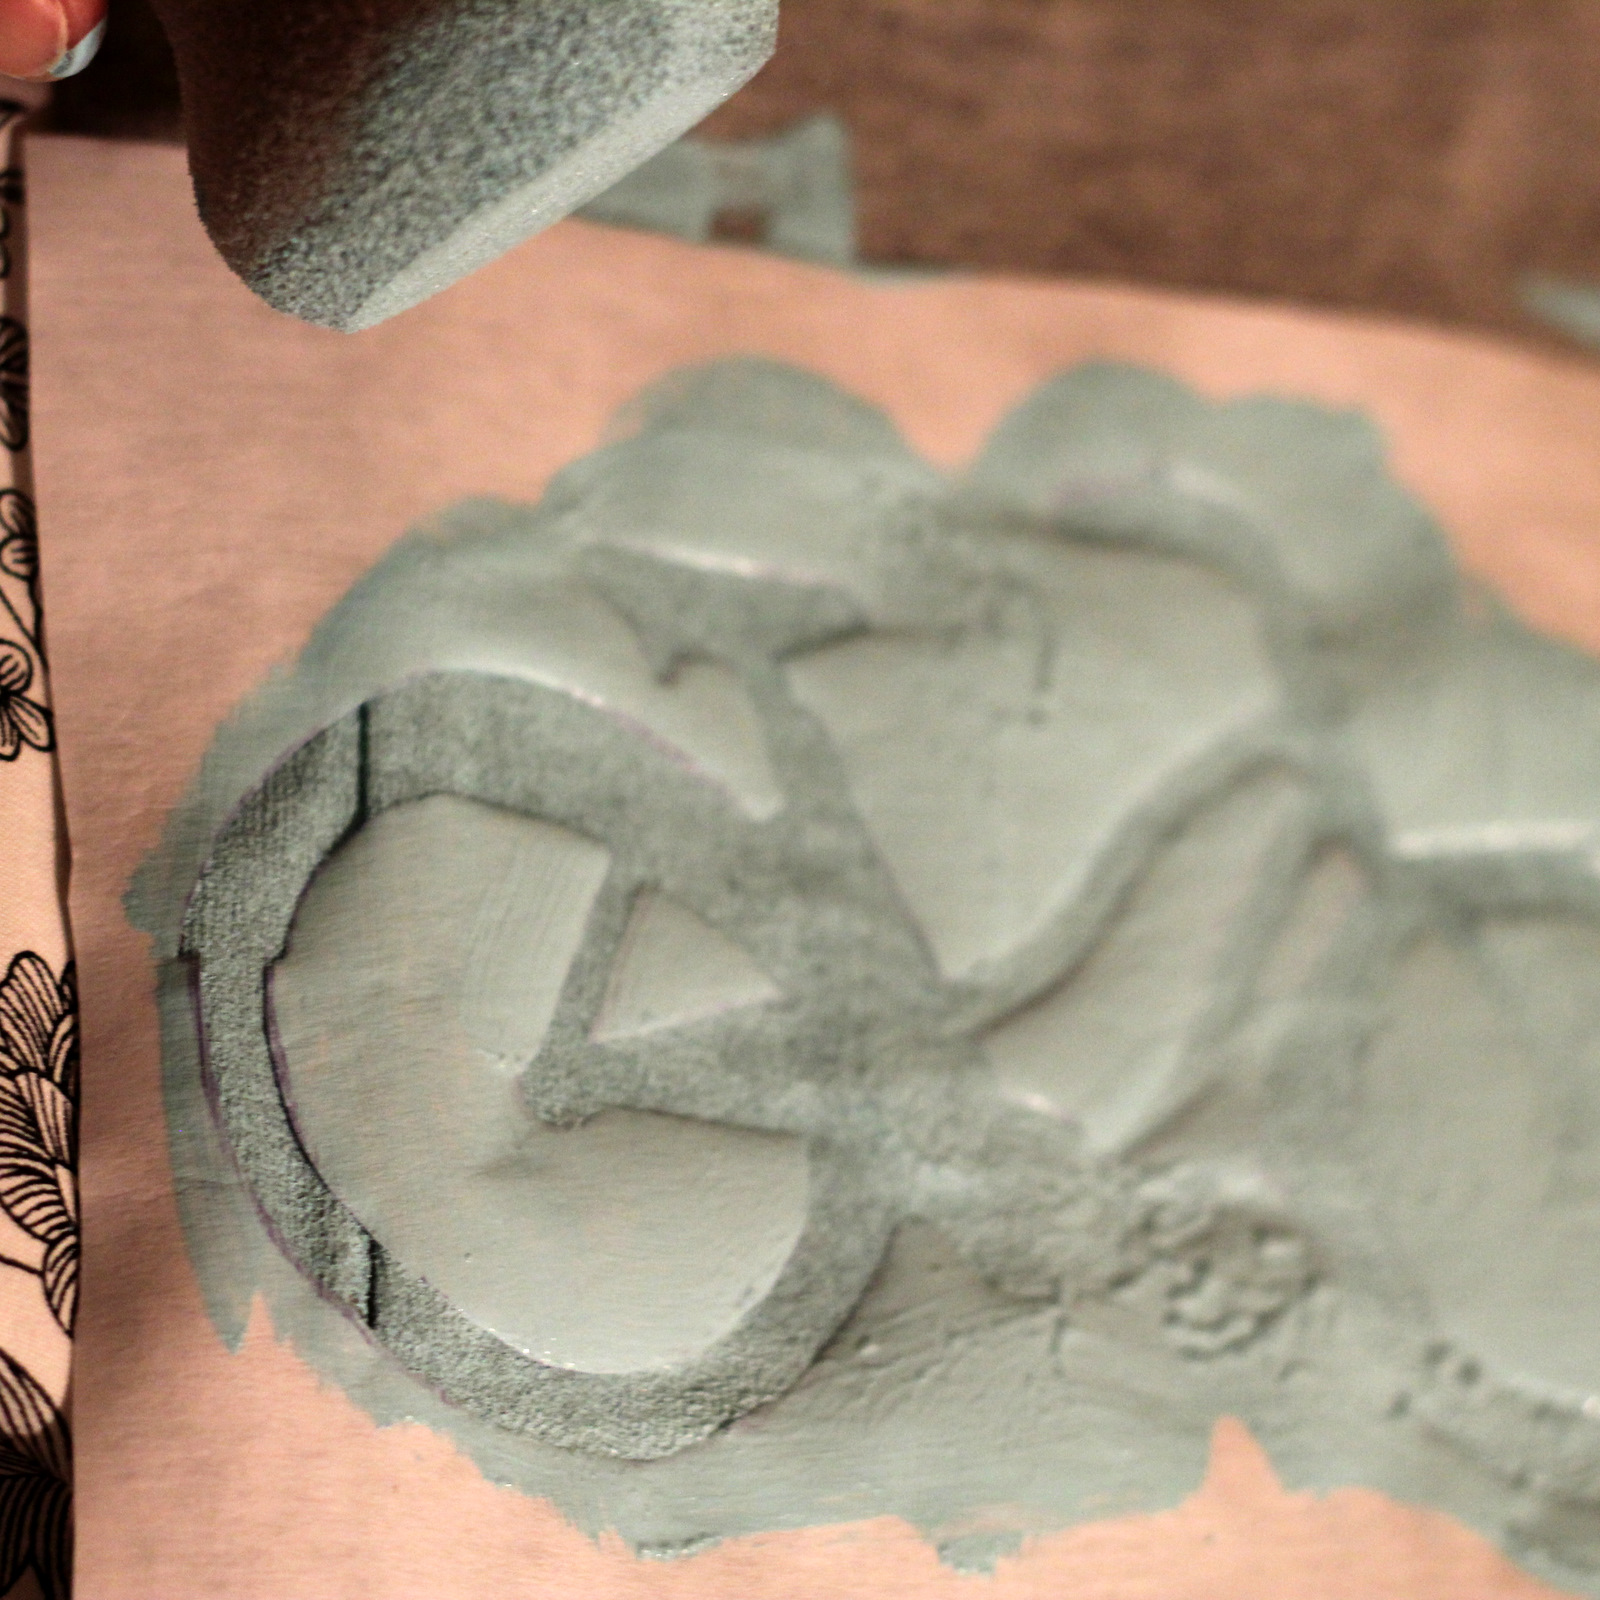
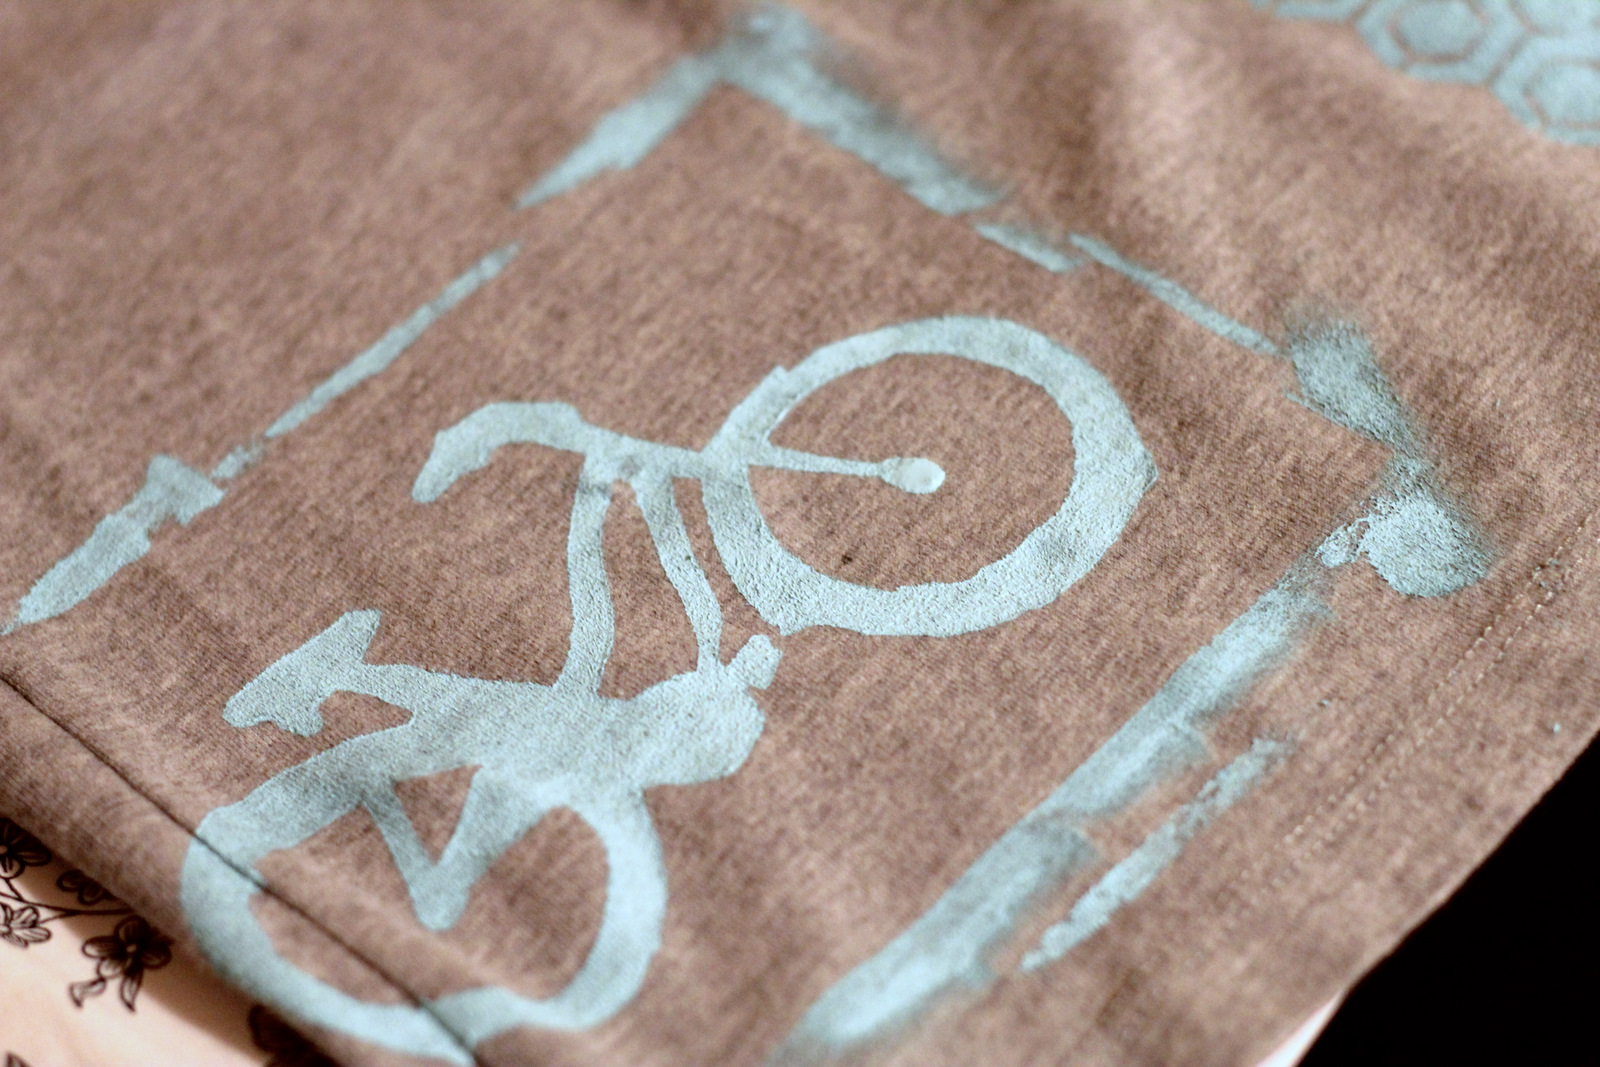
5. Sponge fabric paint onto the stencil, and also around the edges of the freezer paper.
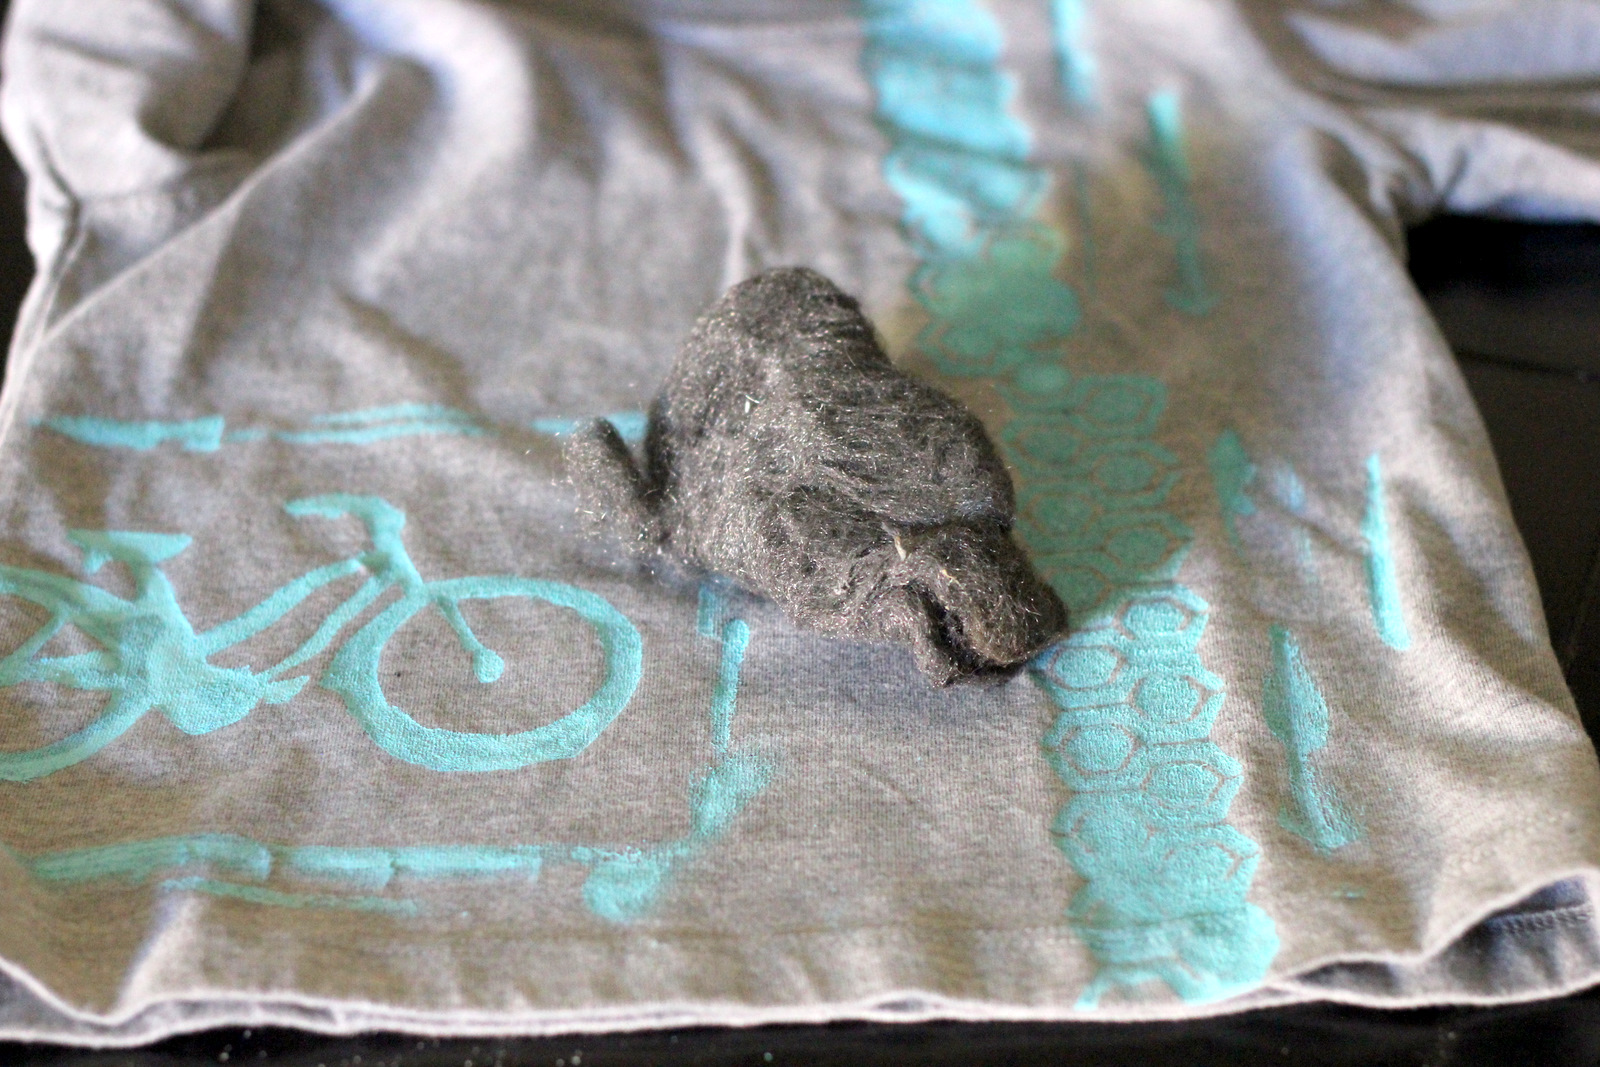
6. Once all of the paint is dry, scrub the painted areas with a sanding block or steel wool, further adding to the distressed look.
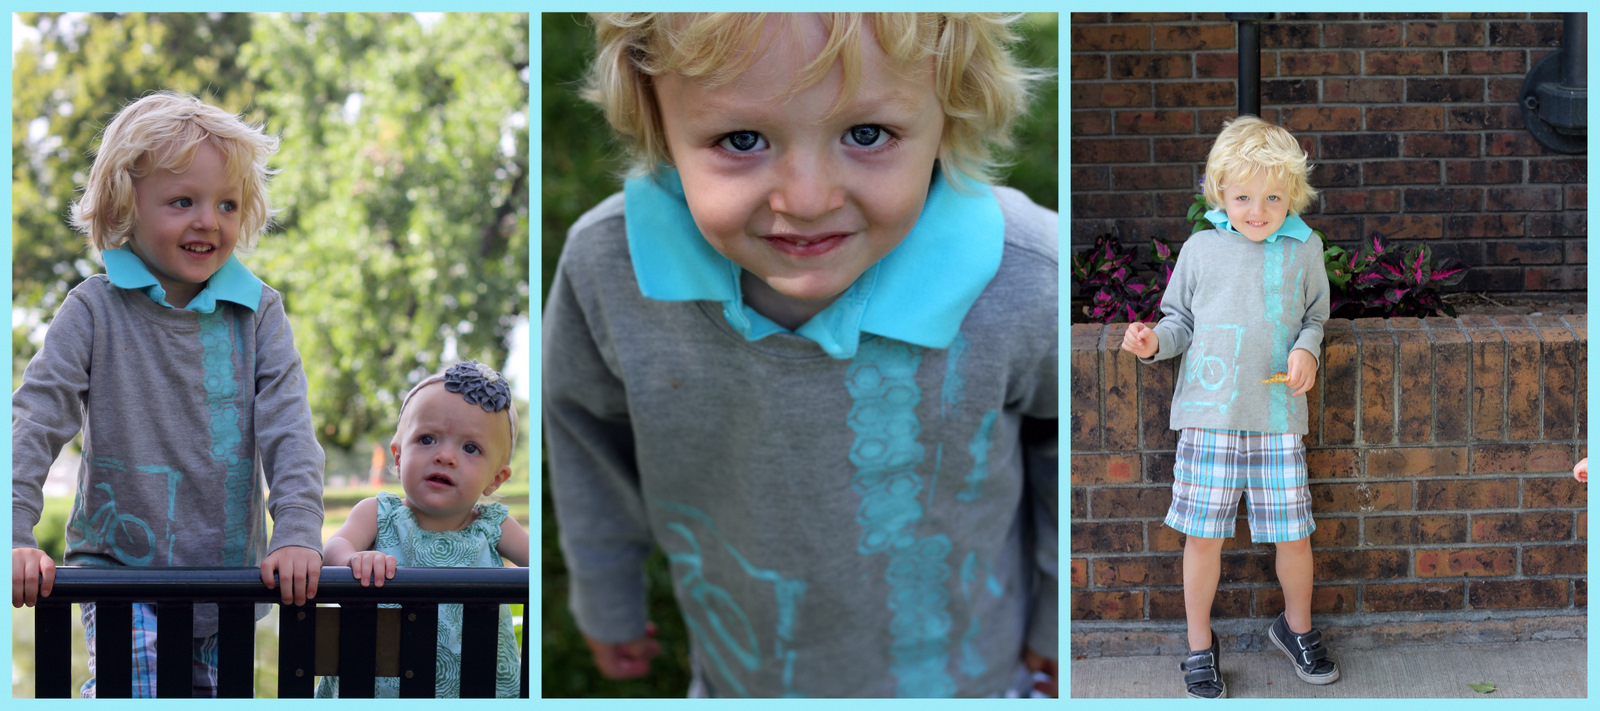
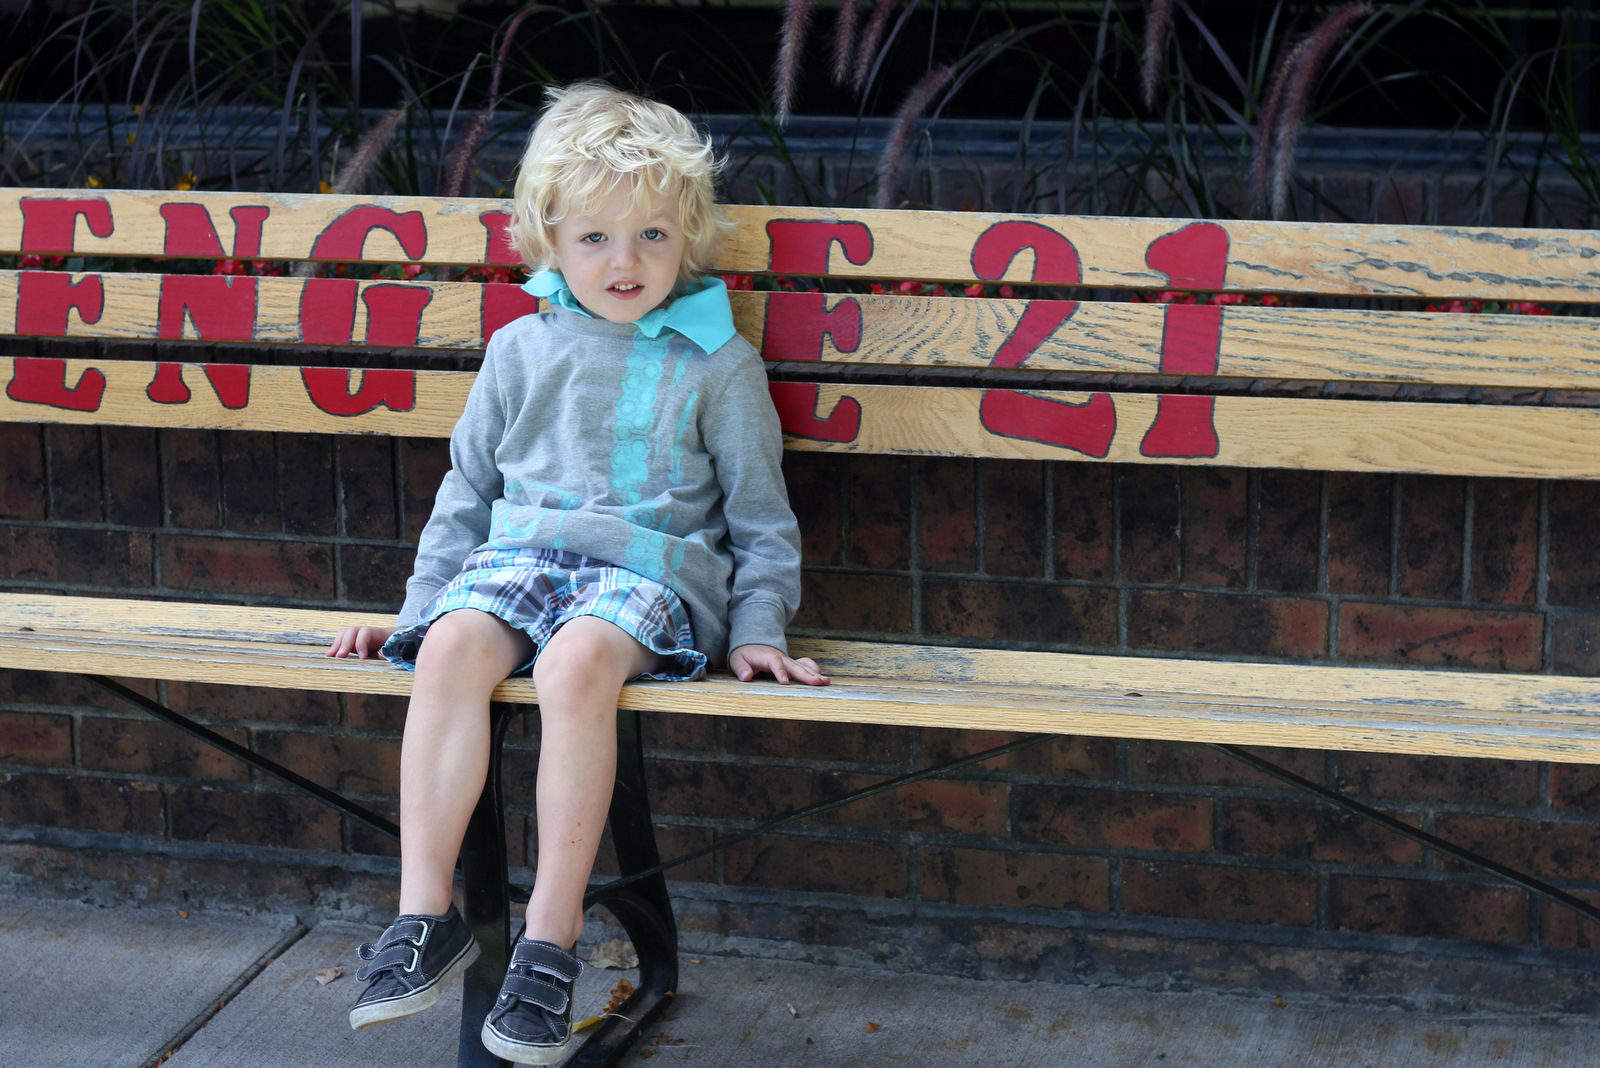
7. Pair with plaid shorts and a polo for a preppy look with a little edge.
ps- This tutorial was first shared on Project Run and Play.


Oh I am going to have to do this with a couple of my t’s as well especially the ones which are starting to get holey. maybe patch a contrasting color behind the holes to match the design and that it will look intentional! Thanks for the great idea!
Your son is just so adorable!
Thanks Krysti! 🙂 I think so too. 🙂
Especially like your bike stencils.
I use plastic from the hardware store. It is very firm, actually has lines on the back. It cuts nicely with something firm under it. Cuts with a cardboard cutting tool. That is the only thing I use for stencils, very pleased with the end product. PLAN TO TRY THE BICYCLE NEXT.
We are 70 plus and avid bikers, so will anxiously try the Bicycle next.
I think the plastic is used for floor protection. A small amount goes a long way, must be about 36″ wide. Can wash it off, and use multiple times.