
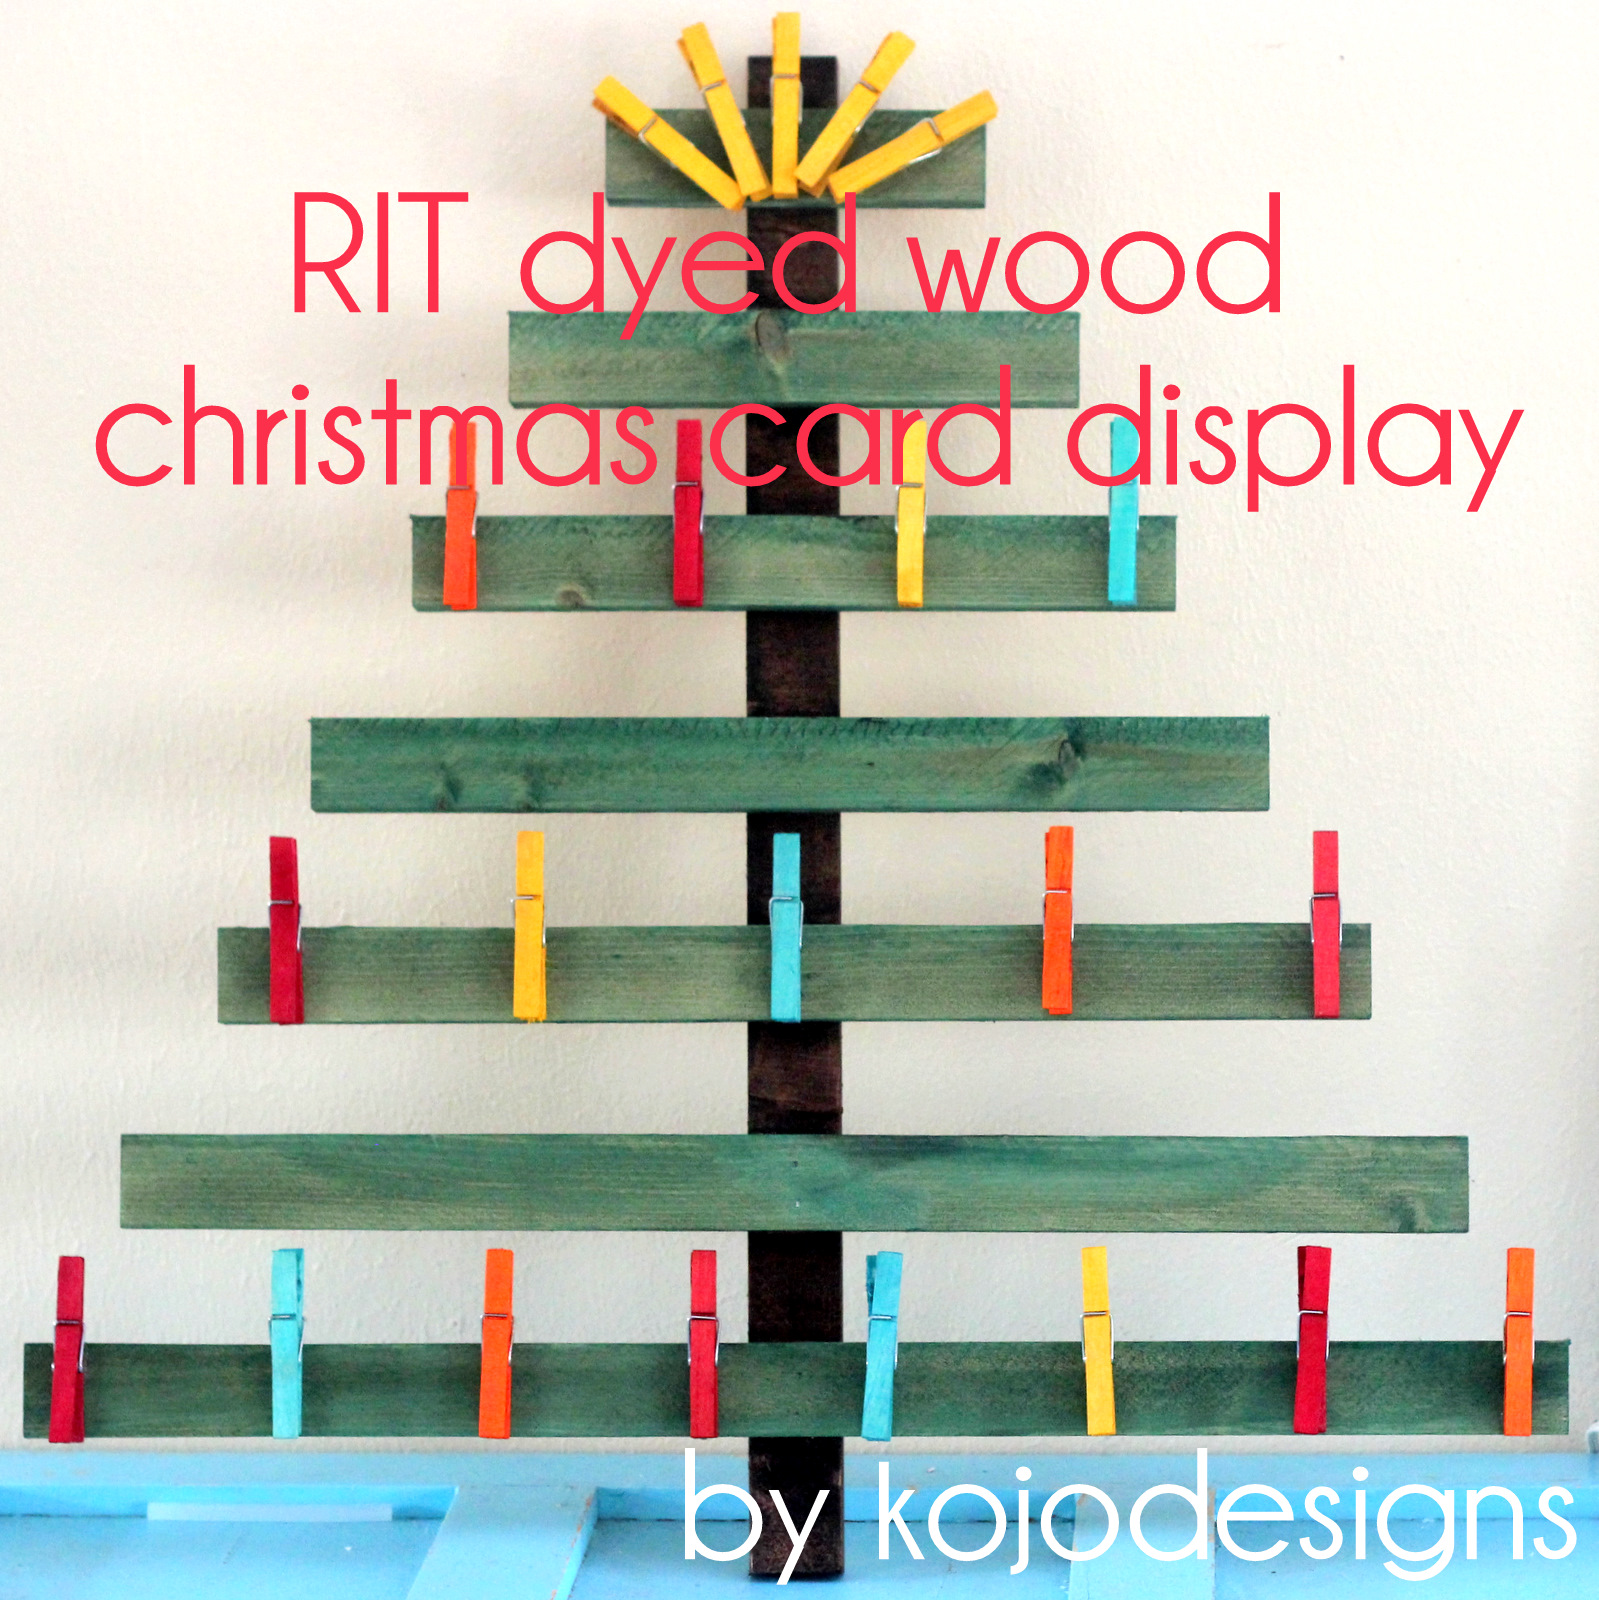
dyed wooden clothespins (and a christmas card display!)
As an Amazon Associate I earn from qualifying purchases.
They’ve come up with a Color Formula Guide that lets you make more than 500 colors by combining their dyes (and sometimes water). I have this thing for custom colors and have always felt a little, well, stifled by the set group of colors out there. But NOW, now I have a secret weapon for all my custom color needs. Feels fabulous.

I almost couldn’t decide which project to work on with the beautiful box RIT sent me (including every. single. dye. color. in their line)! But then I couldn’t get the idea of dying wood without the yucky, smellyness of wood stain our of my head. Plus, we don’t have a way to display our Christmas cards. And we need one. So there’s that.
-scrap 1″x2″ board, cut into eight pieces (6″ long, 9″ long, 12″ long, 15″ long, 18″ long, 21″ long, 24″ long, and another 24″ long for the trunk)
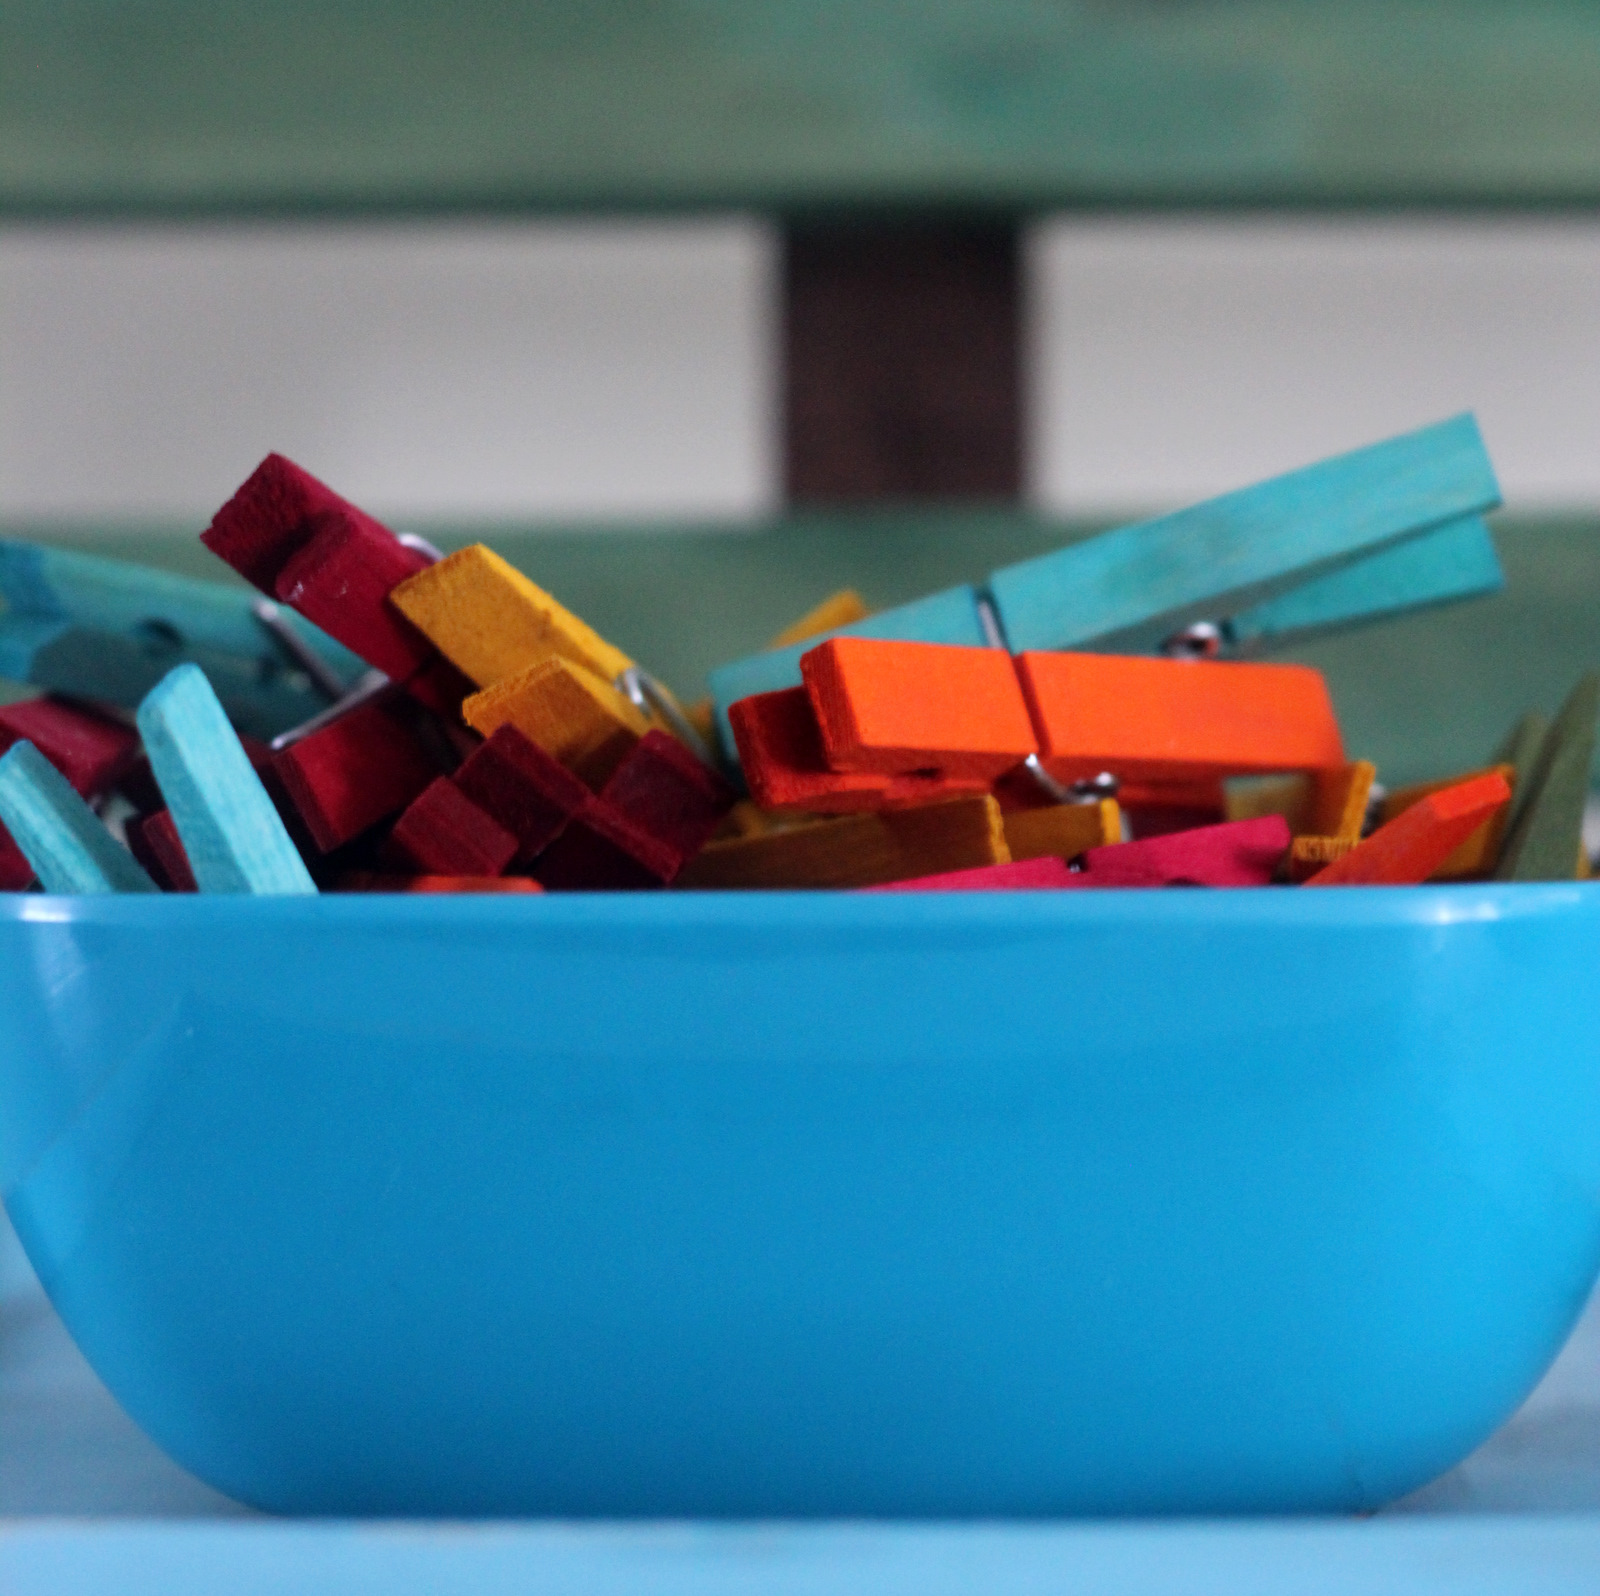
–wooden clothespins (I used twenty two)
-a rainbow of RIT dye (red dye, orange dye, yellow dye, green dye, teal dye)
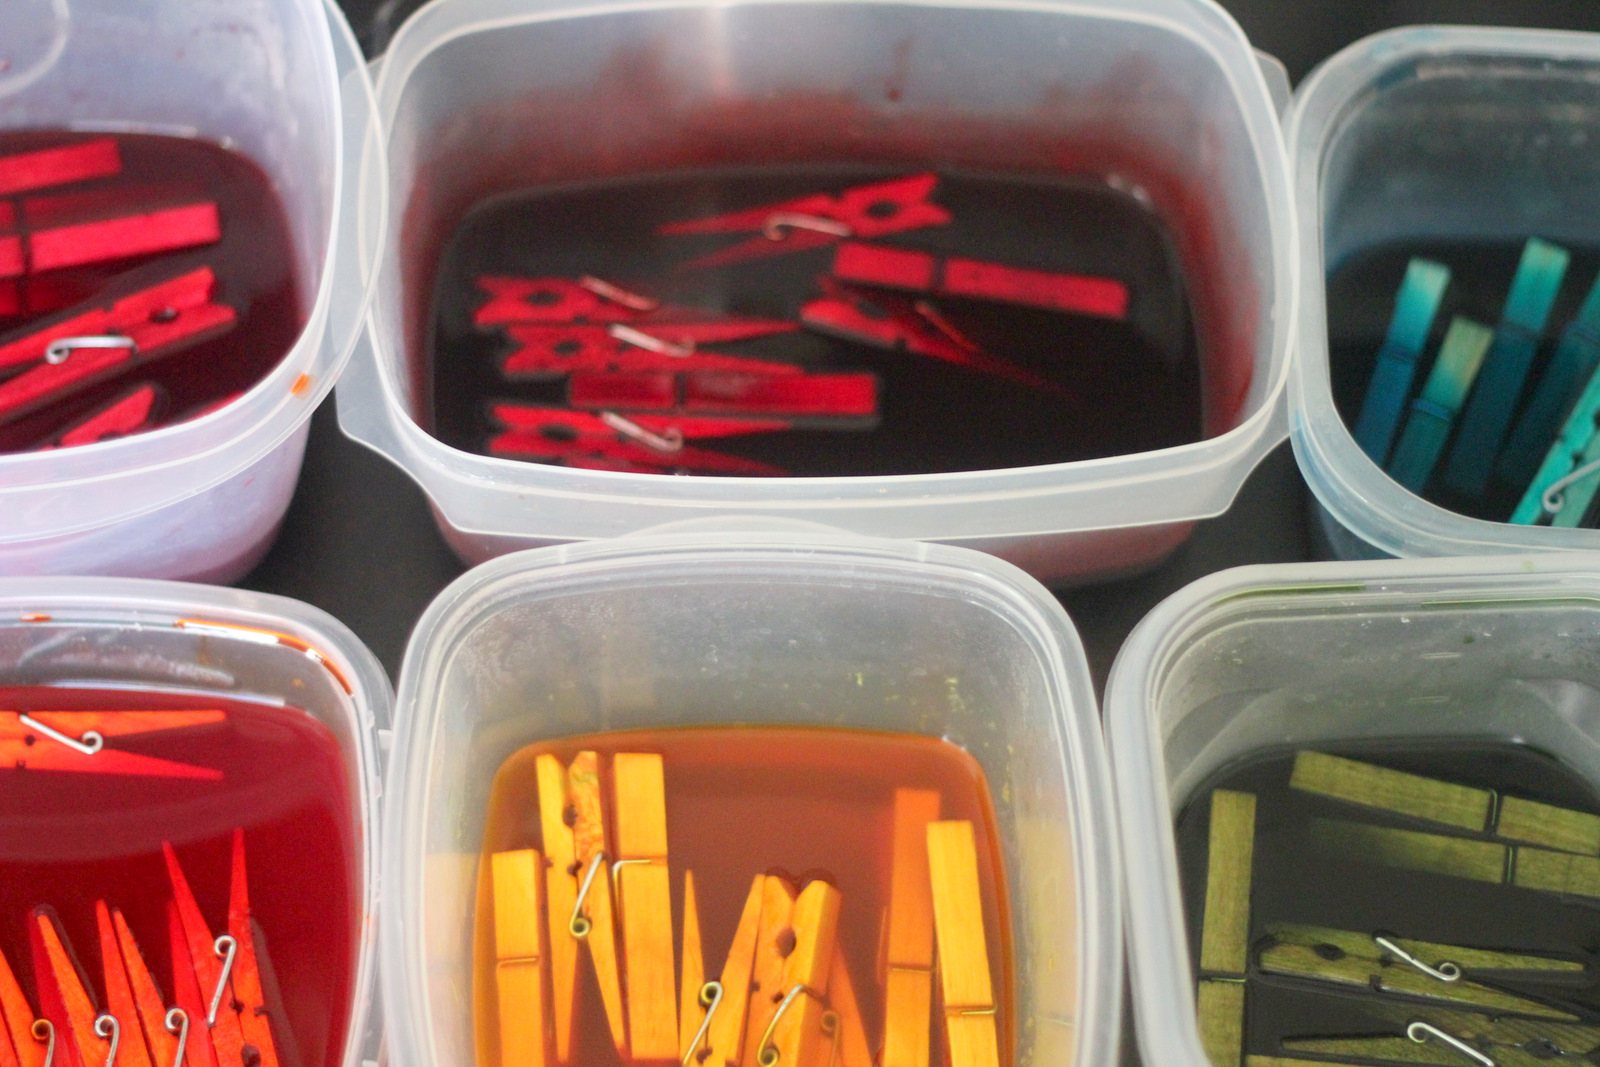
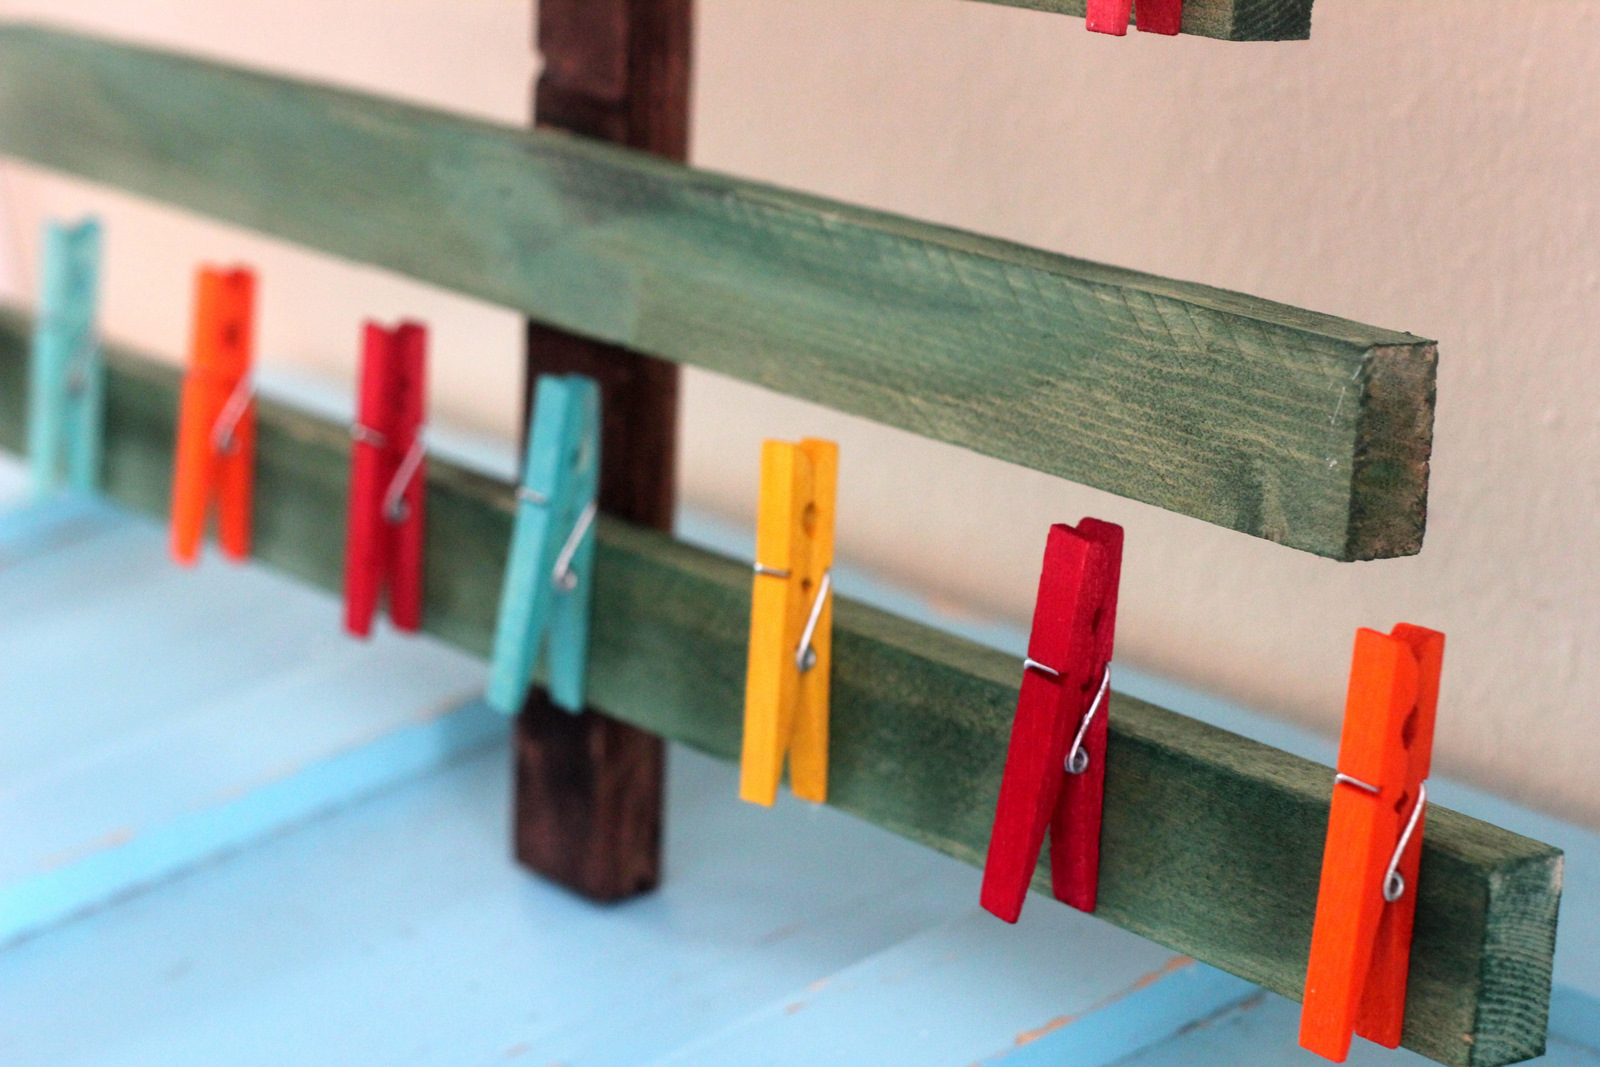
First dye your clothespins. Make small batches of dye and soak your clothespins in the dye to make yourself a mini clothespin rainbow (I’ll be honest, I. love. these! No wood is safe from the RIT dye now that I discovered how fabulous it looks dyed).
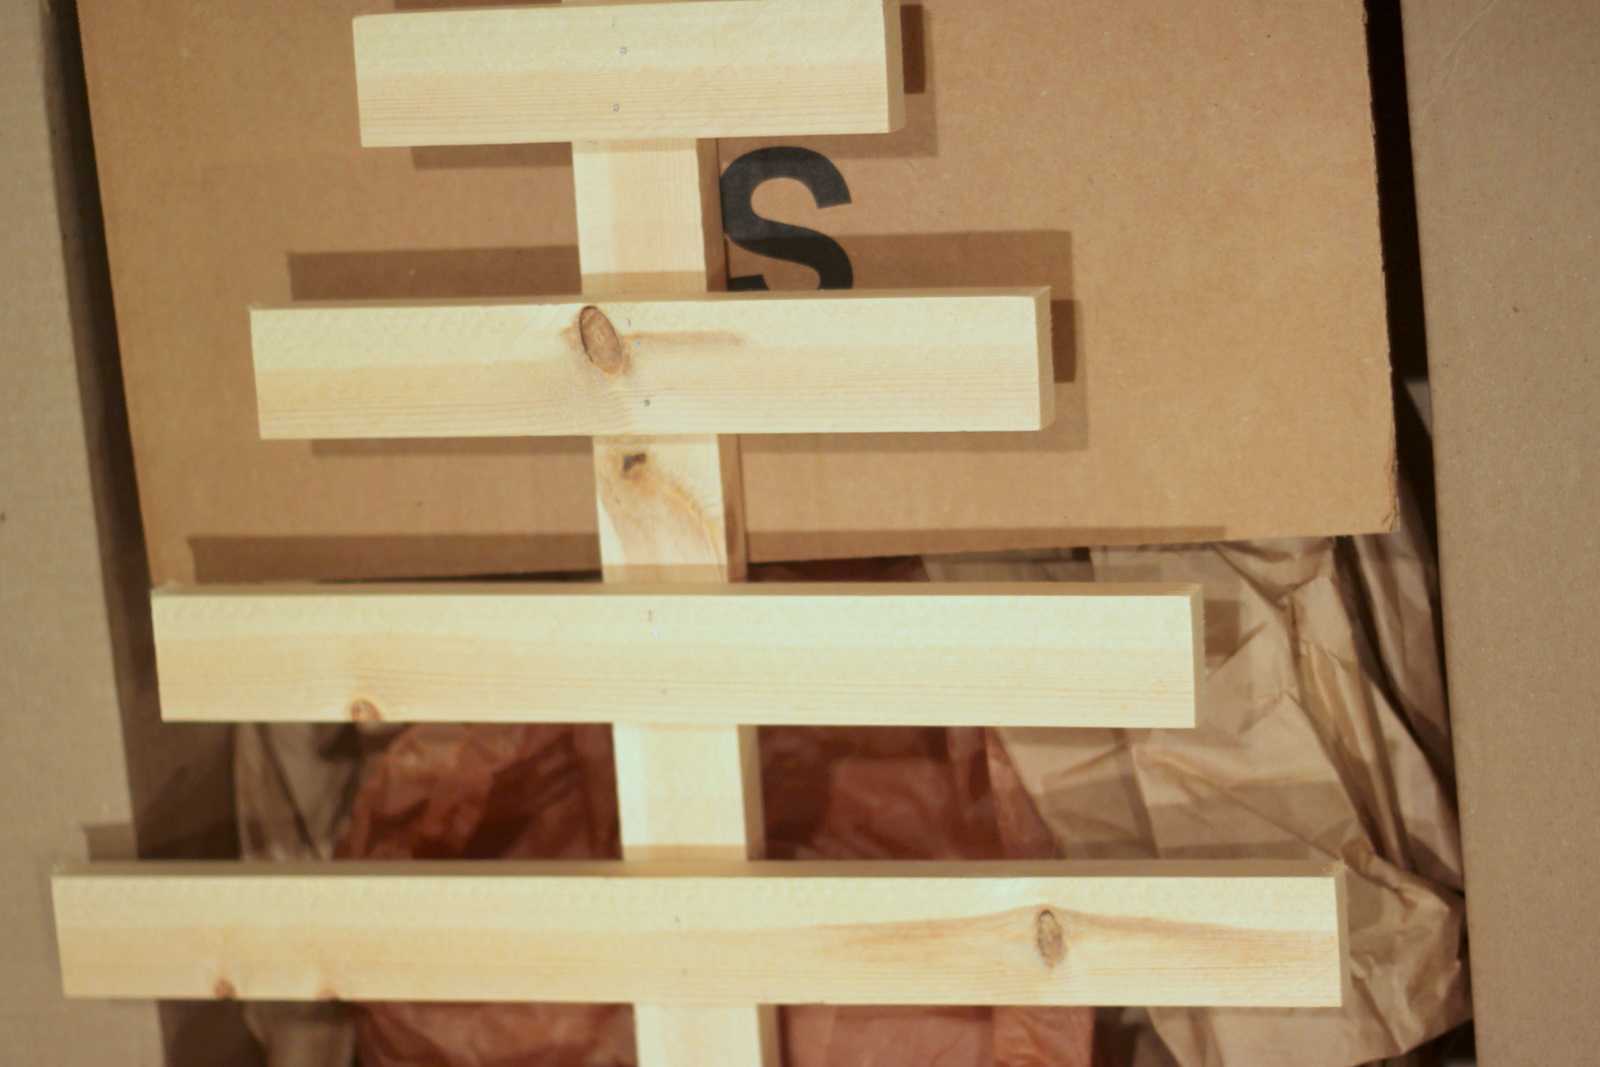
Nail the shorter boards to the longest board, in order from shortest (on the top) to longest (on the bottom).

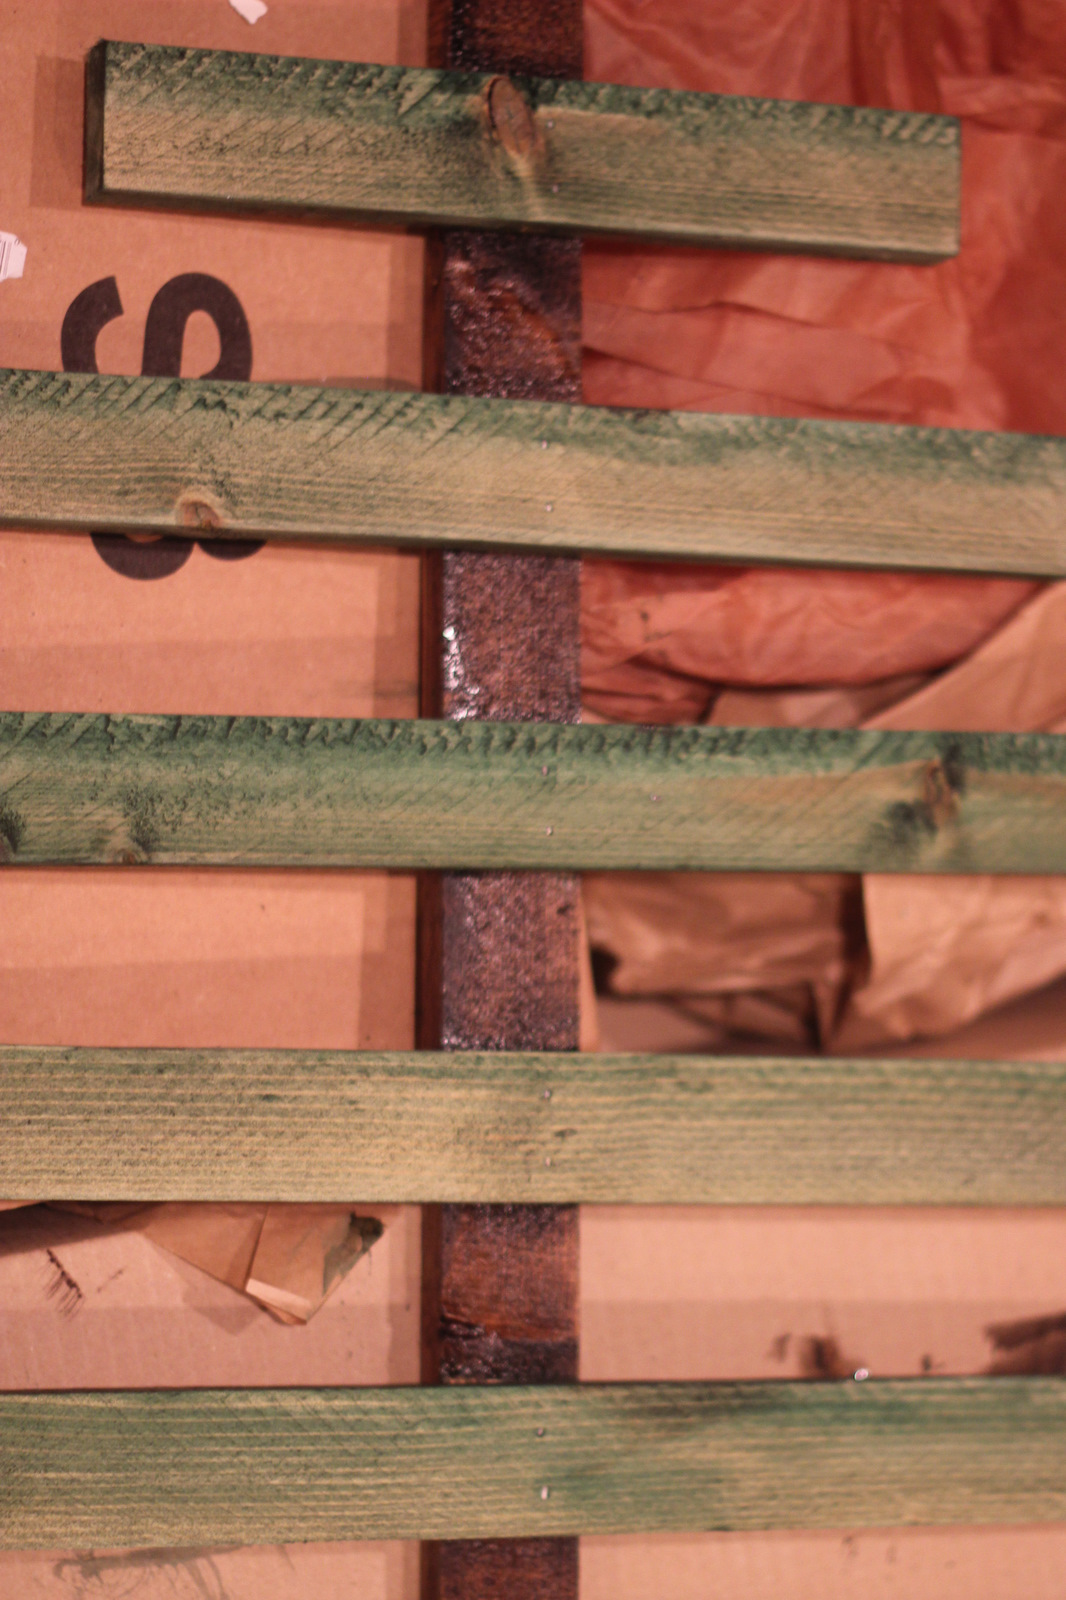
Paint green dye on the ‘branches’ and brown dye on the ‘trunk.’

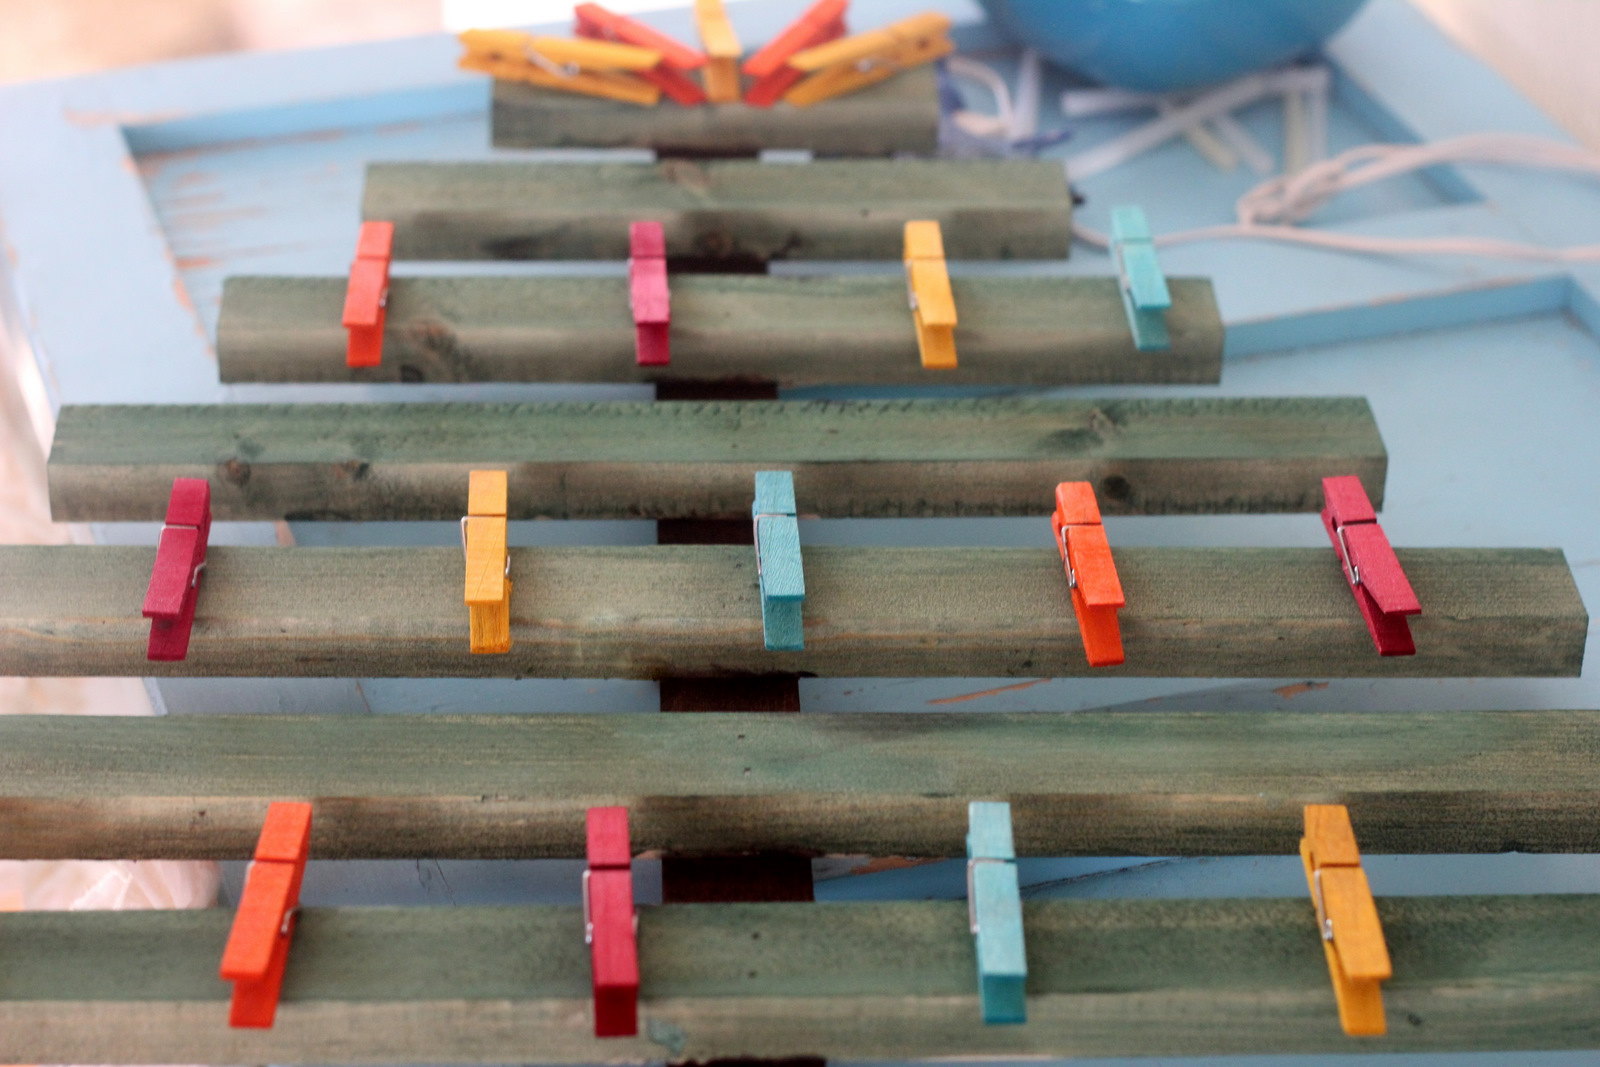
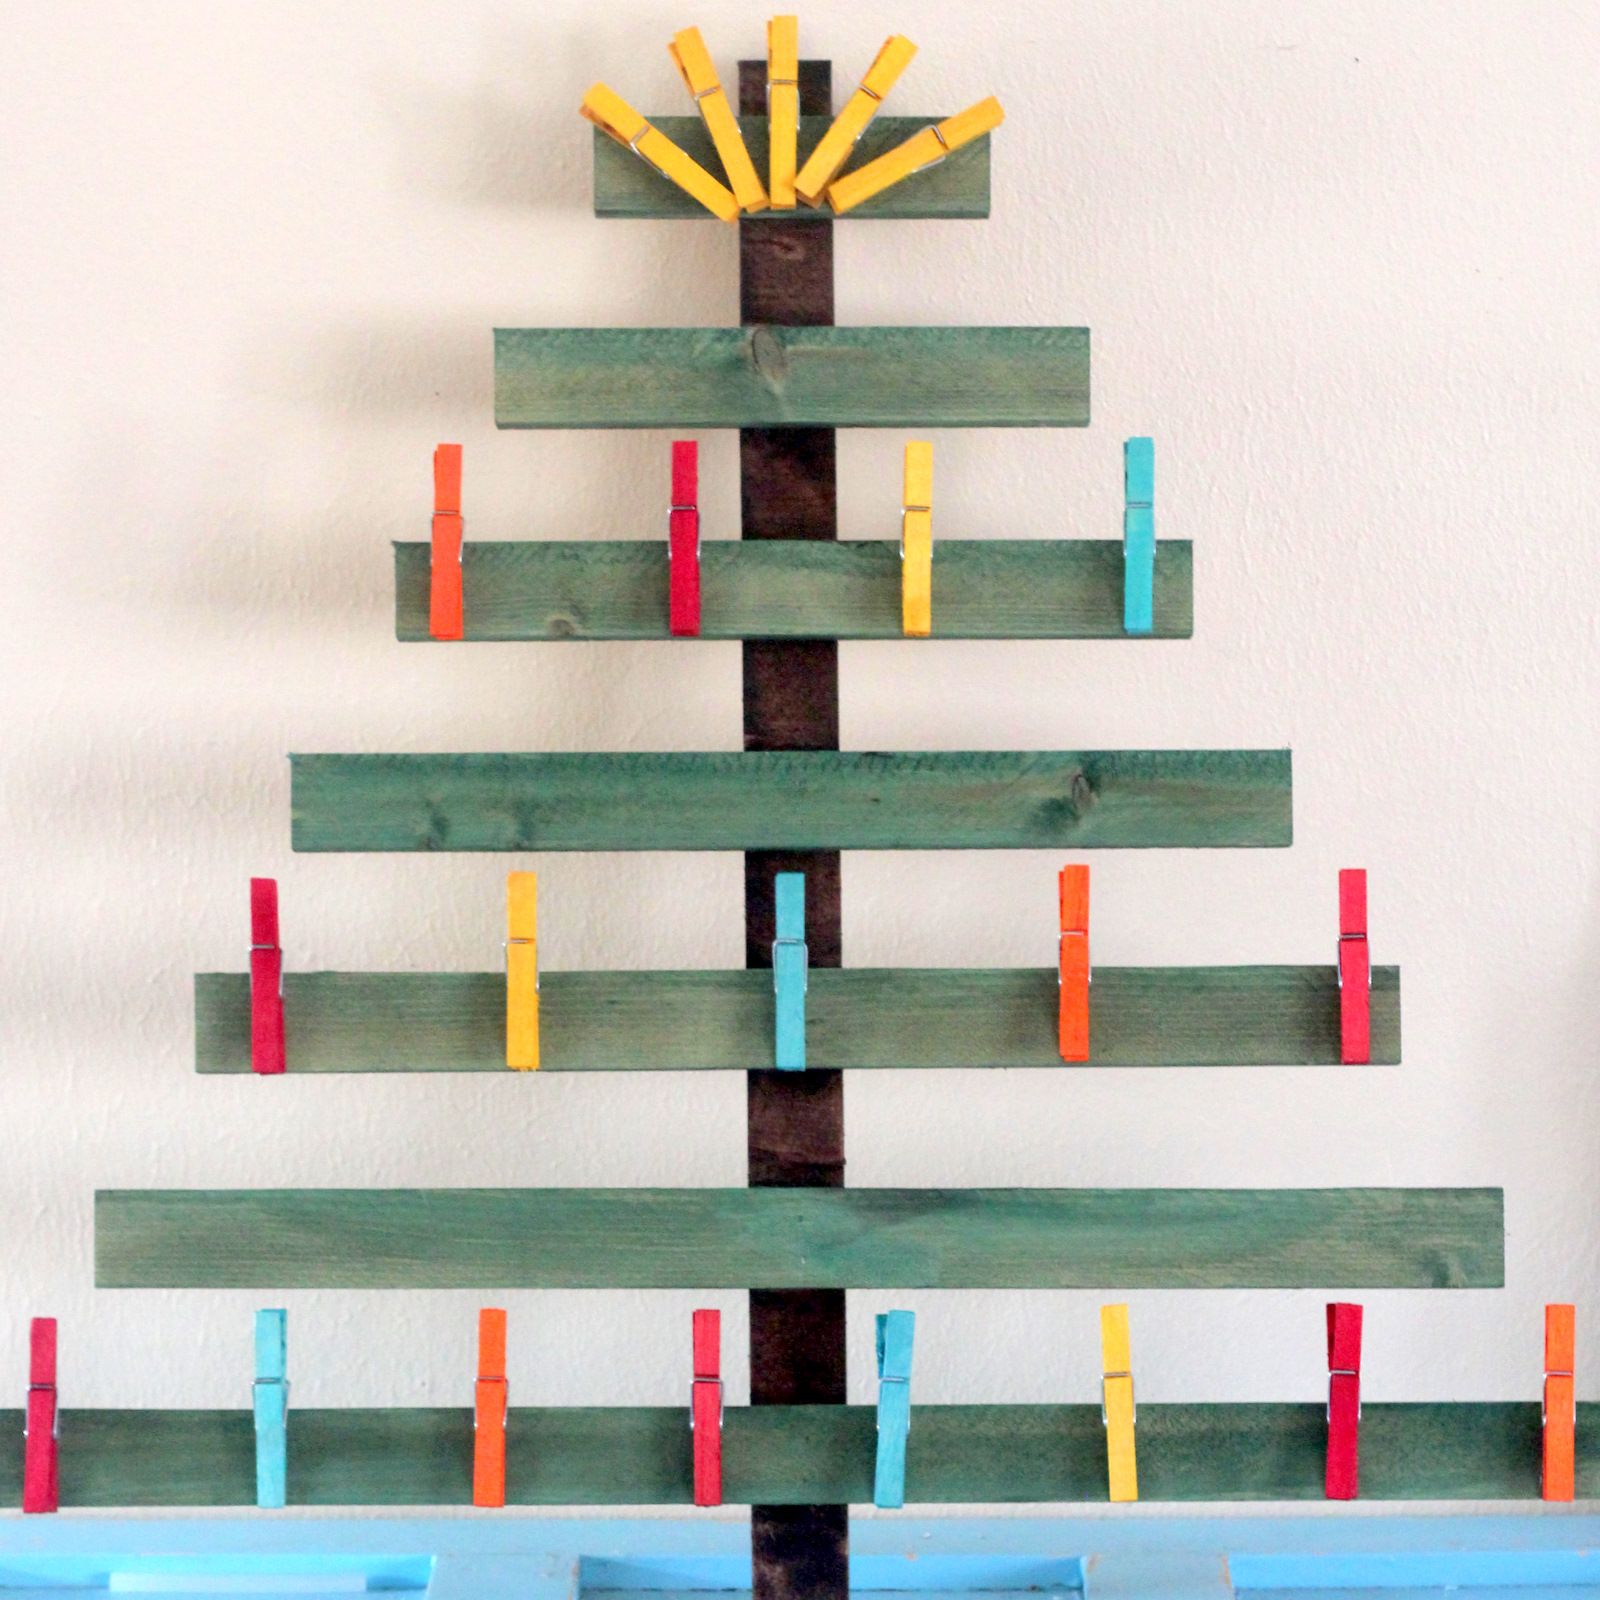
Let everything dry out (the clothespins and the ‘tree’). Hot glue the dyed clothes pins onto the ‘tree’ like lights. Arrange the top row in a yellow starburst pattern. Glue that in place too.

Brilliance love it
Thank you so much for the idea- this is exactly what I needed for a kid’s environmental fair I’m helping with. We won’t have each group of kids long enough for them to paint the clothespins, but they’ll be able to add patterns (then glue wings and eyes) to the already dyed ones! I am making dragonflies out of clothespins and have now dyed over a hundred using this technique. The kids are going to love choosing from the different colors! Thank you again!
I love this Sandra! I’ve been using the dyed clothespins for all sorts of things this summer too- I bet your dragonflies turn out great!!!
Wow – this is going to save me a ton of time this summer! My art room is rainbow themed and every year I paint new sets of clothespins in the colors of the color spectrum… can’t wait to try them in the dye! Thank you, another one of those “why didn’t I think of that?” moments…
I love this Ann! The ability to color wood changed my life- brilliant, right?
I love this…..we will be using this idea for our Young Women at Church. We will put a picture of the Savior on the top row, and then attach black and white pictures of the Young Women on the clothes pins on the tree. We will then attach it to our bulletin board….it will look fabulous and will be fairly inexpensive to make too….BONUS!
Andrea I love that! Send me a pic when you’re done if you have a chance. 🙂
Could u use easter egg dye instead? If it works it would be more budget friendly, right?
Hmmm, I have no idea Jenn! That would be budget friendly. If you try it and it works, would you let me know?
Love this idea! I am planning on making some for my first grade classroom. Just curious what your dye to water ratio was. I only need to make a small batch of each color. Thanks for your help.
Hey Deb! I used the ratio’s from the wood dyeing directions on RIT’s site (follow the link in the post). Hope that helps!
I know this is very late to this discussion, so I hope you will see and answer if possible:
I want to use this technique for a wooden (light-weight unfinished birch) eReader cover, but I’m worried about the dye wearing off onto my hands as the cover is handled. Have you noticed any dye coming off your hands as you use your card tree (which is brilliant, by the way: I want one too!)?
Thank you!
First, what a GREAT idea! I love that.
Also, I haven’t noticed any of the color coming off, but I also don’t handle the clips (or the tree) very often. It makes me wonder if it might come off on your hands (or on your clothes/whatever you set your e-reader on!). My best thought is to dye some clothespins (or something) and handle them to see if the dye does come off???
Sorry I can’t be more helpful!
You could always do a spray clear finish coat to seal the color in. There are several good ones on the market.
I absolutely LOVE your Christmas card display and want to make one of my own this weekend! Did you use the powder or liquid RIT Dye?
Thanks Carissa! I used the liquid RIT. Send over a pic when you finish- I’d love to see it!
Love your tree! I will have to make that closer to Christmas!
I dyed clothes pins in December to make magnets. They turned out great, but the silver parts rusted a little,right away, some more than others. Did this happen to you? Or do you have any ways to avoid it?
Hmmm, the silver parts didn’t ever rust on mine. I wonder why not?
I was just thinking the other day that I should dye more clothepins for non-Christmas-y purposes. 🙂
I’m doing this for my classroom this year! Question: did you sand your clothespins before you dyed them? I didn’t know if this was a necessary step for clothespins. Thanks for the awesome idea!
Hey Jessica- these are perfect for a classroom. Nope, no sanding, just into the dye baths.
Hope that helps!
Could food coloring be used?
Karlene- I don’t know! If you try it, will you let me know what you find?
I used food coloring mixed with 1 TBS. white vinegar and it worked perfectly! Thank you, Kirstin for this great idea!
What a great substitution! Do you think this project would work with rulers and yardstick pieces glued together with wood glue instead of 1″ x 2″ board? I want to use it as a card display to lean against the wall. Thanks for the cutest idea!
As long as the wood is raw wood, I’m sure different kinds of wood than just 1″ x 2″ boards would also work! You could always do a test run with a ruler and a yardstick to check first, though? Let me know how it goes if you do!
Make sure to rinse them off well. I actually put mine into the oven on 225 degrees to help them dry faster. If they are even slightly wet and you store them in a plastic bag, they will mold over within a couple days.
There was a question of sanding/filing. I look over them when they’re going into the dye and chuck out any that are obviously too damaged to look good. Then when they’re out and dry, I’ll check the jaws to be sure they’re not too jagged. The water of the dye causes wood to expand. But it usually needs just a few seconds with sand paper and they’re fine.
I love the look of the little bowl/containers. But I do mine in sandwich or quart size zip baggies and place them lined up in a larger square container to keep them upright. No mess, no spills, and easy storage for using again.
So clever, thank you for the idea.
We are going to make the Christmas tree! How do you stand the tree? Some of us do not have the wall space to lean it up against the wall. Did you put cleats or something else to help it stand?
Hey Debra- we ended up putting a little mini ‘stand’ at the bottom (using an “x” of wood). Hope that helps!
My husband used dye to make a wooden sign and found that the dye faded over time….what is your experience with dyed wood fading?
Maryann, we actually don’t have this display anymore (it got downsized in one of our moves!), so I can’t tell if the dye would last for years. I have some dyed clothespins that are still going strong, but they’re so little and I wonder if that makes a difference???