
color my summer tutorial- purple dahlia headband
As an Amazon Associate I earn from qualifying purchases.
One of my very favorite things about summer is the ushering in of SUNDRESS WEATHER! Woohoo! Now, I know that not all of you share my view that sundresses are the Most. Fabulous. Invention. Ever (ahem, Jord). But hear me out on this one- pair this one uber-functional piece of clothing with accessories and sandles and you are ready for your day- glorious!
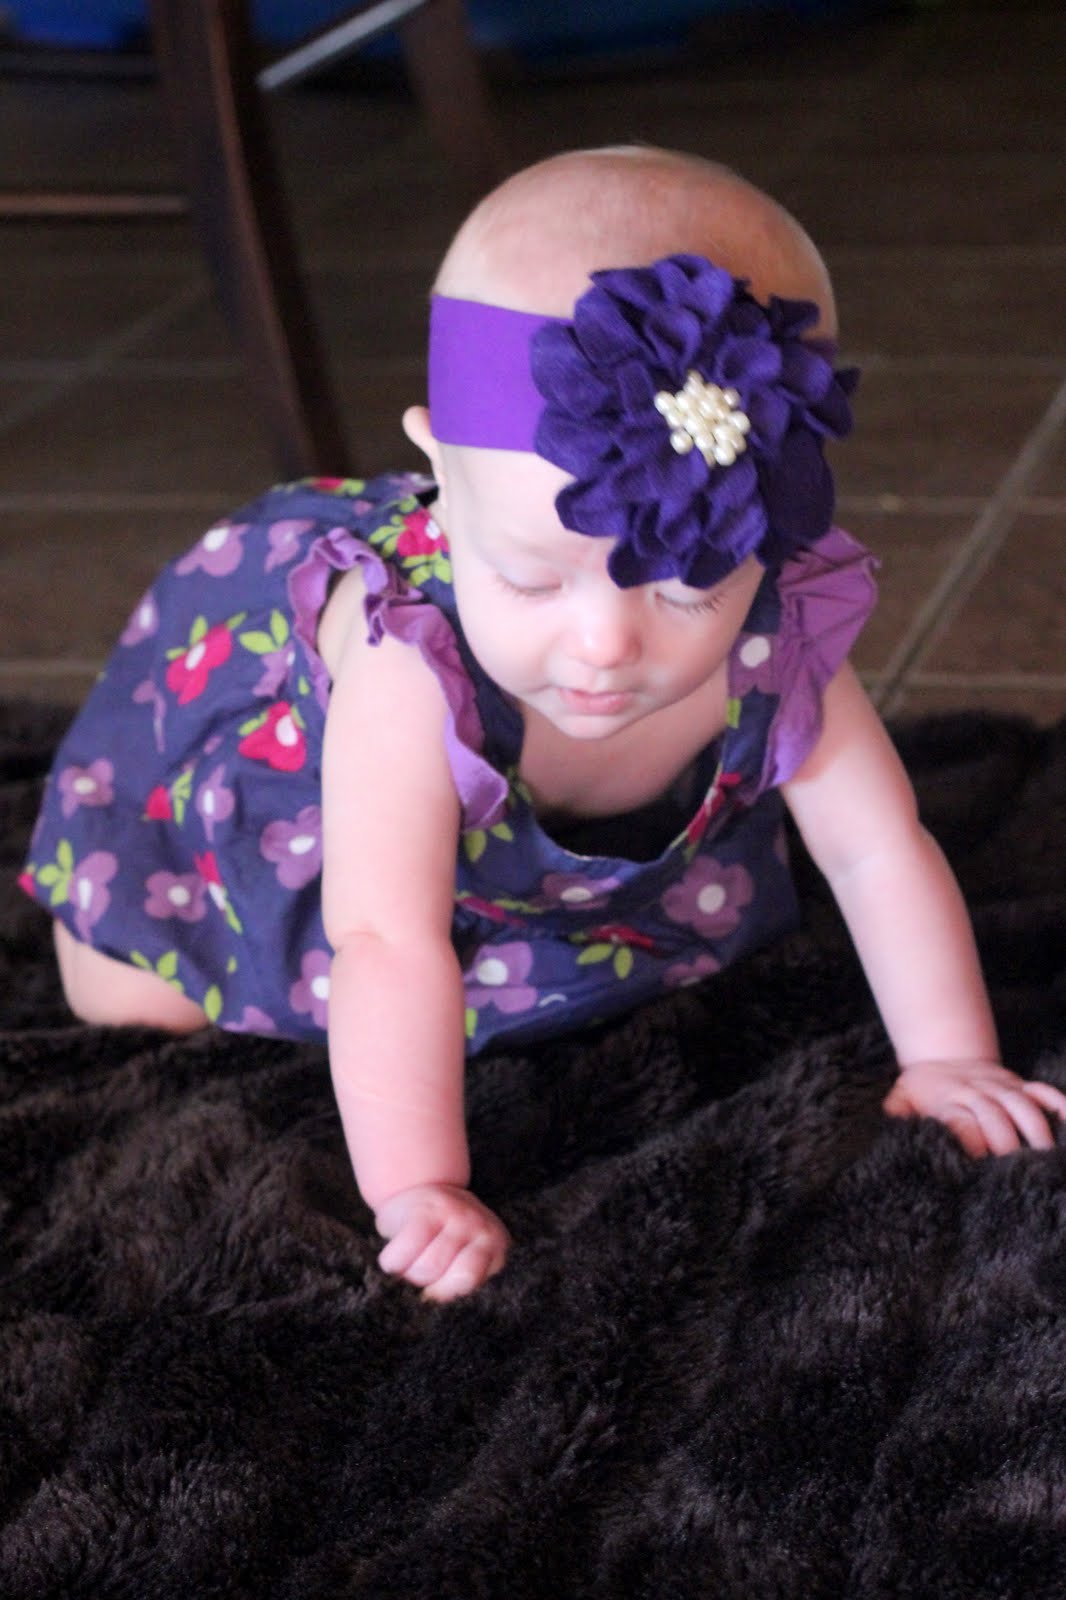
Even if you’re still not on board, you have to admit that there is an abundance of adorable baby girl summer attire in your daughter’s closet that you’ve just been waiting to pull out! And what better way to complete that darling summer outfit than a cute as can be dahlia headband?
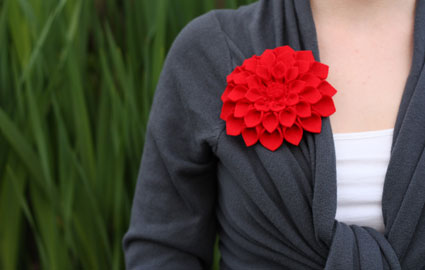
About a year ago, Megan from Not Martha shared this genius felt dahlia tutorial that immediately landed on my To Make list. However, I didn’t get around to attempting it until a recent car trip. And I didn’t have any glue on hand.
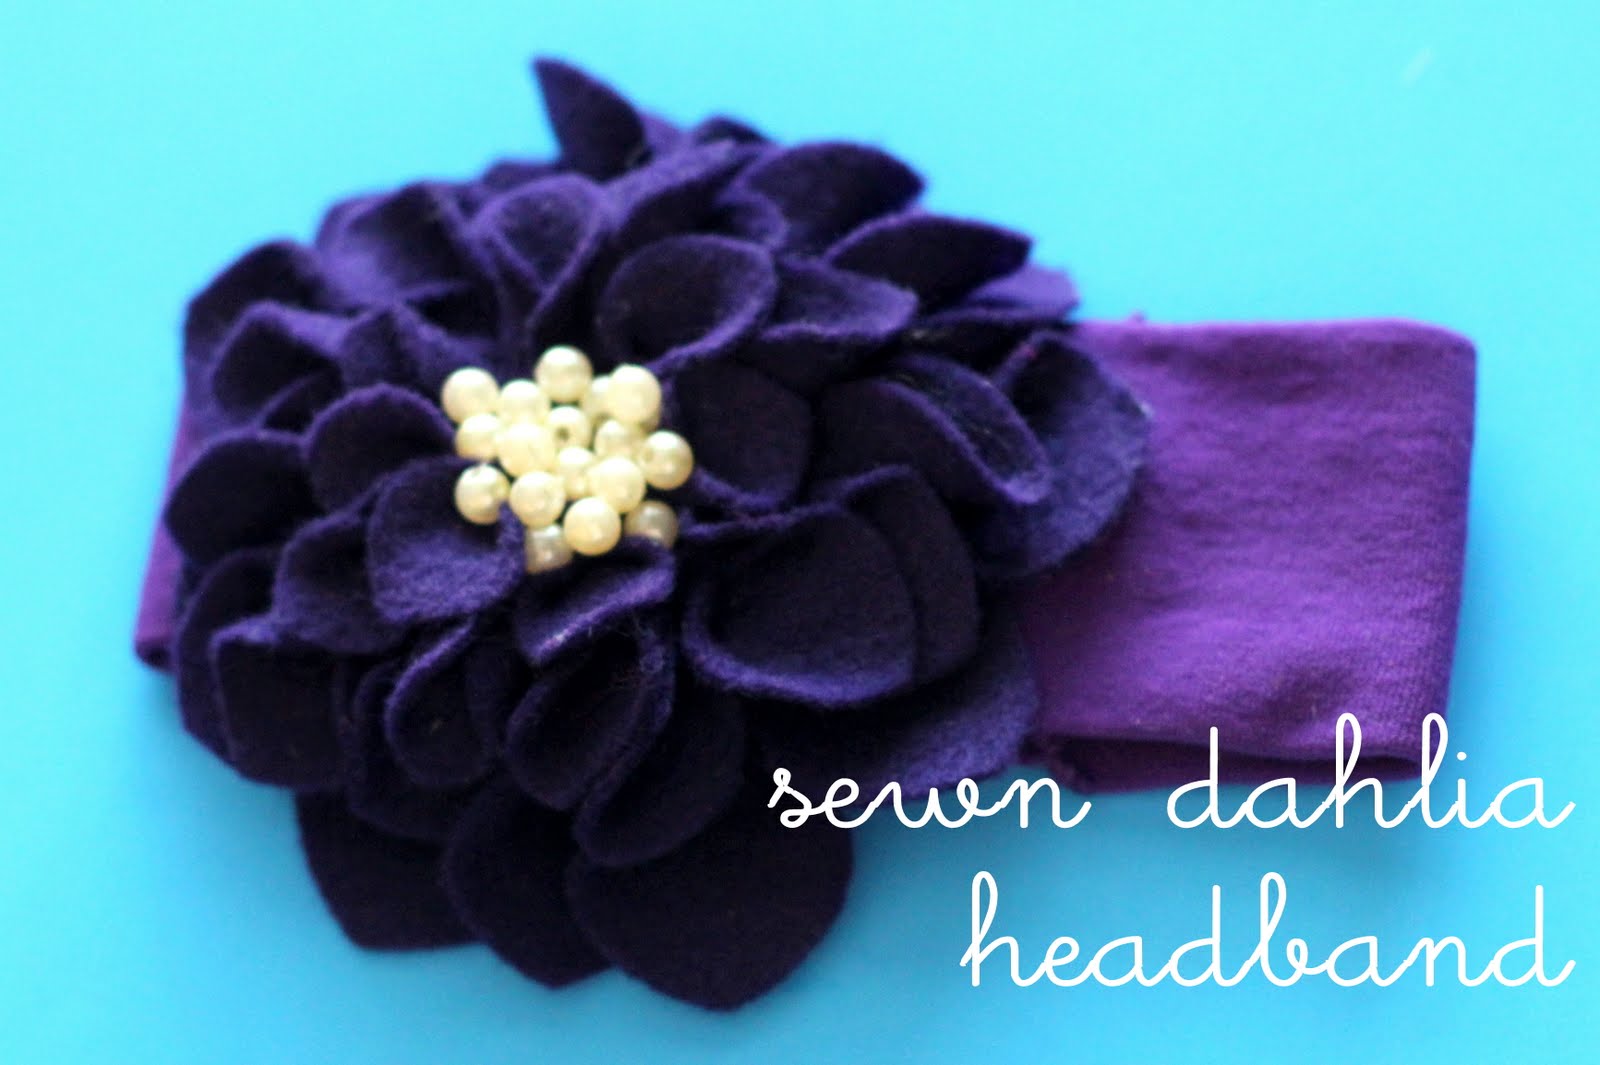
So this is my sewn version.
To make one too, you’ll need-
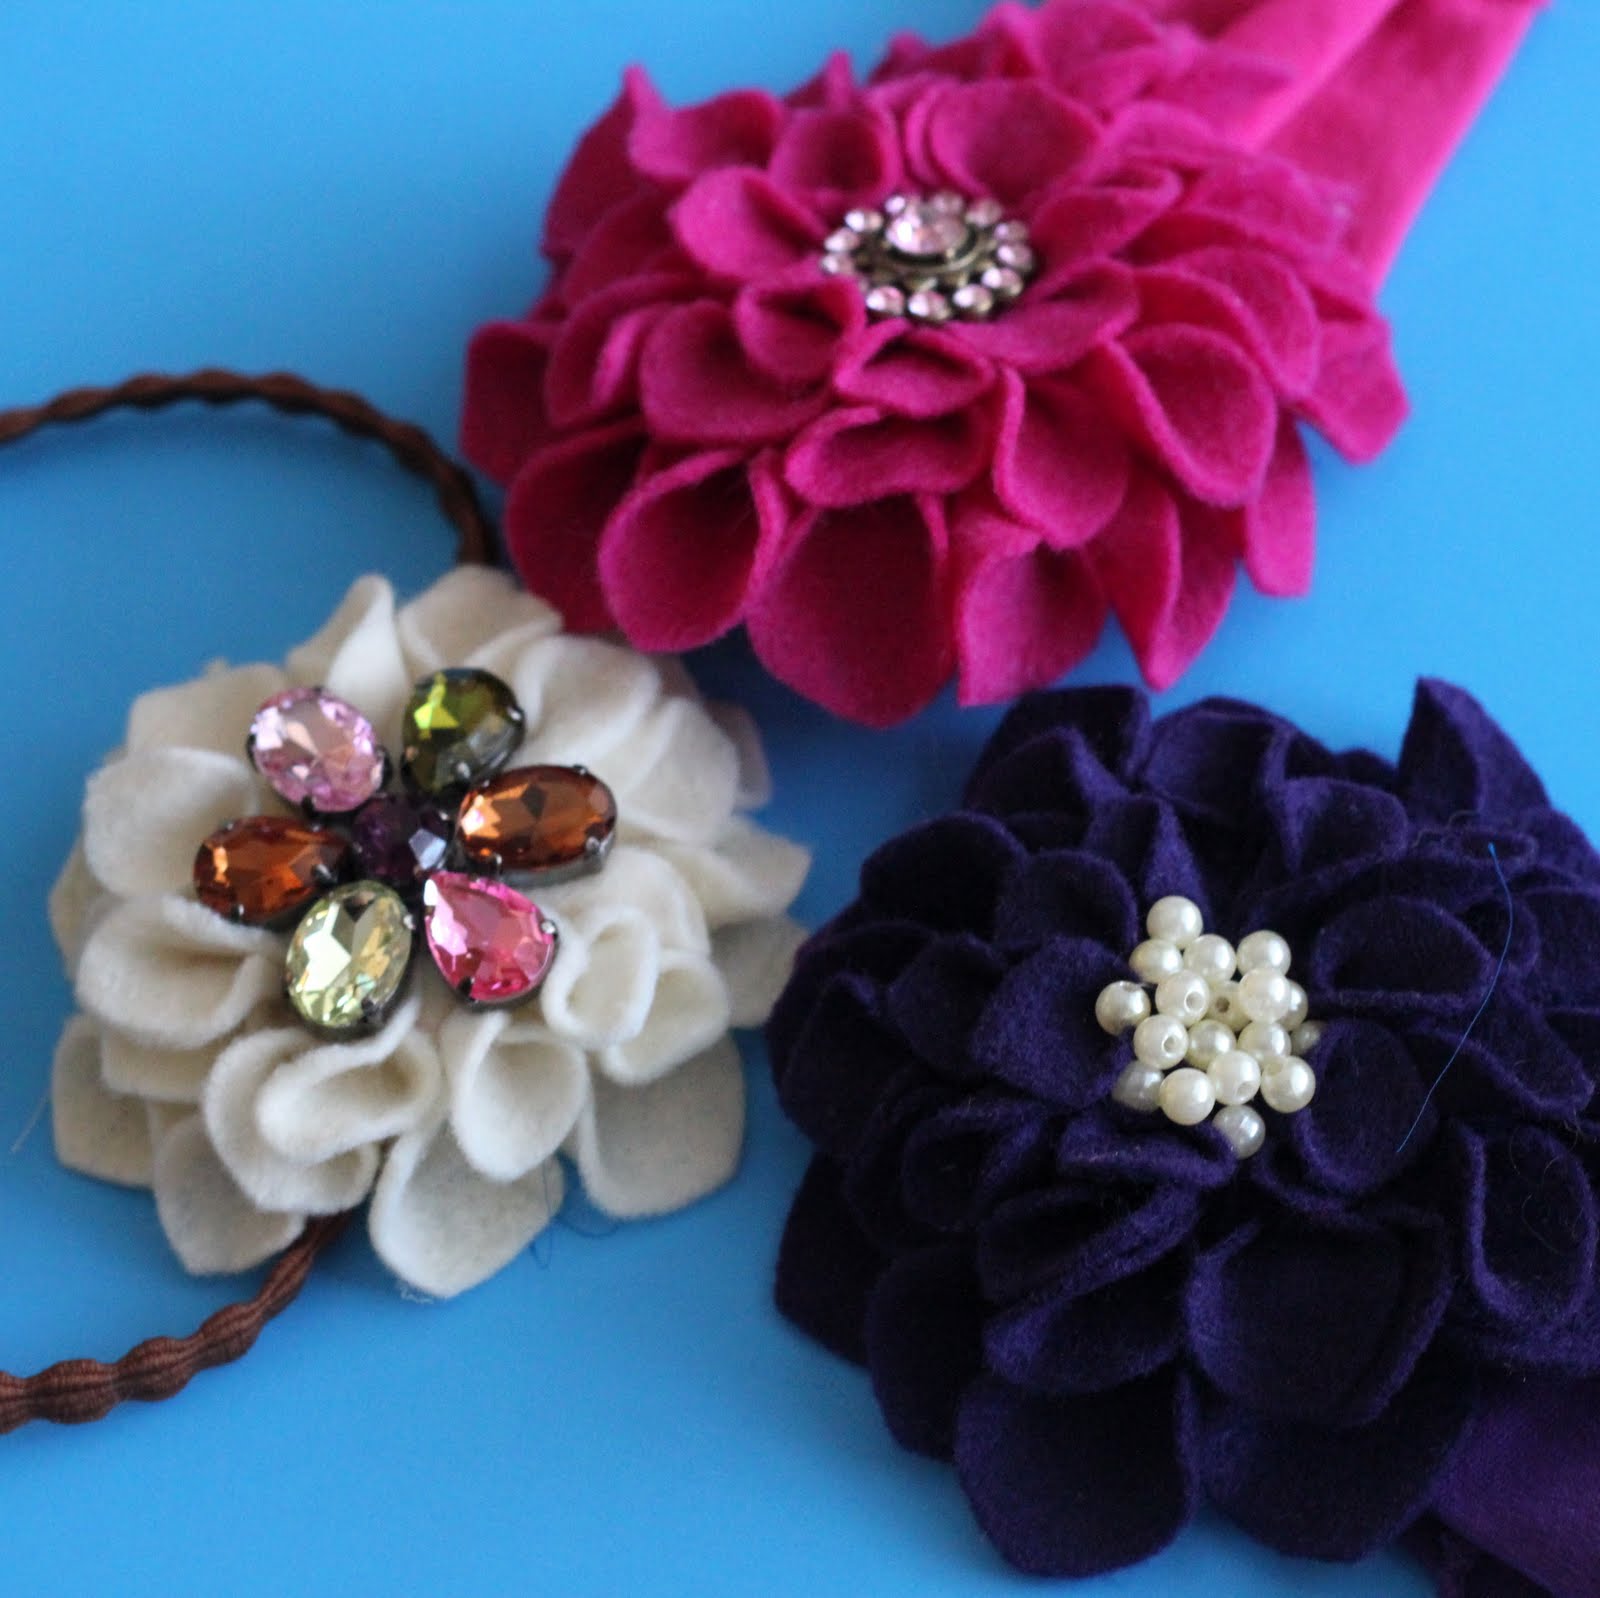
-a 9×12 sheet of wool felt
-a stretchy headband (I found this one at Michael’s [random, right?], but I’ve also had luck finding plain baby headbands at Target and at Dollar Tree)
-sew on pearl beads
-invisible thread and needle
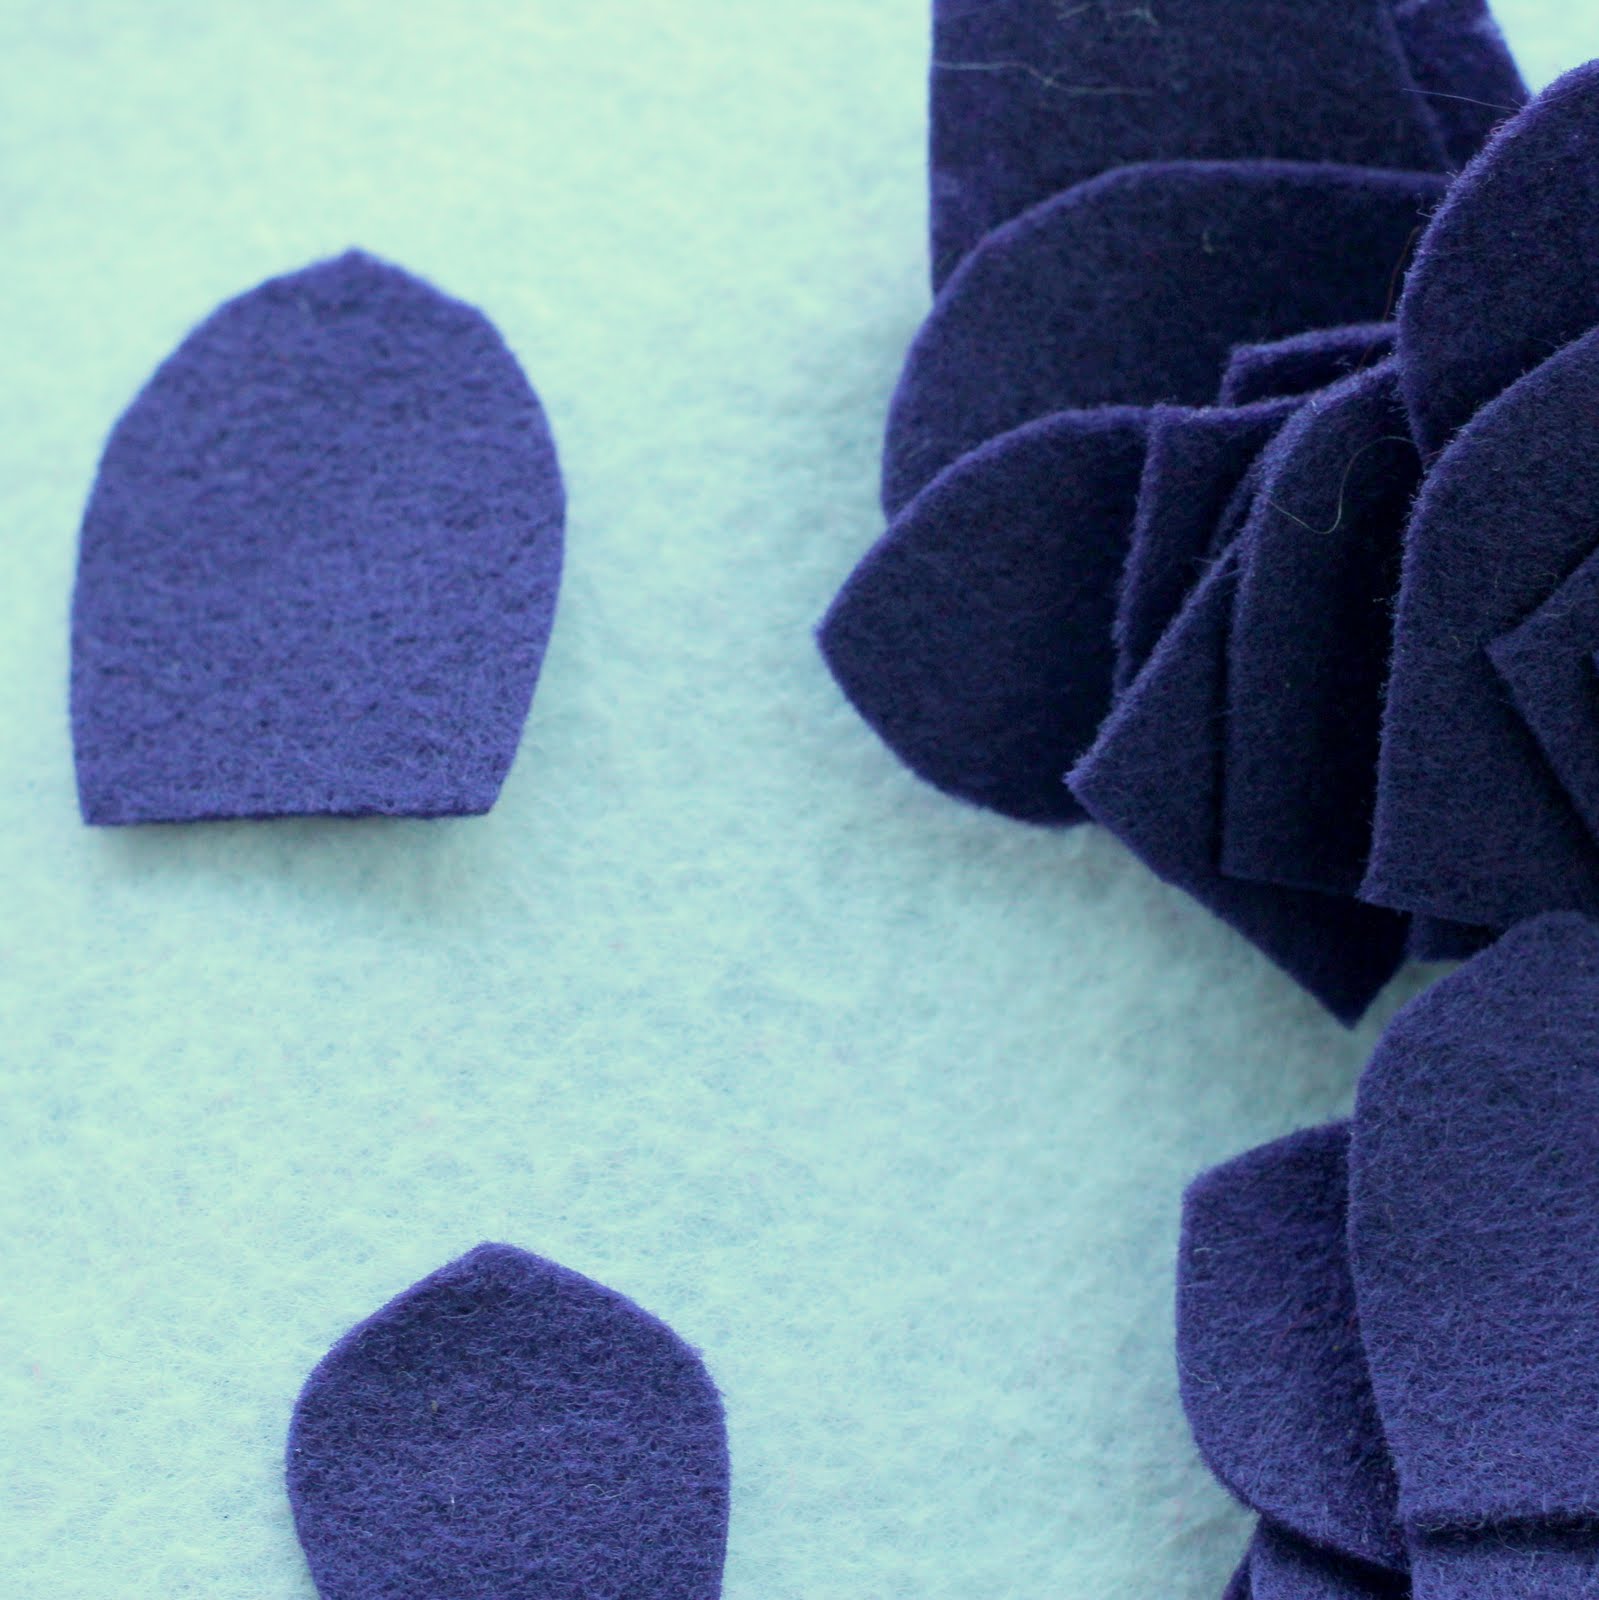
1. Cut out a whole pile of wool felt petals in three different sizes. As suggested by Not Martha in the tutorial for the glued version, I cut my felt into a few 2″ rows, a couple 1.5″ rows and a couple 1″ rows (and used the leftover to make my circle flower ‘base’). Then, I cut the rows into rectangles and then made ‘petal-ish’ shapes. It’s not an exact science- just freehand it. Be sure to make a point at the top of each petal, though, if you want your finished flower to be dahlia-esque.

2. Fold the bottom of the flower in to make a pinched petal.
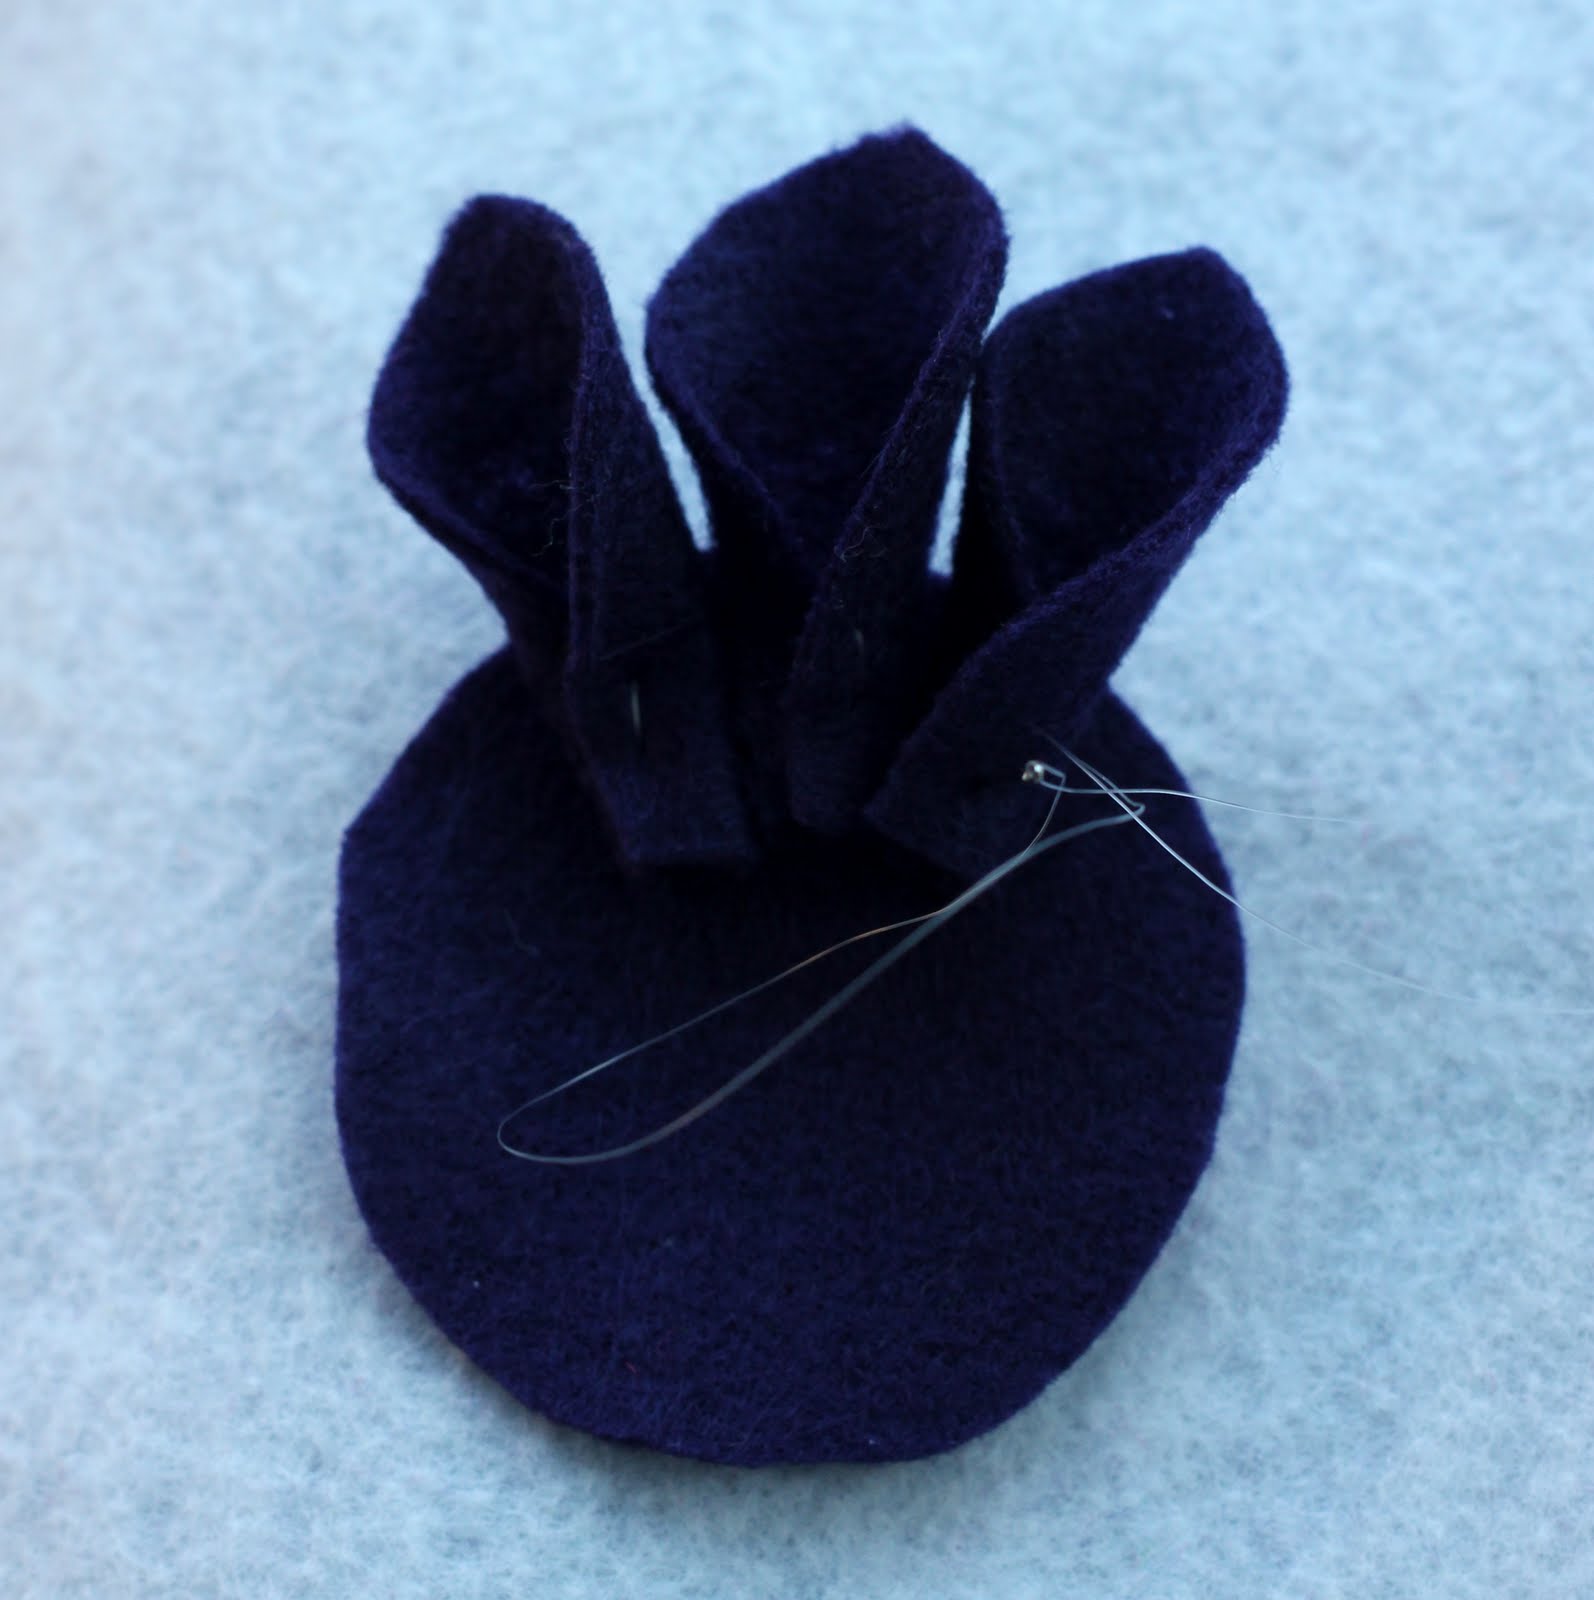
3. Secure the pinched petal to the circle base (my circle was about 2″ wide) by handstitching with invisible thread. It worked best to stitch across the base of the petal horizontally and then secure with a vertical stitch as well. I usually did one more stitch just for kicks, so three stitches per flower.
4. Continue around the entire base, using your biggest petals.
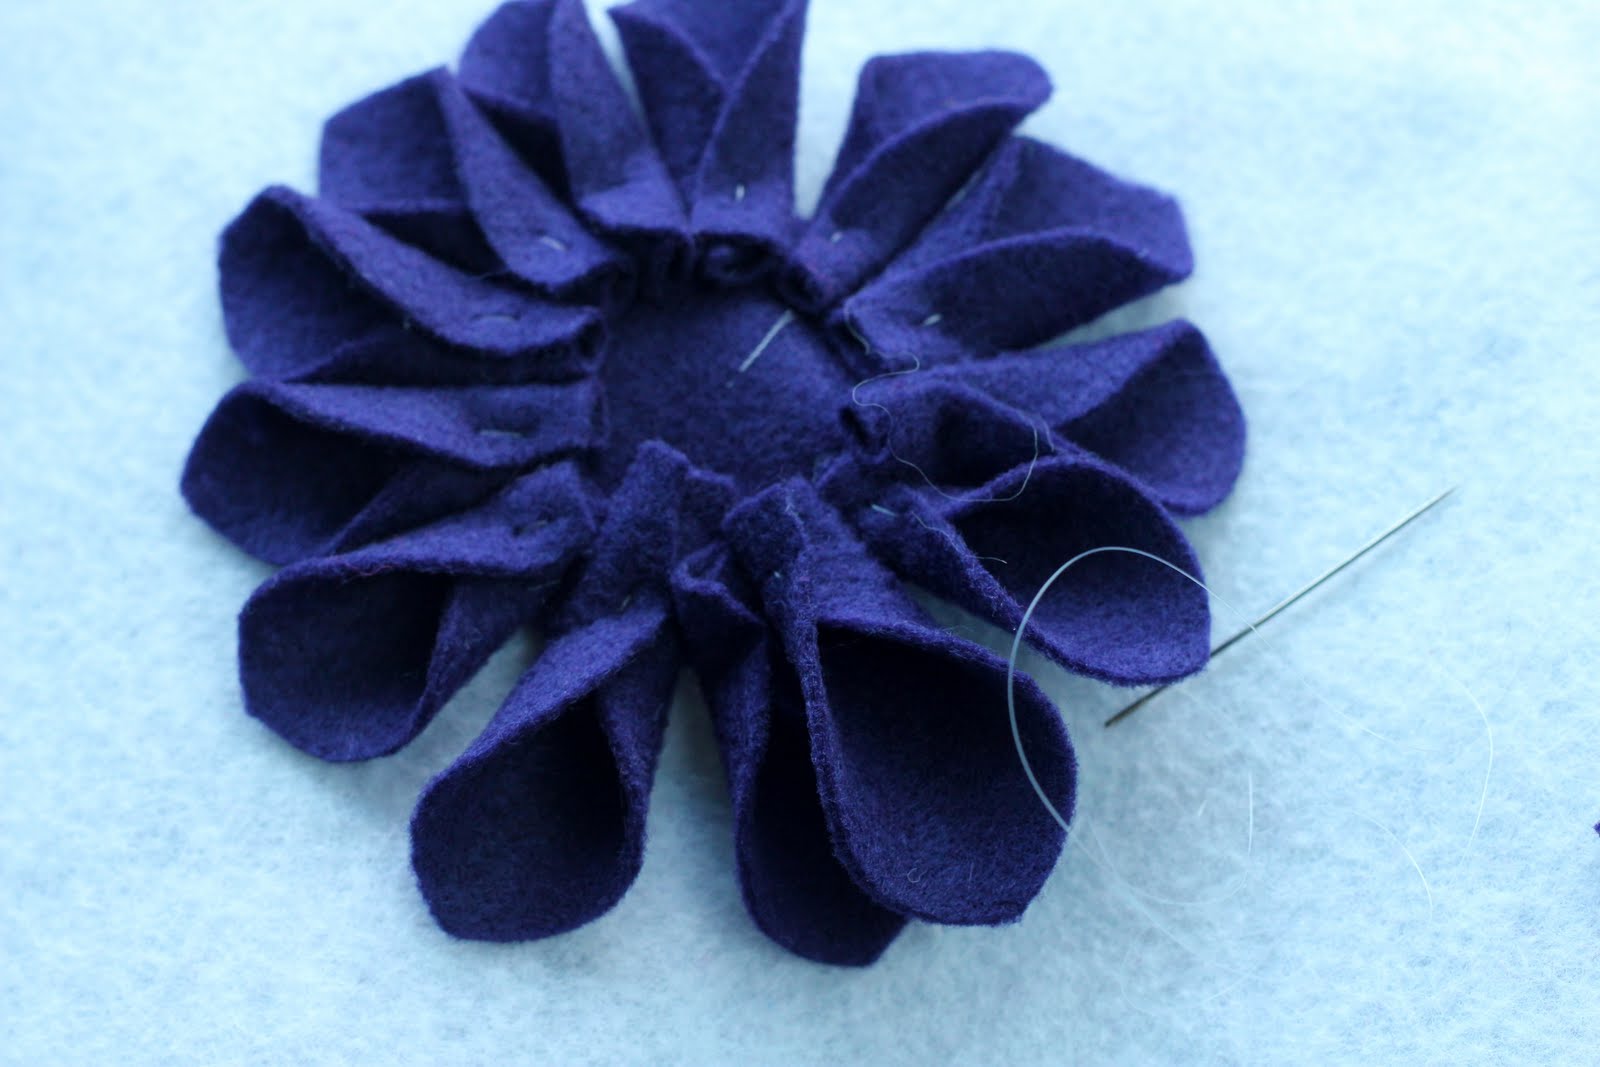
5. Repeat entire process for the middle layer, using your middle-sized petals.

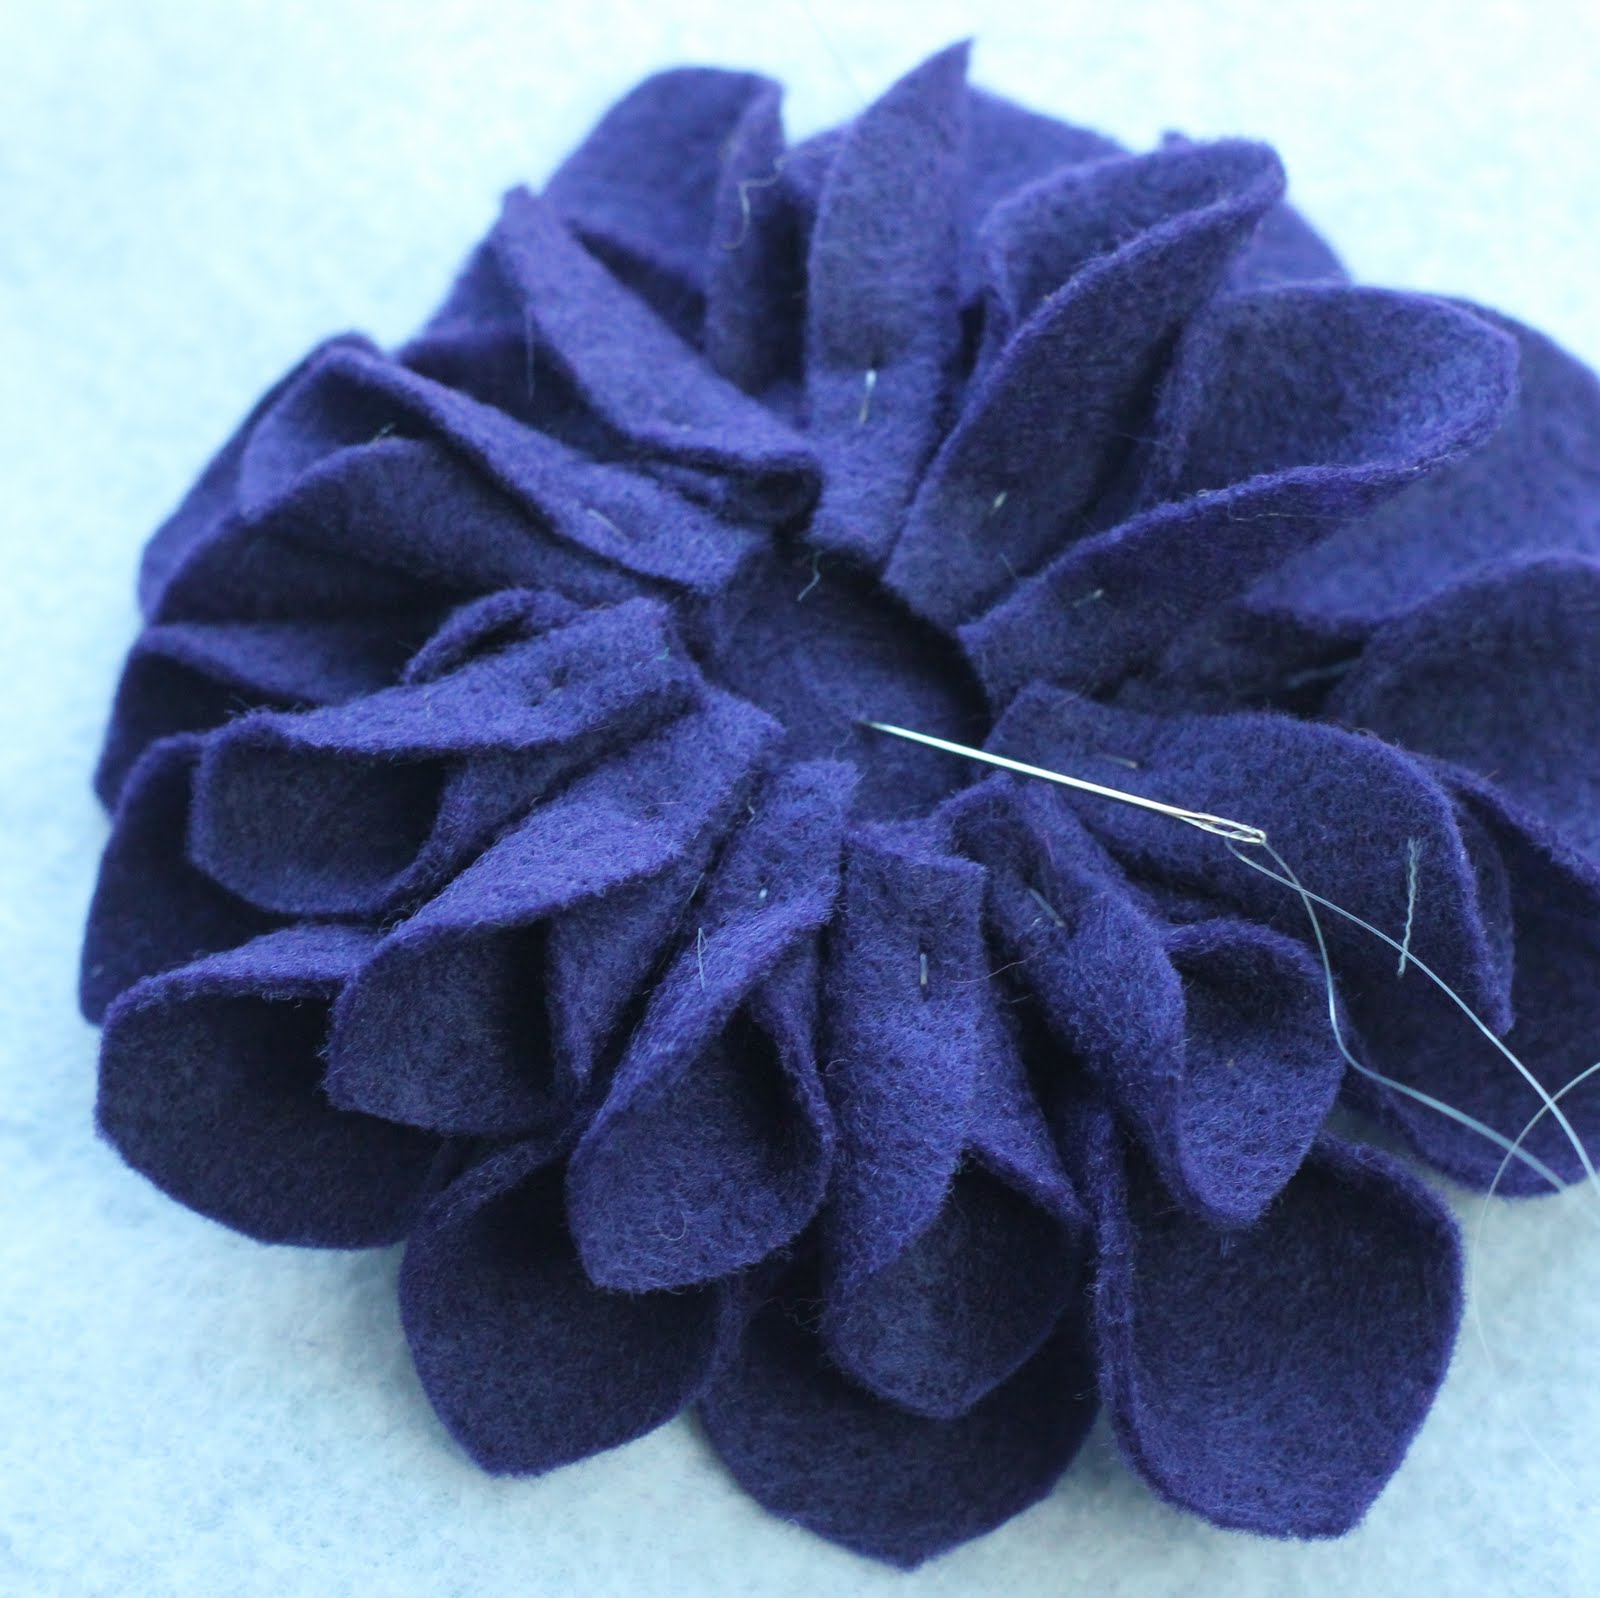
6. Finish off petal-ing by handstitching the smallest petals into a top layer. There should be only a small spot in the center that isn’t covered in petals.


7. In that uncovered center spot, stitch a pile of pearl beads (I think I used about 20 total). For full coverage, some of the beads will be stacked on top of each other. Oh, and the back of your flower base will be a mess of invisible thread- haha!

8. Sew around the perimeter of the felt base, securing the flower to the headband. Sew threw the petals- if they aren’t stitched in place, they have the tendency to flip up and get all backwards.
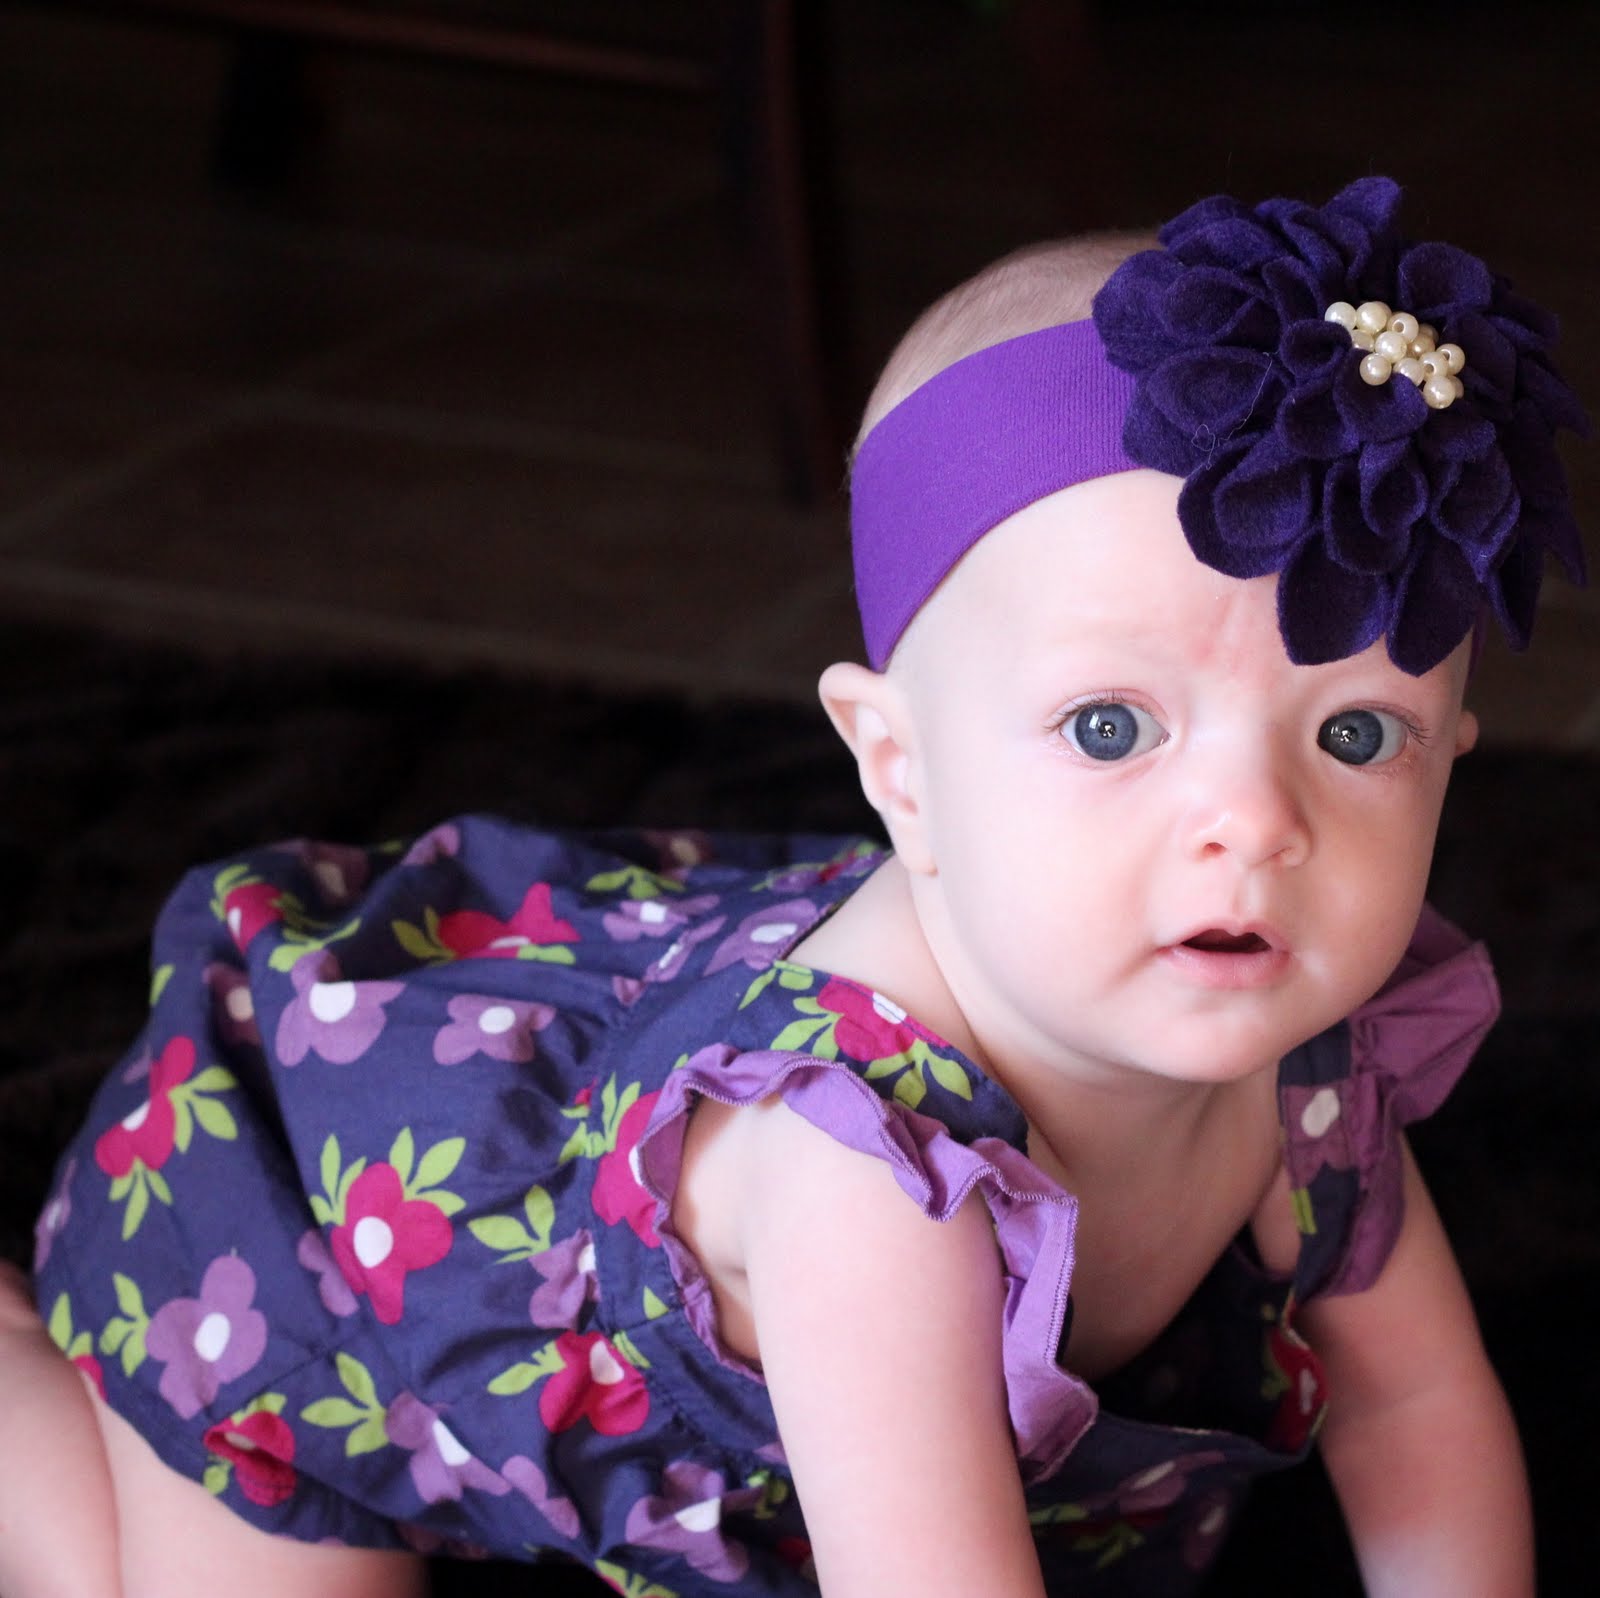


9. Pair this new headband with something summer-y! So adorable!

Be sure to also check out the purple goodness by Tara from Easy at Delia’s today!
What a beautiful flower. I just planted some dahlias in our yard! As pretty as the flower is, it dwarfs in comparison to the other beautiful blossom (your baby girl) in your post!
These are SO beautiful!!! I love all 3 versions, just gorgeous! (And I TOTALLY agree with you about sundresses.)
Your MIL will have an amazing time in Scotland, I'm so jealous of her! 🙂 Can't wait to hear how it went.
My nursery has been temporarily put on hold as I was having lots of problems with pre-term labor last week, and am on bed rest this week! 🙁 But the top of my to-do list is baby headbands, one thing I can still do seated and without my sewing machine 🙂 So I'll be adding this version to my list! Thanks, perfect timing!!
Have a great weekend!
Erin
LTC
I lOVE this! Im going to make at least one of these for a pillow on my bedding make-over! How cute would one of these be on a pillow?!!! Im going to link to this tutorial! Thanks!
http://www.justcallmeblessed.blogspot.com
Since my girls won't leave headbands on, I'm thinking this would be super cute made into a barrette for me! I'm picturing a low side ponytail…just something to glam up the mom's go-to hairstyle.
Oh, how I DEEPLY LOVE that headband. And, if you made it in the car, does that mean you took your tutorial pictures in the car? If so, I love that part, too.
love the ones with the jewels in the centers! I've made the original from Not Martha, so fun. But I love your twist on the style and sparkle!
Taylor
hahaha-kimiko, yep, took all of the pics in the car. I feel like the quality is pretty shoddy, but what do you do, right??? and it makes for a funny story. 🙂
hahaha-kimiko, yep, took all of the pics in the car. I feel like the quality is pretty shoddy, but what do you do, right??? and it makes for a funny story. 🙂
oooh I love the bejeweled white one! Nice job Kirstin. Did you really do this on a car trip. You are crazy talented. 🙂
So cute! Guess I'm adding this to my to-do list! 🙂
So pretty! I've got a friend who loves dahlias, so I'll have to make her one 🙂
I love your blog! I have to try this flower. Your baby makes me want another one!
This is so precious. nothing cuter than adorable babies who wear giant flower headbands. makes me want another. Number 4 is almost 2..
Just a quick note to let you know that a link to this post will be placed on CraftCrave today [14 May 02:15am GMT]. Thanks, Maria
Yes! Something without glue!!! I just started my own little business and bought a bunch of fabric for my Christmas collection that WILL not singe… so I wanted to make another kind of flower and all the tutorials I've found use glue – which I'm determined not to do if I can help it 🙂 This is SO great! Thanks heaps!
I so tickled to find this. I've been looking for something to make for Christmas since I bought a bunch of fabric that didn't end up working for my singed flowers and everyone seems to use a TON of glue… tacky. Thrilled to pieces and can't wait to try it. Looks rather time consuming though!
i heart these. they are gorgeous. I will have to try…
They are not low maintenance, but SO CUTE! 🙂 Send a pic over if you try it. 🙂
Beautiful! Do you think I can make one for a cushion?
absolutely- bigger petals and a little more time and this would totally be a cushion!
could you make these from any fabric or must it be something thick like felt?
Laney, I bet you could try other fabrics, especially ones that don’t fray. The drape will be different, but I think it’ll still look good?
These are beautiful! Going to make some to attach to beautiful crocheted hats as well as canvas wall art for my 19 year old baby’s room . Thanks for a great idea.