
how to make a backyard puppet theater
As an Amazon Associate I earn from qualifying purchases.

Once warmer weather hits, we pretty much live in our backyard. Between sprinkler running, barbecuing, picnicking (does it count as a picnic if it’s in your own backyard?), and summer night star gazing, come May, the backyard is our favorite spot. This summer, we were wanting to add another feature to our Backyard Fun Repertoire.
As soon as we saw this doorway puppet theater at Country Living, we knew it was a project we’d be attempting. Add a few orange accents, and we’re ready to Color Our Summer (or backyard at least) with puppet show-y goodness!
We basically followed Country Living’s tutorial (as always, there were a few tweaks along the way)… And since there aren’t step by step photos at Country Living, we even took pics along the way to share with you here!
Want to make a backyard puppet theater too?
1. Gather your supplies-
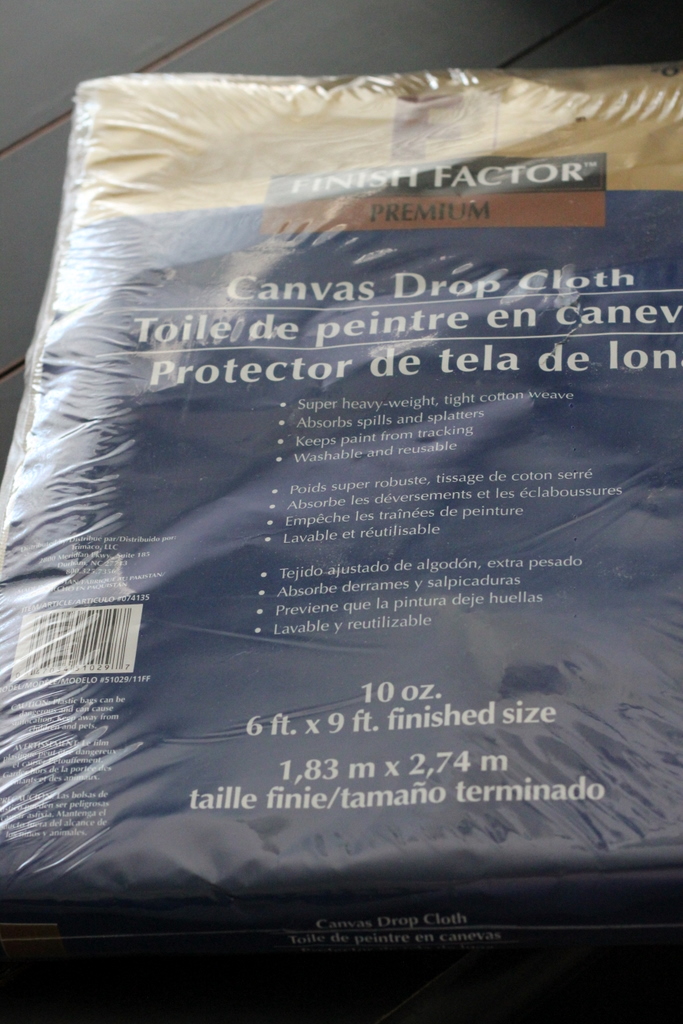
-A 6’x9′ dropcloth (you could also use a curtain, but a drop cloth is both cheap, sturdy, and perfect for backyard use)
-A yard or so of orange fabric (or whatever other color suits your fancy)
-Sewing machine and supplies
-A matching felt bunting for kicks

2. Fold your drop cloth in half horizontally (this ensures your ‘puppet stage’ will be centered). To measure our ideal puppet stage height, I had Burke lay on the drop cloth. I figured that if it’d accommodate a standing three-year-old, it’d be a good height for both older kids (sitting on their knees) and younger kids (reaching up). Mark your measurement.
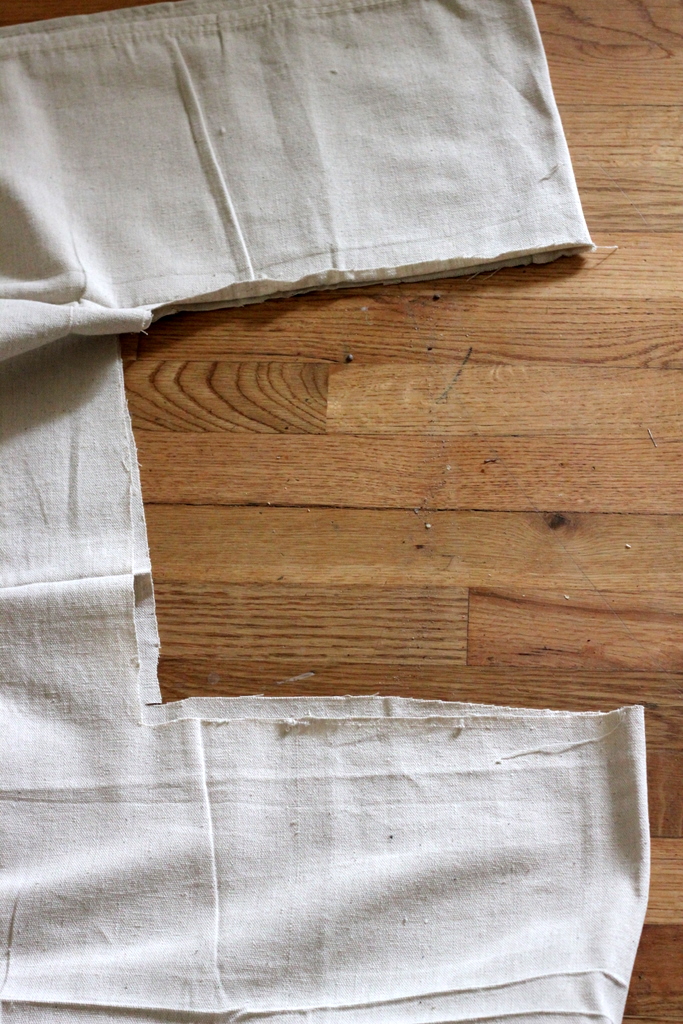
3. Cut out your ‘stage’ (I drew it out first because I’m not great at cutting straight lines). Mine is 24″ wide and 16″ tall. *Tip- since your drop cloth is folded in half, your horizontal line will only need to be half of your finished length (since I wanted a 24″ window, I drew a 12″ horizontal line).

4. Iron/sew strips of heavy interfacing around the four sides to stabilize the sides of your ‘stage.’

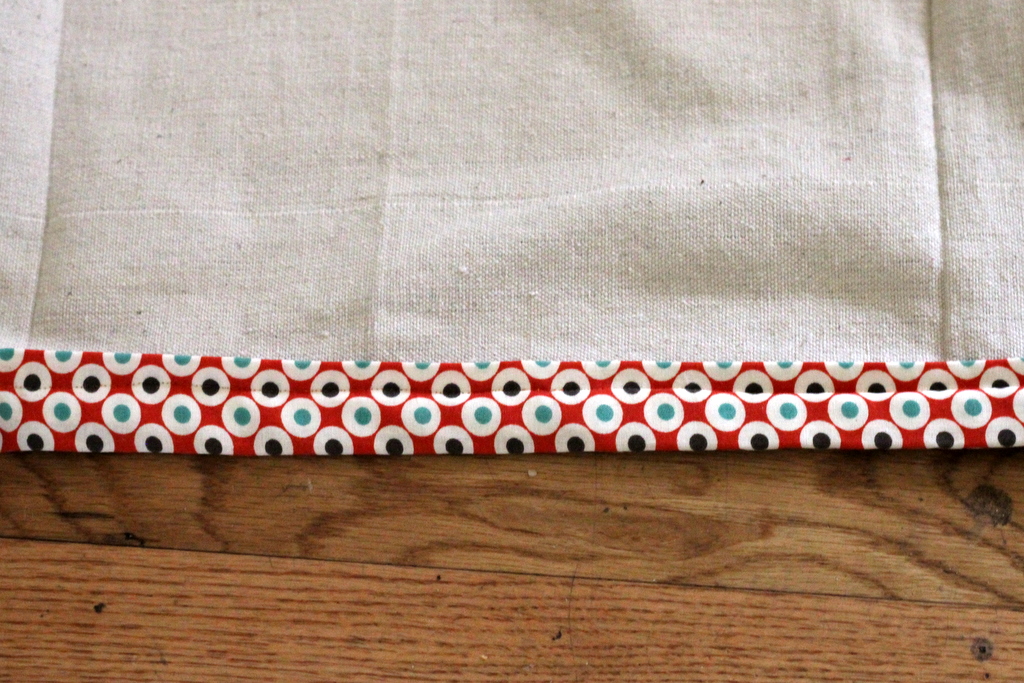
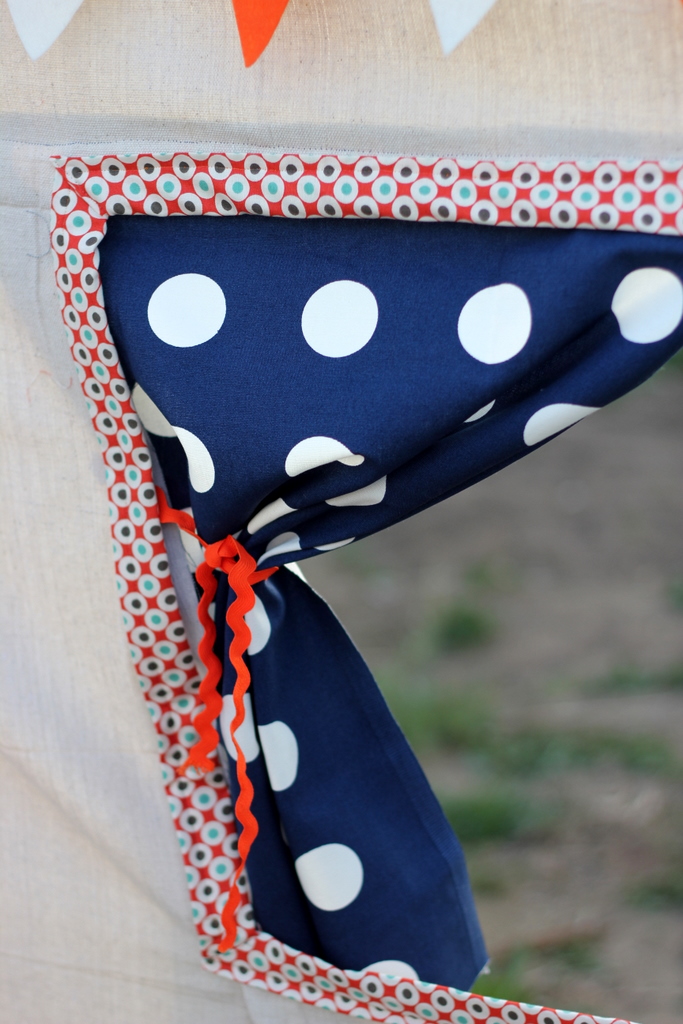
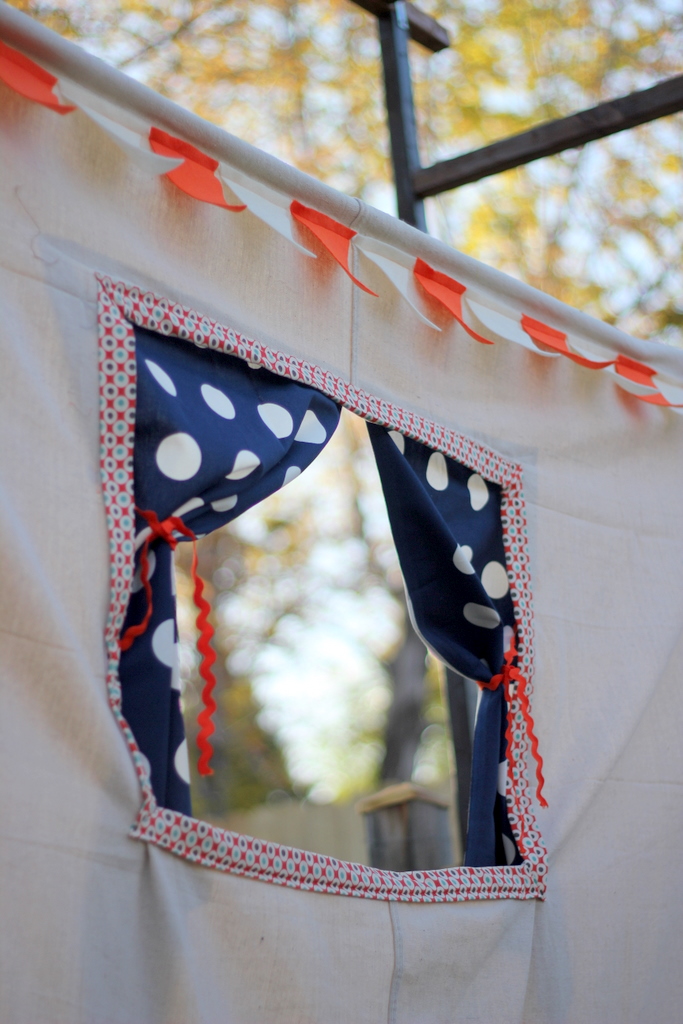
5. Cut 6″ wide strips of fabric. Iron in half, then in half again. Use this sort-of-bias-tape to cover your rough edges and add a little punch to frame your stage by sewing it around your ‘stage’ framing. At each corner, I tucked the edge into a triangle to make the frame look finished.
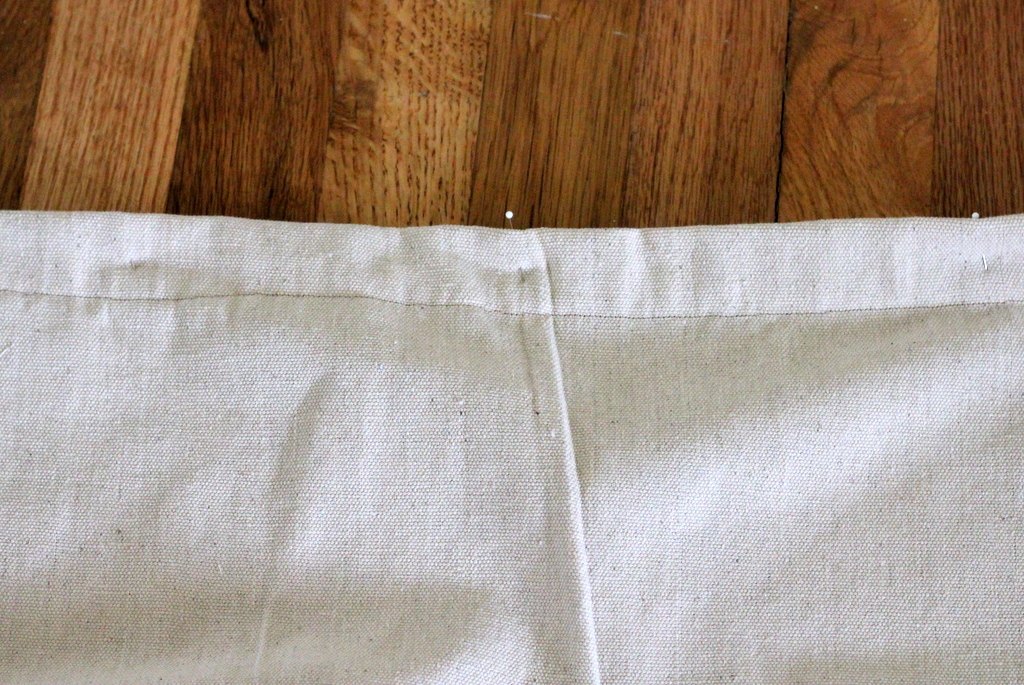
6. Pin down the entire top edge and sew a tunnel/casing. Thread a rope through the casing for easy hanging. You can also push a dowel rod into the casing to help the center (where the ‘stage’ is) hang nicely.
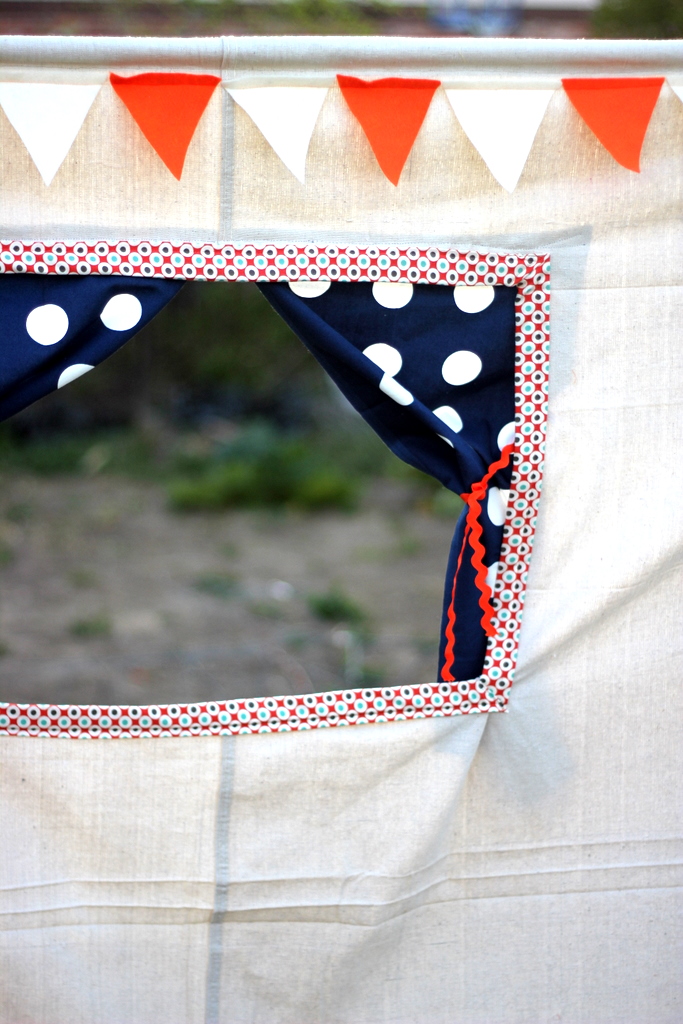
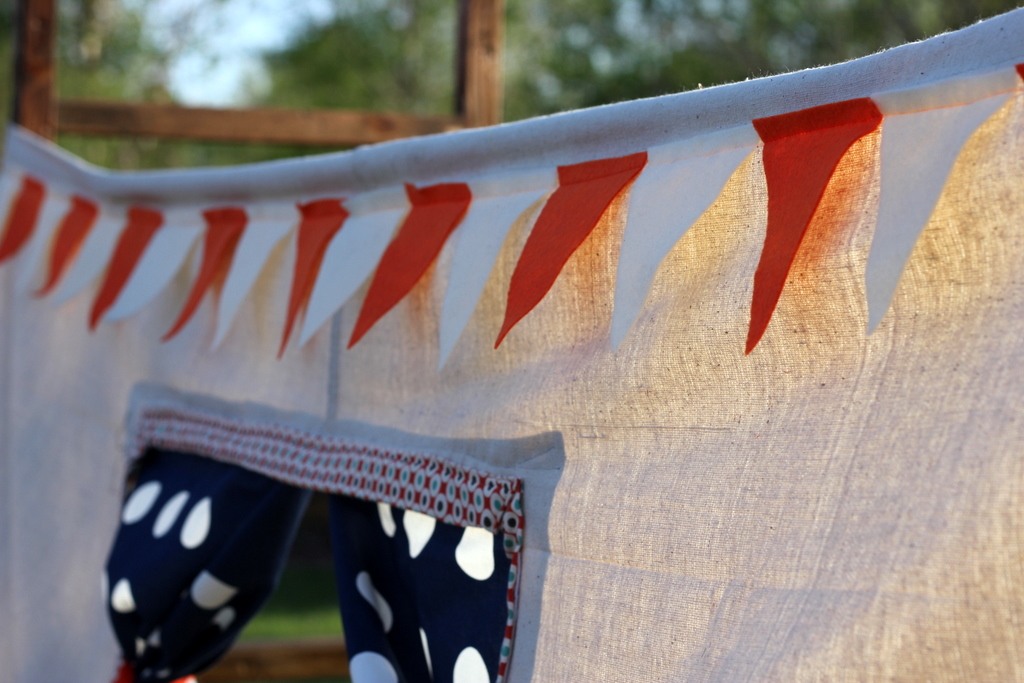
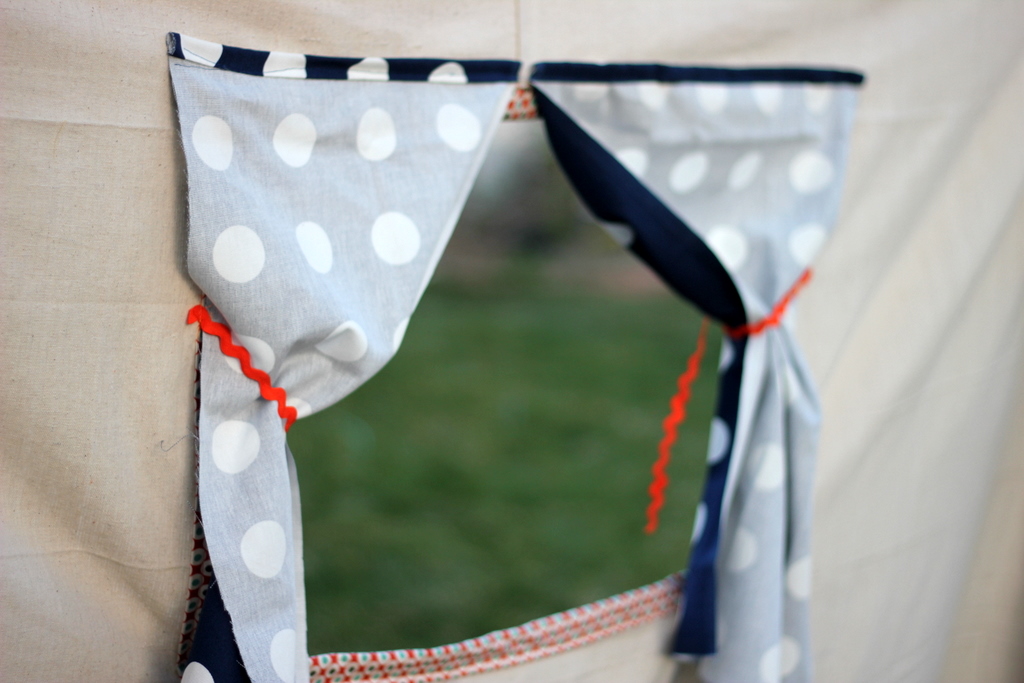
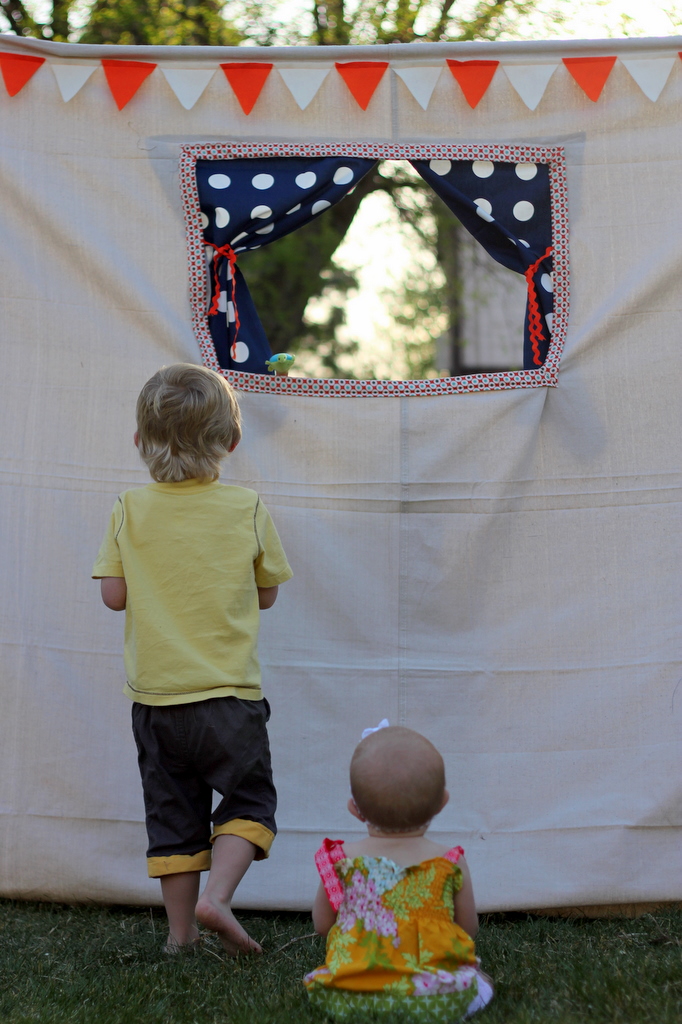
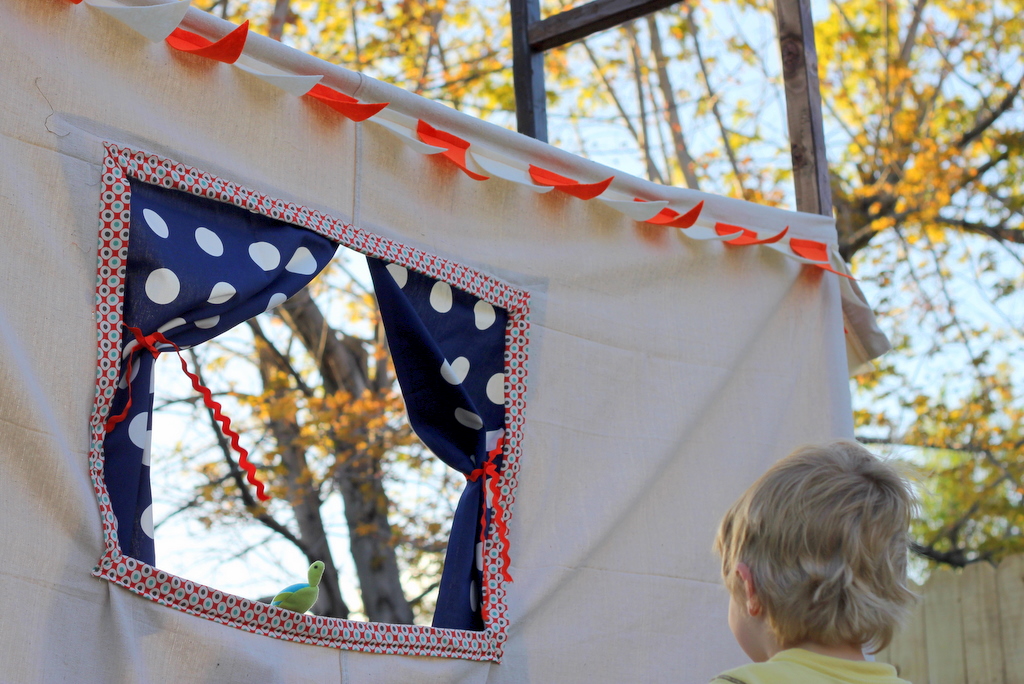
7. Decorate your ‘stage’ with tied-back ‘curtains’ (just two panels of fabric, sewn across the top and cinched to look stage-esque) and a line of festive flags. In case you’re wondering, I sewed the tiebacks in place too (you can see the setup in the picture of the back).


8. Hang in the backyard (we hung ours across the entrance to the garden because of the conveniently located posts, but there were all sorts of possible hanging spots) and enjoy some theatrical family fun!

Looking for more orange-y, summer-y goodness? Head on over to Delia’s to check out Christie’s darling poppy dress!
to say this is cute wouldn't be doing it justice – this is AMAZING!!! I am in love!!! And I might have to recreate for my backyard!!!! Although I will need a might long sheet to start with, I don't think any of our trees are that close together…hmmmm…
I love it!!! I linked to your tutorial on Craft Gossip Sewing:
http://sewing.craftgossip.com/tutorial-backyard-puppet-theater/2011/05/10/
–Anne
so fun!!!! i LOVE the orange accents!!!!
I. Love. This. 🙂 I need to make one stat.
I so want to make this! What a great idea. I love the colors you chose too! I just love navy blue and orange together.
Oh my gosh it's SO ADORABLE!! I love the fabric you used for the curtains and the banner is too cute!
Also love the pic of both kiddos sitting in front of it waiting for the show to start. Too cute!!
That is just the cutest thing ever! I love it!
So fantastic! It just screams "childhood summers!" I love it. Love it more in orange. Thanks so much!
Just a quick note to let you know that a link to this post will be placed on CraftCrave today [14 May 02:15am GMT]. Thanks, Maria
ADORABLE!!!!
I think I will make an indoor one (too hot in Vegas for outdoor summer theater)and use a tension rod and hang it in a doorway. thanks for the idea! I have a few blackout curtains I got on clearance that would be great!
I think I will make an indoor one (too hot in Vegas for outdoor summer theater)and use a tension rod and hang it in a doorway. thanks for the idea! I have a few blackout curtains I got on clearance that would be great!
What a great tutorial!I'm visiting from 101 summer sewing tutorials roundup. {I'm already a follower} Have a great day! http://runwithglitter.blogspot.com
hi Kristin!
I thought that your puppet theater would make a great addition to our outdoor gallery. I plugged it into the theclassroomcreative . Thanks, karen
thanks karen- my mom actually uses it in her classroom (she’s doing puppet shows this week as part of a final literacy project). 🙂
We are huge puppet lovers over here! & used to have a table top theater, but long gone. This would be perfect for summer fun & easy to make, use & fold up. I will definitely have to make one! & share with a link back to you! A new follower.
Thanks Theresa- we’ve gotten a ton of use from it. 🙂
Hi there, I love this and have shared it on my blog. Ive included one picture, your website and a link to this tutorial, please let me know if this isnt okay and ill take the post down, I just love this idea and wanted to share! Thanks 🙂