
winter wonderland couture ruffle dress
As an Amazon Associate I earn from qualifying purchases.
About this time last year, I was a few months pregnant with Piper Jane. And I should tell y’all, I get so sick when I’m pregnant. Like nine-months-of-vomit sick. In the middle of all of the yuck, I remember writing a funny note to Babycakes #2 (now Piper Jane) about how I am lousy at making boy stuff, and how I’m better at sewing for girls. I promised a whole wardrobe of cute dresses to Baby #2 should she, in fact, be a SHE.

Fast forward to August when Little Miss Priss joined our family. This fluffy, ruffle-y goodness is what I had in mind. 🙂

To make a layers-of-white-and-cream dress for a baby girl in your life, you’ll need:
-eleven or twelve strips of 4″ tall fabric (I used silk and cotton)
-a large rectangle of jersey (your size will be determined by your ‘model’)
-a length of elastic, about the same length as your wearer’s waist measurement
-a sleeveless onesie in your wearer’s size
-ribbon for a belt (mine is a yard and a half of velvet ribbon)
-small circles of chiffon, silk and cotton for the belt ruffles
1. Measure your little ‘model’ from her sternum to below her knees. This will be the height of your jersey rectangle (which will be the base of the bottom of your dress). Measure the circumference of her waist/chest and double or triple (or somewhere in between), depending on how fluffy you want your dress to me (mine is doubled). This number will be the length of your jersey rectangle. Cut your jersey rectangle and sew together into a tube (you could also use the bottom of a white tshirt since that is already a tube of jersey). Rip long strips of silk and cotton (this gives the edges that gently tattered look). They should be about 4″ tall and longer than your tube of jersey. You’ll gather the top edge of each one, so they don’t have to be uniform in length, just longer than the jersey.
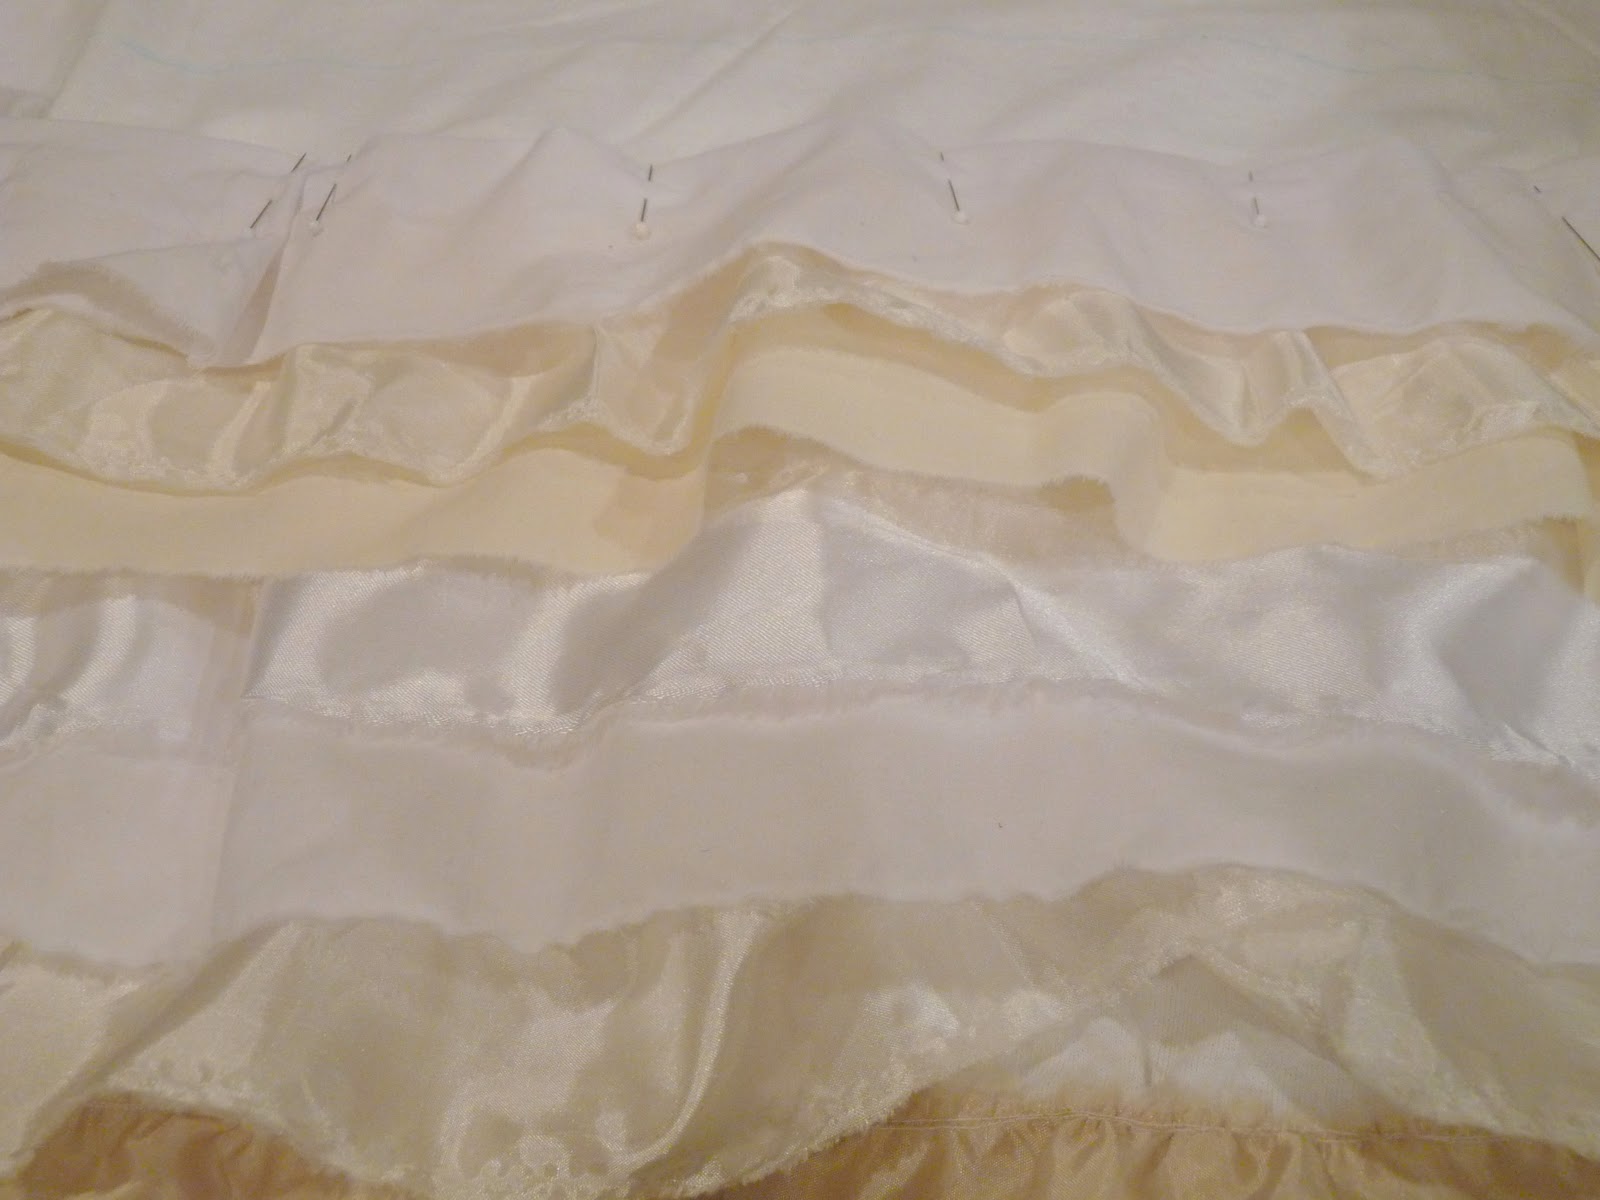
2. Starting at the bottom, start sewing on the strips of fabric one at a time. Alternate materials and colors (play with this beforehand to find an order that’s pleasing to the eye). Make sure the bottom of one ruffle/fabric strip entirely covers the top of the next.
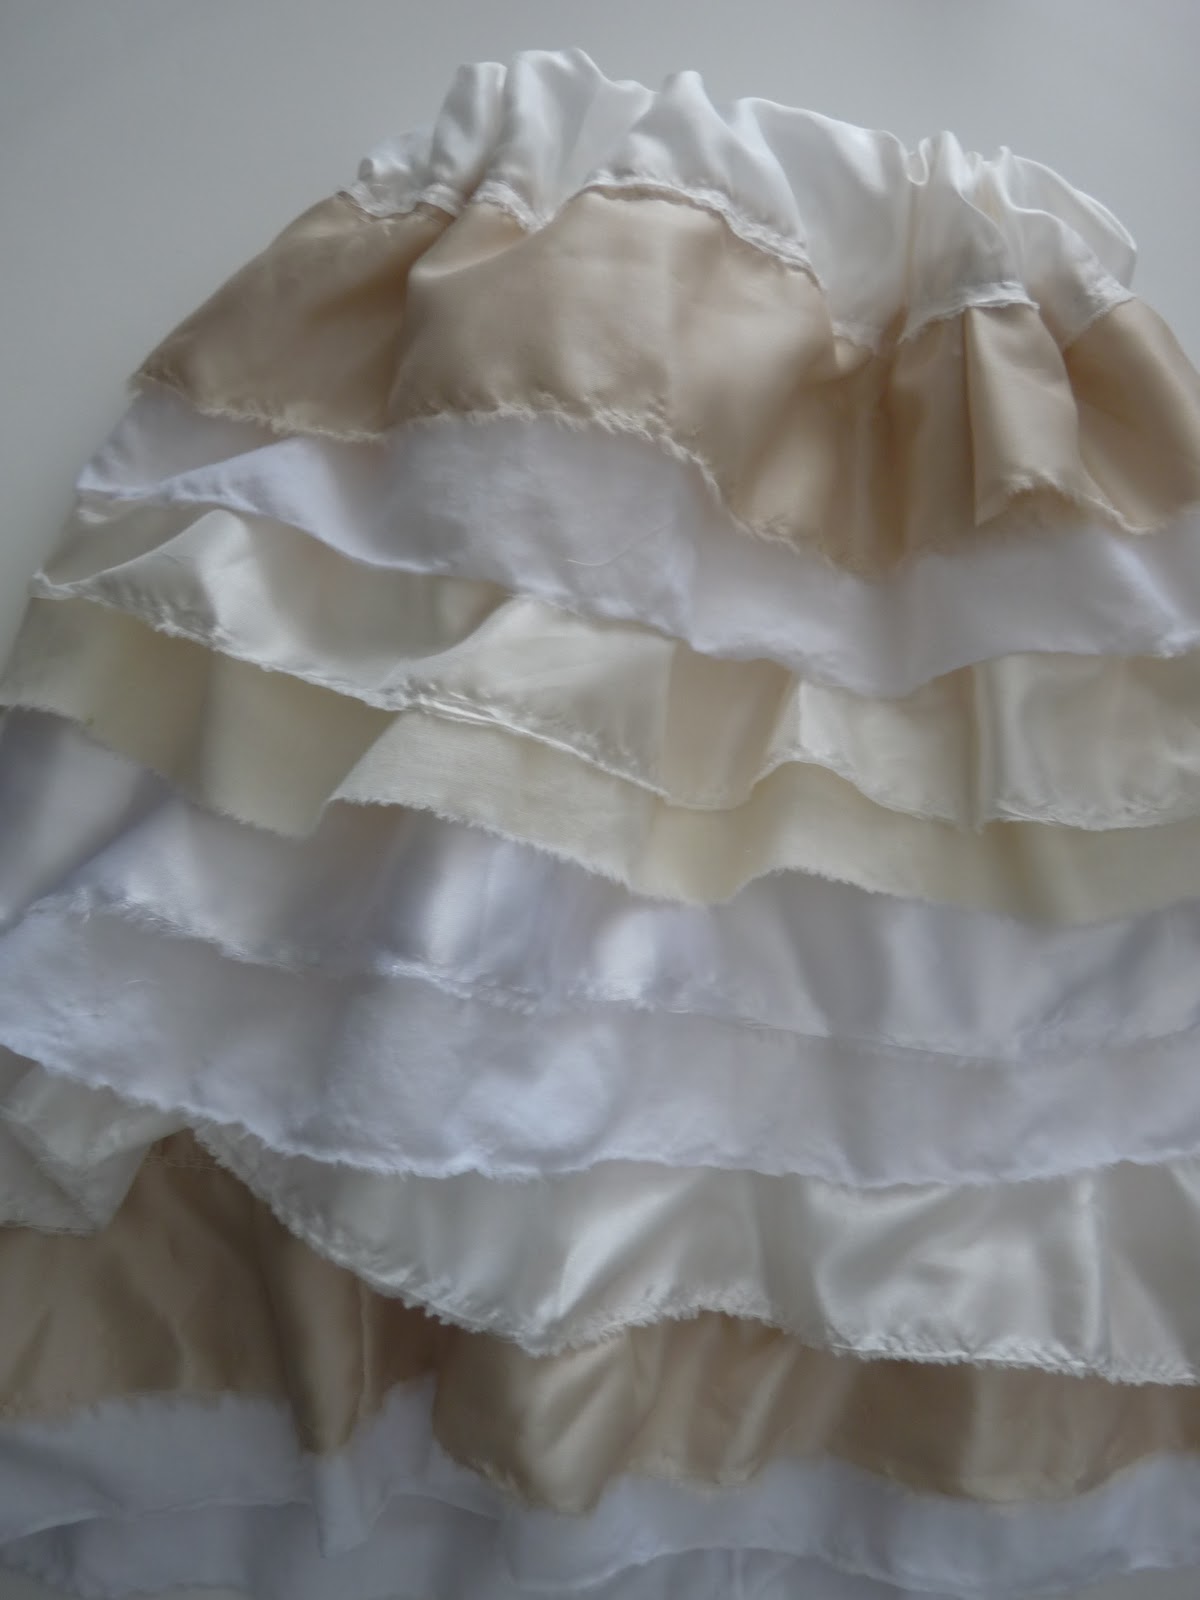
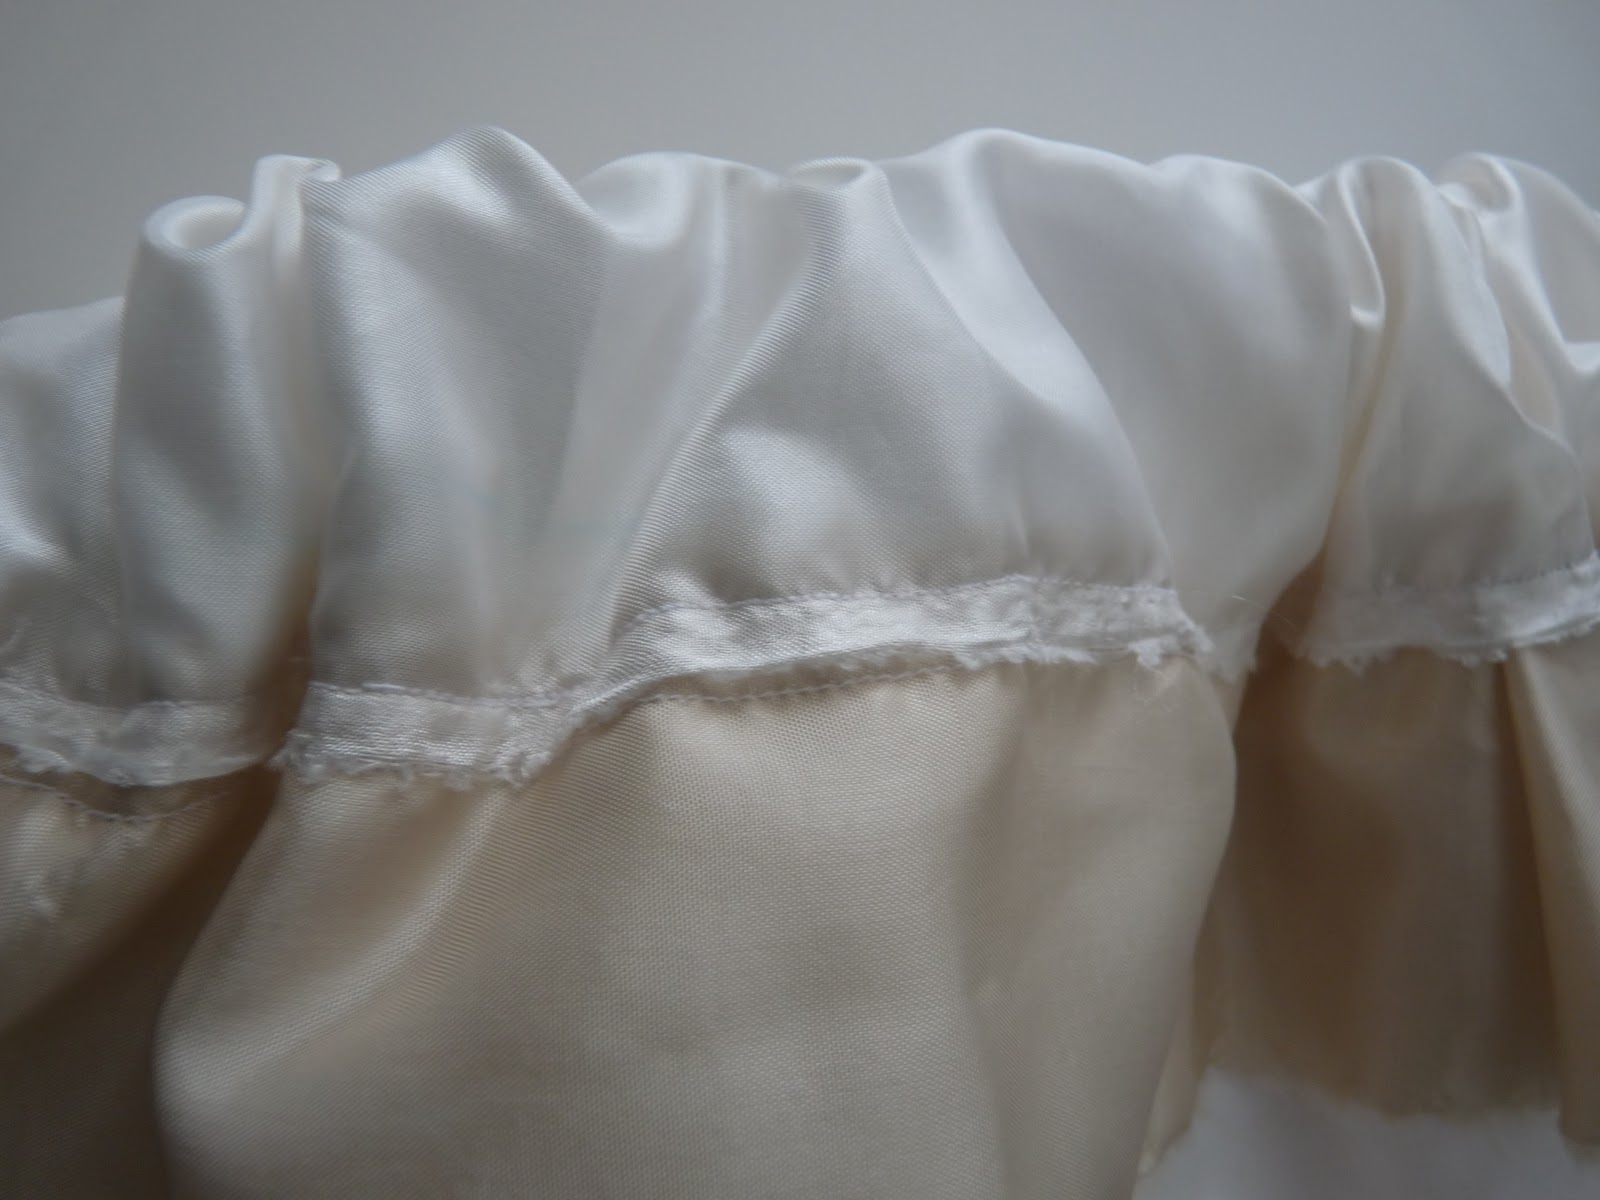
3. When you have a ruffled tube of jersey, fold down the top and sew a ‘tunnel’ (this will be your elastic casing). I ended up having to then sew down the bottom of the top ruffle so that it wasn’t sticking straight out. Thread elastic into the casing (measure your little one first to see how much elastic you’ll need) and sew the two ends of elastic together to cinch the top of the tube (it should look like a ruffle-y skirt at this point).
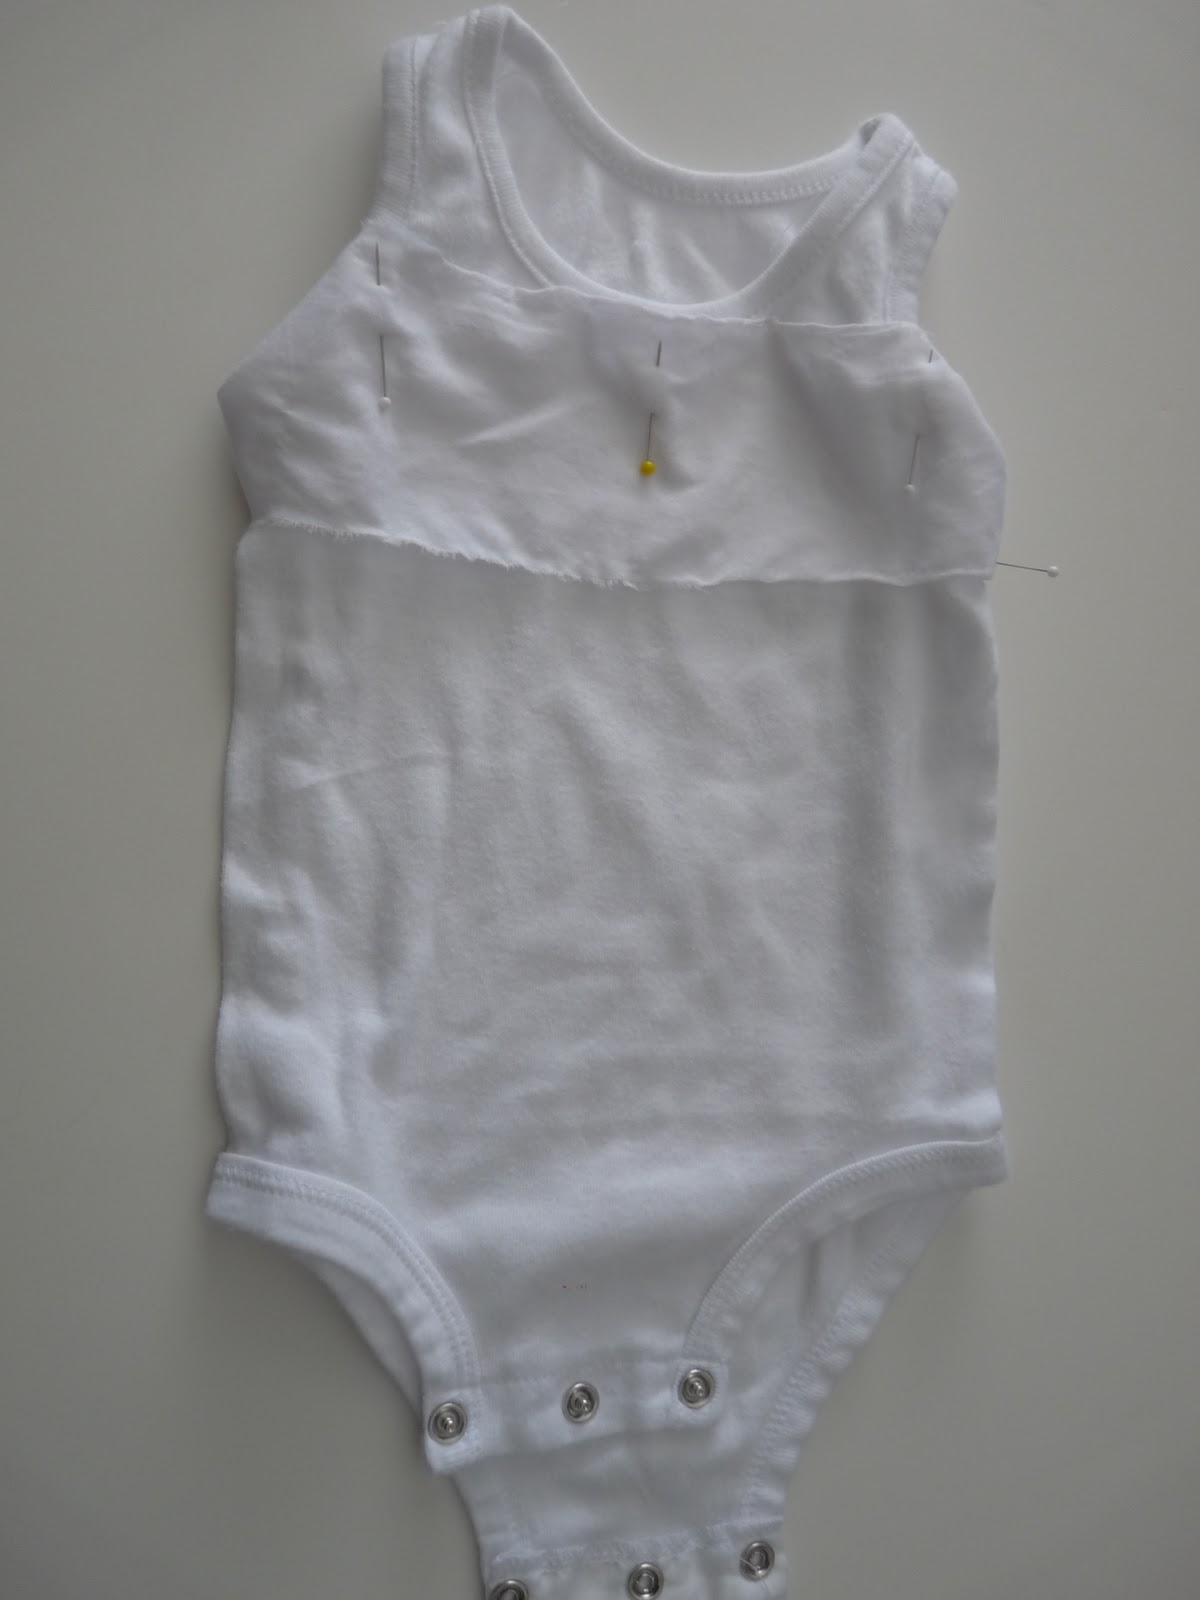
4. In keeping with the ‘only jersey touching the skin’ rule, I used a sleeveless onesie for the bodice. First, I sewed a ‘ruffle’ (another fabric strip with tattered edges) along the top of the onesie, across the bottom of the neckline, alomg each armhole, with the tattered bottom edge dipping about an inch below the base of the armholes.
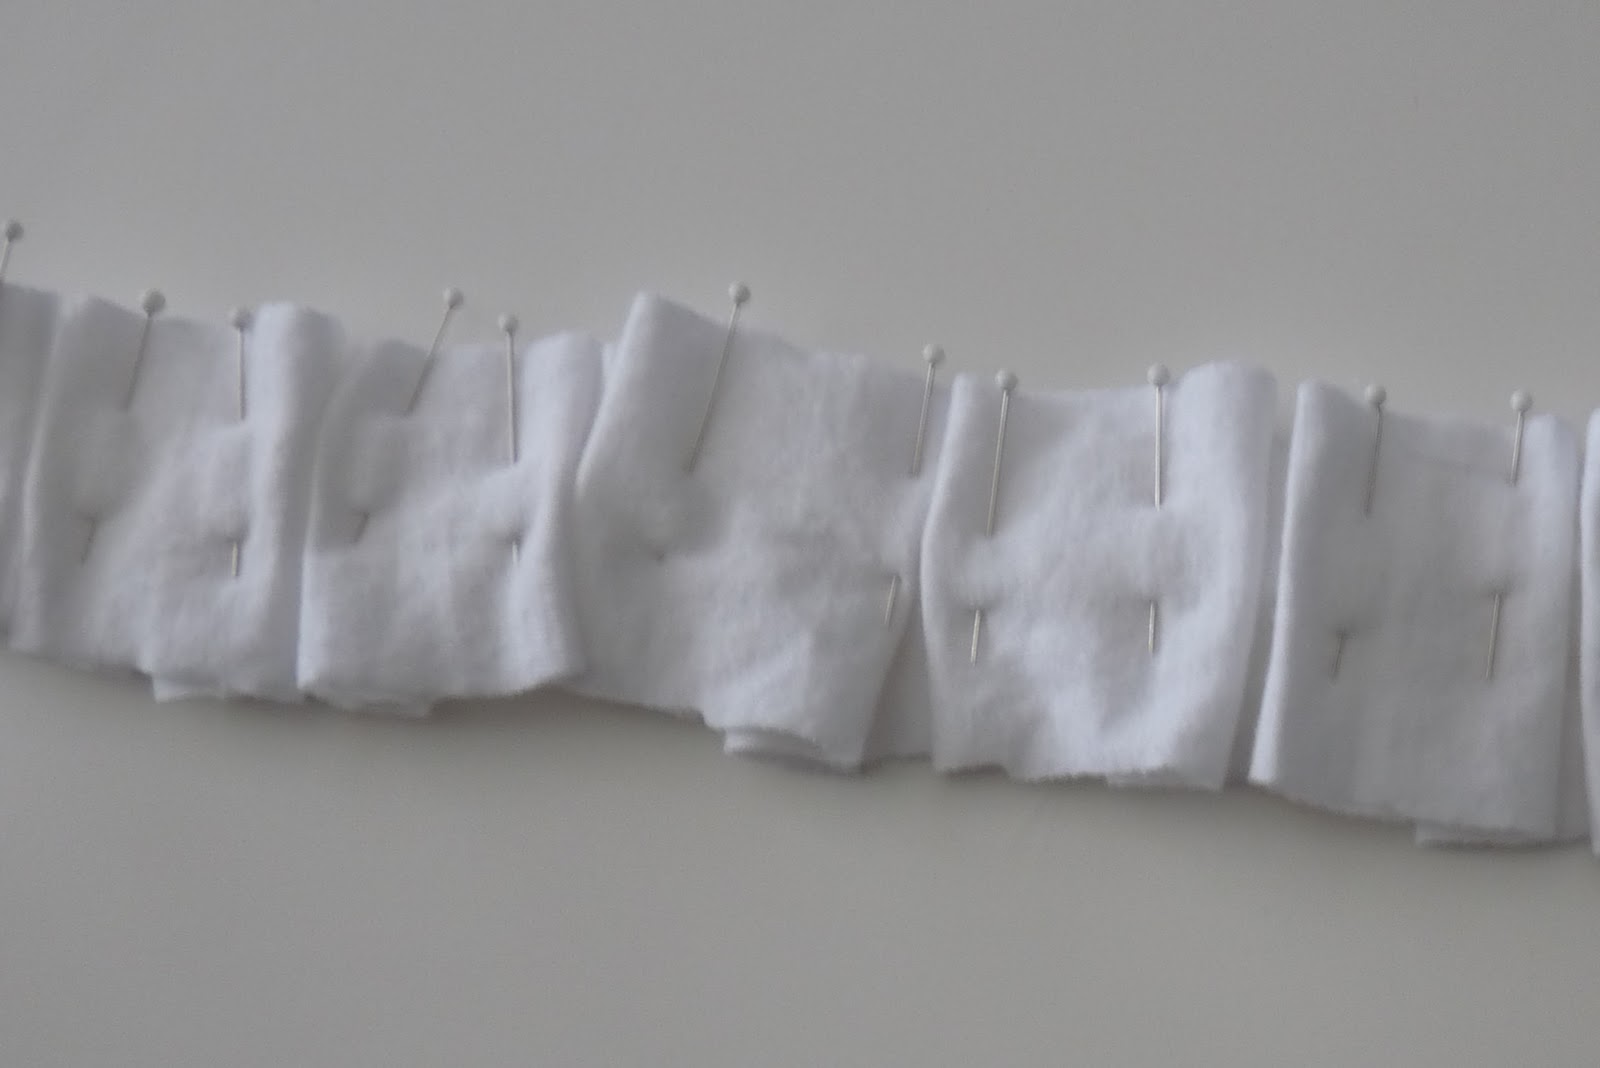
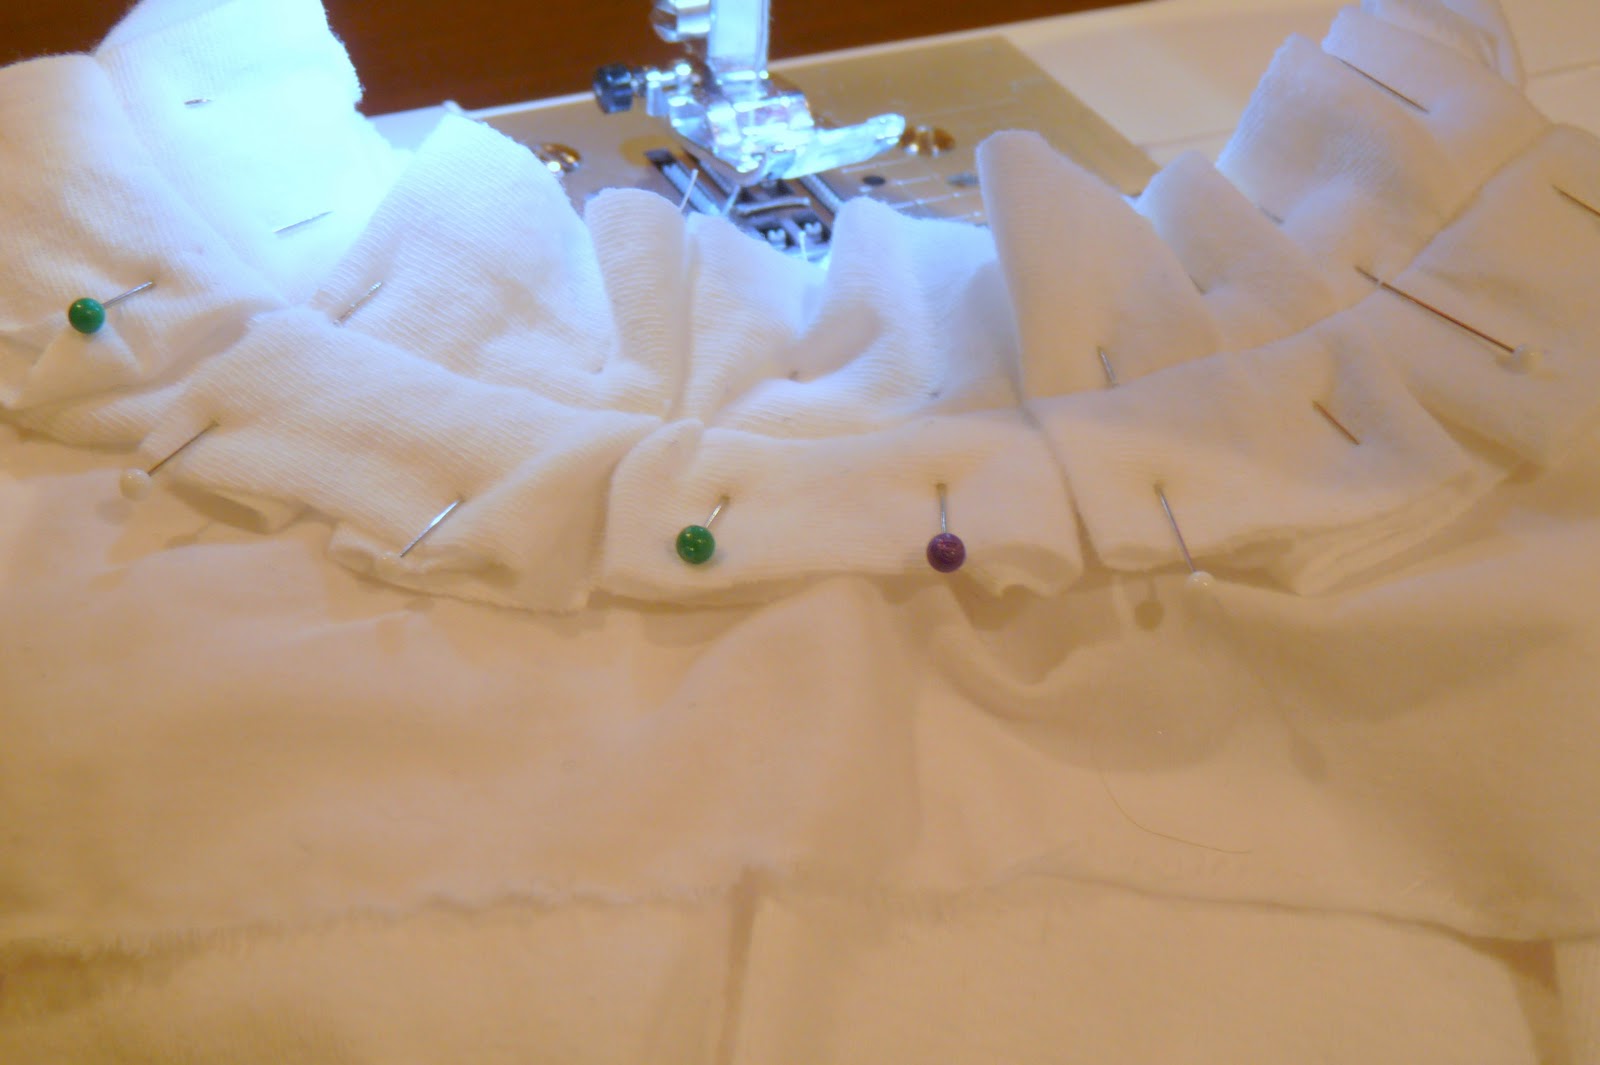
5. Then I made a long, thing strip of pleated jersey (pin in place as shown and then stitch down the middle). I pinned the strip around the collar, slightly overlapping the ‘ruffle’ from step 4 and sewed in place.

6. To attach the ruffled bottom to the now ruffled top, turn the skirt inside out. Slide the ruffled onesie into the tube/bottom until the top of the tube meets up with the fabric strip ruffle. Lift the ruffle and pin the top of the tube under the ruffle on the onesie. At this point, the inside out, upside down ruffled bottom should be pinned in place on the onesie.
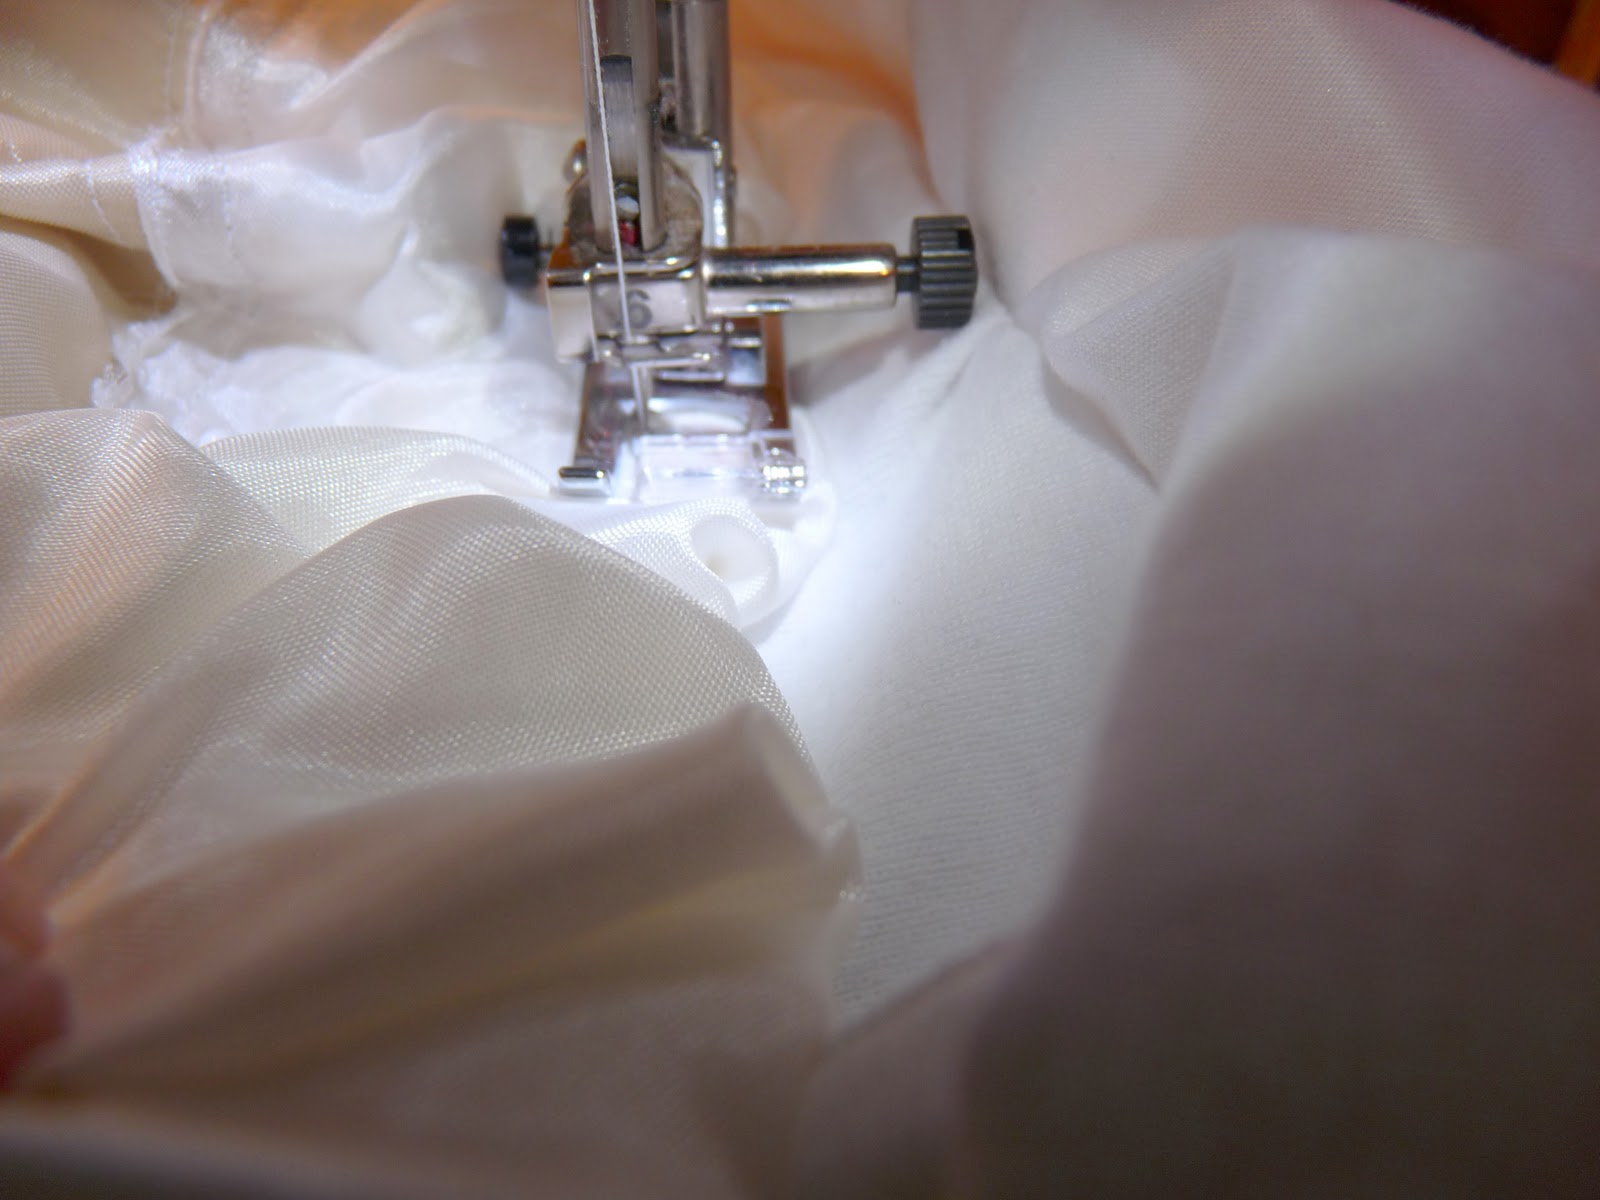
7. Sew the two pieces together, being careful not to catch the ruffled bottom or the ruffle that’s sewn on the onesie in your line of stitching. You’re just attaching the bottom to the top.

8. Make a belt using the same ruffling method as I described in the tutorial for the winter wonderland headband. Tie in place below the spot where the top and the bottom meet (mine was along the top, sewn-down ruffle of the bottom piece).

9. Pair with a cute headband and you’re done.


I am so in love with this dress. Was not expecting a tutorial on it at all, thank you so much for this!!!
hands down the most gorgeous child ive ever seen!
This is a beautiful dress for Miss Piper Jane! And you are an amazing mom to both Burkey Boy and Piper Jane (and a fabulous aunt too!).
The dress is almost as beautiful as Piper! 🙂 You did a fabulous job.
wow such a beautiful dress on a beautiful baby! she truly looks like an angel.
Oh, that is the sweetest little dress, and the cutest little baby. I love it. I might have to see if I can make it for my new grandchild (only if it is a girl, of course!)
scrumptious!!
This dress is gorgeous, but I must say the model far outshines it!!
And I want to let you know I gave you an award over on my blog Killing Time.
This is brilliant!! A fancy dress that's comfortable for baby, too!! I linked to your tutorial over at Craft Gossip Sewing:
http://sewing.craftgossip.com/tutorial-ruffled-baby-dress-lined-in-soft-knit-fabric/2011/01/30/
–Anne
Gorgeous! I"m so happy that I found your blog it is absolutely wounderful. thanks for the tutorial.
Erika
LOVE, i'm actually making one of these for my daughter's blessing dress 🙂
This is the most darling baby dress I've ever seen! Well done 🙂 I've included it in my link round-up on the FaveCrafts Blog: http://www.favecraftsblog.com/link-love-clothes-for-the-little-ones/
Would you be interested in publishing your tutorial on FaveCrafts? Email me if you're interested 🙂
My-oh-my! I LOVE this dress! My little gal is about the same age and I cannot wait to give this a shot. Thank you for the tutorial!
this dress is too cute, i absolutely can not wait to make one for my daughter!
I'm in process of making this awesome dress. I have a question…..the ruffle that is sewn onto the onesie is only on the front? Or did you carry it around to the back? Mine is not looking exactly like yours….mine seems more "shabby", but maybe thats the point?? =)
Awww! So adorable! I am a mommy to twin boys, who just turned 2. I am pregnant with #3 and just found out that it is a girl. I have spent all week drooling over girlie dresses and bloomers and headbands. I know what you mean about being excited about sewing for a little girl. I *hope* I can get the time to start soon. I need some practice before I can attempt dresses. LOL
I love this dress! Did you do anything to the raw edges so that they didnt continue to fray? I am worried about the fabric falling apart:(
Hey Danielle! I didn’t put anything on the edges, but don’t mind if it frays (I kind of like that look, I think). You could probably put fray check on the ends though.
hello! I came across your website through pinterest! I am a very basic, beginner sewer, but LOVE this dress! I do not have any children, but would love this dress as a “someday” dress for a baptism! Would you ever be willing to sell a dress like this?? And for what price?? 🙂
Beth- thanks for your compliments! Wow. We aren’t doing any custom work right now, but thanks for the compliments. 🙂
I just Pinned this! Such a cute tutorial. I do have a question though. So you are not “ruffling” any of the satin fabric correct? The elastic will create the ruffling? Am I thinking it correctly?
Hey Sam! The lengths of satin/muslin/etc. are all longer than the jersey tube. So you sew a basting stitch along the top and gather up the ruffle before attaching it to the skirt. 🙂
If you have any other questions, let me know! 🙂
Love, love, love this dress!! I’m currently attempting to make this out of my wedding dress and my grandma’s wedding dress for my daughter’s baptismal gown. So far it is going great!I did have a question though…. Did you take the ruffle around the neck all the way around? Or just keep it in the front? Thanks again for sharing this!
Hey Amy- I bet that’s going to be gorgeous!
The ruffle goes all the way around the neck (easier than figuring out a way to cleanly stop and start it).
Send me a pic when you’re done- I’d love to see it!
love
k
Thank you so much for this! I made a version of the dress for my daughter. and we got lots of compliments on it 🙂 Thank you again for sharing
I love it that you made one too Kristy! I just packed up Piper Jane’s this weekend (it’s been too small for awhile, but just hanging in her closet). 🙂
This dress is so gorgeous! I am working on it right now and I’m wondering what you did when the ruffle strip ends. Did they meet around the back or on the side? And did you sew the ends together so there isn’t loose ends?
Hey Christy- I love it that you’re making one (you’ll have to send over a picture when you’re finished).
The raw edges met up in the back- and yes, I sewed them together (though, the whole dress has a decent amount of ‘raw edges, so you’d probably be able to get away with leaving them unfinished, or just folding them over). To hide the seams, I made little pleats. With all of the ruffling, you can’t really tell that they’re there. 🙂
Hope that helps!
After hours of searching I stumbled on your dress via pinterest. At first I only found the picture and was heartbroken I couldn’t find a tutorial. It was exactly what I wanted and as I kept hunting for the perfect dress I kept coming back to this one. Imagine how excited I was to FINALLY find the tutorial. I’d love to send you a picture. I added some lace rows to mine and I absolutely love it. Thank goodness there are such talented people out there like you willing to share. If you knew the whole story of how my little angel came to be you’d feel pretty darn amazing that you created the perfect dress for her. Thank you a thousand times!
Bethany, I love this! I’m so glad that you found the tutorial- sounds like you have quite the special little girl. 🙂
Thanks so much for this tutorial! It really inspired me when I was making my daughter’s blessing gown. I finished the edges of the ruffles and also added some lace ones. It was adorable. Thanks!
Julie, I LOVE that! 🙂 I bet it was gorgeous…