
kojotutorial: snowflake banner
As an Amazon Associate I earn from qualifying purchases.

Earlier this month, we had a little Winter Wonderland brunch to celebrate the rapidly approaching arrival of Baby Evie. The decor was super simple- snowflakes, snowflakes, white garlands and more snowflakes!
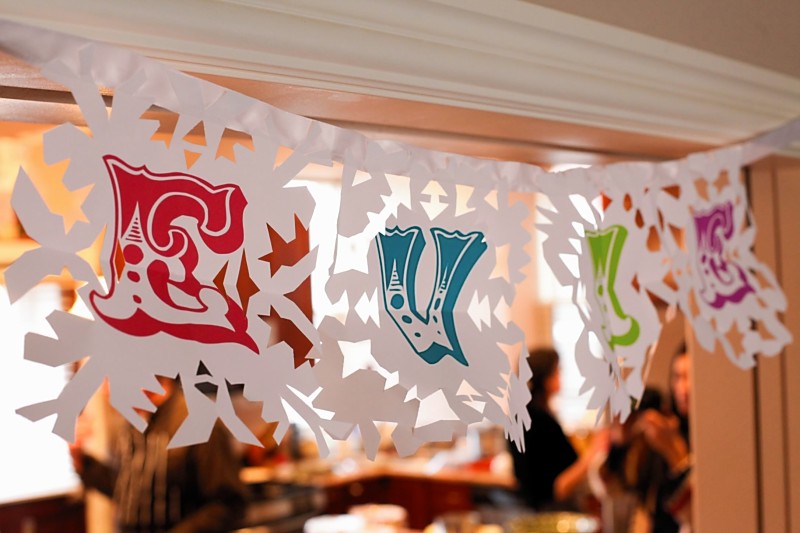
One of my favorite parts was the trio of snowflake banners with Evie’s name on them. Hopefully Jordi can use them to welcome baby girl home… or perhaps even as decor at the hospital? They’re lovely, and, even better, they were super simple to make!
Want to make one too? You’ll need:
-white square pieces of paper, one for every letter of your banner
-a printer
-scissors
-ribbon
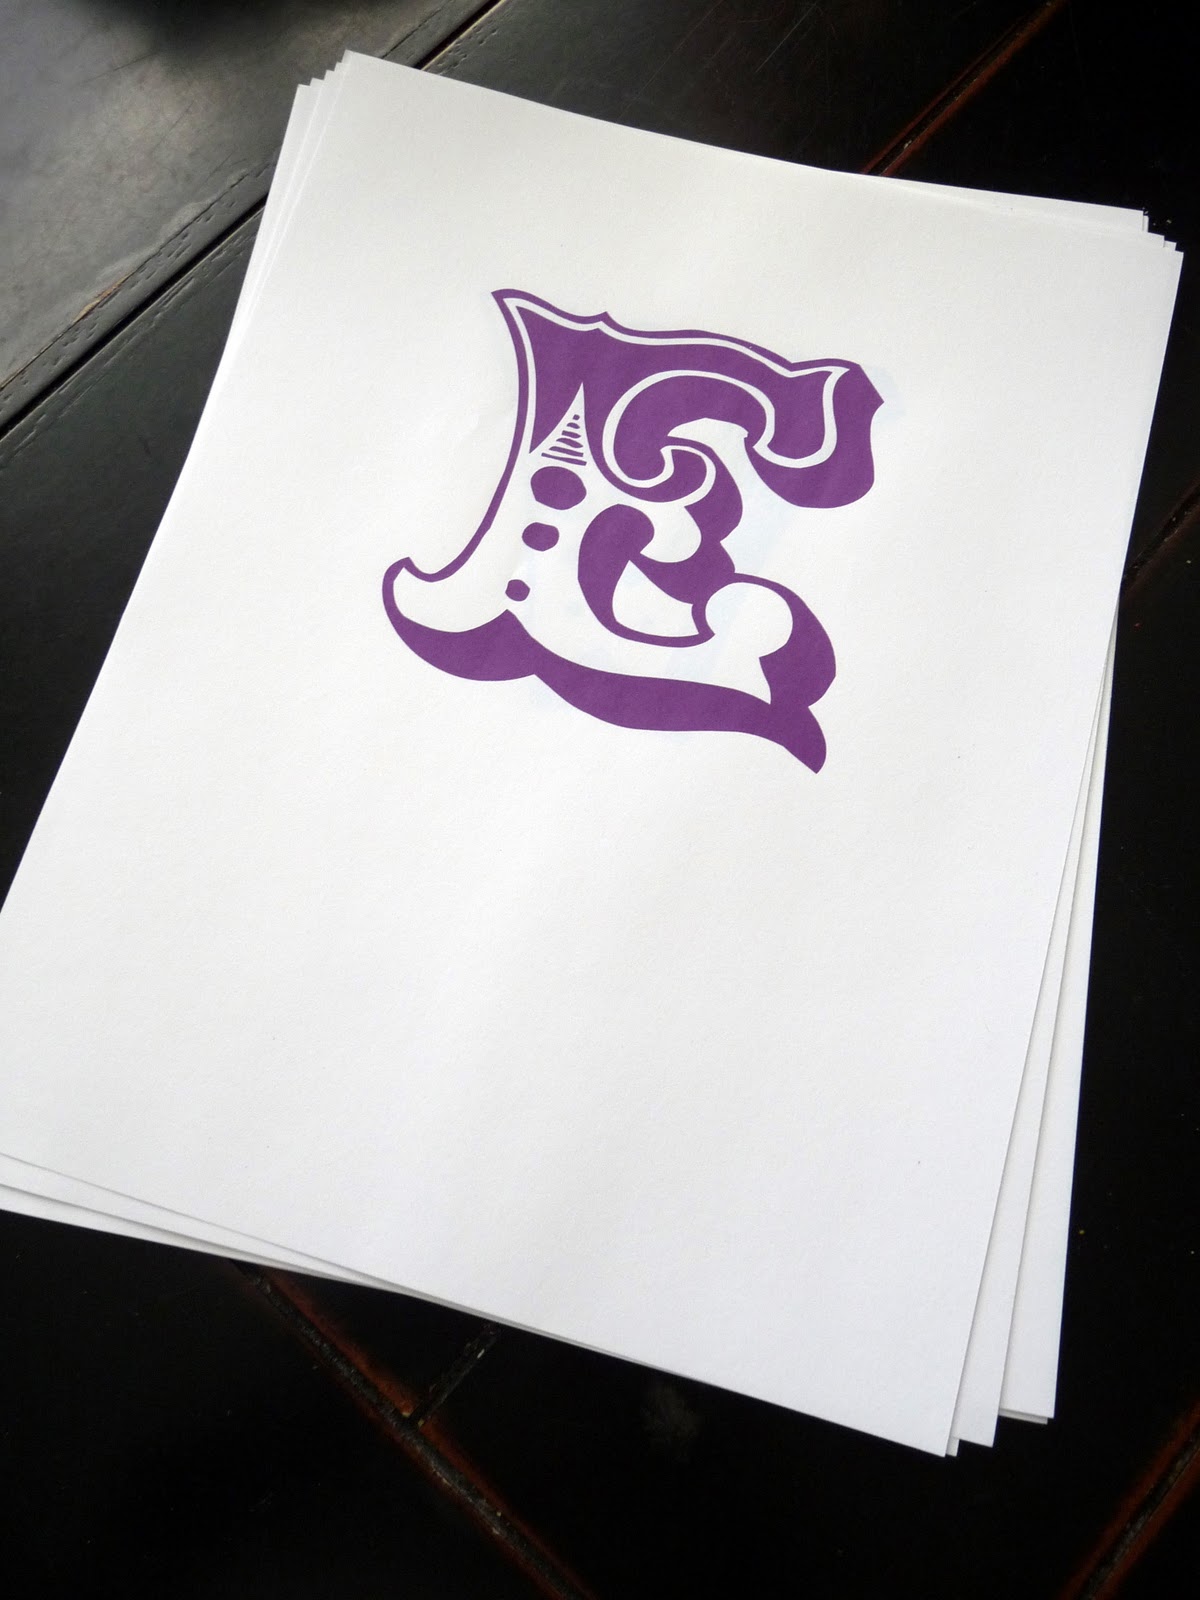
1. Print out the letters for your banner onto letter sized paper (regular printer sized). Make sure your letters are centered horizontally nearer to the top of the paper than the bottom (you’ll be cutting the bottom off).
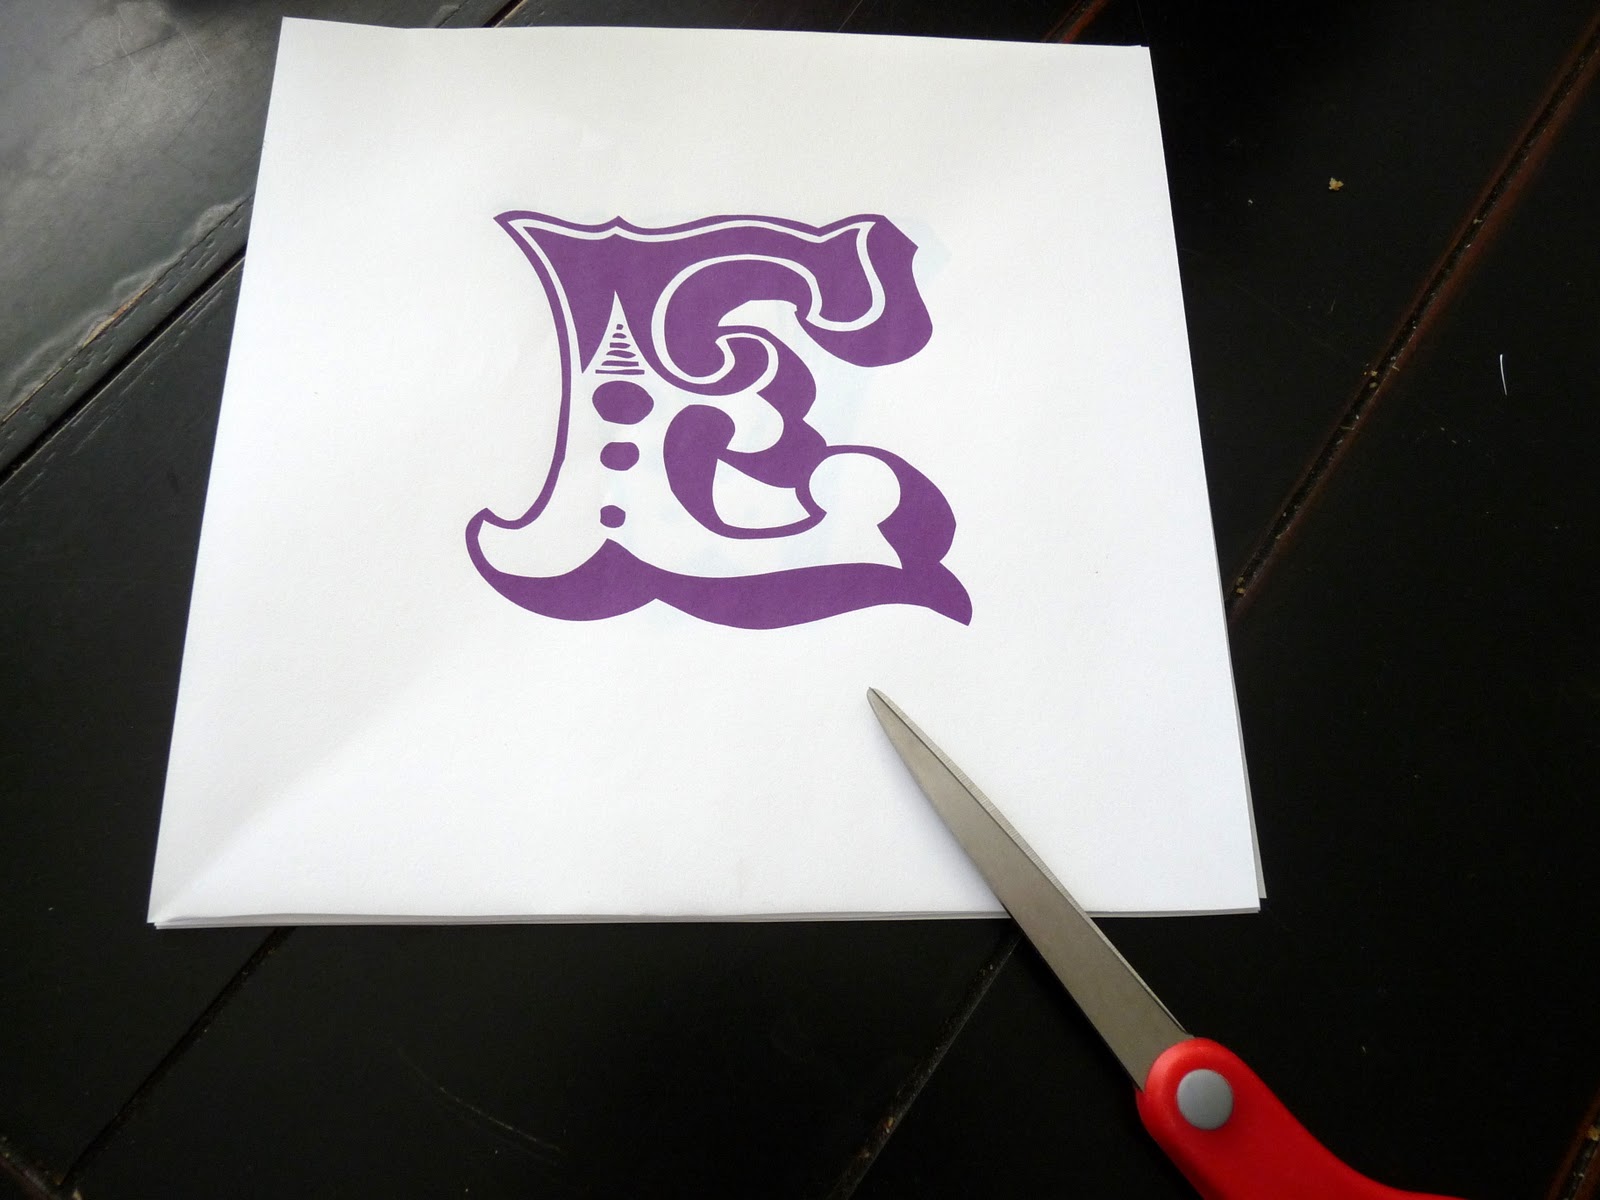
2. Cut off the bottom of your paper off, making a square.
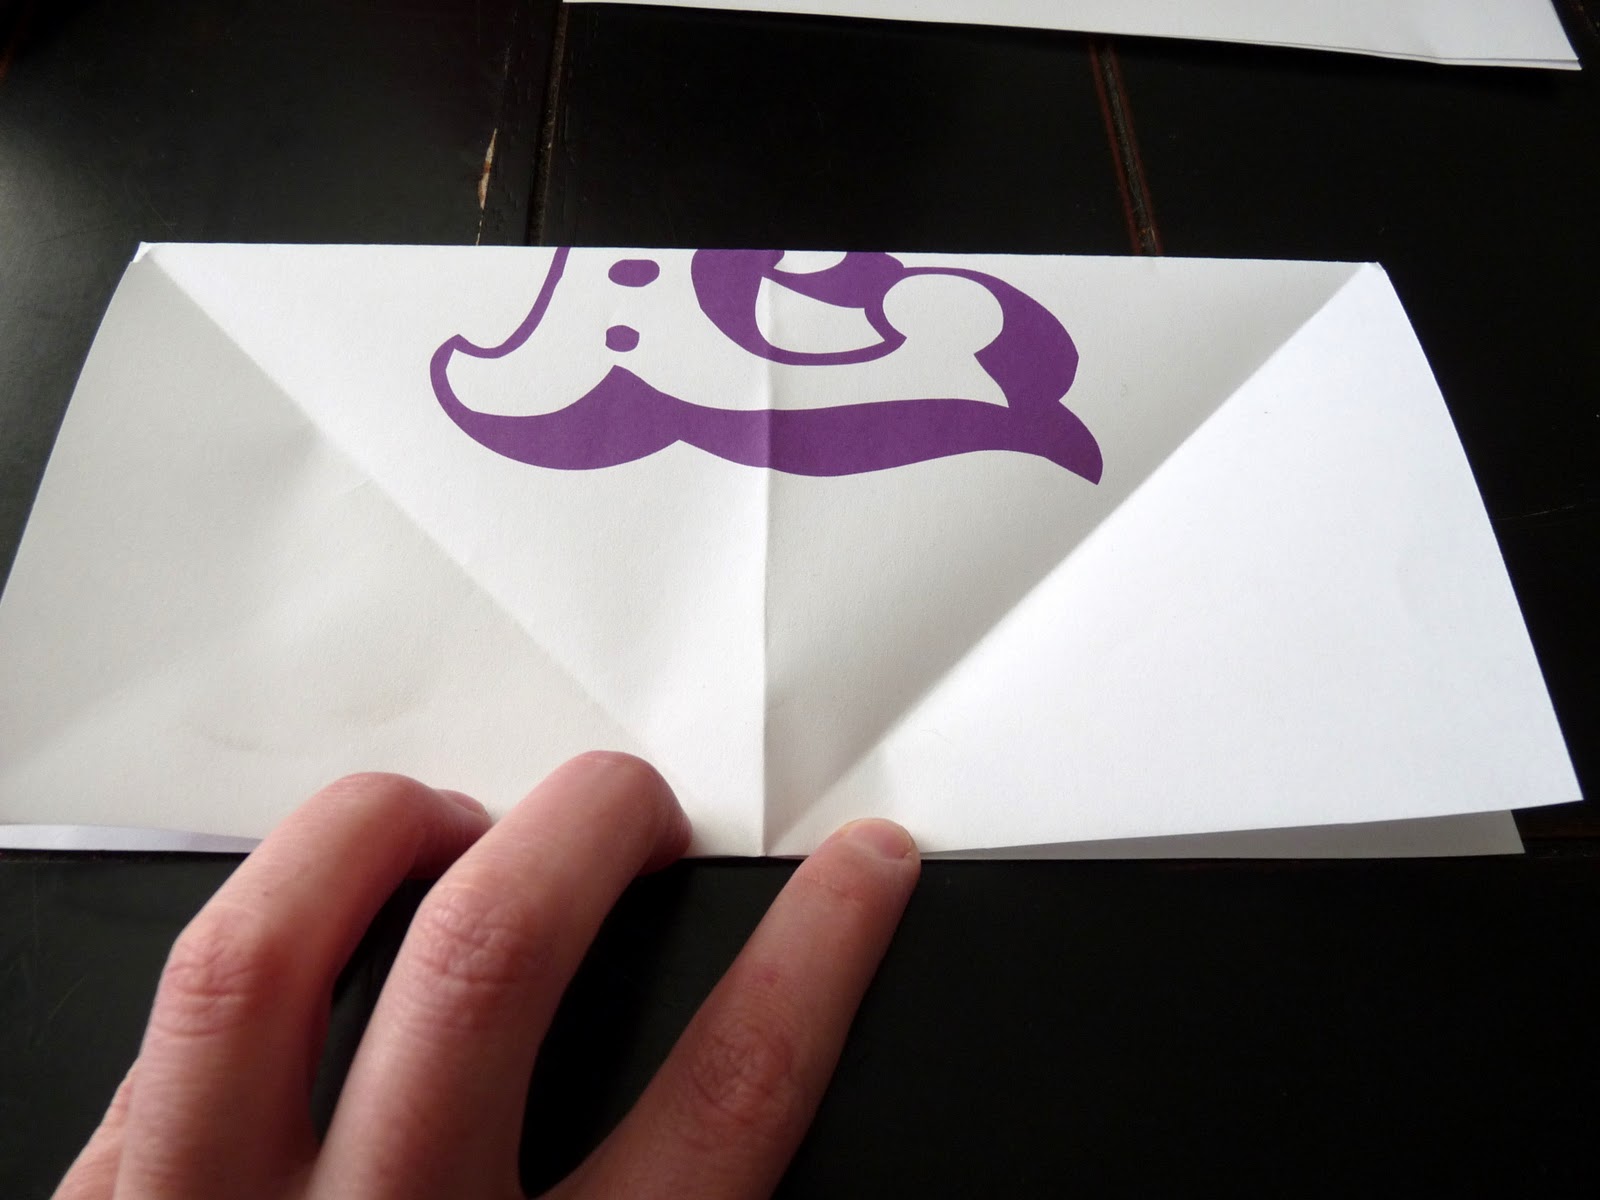
3. Fold your square in half and in half again. Next fold diagonally.

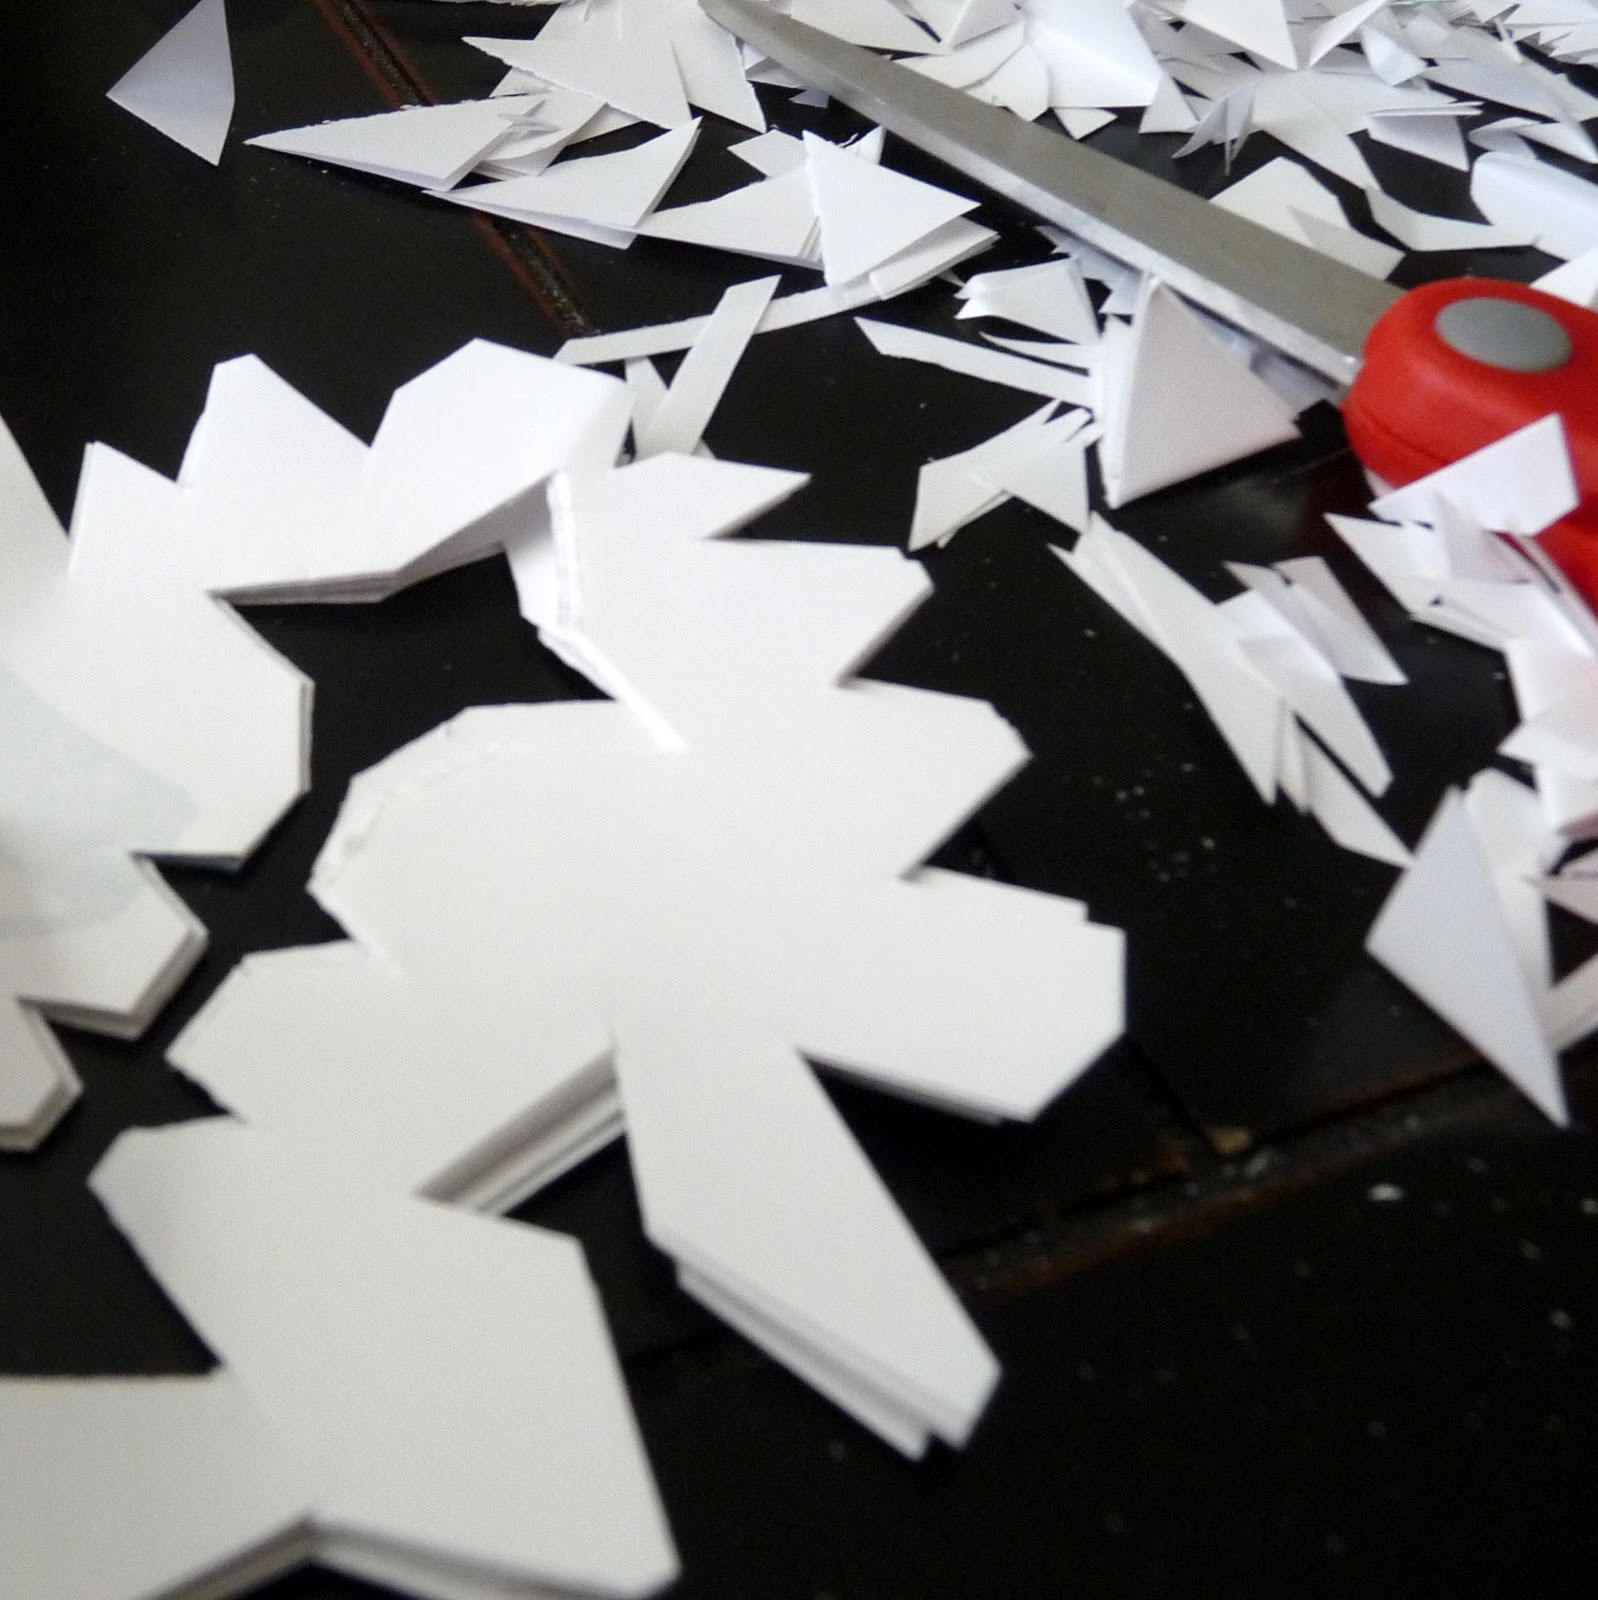
4. Start cutting. Round the corners and cut on all the folds (except the folds that go through the printed letter). Be creative in your shapes and just keep cutting. Repeat for all of your letters.

5. Unfold your ‘snowflakes’ and attach to a ribbon (I did this by sewing across the top, but you could also tie with ribbon or even use hot glue).
6. Hang and admire! Perfect for a winter baby, or for brightening up any winter festivities!
How cool is that! The finished product is awesome!!!!!!!!!
Paula
Oh I LOVE this idea!! I might give it a go for my nephew's birthday in a few weeks 🙂
Oh my gosh, how have I not dscovered this blog before?? It's SOOO awesome!
Oh my gosh, how have I not dscovered this blog before?? It's SOOO awesome!
That snowflake garland is genuis!