
how to make a reading nook from two wooden palettes (part 2)
As an Amazon Associate I earn from qualifying purchases.
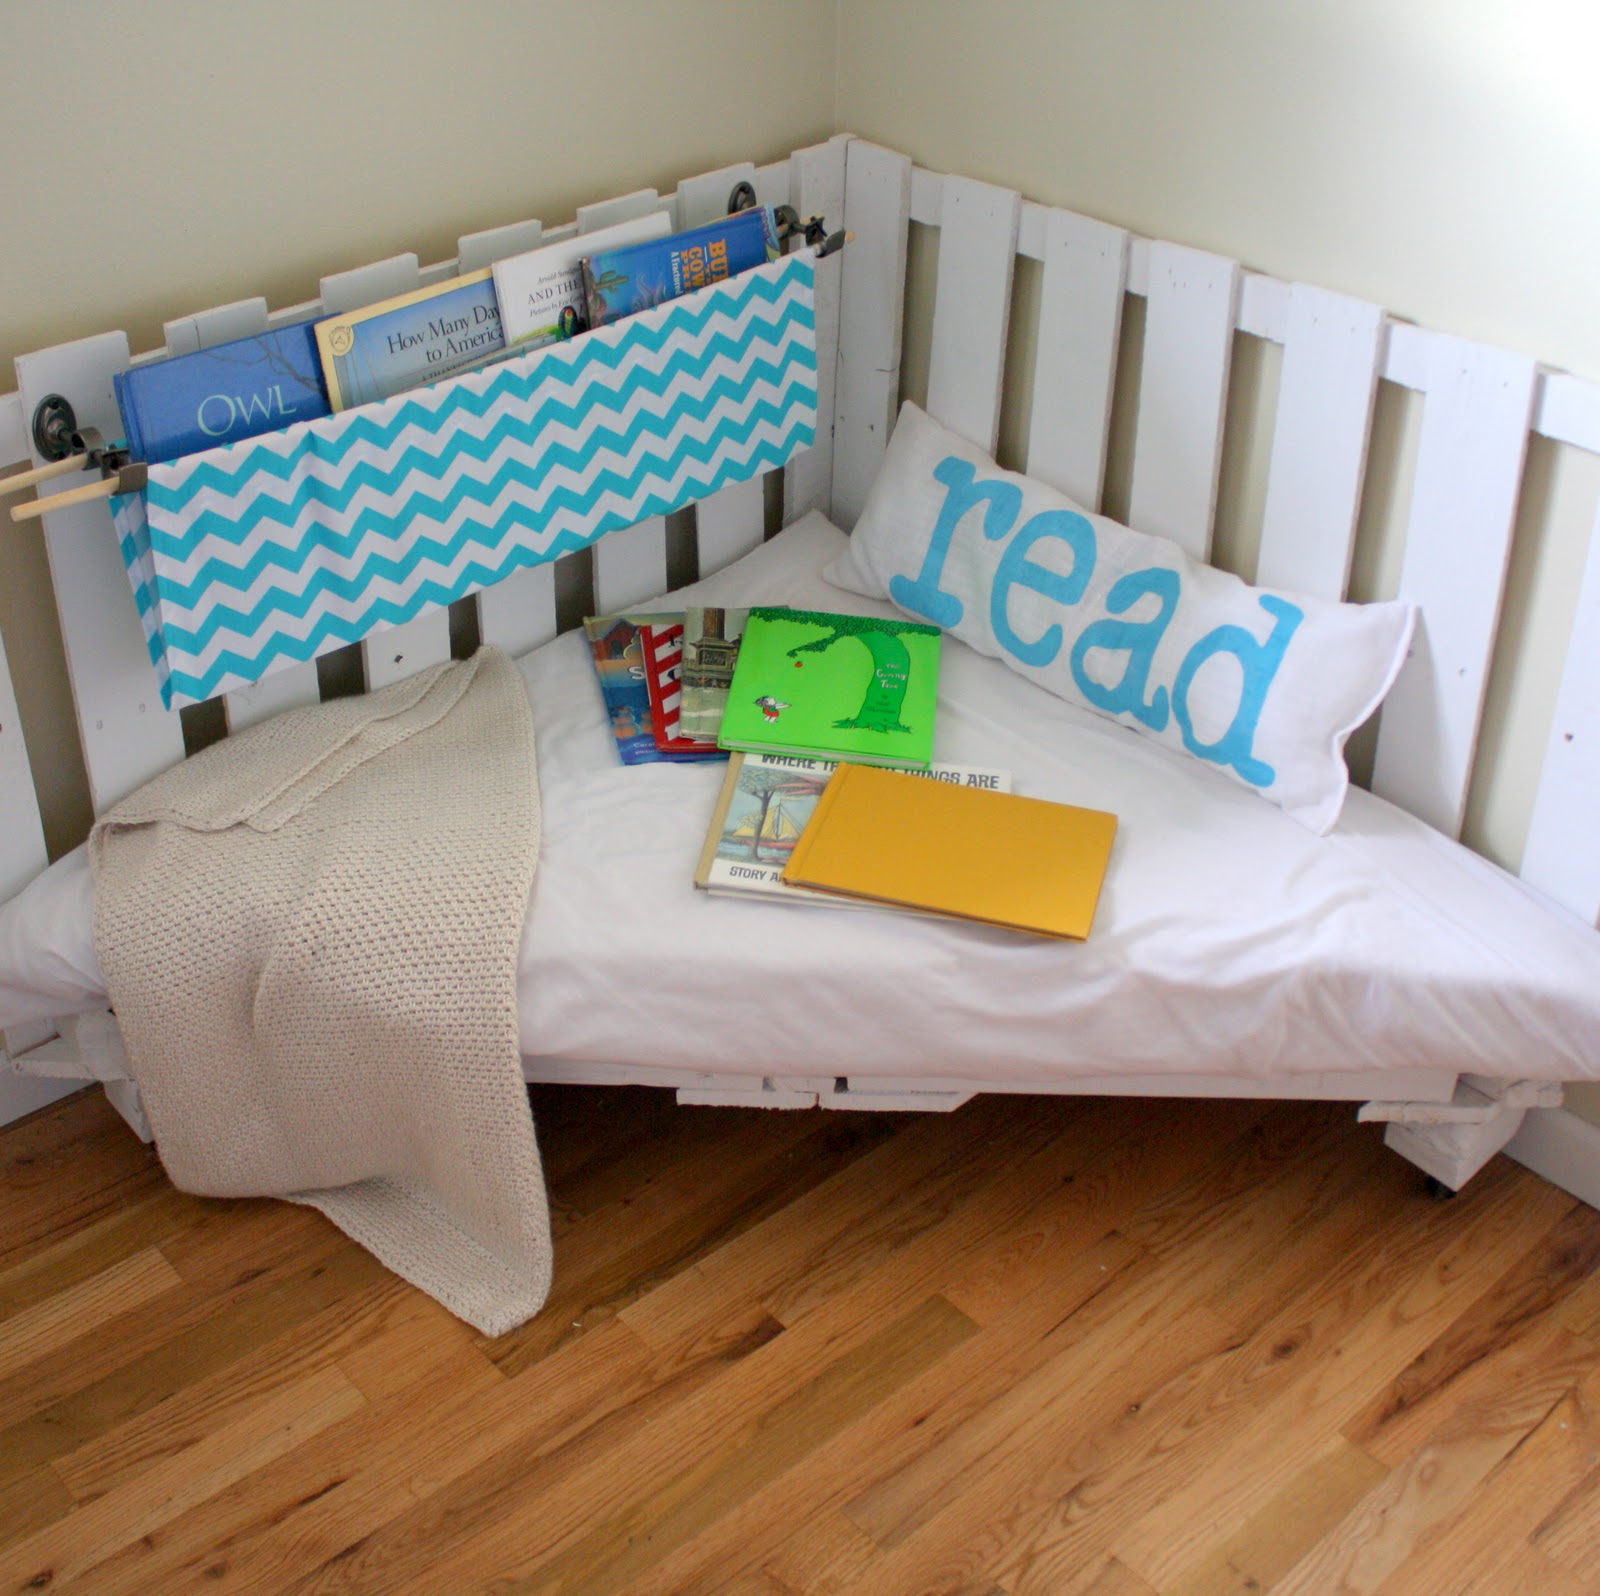

Allright, friends! It’s time for the second installment of Build A Chair Using Palettes. In part 1, we built the platform of the chair/reading nook. Today, we’ll be attaching the sides of the chair and painting it!
For this second part of the chair building, you’ll need:
-a wooden palette (if you already collected two for part 1, this part will use your second palette)
-two pieces of scrap 2×4 at least the length of each of your ‘chair’ sides
-a sander (I used an orbital sander, but any will do… you could even hand sand if you were really into manual labor)
-circular saw
-crow bar or reciprocating saw (to pry planks of wood off of the palette)
-nails

1. Sand down all of the planks of wood on the top and bottom of the palette. For me, that was eighteen planks of wood. If you have more or less slats, adjust accordingly.
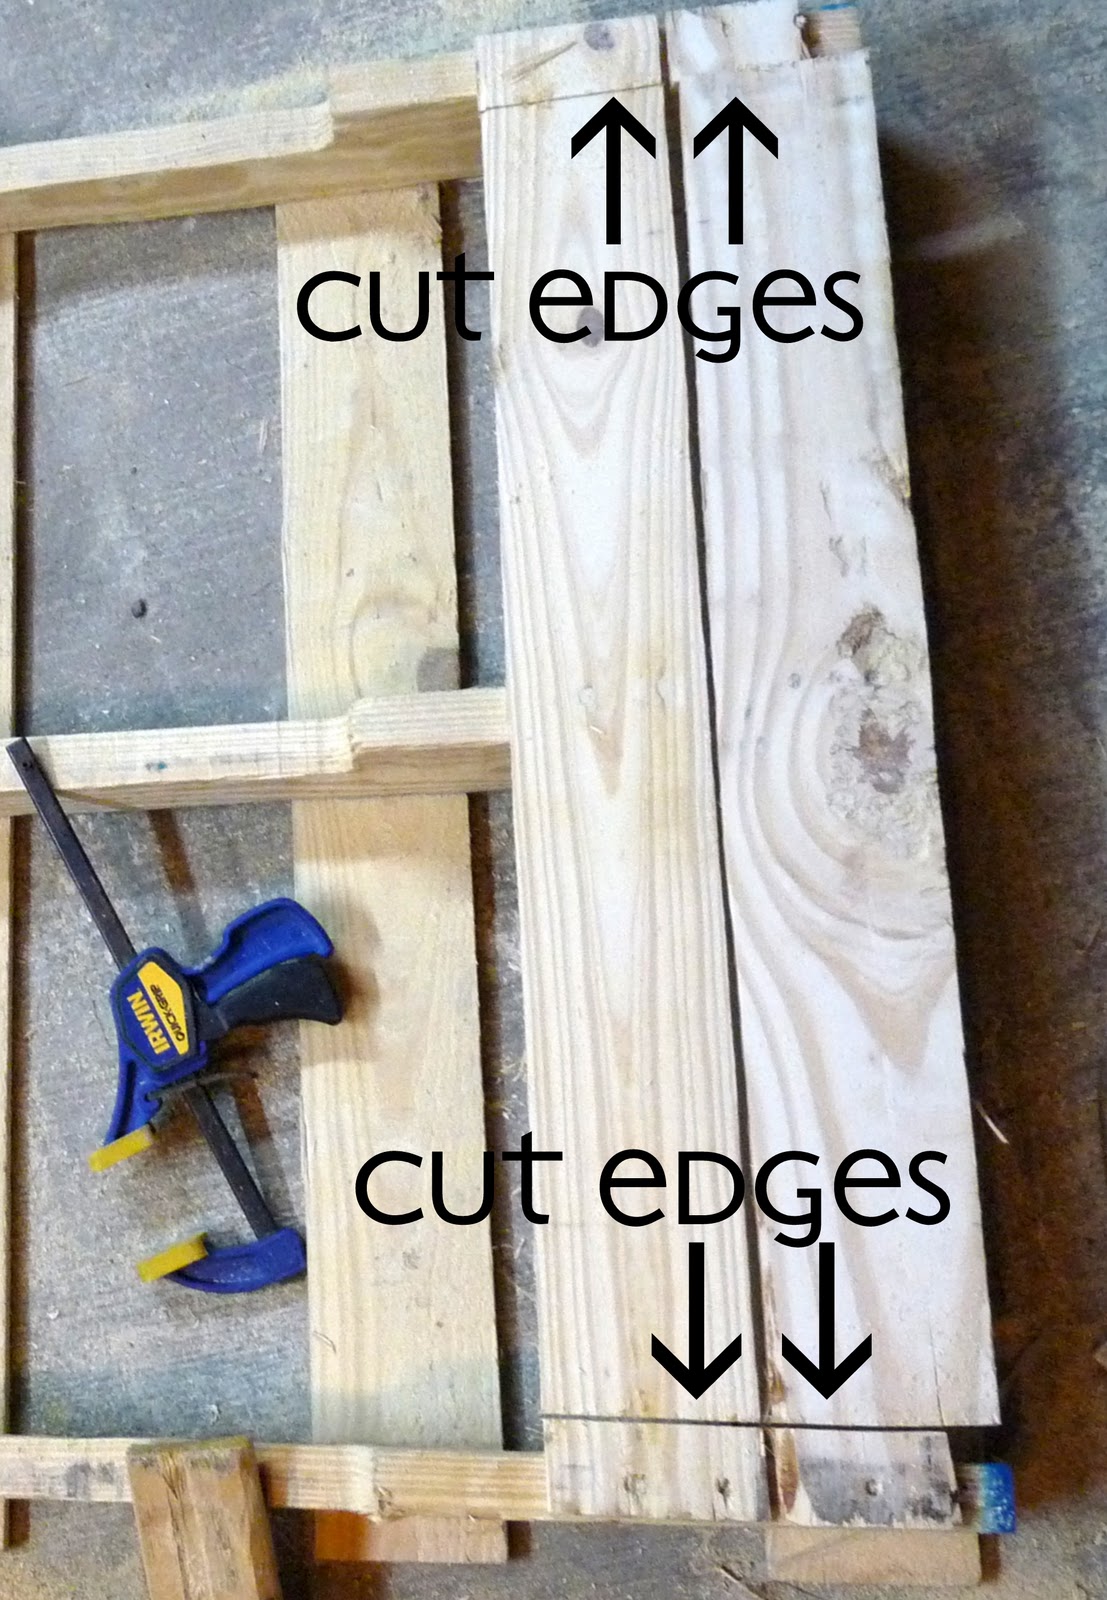
2. Using a circular saw, cut each piece of wood on one side (either top or bottom) as close to the edges as possible, detaching it from the side framing.

3. Detach each plank of wood from the palette. You can either use a crow bar to do this or, if you have a reciprocating saw, loosen the plank by pressing on either end. Since the plank is only attached to the frame of the palette at the middle, rocking it back and forth (carefully!) will loosen those middle nails that are still holding the plank in place. Then place the blade of the reciprocating saw between the plank and the middle board of the palette (where it’s still attached) and cut the nails that are holding the two together.
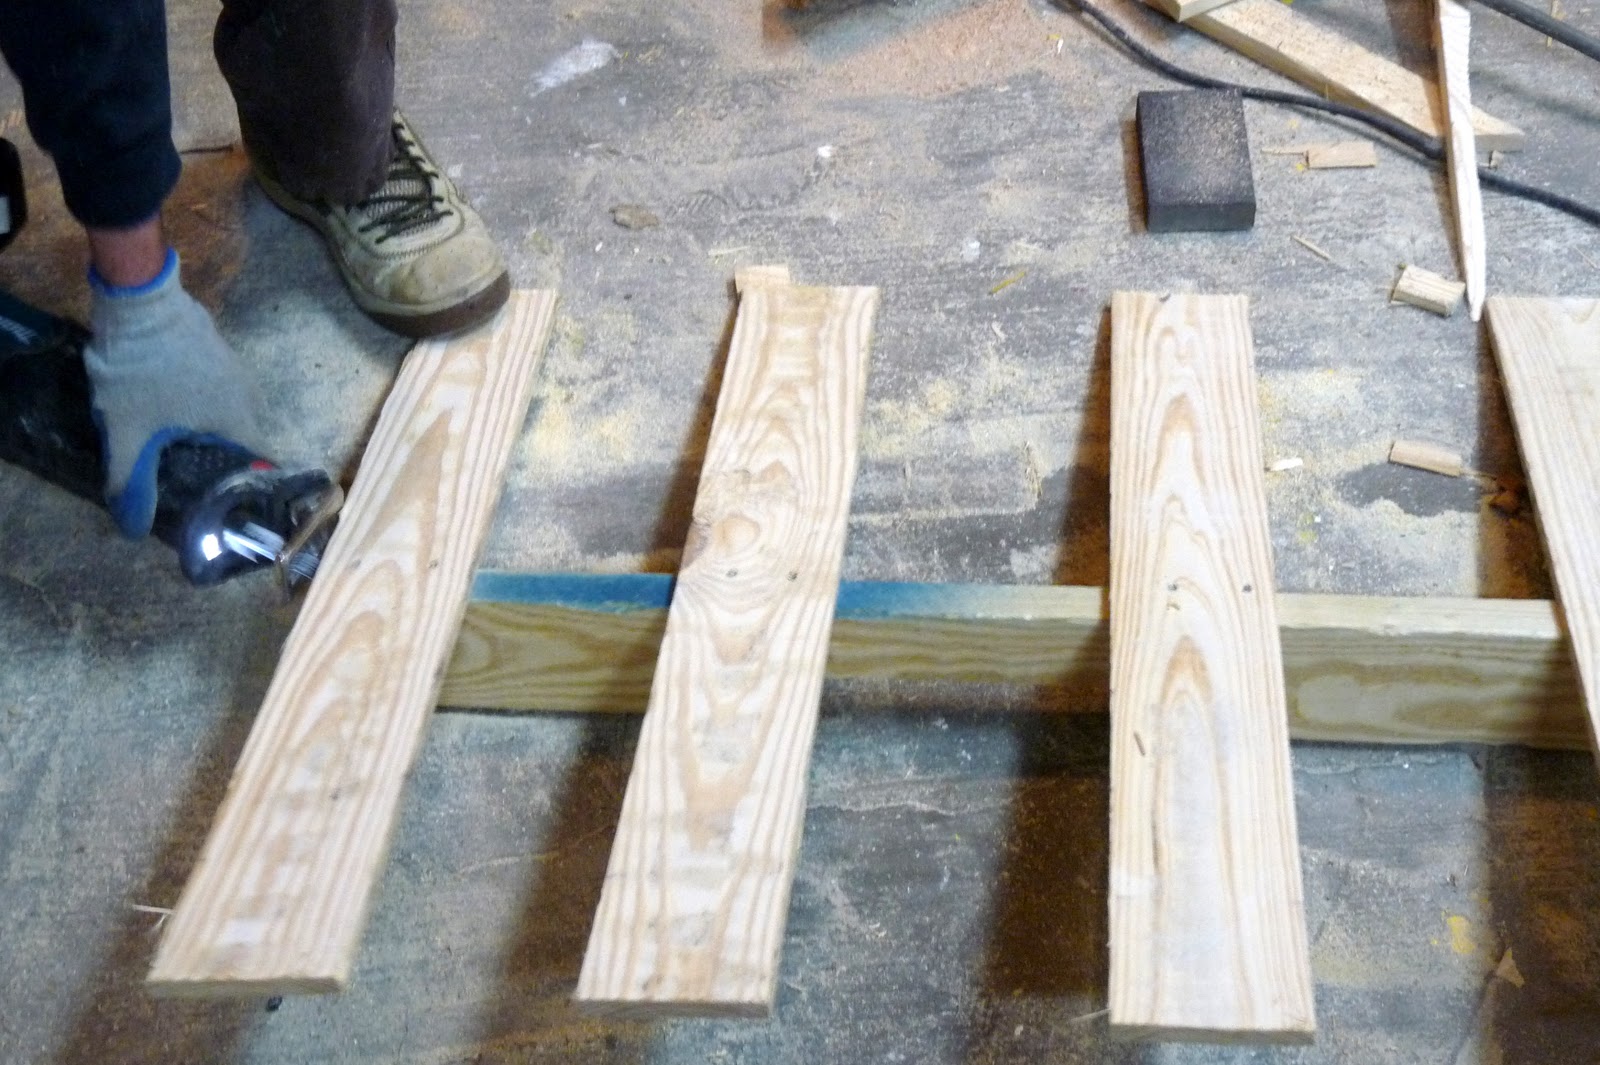
4. Repeat this entire process on the other side of the palette. You should now have at least eighteen planks of sanded wood that are the same size. If they vary in size, cut them to match.

5. Using nails, attach the planks of wood to the back of your ‘chair’ platform, with even spacing between the slats. Overlap the planks at the corner. Make sure the smooth, sanded side of each plank is facing toward the inside of the chair.

6. For stability, reinforce the top of the slats with your scrap of 2×4 running the entire length of the side. Attach to the planks with nails.

7. You’re ready to paint!
Remember, this is part 2 of a series to make a reading nook using palettes. We’re making this…

*Find part 1 of this series here.
I just checked out your knotted quilt on SYTYC… and I'm just dying to know how you made it! GORGEOUS! I would LOVE to see a tutorial, soon! 🙂
Just a quick note to let you know that a link to this post will be placed on CraftCrave today [07 Dec 01:00am GMT]. Thanks, Maria
A haven for learning….outstanding!
So incredibly super darling. I want one in my own corner.
I second the notion of a knotted quilt tutorial! Pretty Please!
this is such a great idea!
i'm due in february,finishing my nursery and i'm dying to know where you got this white blanket from!!!
can you please share?
it is exactly the thing i was looking for!
thanx!!
eva (italy)
this is such a great idea!i'm due in february,finishing my nursery and i'm dying to know where you got this white blanket from!!!can you please share? it is exactly the thing i was looking for!
thanx!!
eva (italy)
@eva
Hey Eva! Thanks for the kind words… the blanket was actually made by my mother-in-law. Sorry I can't be of more help there. 🙂
kirstin
@eva
Hey Eva! Thanks for the kind words… the blanket was actually made by my mother-in-law. Sorry I can't be of more help there. 🙂
kirstin
This is an awful tutorial-I love it! So creative! Thanks so much for sharing the instructions! I posted about it here: http://makealong.blogspot.com/2011/01/i-keep-coming-across-these-amazing.html
That's really creative! I love this reading corner. Although tutorial is great I think I am not able to do something like that. But love to read about it, anyway.
Greetings from Croatia
This is darling! what did you use for the mattress?
dominiquesboutique@yahoo.com
Eleven comments? WHAT??? This is Brilliant! Expect some more traffic the beginning of May when your project is featured on Tip Junkie Decorate!
Great idea!
I think that will do for the kids to school!
Thanks!
This is just awesome! I love pallets….I just made myself a sofa table and a crate on wheels…thanks for sharing this! I might need to make one for the kids rooms.
Still waiting for part 3 of this tutorial!!! Please post!!!
yes, where is part 3? My husband just brought home palette number 1 from work, and we're going to be putting this in my older daughter's new room!
Do you have Part 3 available to post yet? I just got a ton of pallets and am excited to start. Thanks!
I definitely need to put together the Part 3 Cushion Tutorial. Basically, you stack foam egg crates (those bumpy foam pads) and cut to the size of your 'chair.' Then you sew a triangular cover for the custom cushion.
I've changed computers since I made this, so digging up the pictures will be a little labor intensive, but I will definitely put it on my to do list. 🙂
just found this on pinterest and realized it was YOURS! tooo cool! i'm pinning it and going to have to incorporate this somewhere, somehow…
This is a fantastic idea, going to make one in my daughters room. I can not wait to see how to make the cushion.
thanks amber! send over pictures when you get it done- we’d love to see yours! 🙂
I love this idea! We’re about to buy our first house and I’d love to put one of these in with a little tweaking for me! Do you think it would hold an average full-grown adult? 😀 My craft room would be a much happier place if I had one of these to curl up in!
If it won’t reliably hold an adult on its own, do you have suggestions to make it so it will?
It definitely will hold an adult (and a kid or two!). If you’re just making it for you, I’d eliminate the book holder and cover all of the edges with cozy pillows. I also might make it a bit taller.
Send over pics if you make one!!!
love
kirstin
ps- I noticed your email address- are you here in Denver? You should come to our creative types meet up on March 10th! 🙂
I’m in the Tech Center! I’d love to come to a crafty/creative meet-up! And I’ve got some friends that would like to, too! Just tell me where to be and when! 😀
This is ridiculously adorable and awesome!!! Great tutorial – and I want one! *yelling to hubby to find me some pallets*
haha! my hubby gets dragged into my projects too (clearly). 🙂
I LOVE this! My husband began to make it for my little boy and girl on the way! But we have not finished – we would love to see part 3! We tweaked ours a little and made a flat top and put hinges on it can lift up and we use it for storage! Egg crates were a great idea, we stacked two 2″ ones to make it extra soft. My son loves it so far! Thanks!
Janae, I LOVE it- your modifications sound fantastic. Send me a pic when you’re finished, would you??? I’d love to see it. 🙂
Thank you Kristin, how do I send a picture? I just took two
LOVE it- kojodesignsAThotmailDOTcom. 🙂
What a cute idea! I wish every parent made reading special and created a reading chair!
We used your post for our weekly reading series for the summer @ theclassroomcreative . We hope to inspire other parents with your post. Enjoy your summer! Karen & Nicolette
My husband and I finished making this a couple weeks ago but still working on a pattern for the triangle cover. I’m trying to make it removable with Velcro striping on one of the hidden sides. It’s so simple yet it’s kicking my butt.
I love that Stephanie. Simple add-ons kick my tail all the time! 🙂
Turns out I just needed to sleep lol. I knocked it out this morning. I’ll e-mail you a picture.
Wood pallets often contain toxic chemicals, carcinogenic formaldehyde. Choose your pallets carefully. There are safe pallets which are stamped with an “HT”.
True, thanks!
My friend posted this on Facebook. I decided I want one of those for my home school!
What a great idea, Rebecca! 🙂
Idée complètement géniale ! Très joli !
Lilikaly
I love this and just posted about it on my reading facebook page (Story Fortress)
Thanks Marilyn!
This would make a great pet bed too. Although.. I don’t have pets and I DO have 8 children…not sure why I am even having thoughts about pet beds.
True! And funny! 🙂