
kojotutorial: no sew jersey ruffle
As an Amazon Associate I earn from qualifying purchases.

We’re on a no-sew kick this week… gotta love hot glue guns! I should tell you, though, that figuring out how to make lovely little jersey ruffles (they’re the ones on the bottom tier in the picture above) without a needle and thread is a little bit dangerous. Sometimes figuring out a shortcut just makes your project list longer… at least around here, it does. Consider yourself warned.
To make a pile of no-sew jersey ruffles, you’ll need:
-scraps of jersey, cut into 2″-3″ circles (I seem to have an endless supply of white tshirt scraps that are perfect for this project)
-coordinating nickel-sized felt circles (one for each ruffle)
-scissors
-a hot glue gun
-a pen or white crayon
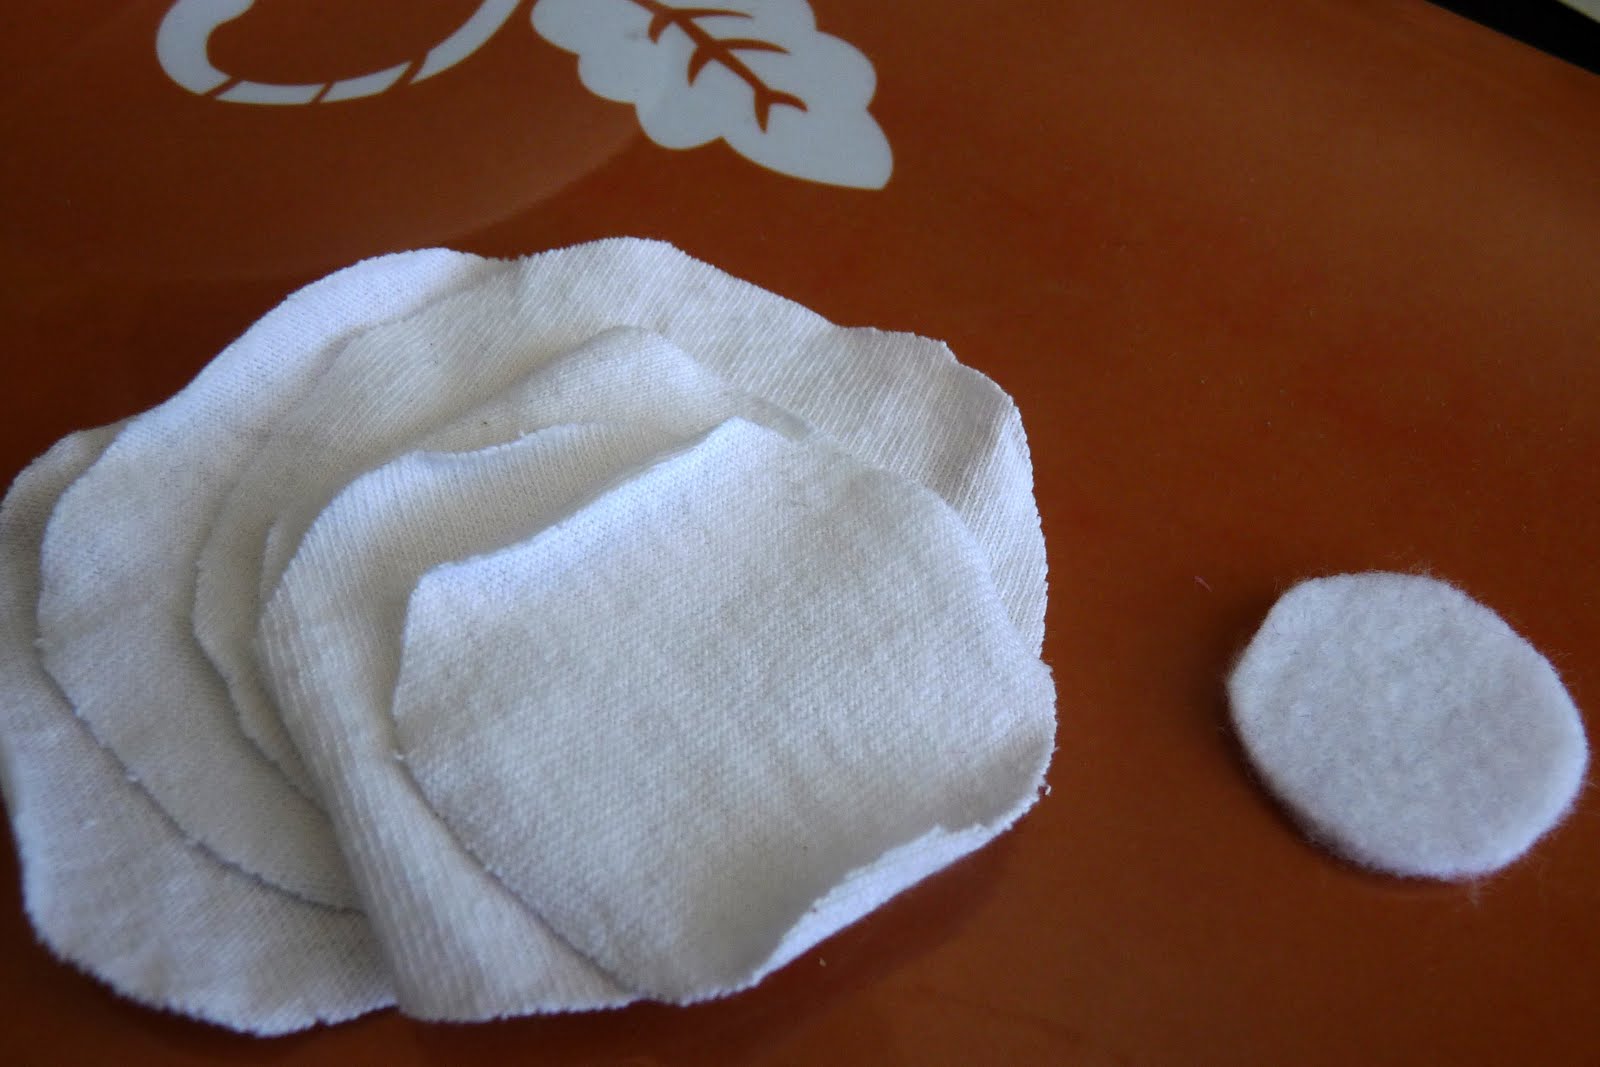
1. For each ruffle you’ll need five jersey circles (just freehand them) and one nickel sized felt circle. My jersey ruffles are usually about 2″-3″ in diameter… the important thing here is that all five of your circles are roughly the same size.

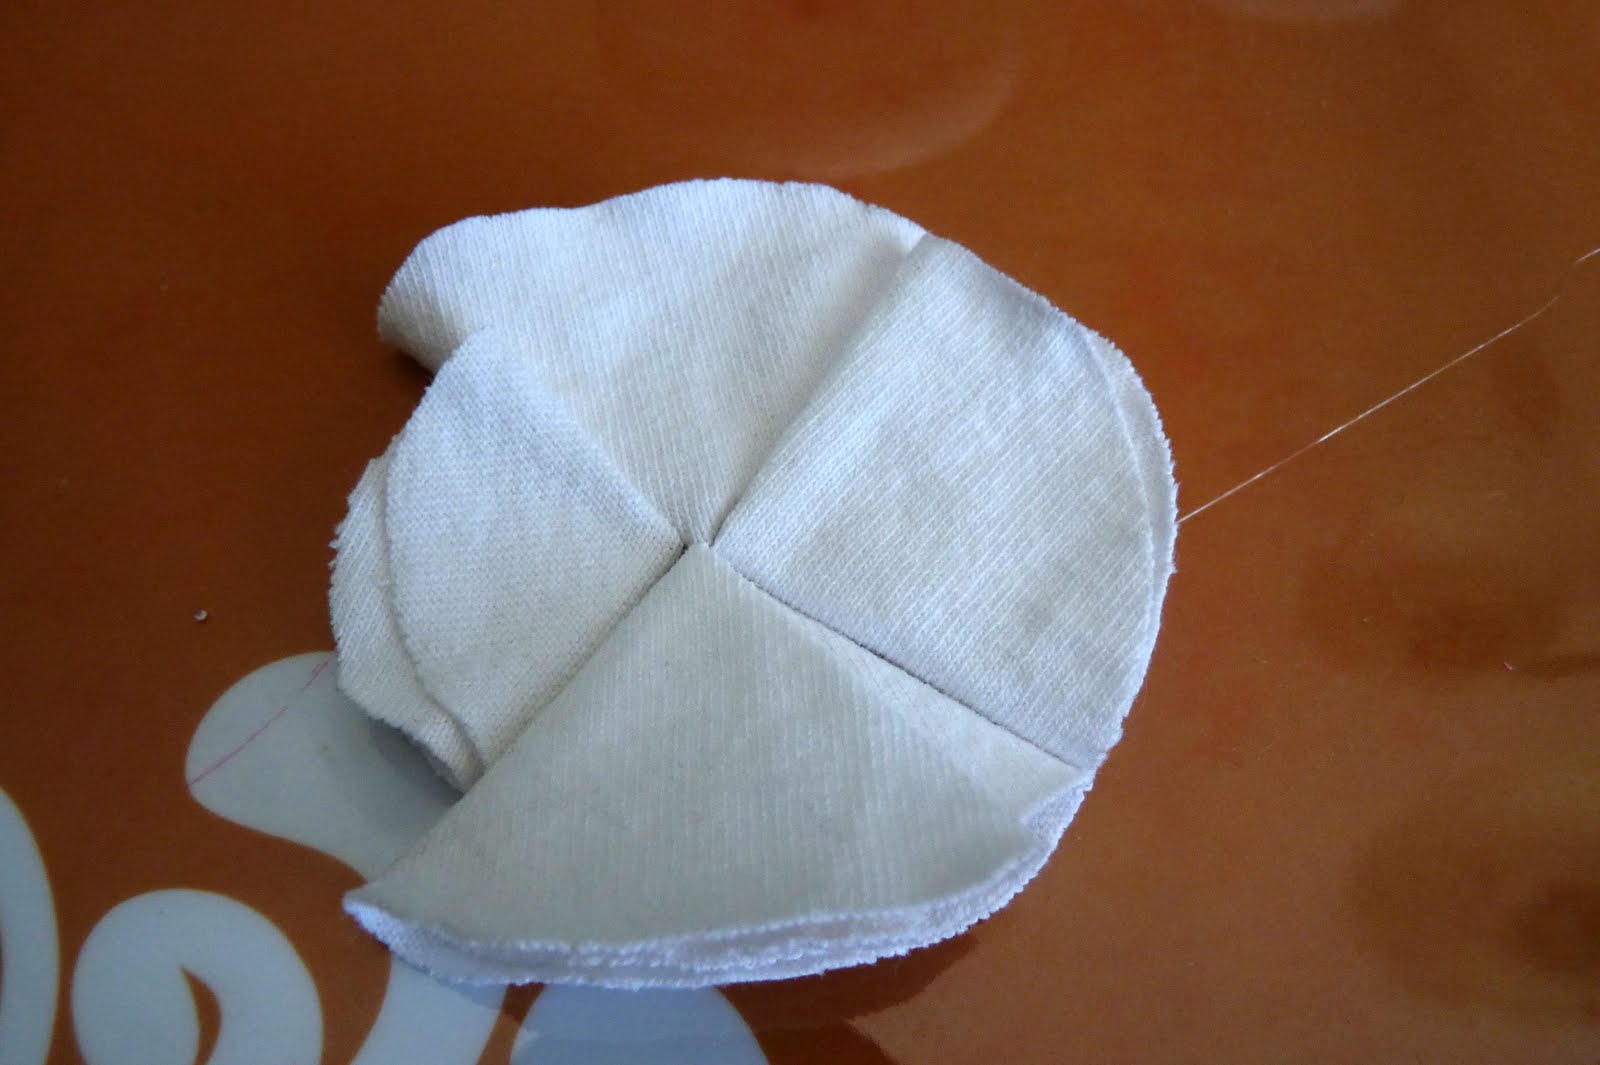
2. Once you’ve cut out all your circles, fold four of your jersey ruffles in fourths.
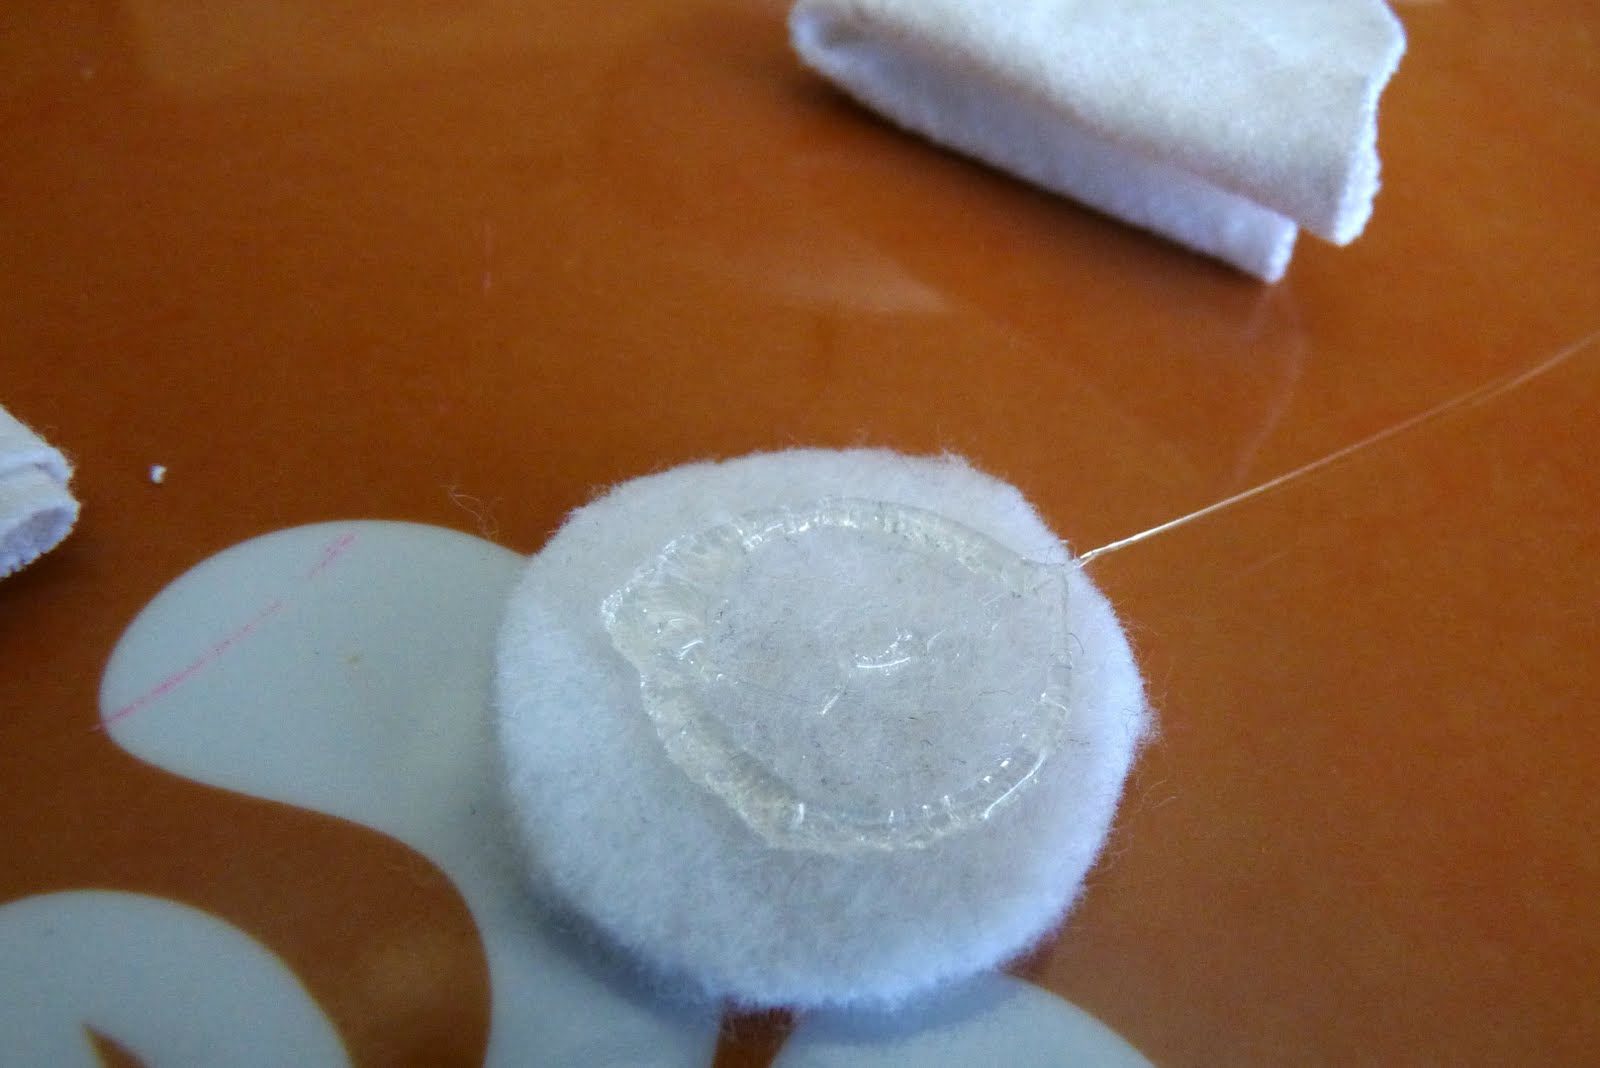
3. Make a circle of hot glue around the perimeter of your felt circle. Place your folded jersey circles onto the felt circle so their tips meet in the middle.

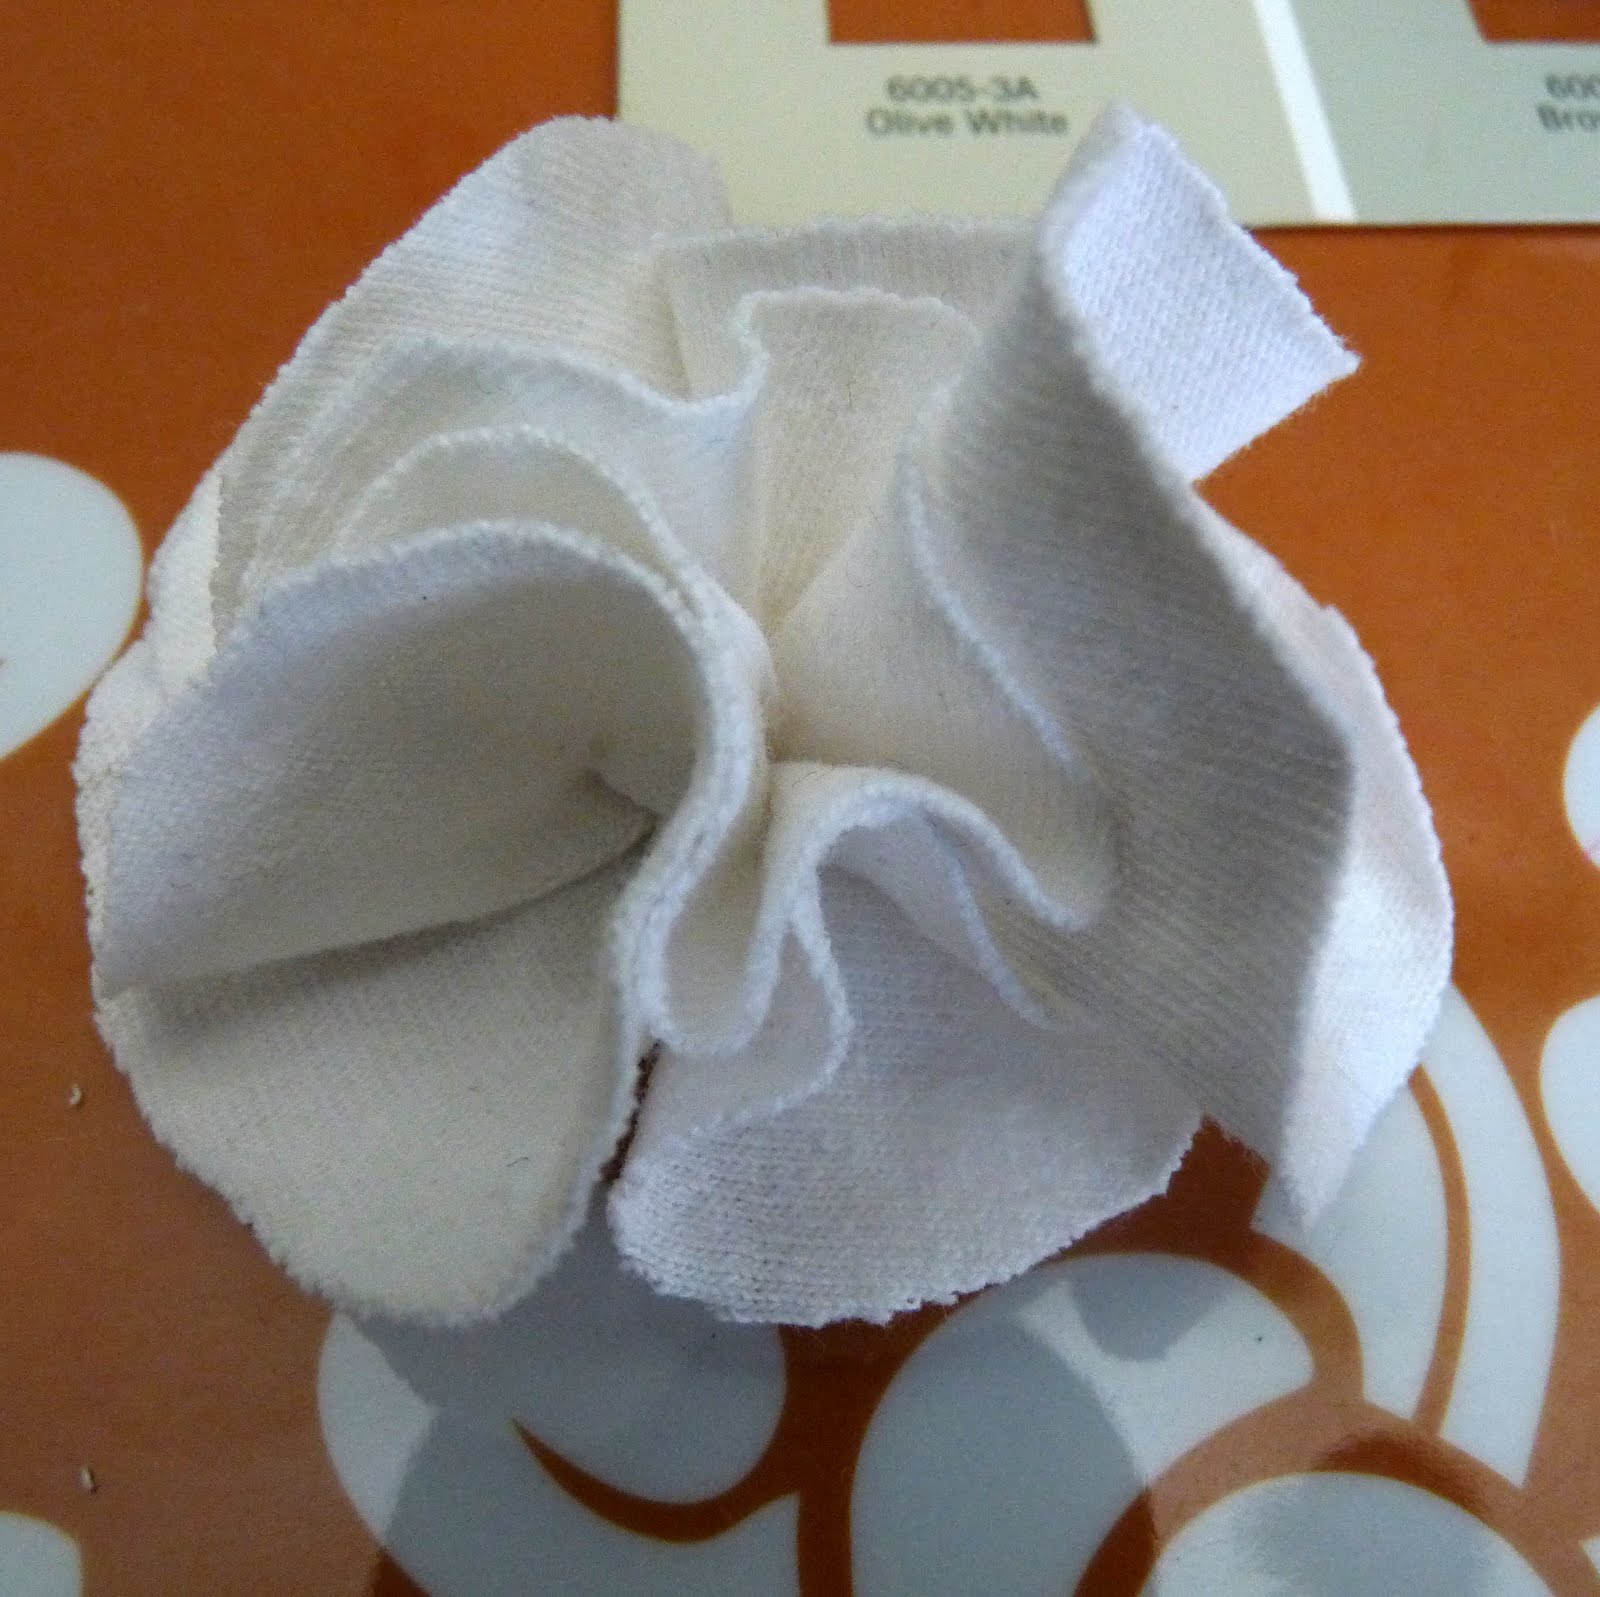
4. Before the hot glue cools/dries, unfold your jersey circles and puff them up by bunching them together. I’ve found it’s easiest to simultaneously poke two of your fingers into the middles of unfolded circles until they glue together all puffed up (hope that makes sense).
5. Take your last jersey circle and twist it around the tip of a white crayon or capped pen (like you did with tissue paper in elementary school). Put a dab of hot glue in the middle of your puff-of-jersey-circles and press your remaining circle into the glue. While your glue is hot, mess with the jersey circles for optimal ruffleyness (fluff them up, push them into each other, make sure there aren’t little weird sections sticking out, etc.). Then repeat. And repeat. And repeat again, making a whole pile of ruffles.
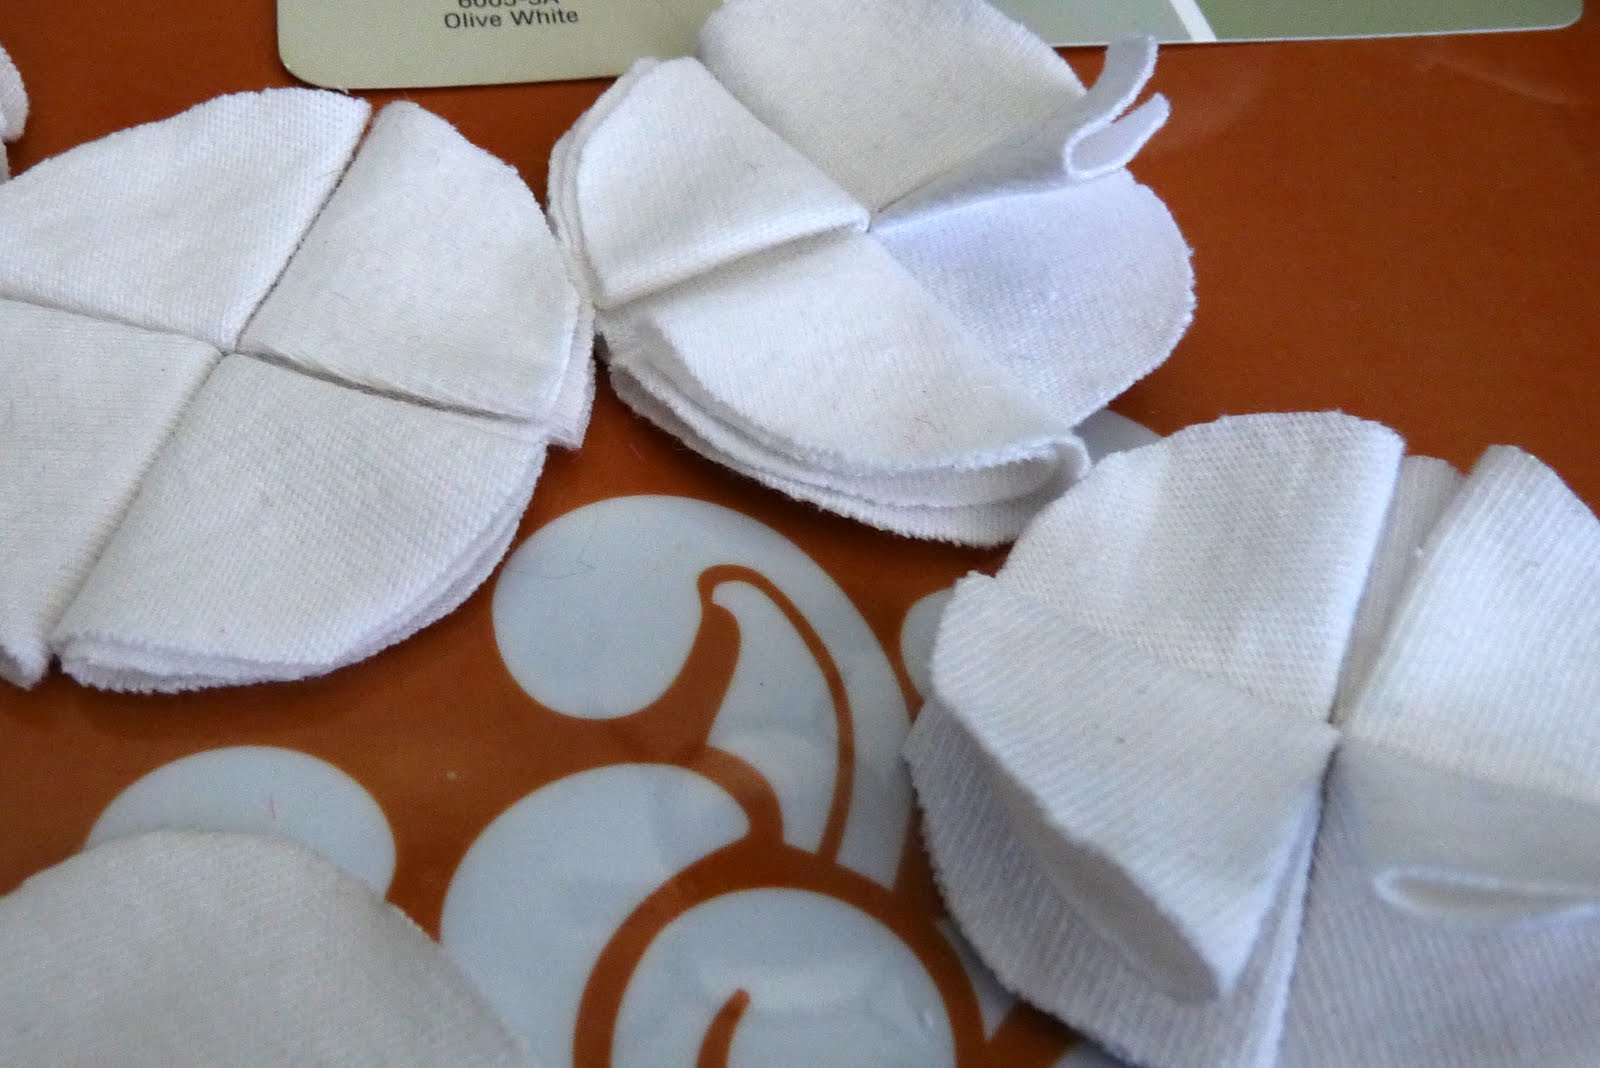
***Doing this process assembly-line style (cut all your circles, then fold them in groups of four, then do a bunch of gluing the fluffing, then add the centers) makes things go much more quickly. And, let’s be honest, whatever your project, you’ll be making a bunch of these so efficiency is key here.
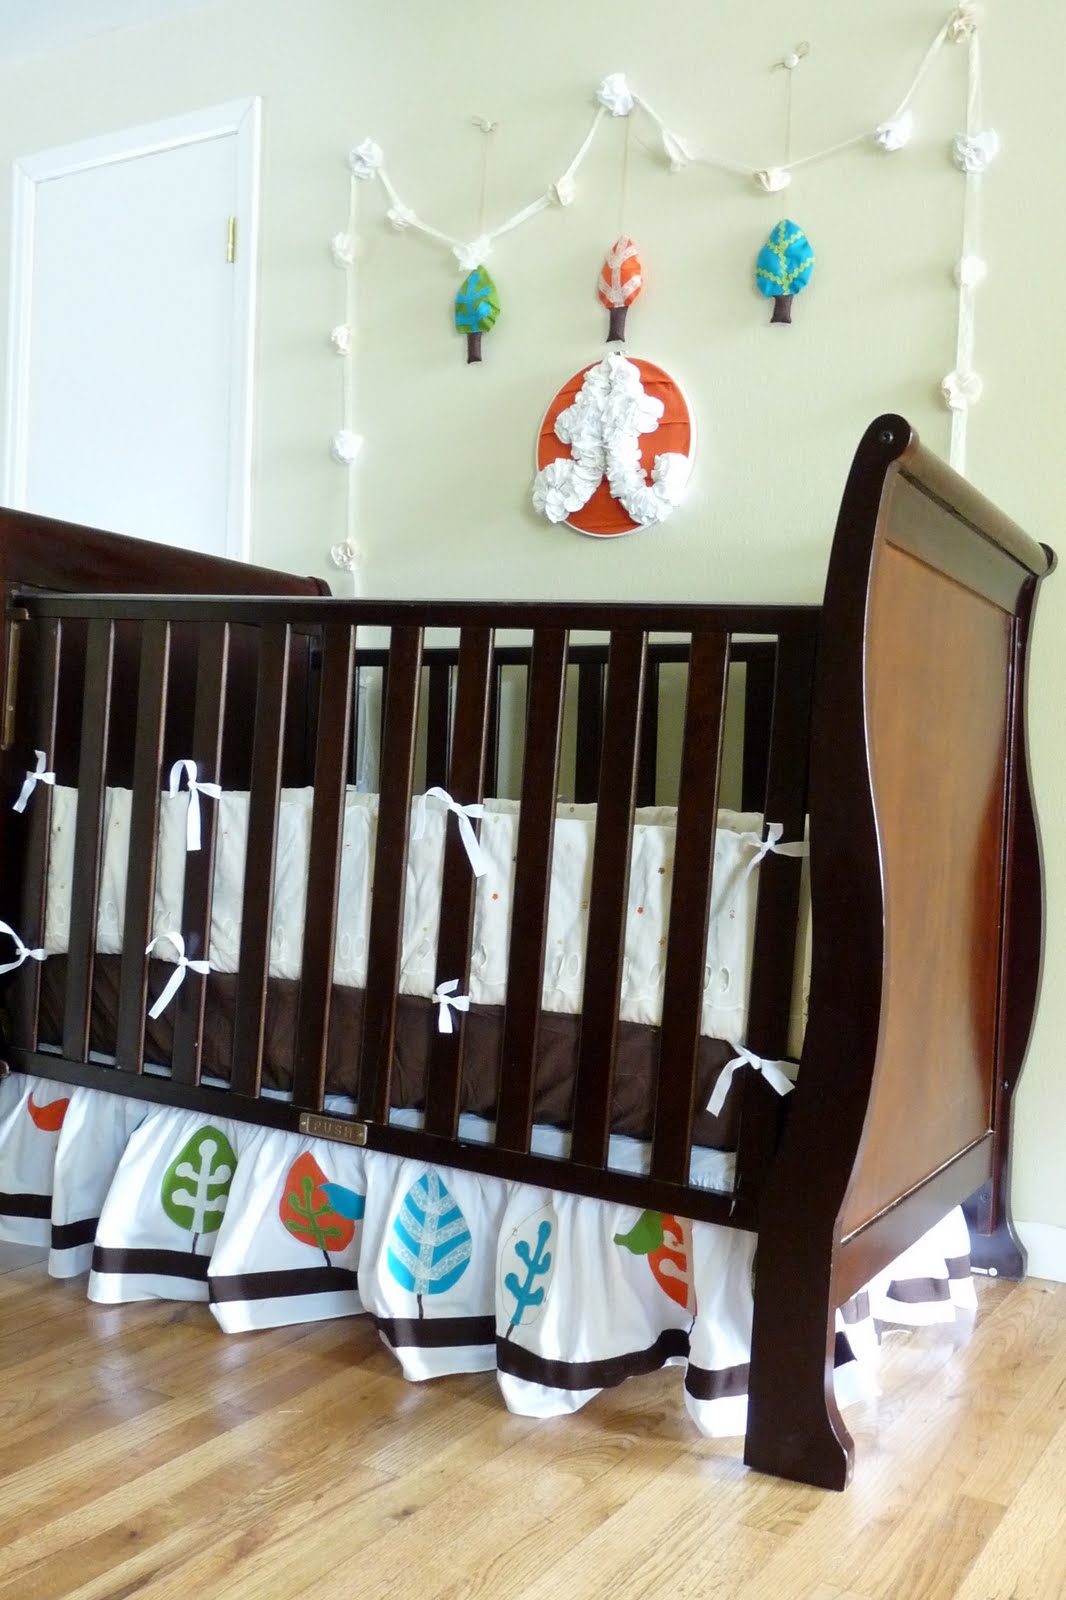
These little ruffles have already made their way into a couple of projects lately (nursery art for Kedron, baby shower decor), and I have all sorts of other plans for them as well (just think of the ruffle-y and truffle-y onesies you could make, to start!).
Happy ruffle-ing, friends!
I love them!
Oh I am in trouble! My husband just replaced all of his undershirts and he's totally learning not to through stuff out! There's tons of usable fabric there and this is perfect!!! I want to make a ruffly pillow. Thanks!
Just a quick note to let you know that a link to this post will be placed on CraftCrave today [21 Jul 12:00pm GMT]. Thanks, Maria
Fun fun. Your baby room is turning out so fabulous. I love the colors.
Just a quick note to let you know that a link to this post will be placed on CraftCrave today [22 Jul 12:00pm GMT]. Thanks, Maria
Oh, how CUTE!!
Super cute! I might do some of these as accesories to the binkie clips I made for my SIL. Thanks!
Just a quick note to let you know that a link to this post will be placed on CraftCrave today [23 Jul 12:00pm GMT]. Thanks, Maria
Just a quick note to let you know that a link to this post will be placed on CraftCrave today [24 Jul 01:05pm GMT]. Thanks, Maria
Just a quick note to let you know that a link to this post will be placed on CraftCrave today [25 Jul 12:00pm GMT]. Thanks, Maria
Just a quick note to let you know that a link to this post will be placed on CraftCrave today [26 Jul 12:00pm GMT]. Thanks, Maria
Just a quick note to let you know that a link to this post will be placed on CraftCrave today [27 Jul 12:00pm GMT]. Thanks, Maria
Just a quick note to let you know that a link to this post will be placed on CraftCrave today [28 Jul 12:00pm GMT]. Thanks, Maria
Just a quick note to let you know that a link to this post will be placed on CraftCrave today [29 Jul 12:00pm GMT]. Thanks, Maria
Just a quick note to let you know that a link to this post will be placed on CraftCrave today [30 Jul 12:00pm GMT]. Thanks, Maria
Just a quick note to let you know that a link to this post will be placed on CraftCrave today [31 Jul 12:00pm GMT]. Thanks, Maria
I made these for my daughter's dress – the first crafty thing I've ever done!!!! Thanks!!!!!
http://onebrickshy.tumblr.com/post/3091261792/gpoyw-i-made-this-edition-i-had-a-rehearsal
I know this is an old post but I’m hoping you’ll clarify about the last circle. I don’t understand what to do with that one? Help! :o)
Dee
Hey Dee! I’ll try to clarify- you get the four ‘flat’ ruffles glued down, you add the middle ruffle (that’s the last circle). Instead of folding it in fourths like the others, you just twist the center around something with a point and glue it in place. Does that make sense?