
kojotutorial: favorite things caddy
As an Amazon Associate I earn from qualifying purchases.

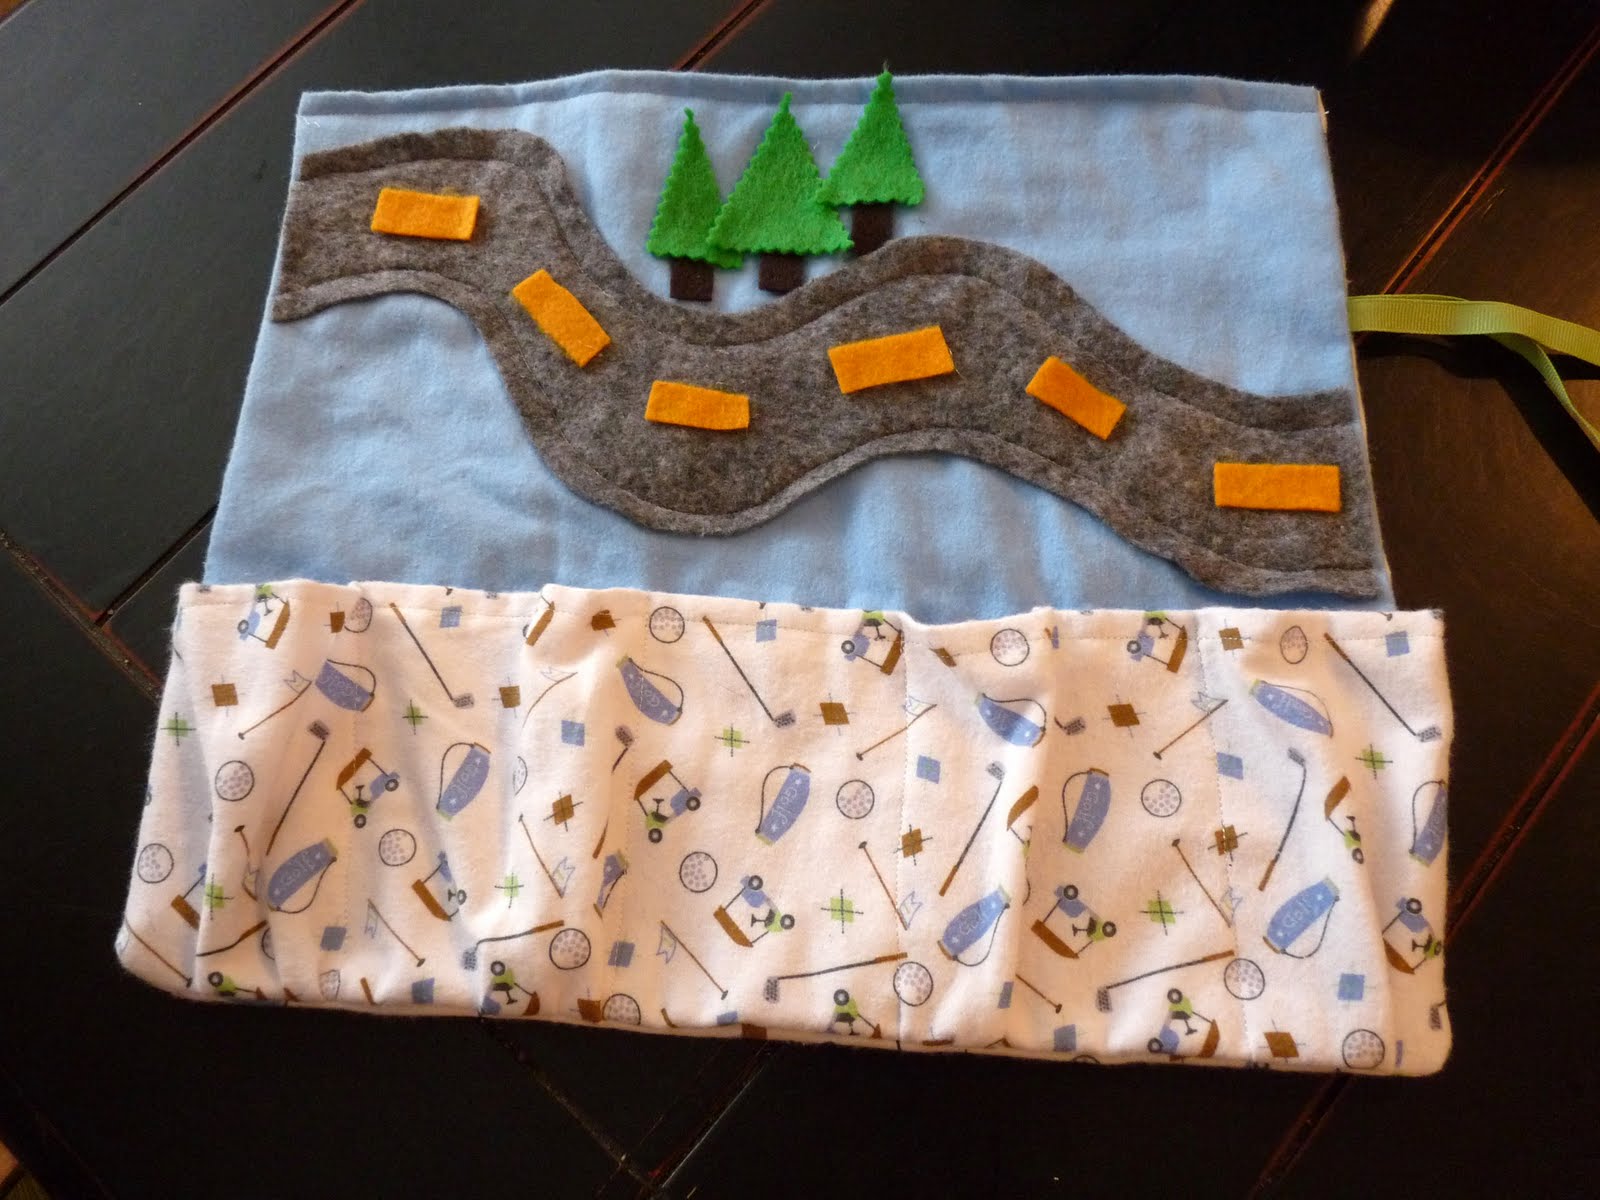

Those are Burke’s “guys.” They are supercool. They need to go everywhere with us. He is not great at carrying five toys at once. Hence the caddy.
To make one for your little one’s “guys” you’ll need:
-two similar sized pieces of fabric (mine were about 15″x15″)
-another strip of fabric (mine was 7″x18″) to serve as your row of pockets
-felt for the ‘scene’
-ribbon (a couple feet)
-a sewing machine

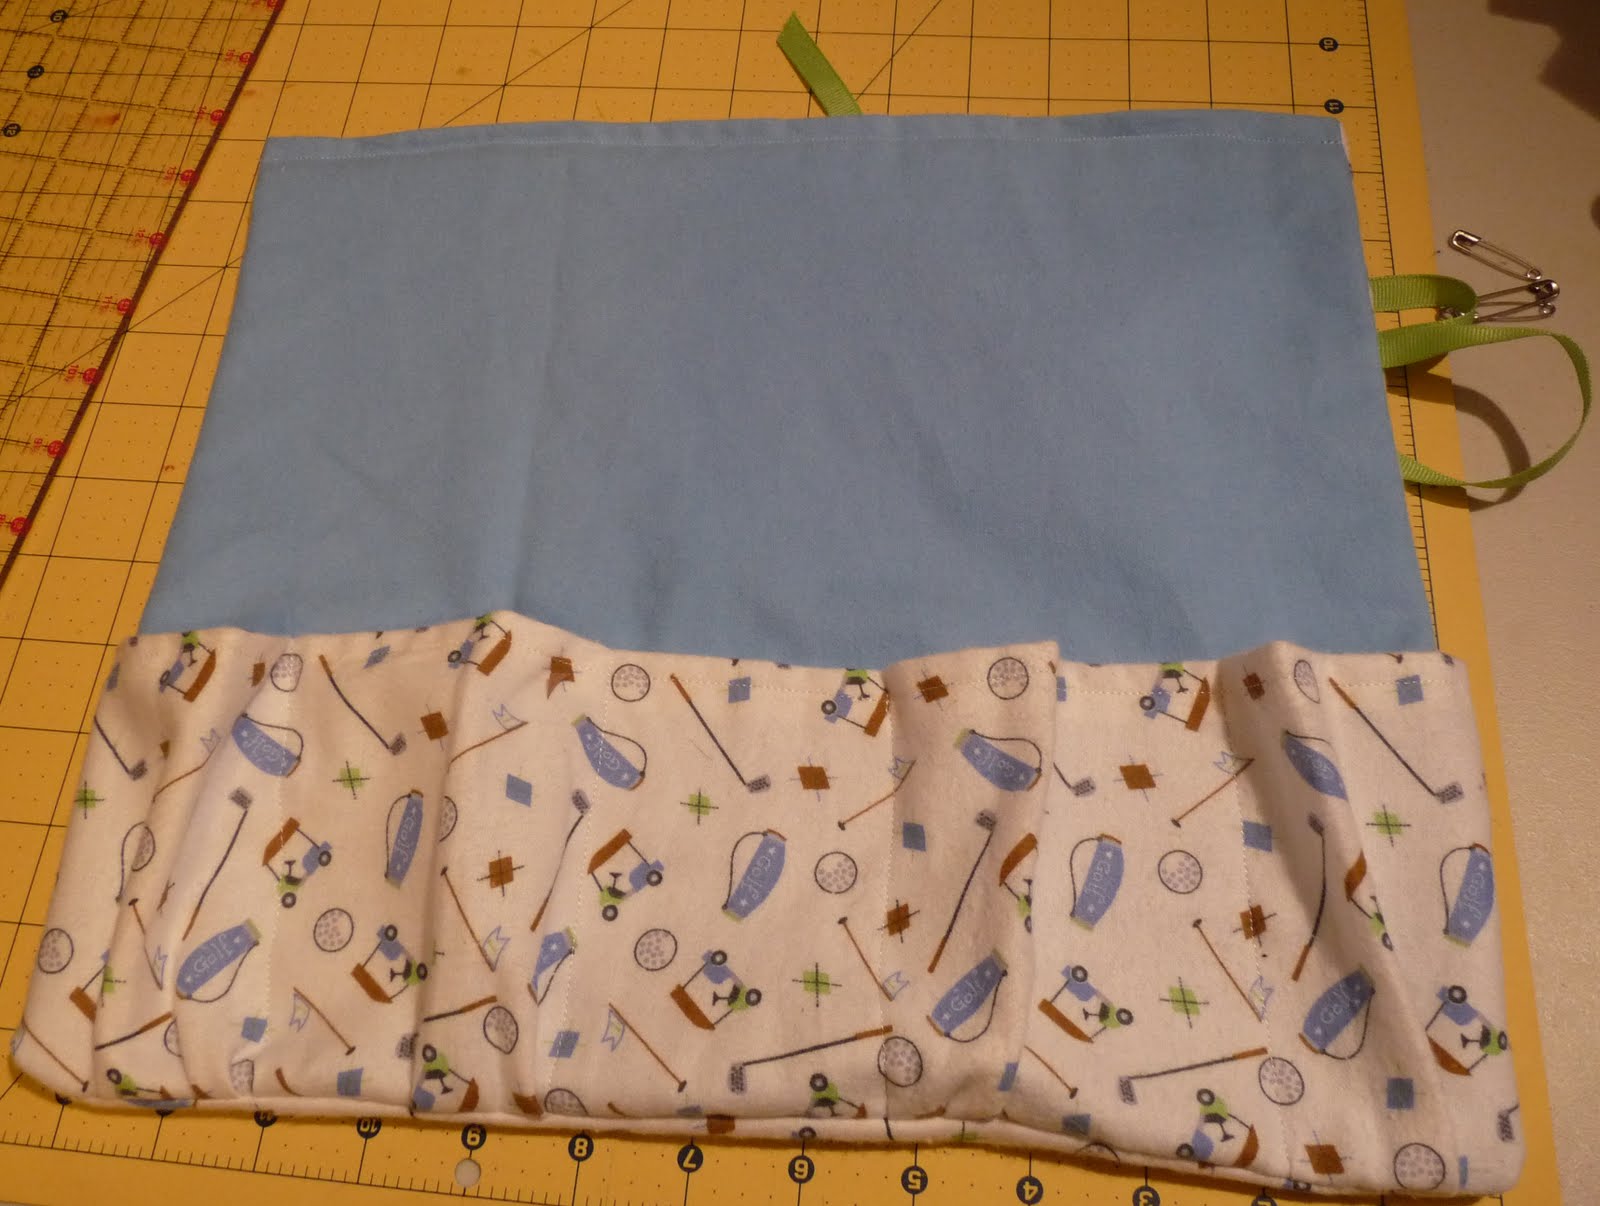
1. First we’re going to make the favorite things pockets on one piece of fabric (later we’ll sew the two larger pieces of fabric together). To do this, first figure out how many pockets you want to provide (I made a five-pocket caddy). Take your length and divide it by the number of pockets (my length was 18″, so each pocket was allotted about 3.5″). Mark these lengths. Also divide the length of your background fabric by the number of pockets and mark (the length of my background fabric was 15″, so I marked every 3″).
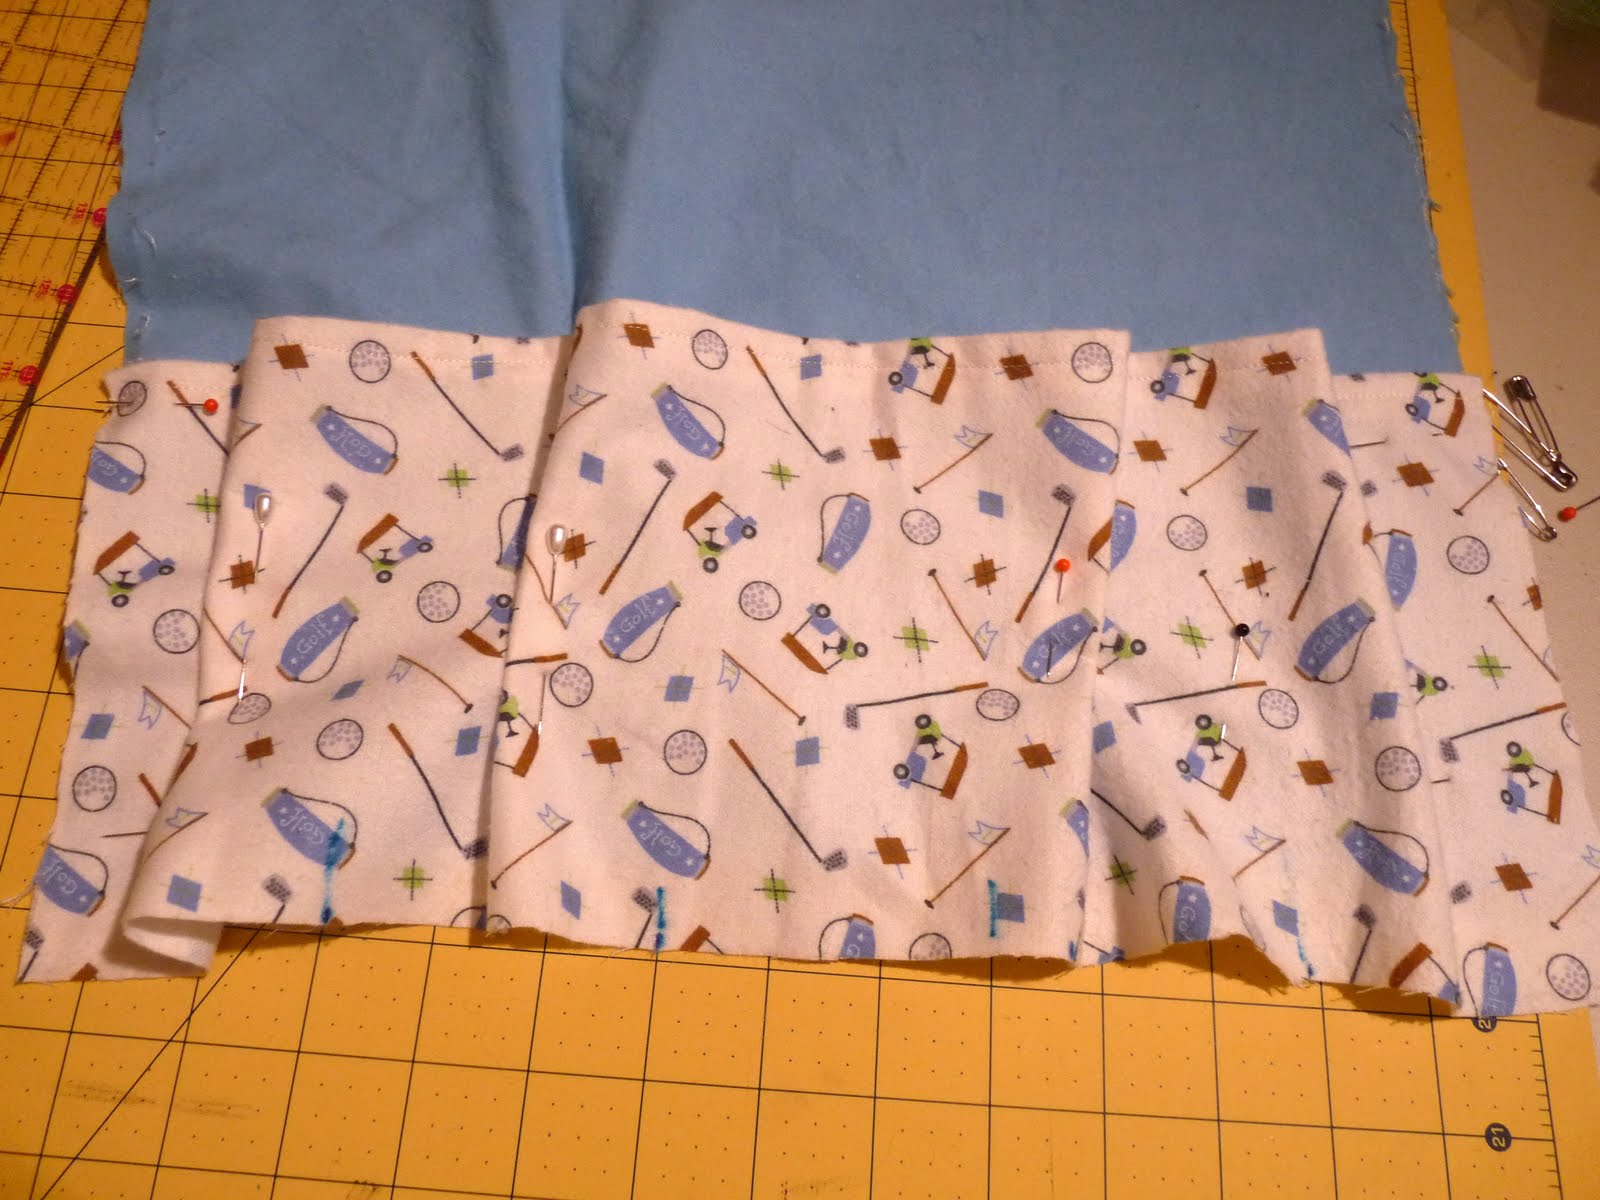
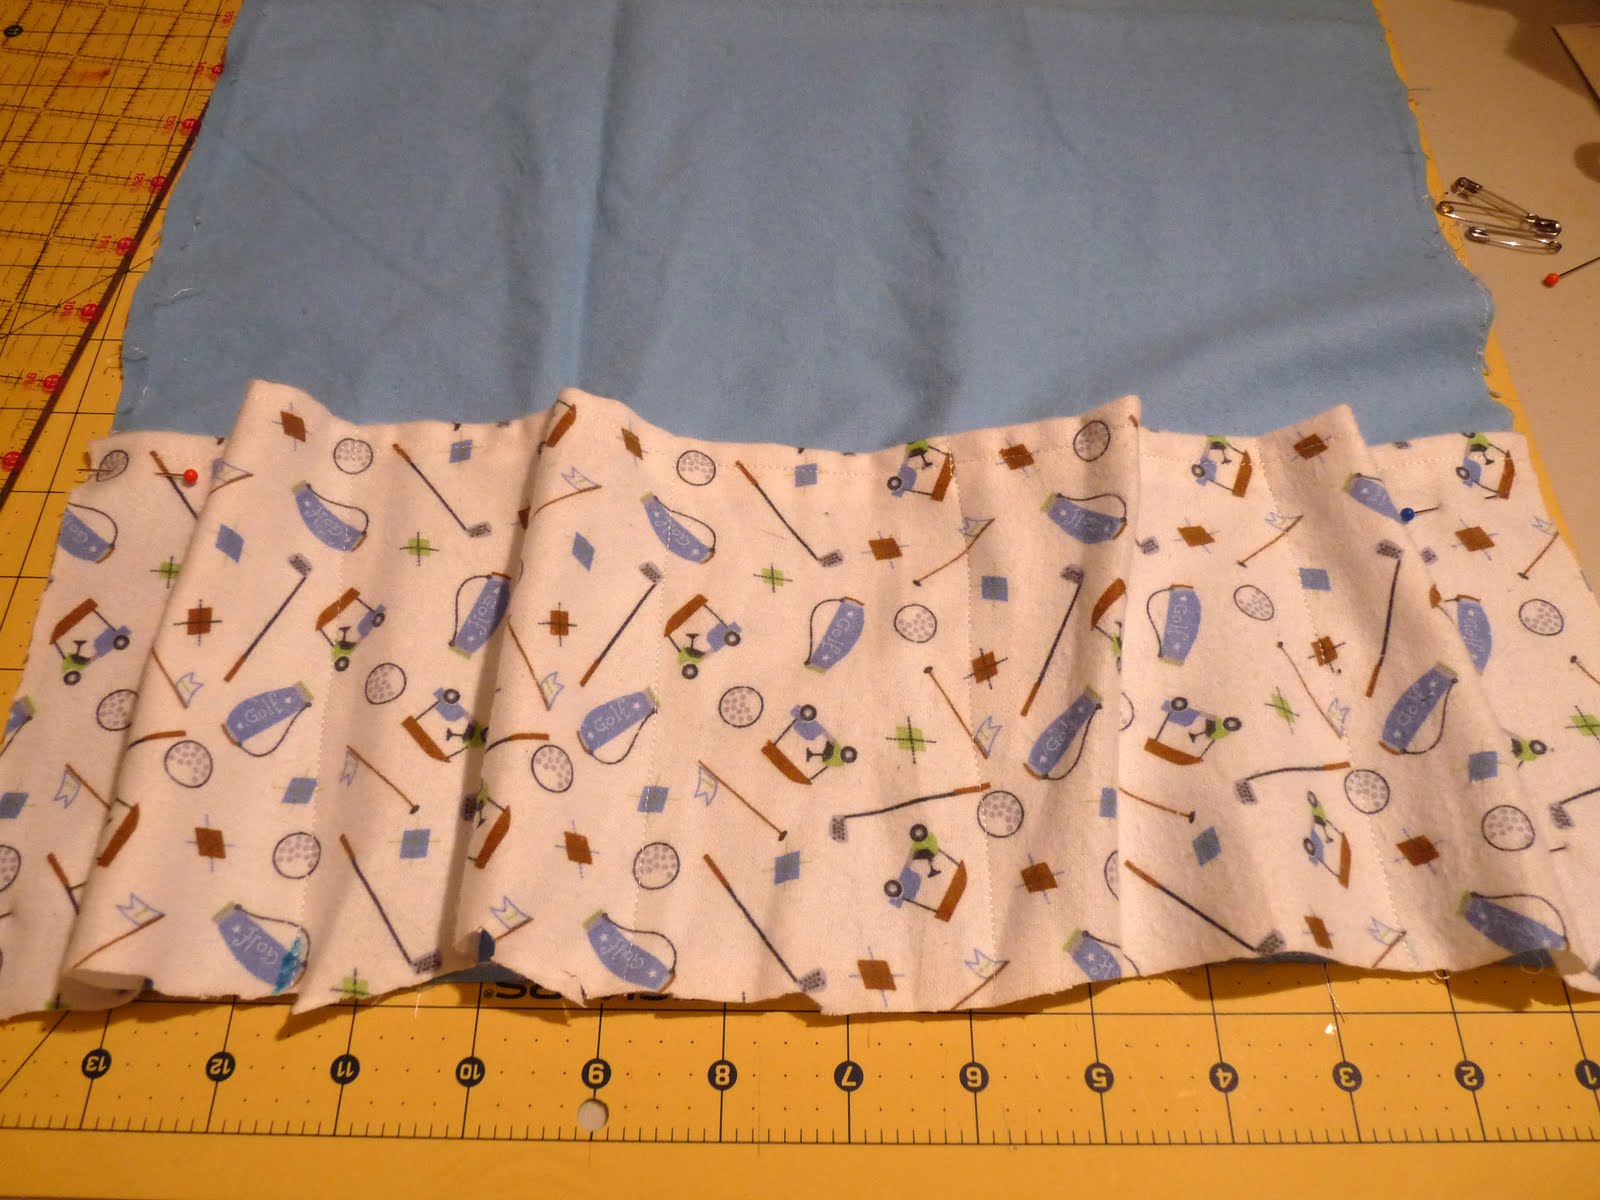
2. Match up the lines, pin the pocket fabric in place and stitch the pocket fabric (with the top edge ironed under and stitched down to make a clean seam) to the background fabric. You should have a row of ‘pockets’ with a little give because your pocket fabric was a bit longer than your background fabric.
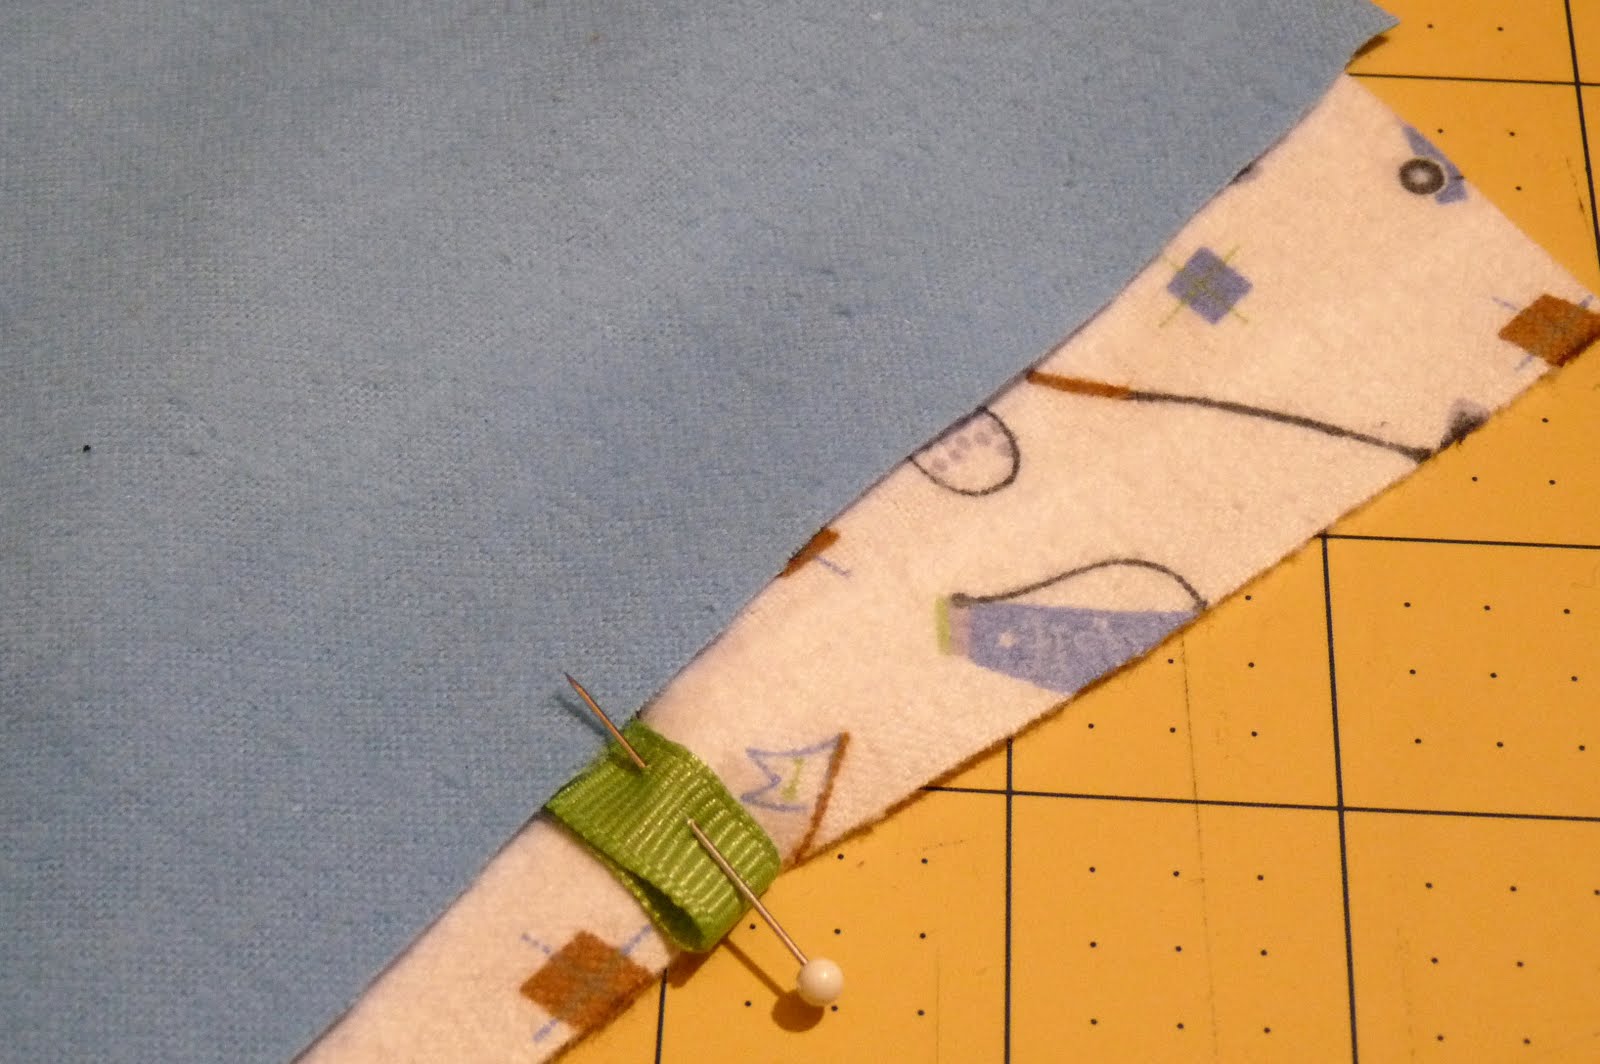
3. Sew your two larger pieces of fabric together, right sides in, like you’re making a pillow case. Pin a ribbon in between the two layers, facing inward (this will be your closure later). When you’ve sewn 3 and a half of the sides, turn your fabric right side out. Make sure you stitch over the ribbon. Finish off the opening (I’d ironed the raw edge in and top stitched across the opening).

3. Create your scene with felt. Hot glue in place. Sew down a few pieces (for the stability of the felt and so that the two fabric pieces stay put).
4. Fill your pockets with toys, tie in a bundle, and bring your little one’s “guys” everywhere you go. This is especially handy for road trips, by the way.
If you’re visiting from Craft Schooling Sunday, Made it Mondays, Metamorphosis Monday, Made by You Monday, Just Something I Whipped Up, Get Your Craft On, Talented Tuesday, Show and Tell Wednesdays, Look What I Made Day, Get Your Craft On, Creative Craft Thursday, Thursdays Treasures, Strut Your Stuff Thursdays, or DIY Day, welcome!
i made one like this for my daughters' polly pockets – i got tired of picking all ten of them up as they fell out of her pockets — great concept, isn't it?
love it! i was planning on making one specifically for cars for my son! 🙂
absolutely delightful! great job! I'm dropping by from The Girl Creative. I hope to see you back at my place soon! until later…
My boys would have loved a little caddy like this when they were younger 🙂
I love it. I really need to make one for my sons helicopters!!!
Great idea. I can't wait to give it a try!
What a great idea! Two little boys + a million toys = need clever solutions. Thanks!
I love this idea! I'm bookmarking and will make for birthday gifts – thanks for the great tutorial!
That's it! I guess I'm gonna have to follow you. 🙂 I come here all.the.time via linky parties and always love what I see. That was a great idea, what a fun way to make your little person feel special, too.
Love it! Great project and tutorial, I'll definately share this with my readers next week @craft schooling Sunday, so thanks so much for linking up and hope to see you again next week!
Cute, Cute!! I just did a car cozy like this for my daughters little friends birthday. I love these things!! Great idea!
i've made just a car caddy but i never thought to make one for all my boys other things. thanks for the idea!
This is really cute!
My little guy has trouble carrying all his "important things" too…might have to make him one!
Alyssa
lifeoflyssie.com
What a great idea! I just LOVE this! Makes me wish I could sew 🙂
What a great idea for a toddler & to take just about anywhere! I have a McLinky party called Tot Tuesdays. I hope you’ll stop by & link up:
http://delicious-ambiguity-nennyk.blogspot.com/
Cheers!
This is such a great idea! And it is totally cute!
I love the unique use of the tote. I only ever see the crayon caddy, but as a mother of Munchkin who needs her little munchkin-buddies with her…..this caddy make a WHOLE lot more sense. You've inspired me to make one, for sure!!!!
This is so perfect! I need to make one ASAP!! My little man carries around a very very similar collection of "guys"…..rocket included! Thanks for the great idea 🙂
I love this, great for road trips too!
This is really very cute!
Thanks for joining Get Your Craft on Thursday. Please join me next week for another wonderful party!!
Please stop by next week I am having guest over each day and I would love for you to tell them HI!
Thanks for linking up on Tot Tuesdays last week. I hope you’ll join me this week for another party. Happy Easter!
Love love love this! You may get me sewing again yet…
Such a clever idea! I featured it on my blog – http://www.campslop.blogspot.com. Be sure to stop by to grab a "featured on" button.
Thank you so much for sharing!