green tutorial- breezy eyelet tunic
As an Amazon Associate I earn from qualifying purchases.
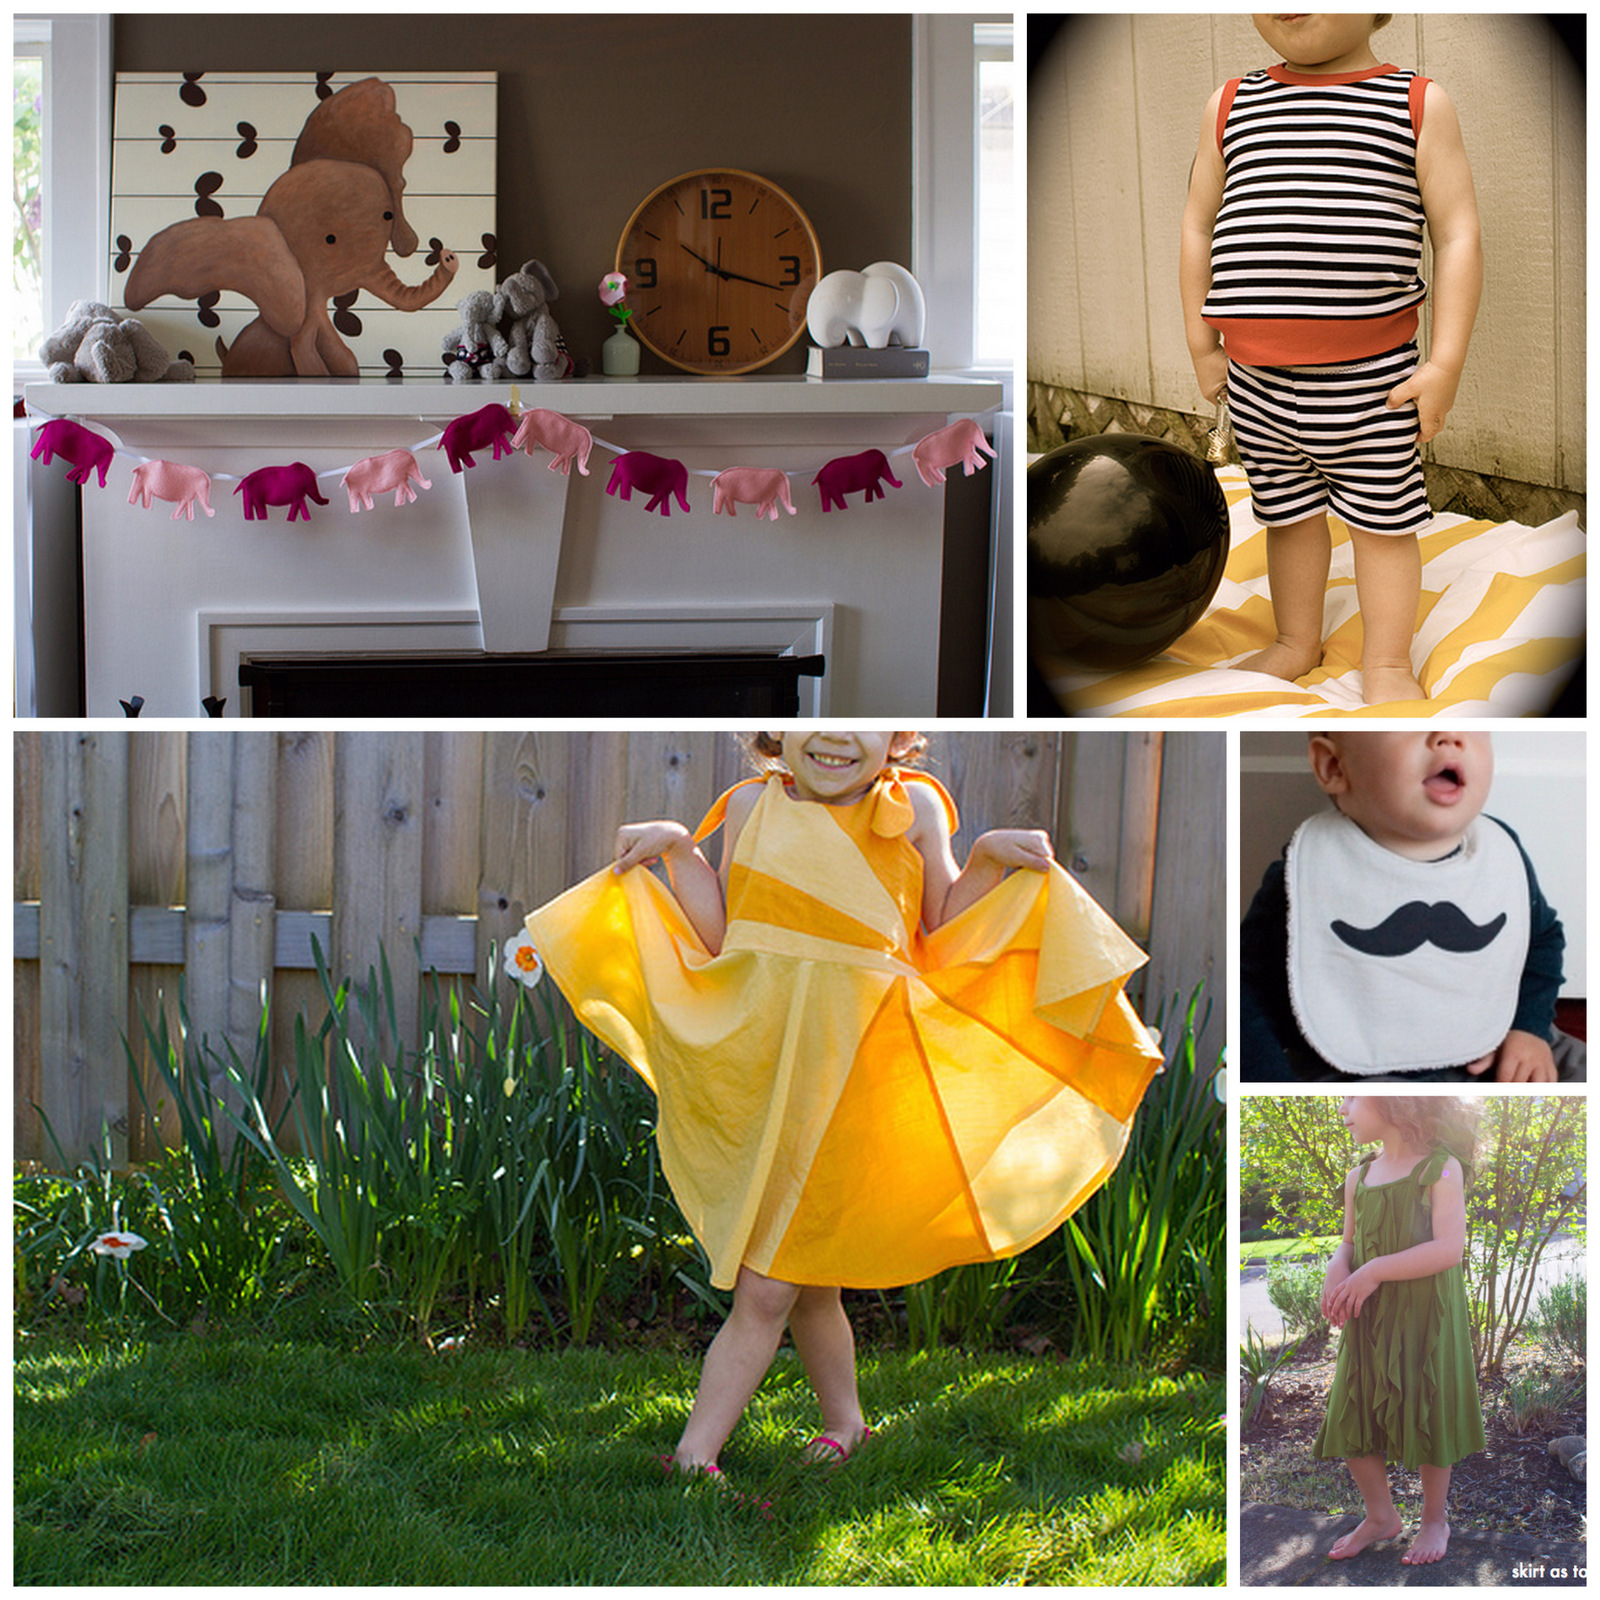 We are in for such a treat today, friends. Kristin, the brains behind Skirt as Top, is our guest. You probably stopped by to see the goodness over there during Vintage May (if you didn’t, go now!) and Kristin has adorableness coming out her ears (like this Sunshine Dress, these boy bibs and this jungle ruffle dress). Kristin’s Smoochies are the exact same age (though opposite genders) of Burke and Piper Jane, so I feel like we share a lot of life milestones as well (I love the pink elephants on parade party she threw for her daughter’s 4th birthday). I just adore Skirt as Top (and Kristin!) and am thrilled to have her here today sharing a green tutorial!
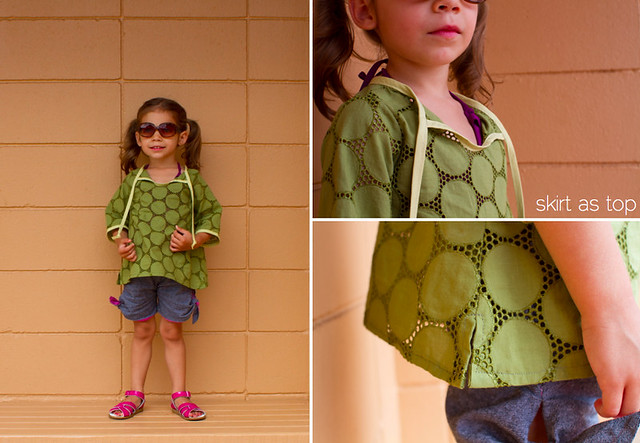
hello! i’m kristin and i’m so happy to be wrapping up color your summer here at kojo! my project today was fully inspired by my fabric, a fabulous green circle eyelet that i picked up at britex during a recent trip to san francisco (where i met and shopped with one of delia’s wonderful color your summer guests, cherie!).
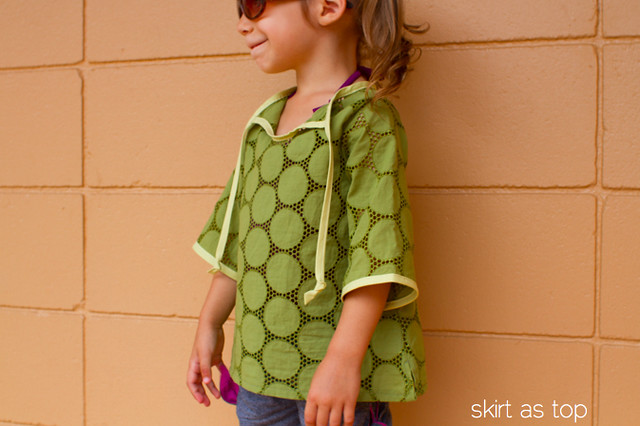
i decided to make a fancy coverup tunic for my little gal to wear over her swimsuit (she changes into her swimsuit first thing if she thinks there’s any chance of swimming that day), but it could be made in any lightweight fabric for an easy summer shirt.
this tunic is a remix of made by rae’s flashback skinny tee pattern, which is the perfect basic top pattern to adapt to many different things. it’s really a must buy if you ask me. in this tutorial, i’ll show you how to alter her pattern to make this not-so-skinny tunic with a keyhole neckline.
MATERIALS
- 1/2 – 3/4 yard eyelet, gauze, or other lightweight fabric (for a 3T)
- 1/2 yard contrast fabric for binding
- coordinating thread for both fabrics
- tracing or freezer paper to make your pattern
TO MAKE THE PATTERN
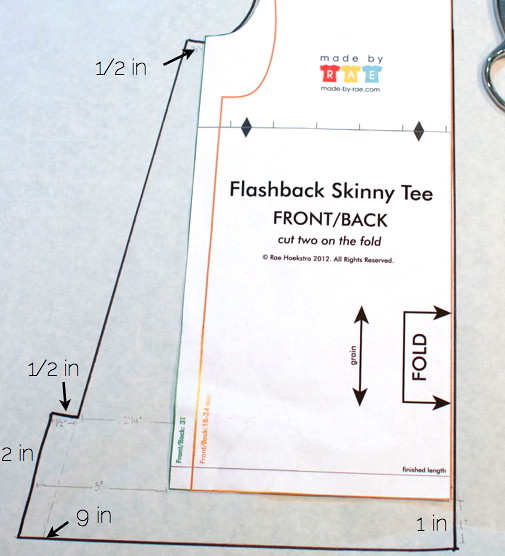
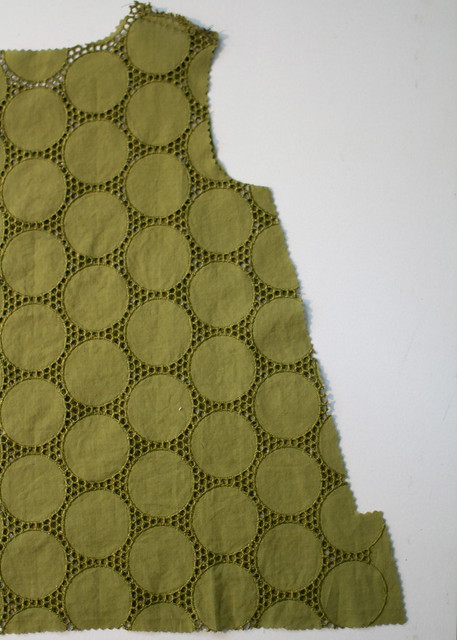
take the appropriately sized FBST pattern for your child and place it on your tracing/freezer paper (mine is a 3T). add 1″ to the length and draw the hemline out from the center seam, stopping 9.5″ from the center seam (fold). make a mark at 9″. extend out the armpit 1/2″ to give the armhole a bit more room, then (with pencil) connect that point to the 9″ mark at the hemline. from the 9.5″ mark at the bottom, draw a 2″ line .5″ away from the slanted side seam to later create the side vents. connect it back to the body of the pattern.
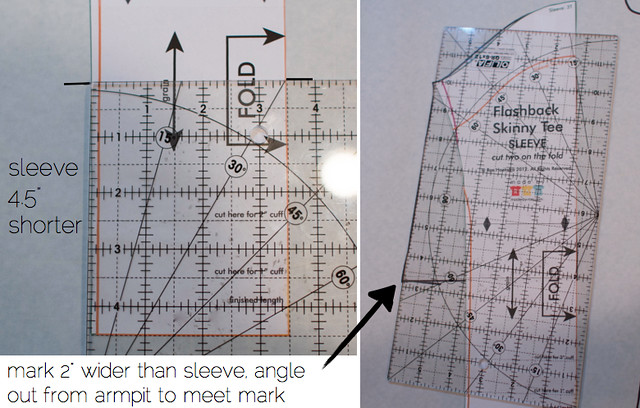
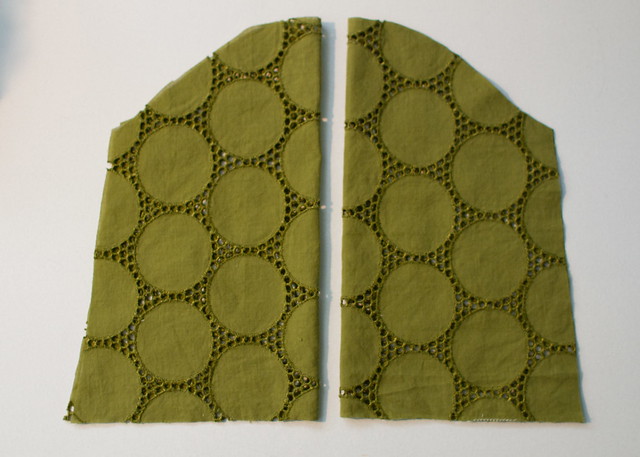
for the tunic sleeves, which are 3/4 length, you’ll shorten the sleeve pattern by 4.5″ (if your child is much larger/smaller than my example, use a long sleeved shirt they already own to judge where to cut a 3/4 sleeve). once you’ve marked either side of this, trace around the pattern’s shoulder line and the fold. mark the base of the sleeve out 2″ from where the FBST would be, and connect with a slanted line from the armpit. you can curve it slightly at the armpit to match the existing pattern’s shape.
trim the front neckline just a bit deeper (barely any).
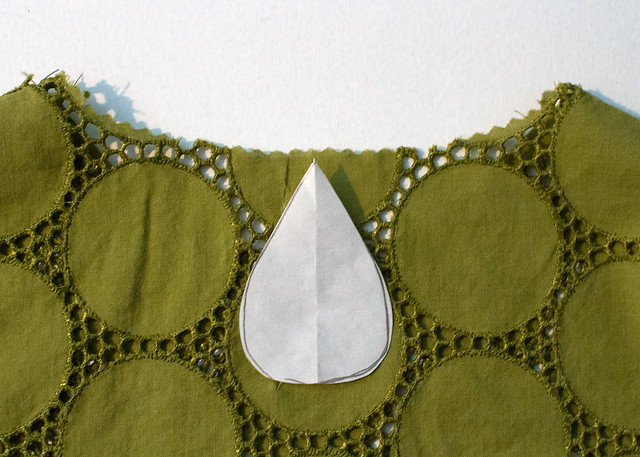
cut a teardrop shape out about 2.75″ tall for your keyhole pattern.
now you have your pattern pieces! mark the fold lines and the size/name of your pattern for future use.
TIP: since you’re making major alterations to an existing pattern, i recommend making a quick muslin and trying it on your child to be sure it fits like you want – the muslin goes together really quickly, i promise. i only added one sleeve on my muslin. better to check now than not have it fit later, especially if your real fabric is as expensive as mine was!
CONSTRUCT THE TUNIC
the construction is largely the same as the FBST, with a few modifications. i’ll talk about the modifications here.
all seam allowances are 1/2″ unless otherwise noted.
align and cut two sleeves and two main pieces (a front and a back), all on the fold. if you have a repeating eyelet like mine, be sure to keep your shapes lined up symmetrically.
sew your shoulder seams right sides together. then sew each side seam, stopping about 1/4″ above the side vent bump out. trim all seams to 1/4″ and zigzag finish together with matching thread. press.
set in both sleeves (sorry no photo! tutorial here if you need one). trim seam allowances to 1/4″, finish, press.
cut out a keyhole by using your pattern piece along the back of the fabric (i first thought the keyhole would be in the back but like it better in the front). center the keyhole, mark, and cut it out. freezer paper works well here – fuse it to your fabric and cut around it.
make 2 yards of double fold bias binding, cutting your strips 1.5″ wide and following dana’s tutorial if needed.
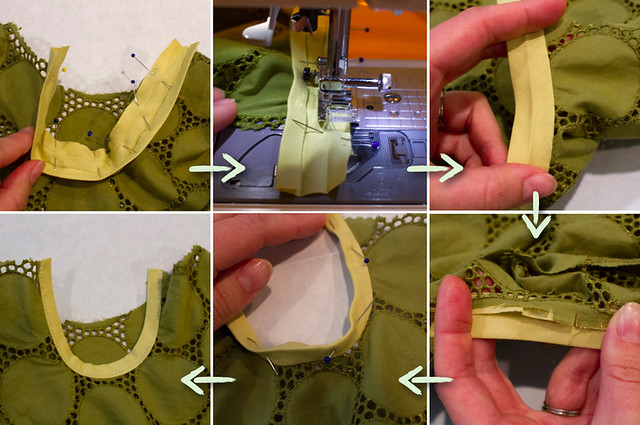
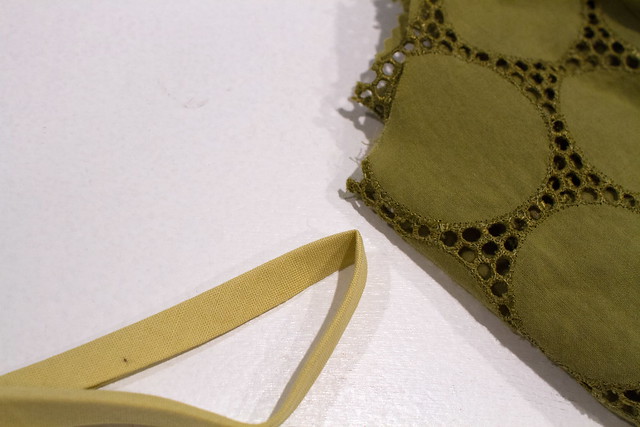
bind the keyhole first by opening up about 12″ of the bias tape and pinning a raw edge to the right side of the keyhole, letting a little extra overhang the edge. sew along the fold line (about 3/8″ seam). finger press away from the garment, and trim into the seam allowance all along the curve. fold the bias tape around to the back and pin, enclosing the raw edge and overlapping your previous stitch line. stitch close to the edge, catching both sides of the bias tape as you sew. trim the ends to match the shirt.
to bind the neckline, cut a length of bias tape 34″ long. find the center, and find the center of the back of your shirt (not the keyhole side). pin and attach the bias binding the same way you just did for the keyhole. if you’d like, you can fold the ends in 1/4″ and then refold your bias tape, though if you leave it raw and knot the ends, i think it looks cute. it’s bias cut, so it shouldn’t fray much. start to sew at one free end of the tape and continue around the neckline, finishing at the opposite end.
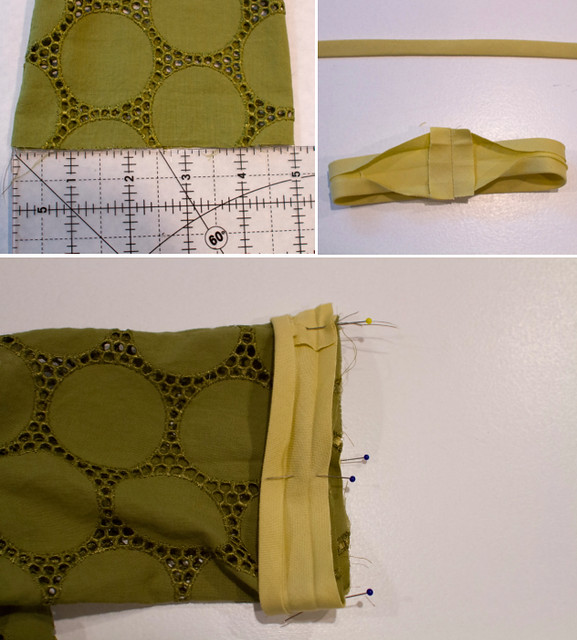
to bind the sleeves, measure your already sewn sleeve’s width on the fold (mine was 5″). double and then add 1″ to that, resulting in two 11″ cuts of bias tape for my sleeve bindings. take one and sew the short ends together, press open, and open up one side of the tape. slide it over the raw edge of the sleeve right sides together, pin, and finish as you did the keyhole and neckline, enclosing the raw edges.
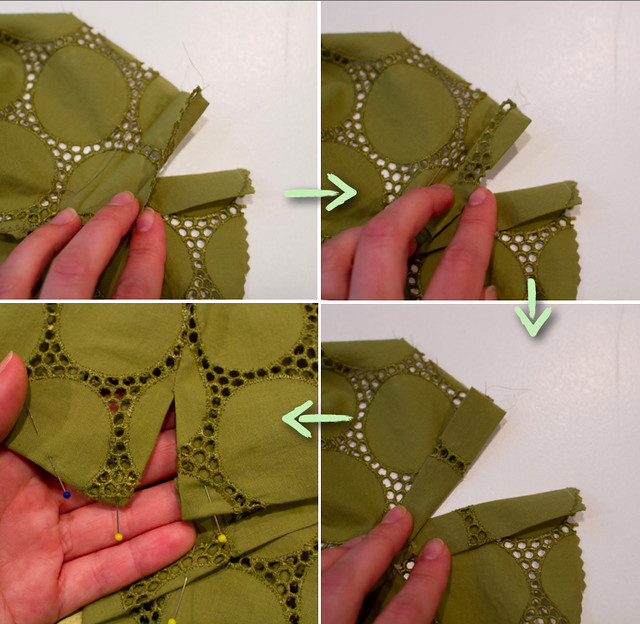
to finish the side vents and hem, fold in once 1/2″ then again 1/2″, press, and pin. then fold up the bottom hem 1/2″ twice, and sew at 1/2″ all the way around, stopping about 3/8″ away from the vent. pivot and sew up, across the top, and down the other side of the vent, then pivot again and continue sewing to finish the hem.
you’re done! your little gal can now throw on a swimsuit, some knot shorts, and her breezy new tunic, and you can do whatever you need to do before going swimming. she won’t LOOK like she’s about to hit the pool, but she is ready. oh man is she ever ready!

thanks so much for having me, kirstin and jordan, and i hope everyone has a wonderful rest of their summer! when you’re not busy summering, feel free to come visit me at skirt as top sometime!
(PS – i took these photos during our recent hawaiian vacation and i already wish i could go back! we swam every day!)
Isn’t that fabric amazing? Also, Hawaii looks dreamy. For more Color Your Summer goodness today, head over to Delia’s (we’re wrapping up this weekend and will be rounding-up early next week- can’t believe it!).




completely fabulous! what a perfect use for that fabric. yet ANOTHER amazing skirt as top creation!!
Gail- SO cute right? And that fabric- to die for. 🙂
It really is so very cute!!!! That fabric is the right color…because it strikes envy into all of us ogling it!!! It looks so cool. A tunic was the perfect choice of project for it!! It’s so funny, there must have been something in the Portland air because I just made Sephira a keyhole dress earlier this week! Ha! You never disappoint with your projects, Kristin. Thanks for that!
Love the keyholes! Seriously, love!
oh thanks kat, your dress is cute too! that’s what this one’s keyhole would look like if it was tied up.
awwww thanks so much for the kind words and thanks so much for having me, kirstin! so excited to be a part of color your summer!!
Can’t tell you how much I love this project(and you and your blog!)! Thanks for joining us!
Lovely! The bias tape is such a good idea around the keyhole too.
Isn’t it? My mind is turning with ideas for this technique…
wonderful!!! what a great little cover up!
Too cute, right? Loved your pink bracelets Miss Anna- so glad you were part of this series!
Kristin this is definitely in my top three favorite things you have EVER made. Seriously, the most perfect use of that awesome fabric. Em could not be cuter in it!!
I couldn’t agree more- that fabulous fabric is perfect for this.
And I love your blog, Jessica (loved your stuff in Project Run and Play and was so glad you guested for Delia for Color Your Summer)! So glad you stopped by!
omigosh, really? woah. i thought about this design forever and ever before finally taking a deep breath and cutting into that lovely fabric, but i’m totally happy with it. thanks jessica!
OoOooOOoOh – I love it. This girl can never do wrong – amazingness is seeping from her pores, I swear!
I feel like I’ve been waiting for this tutorial and these photos forever (maybe since April, when you bought the fabric!), but it was well worth the wait. And thanks for the shout out, Kristin!
Cherie, I love it that you guys found this together. If I’m in San Fran, I’m totally emailing you for a shopping trip too. 🙂
And I loved your little sunshine blanket- SO great! Thanks for being a part of Color Your Summer!
aw shucks, thanks cherie! 😀 just wish we could go shopping together more often…
What a fabulous way to end ‘Color Your Summer’. Such a gorgeous top and the top is beautiful, gotta love Kristin’s work.
Laura- I share your love for Kristin’s work! 🙂
you guys are making me blush.
Fantastic fabric (love the color!), and great tutorial.
Shannon- YES, isn’t the color great! Can’t wait to make one of these gems for Piper Jane.
thanks shannon! i’d never seen that color or type of eyelet before, so it was worth the splurge. kirstin, i’d love to see you make one for piper jane, that’d be so cute!!
what a fantastic top, kristin! i love love love that fabric, and the green is a nice summery alternative to pink. (don’t get me wrong, i love pink, but isn’t it always refreshing to see a little girl in something else? 🙂 i happen to be wearing a similarly cut (store bought) tunic myself… perfect for hot days in the hawaii (or portland) sun!
thanks, robin! couldn’t agree more about the refreshing break from pink – i love how green pairs well with so many different colors.