
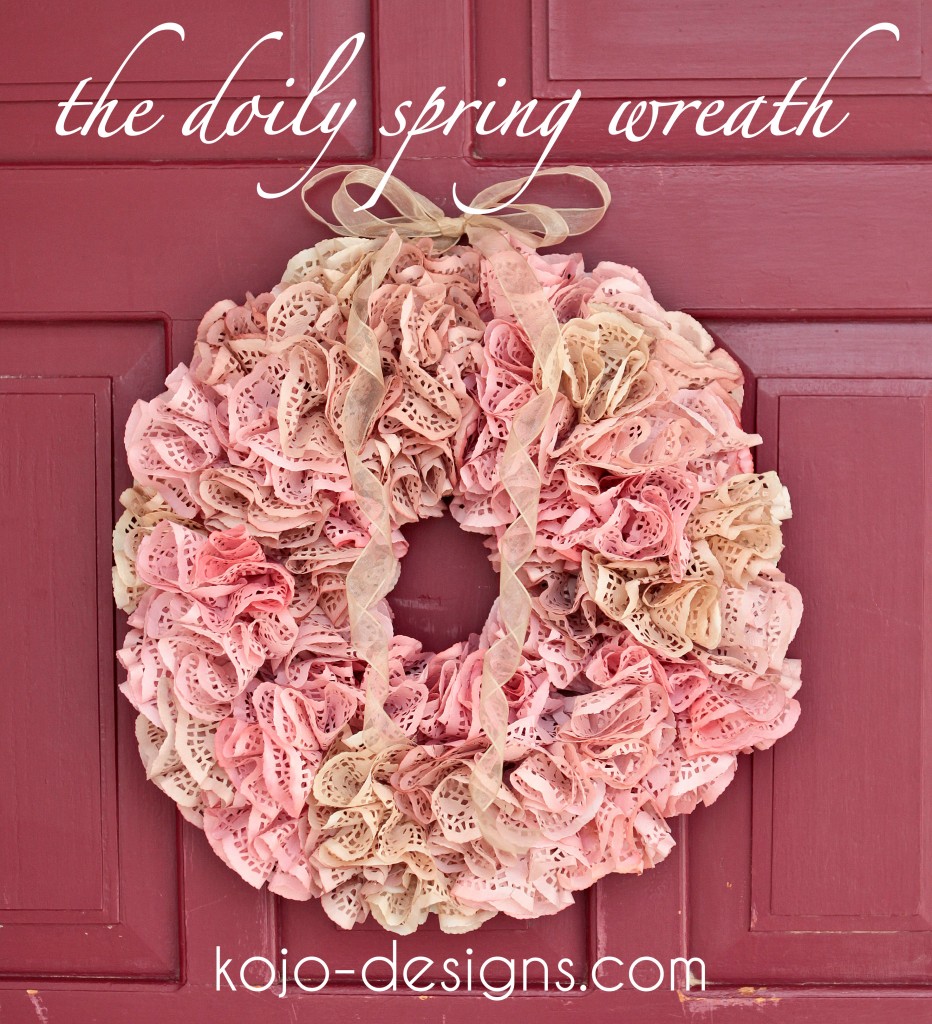
DIY spring wreath (made of doilies!)
As an Amazon Associate I earn from qualifying purchases.
 I know, I am a little obsessed with doilies right now. I made the pinwheels but still had about 3/4 of the package left, so I decided to make a doily wreath as well!
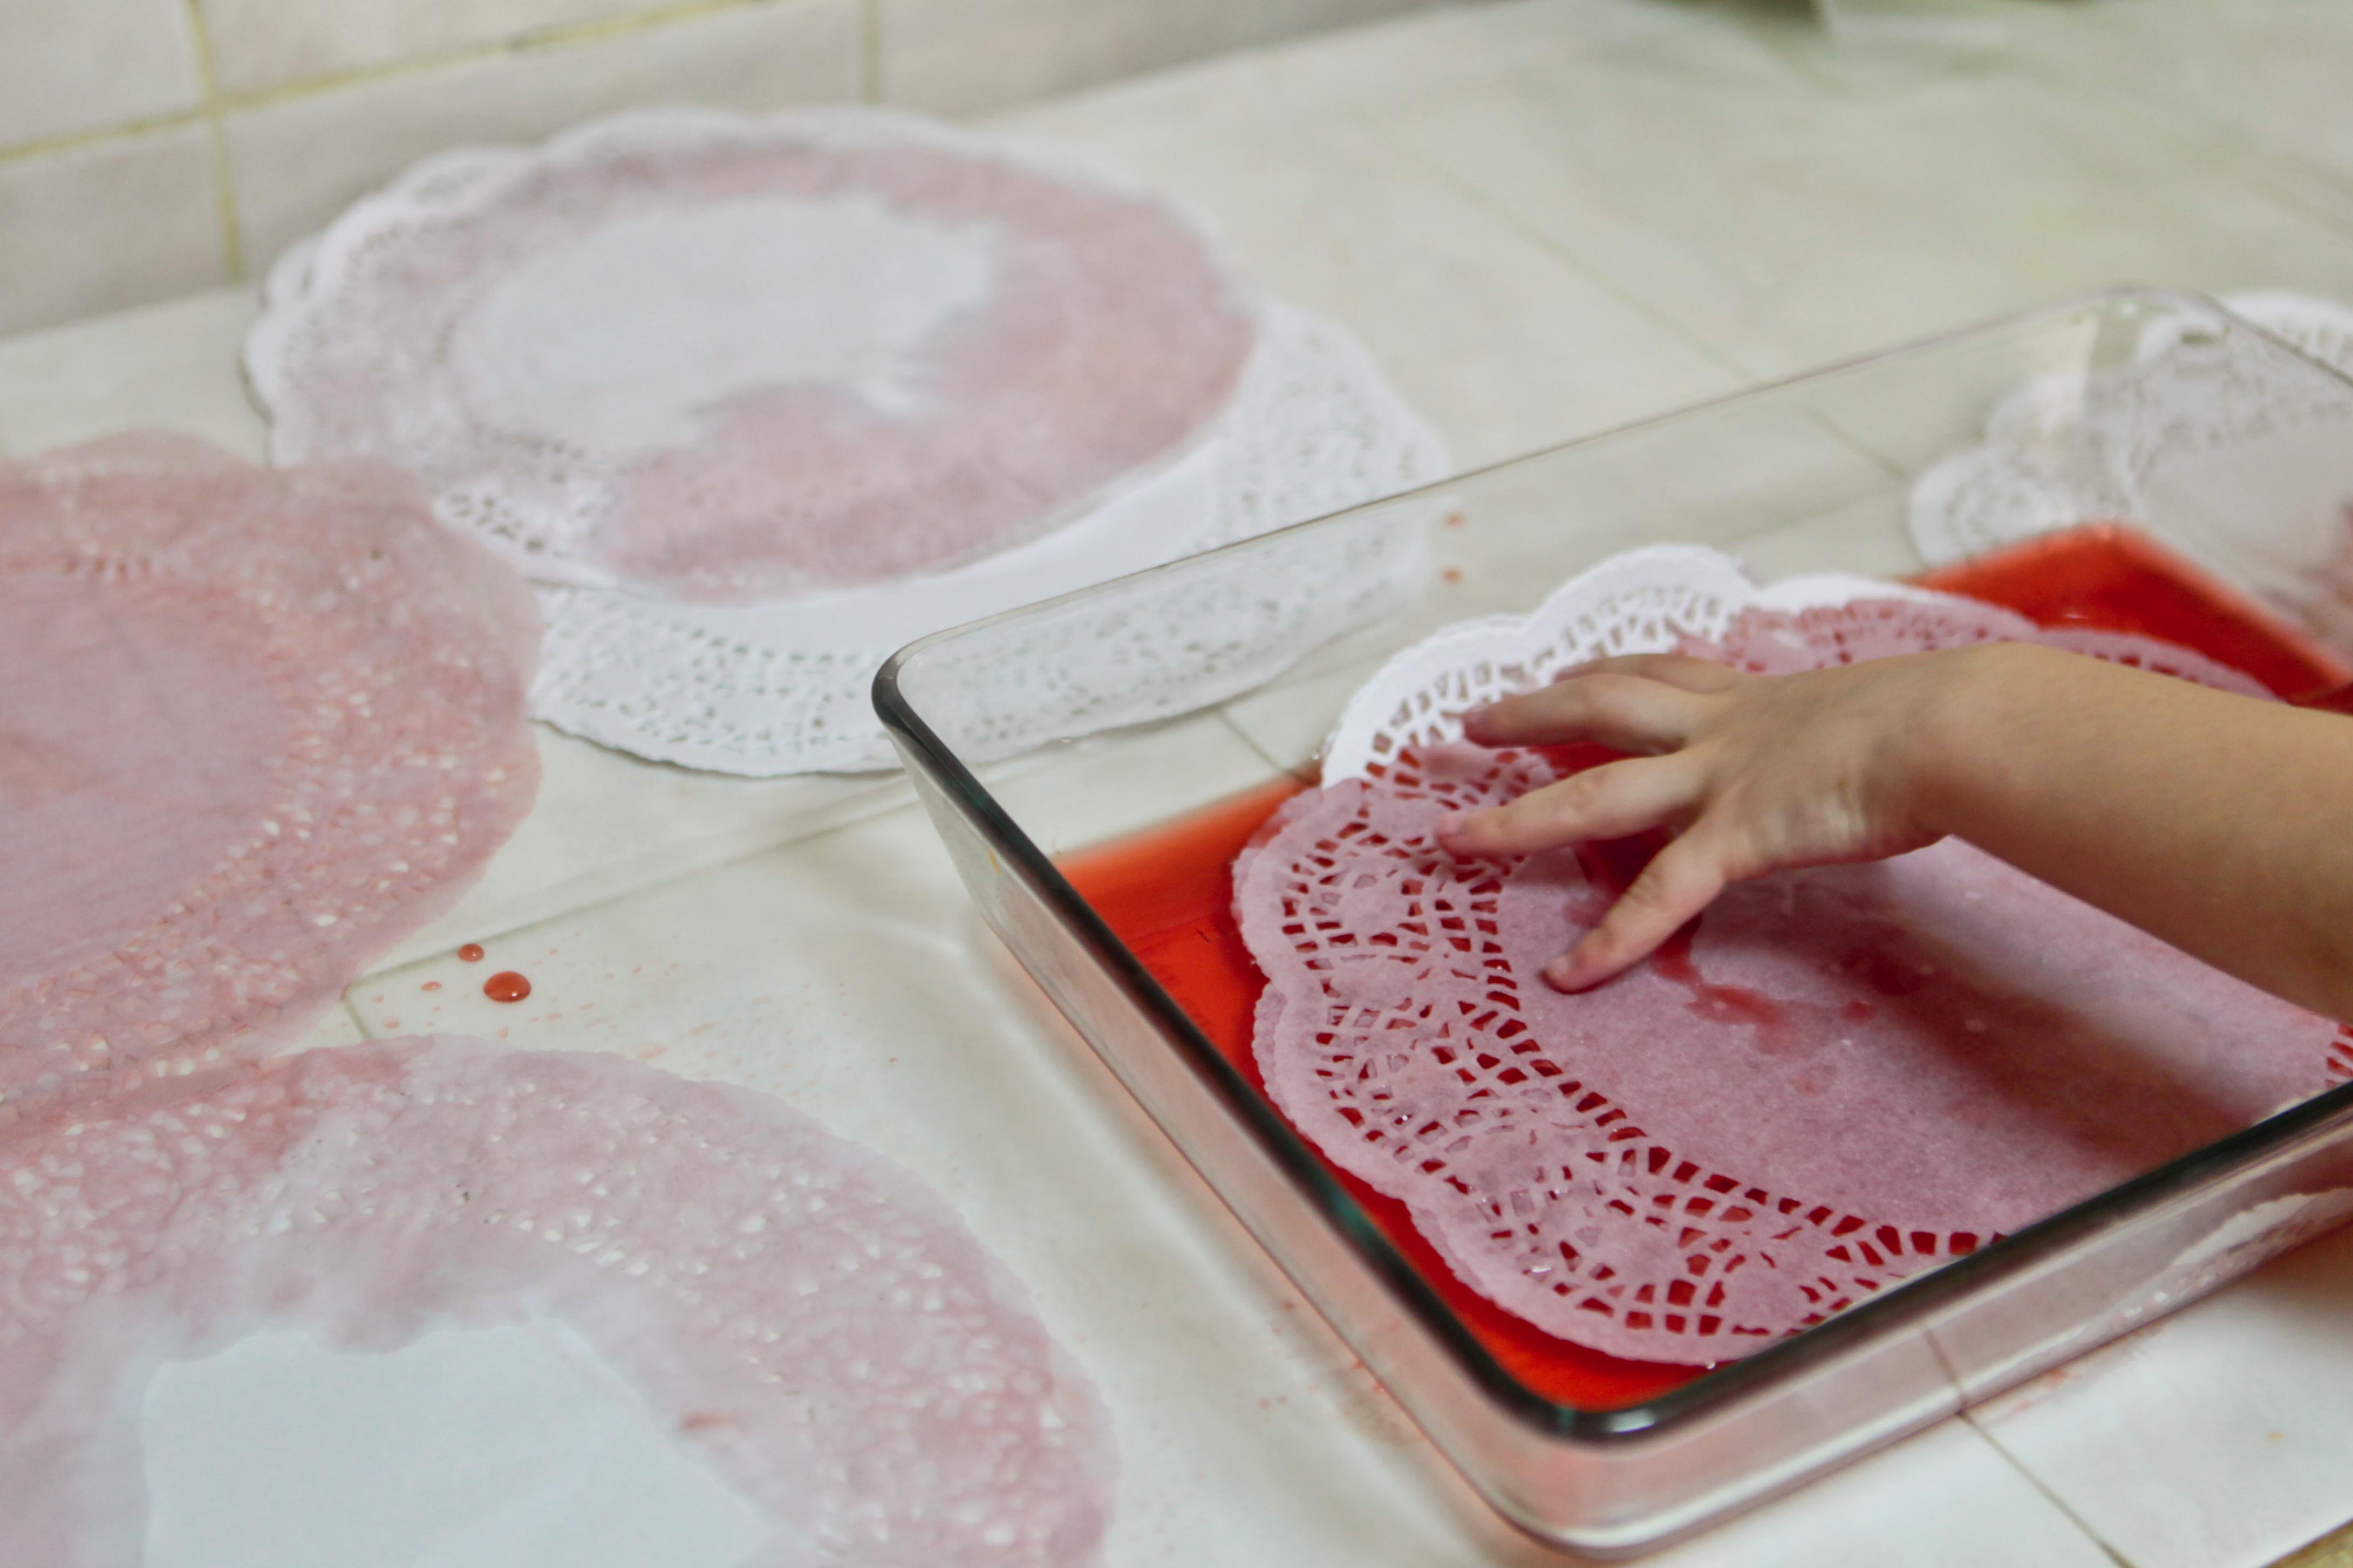
First Keadryn and I dyed the doilies. We used tea and red food coloring to make a muted pink. We just dipped in stacks of doilies (several at a time) and then took them out and let them dry. We tried dyeing them individually, but because they are so thin they ripped easily when wet. It actually worked better to dye a whole stack at once without peeling them apart (about 10-15). We also let them dry without peeling them and it was easy to peel them apart once they were dry. Not all of my batches were exactly the same color, but I like it better that way, I think it adds dimension to the final wreath.
 Once they were dry, we made 5 bazillion doily ruffles…and I forgot to take pictures of the process. But never fear, I found a white doily and took some pictures of how to do it.
Step 1:
 Fold the doily in half, and then half again:
Step 2:
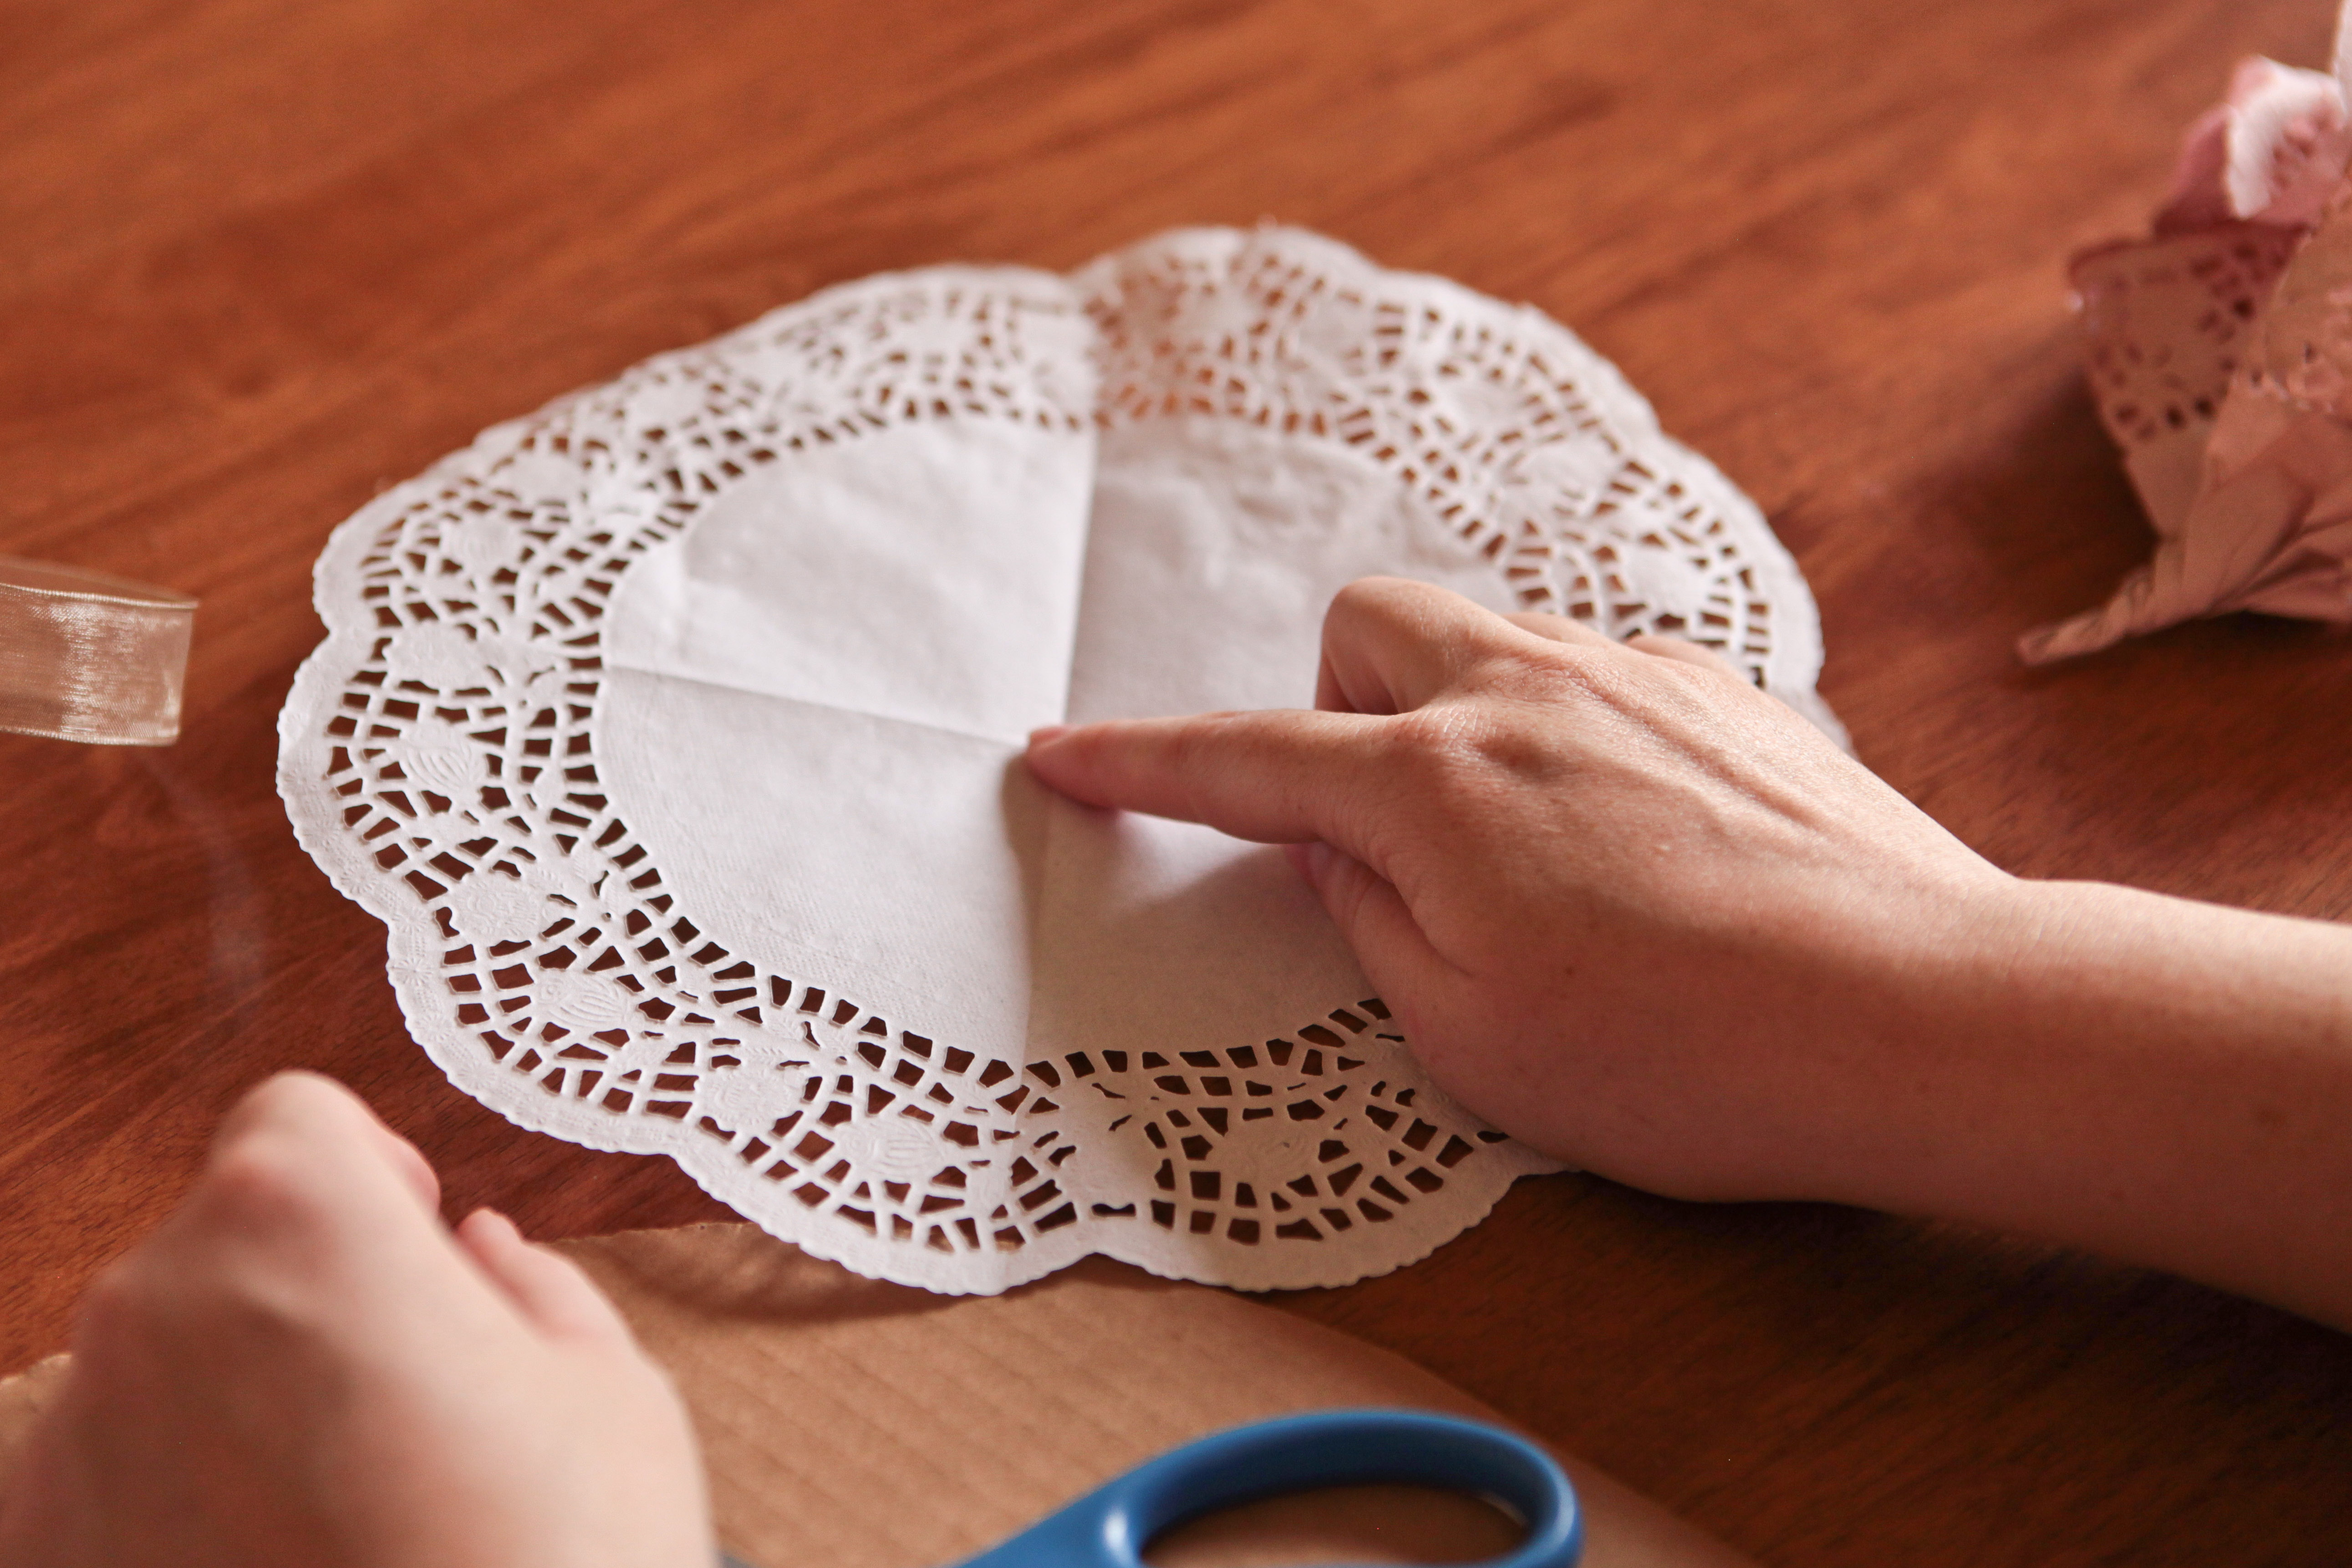 Unfold the doily and put your finger in the middle. Where the two lines mark the middle point.
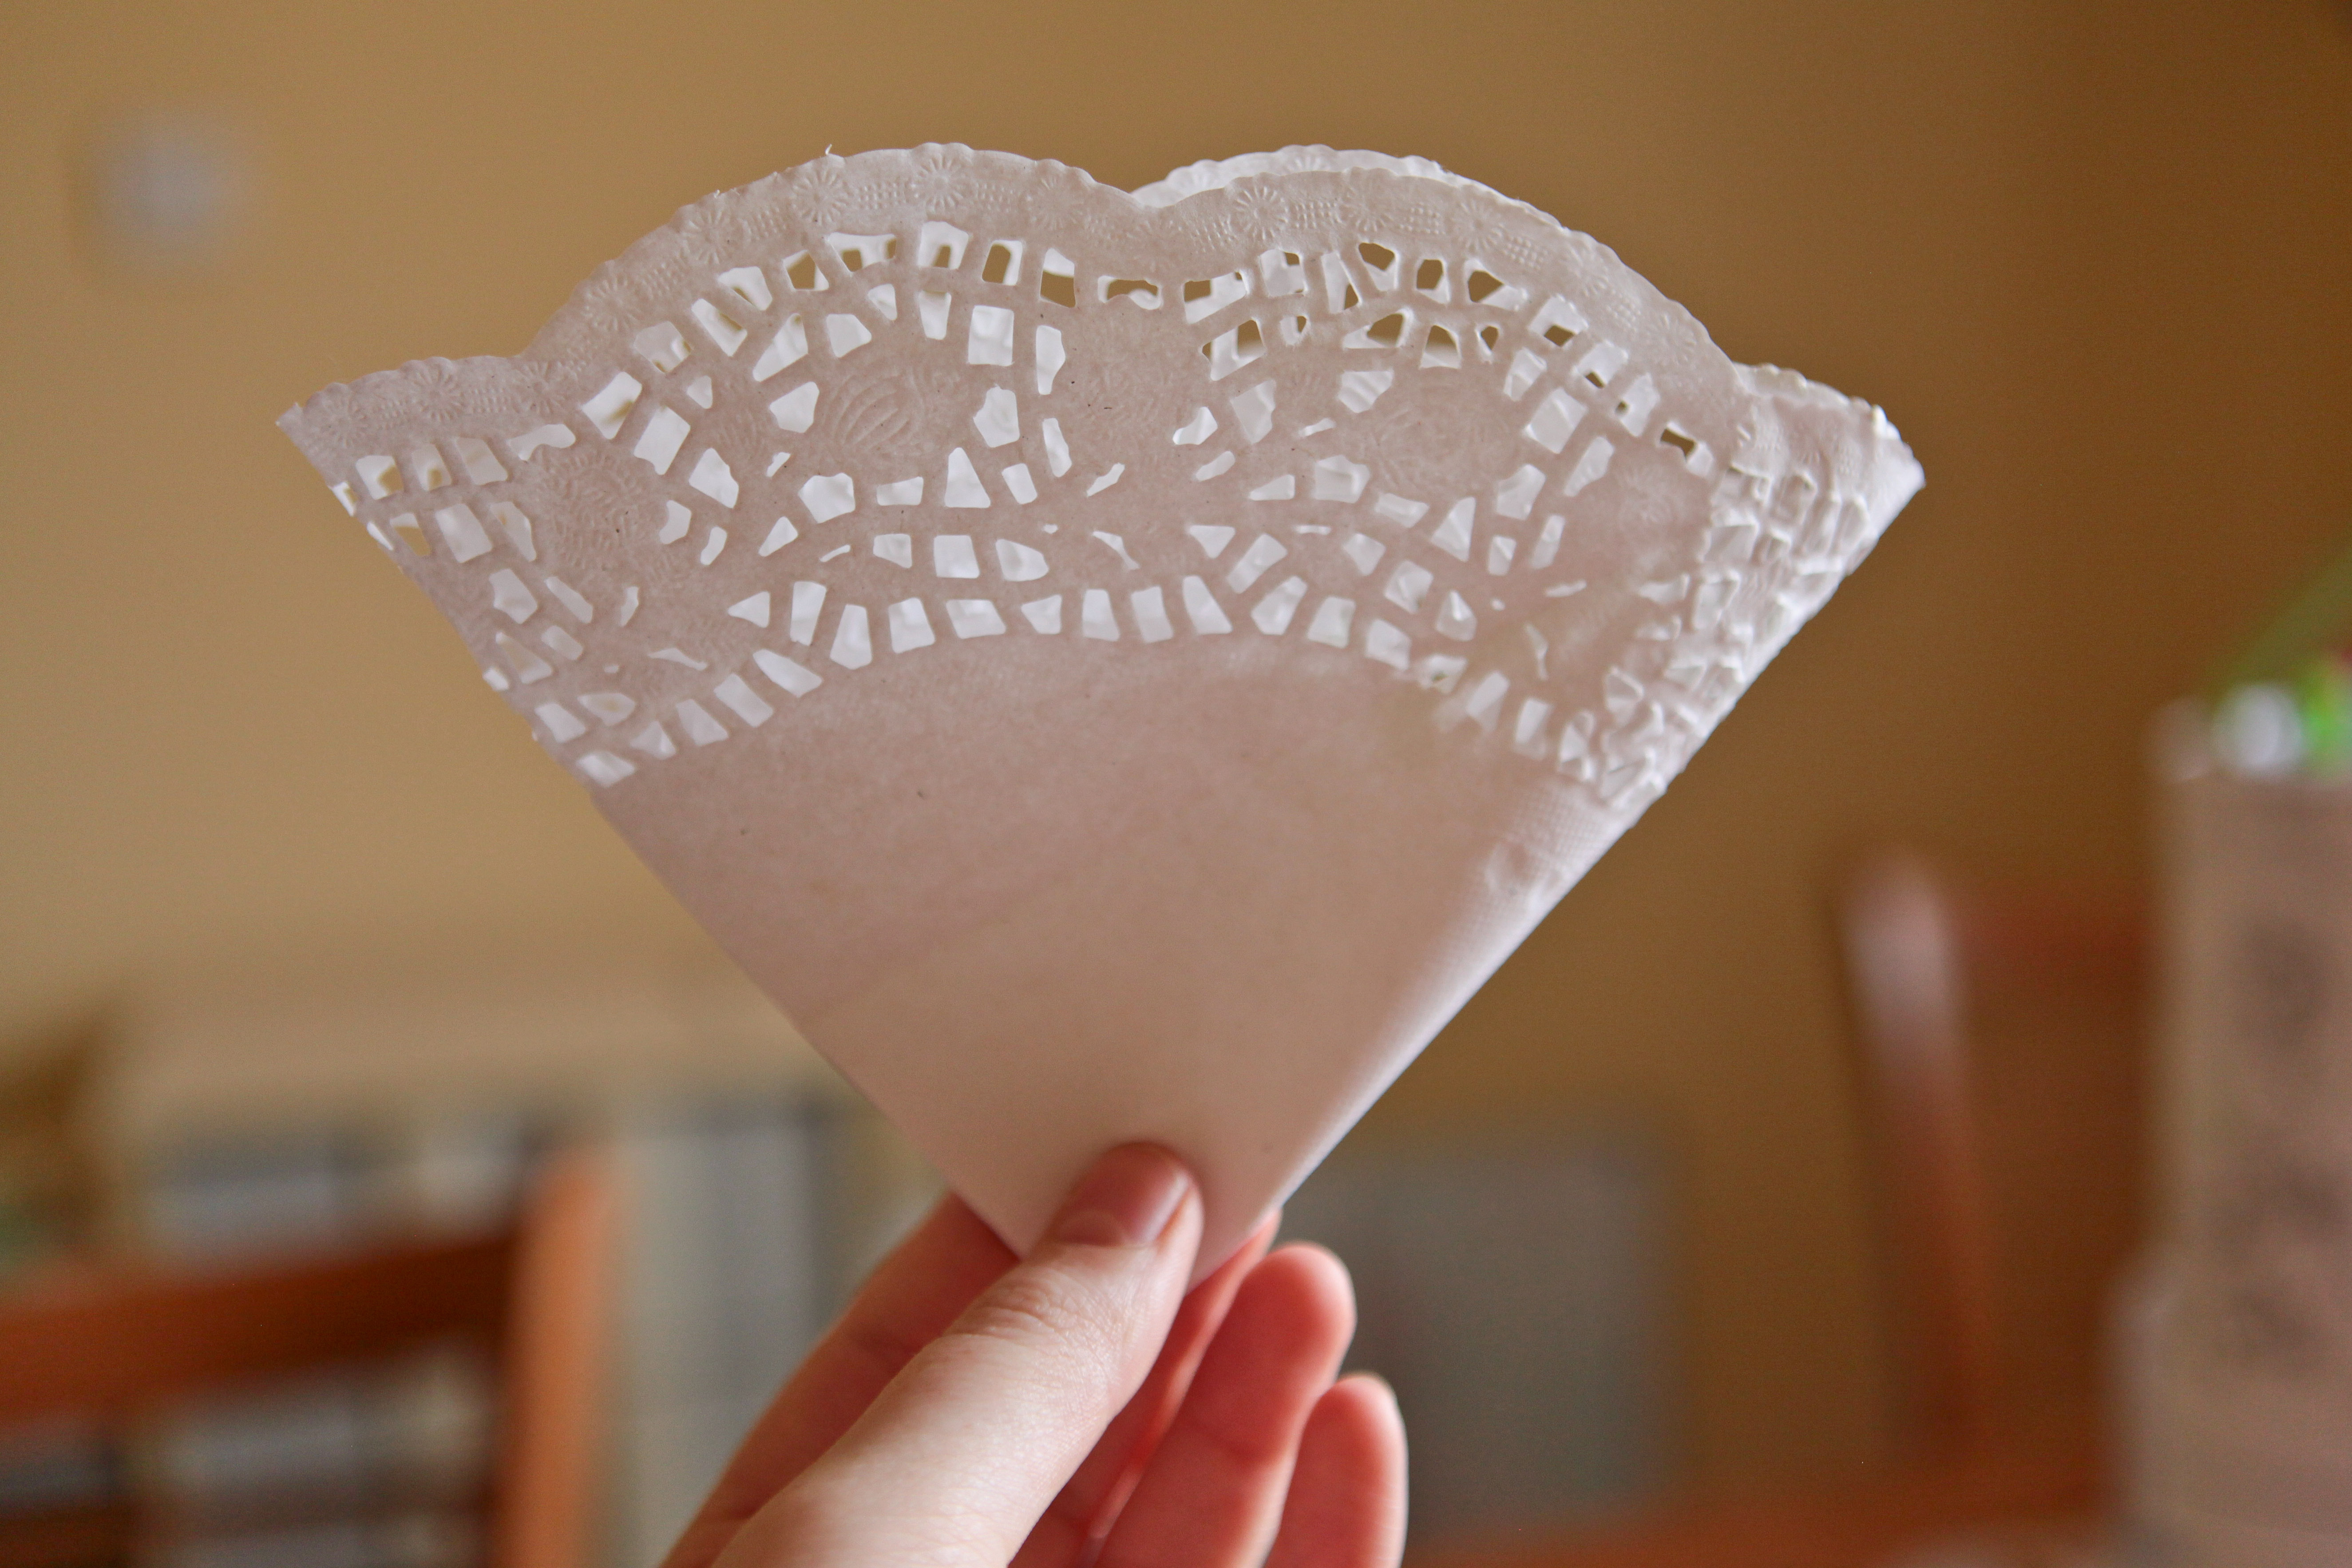
Step 3:
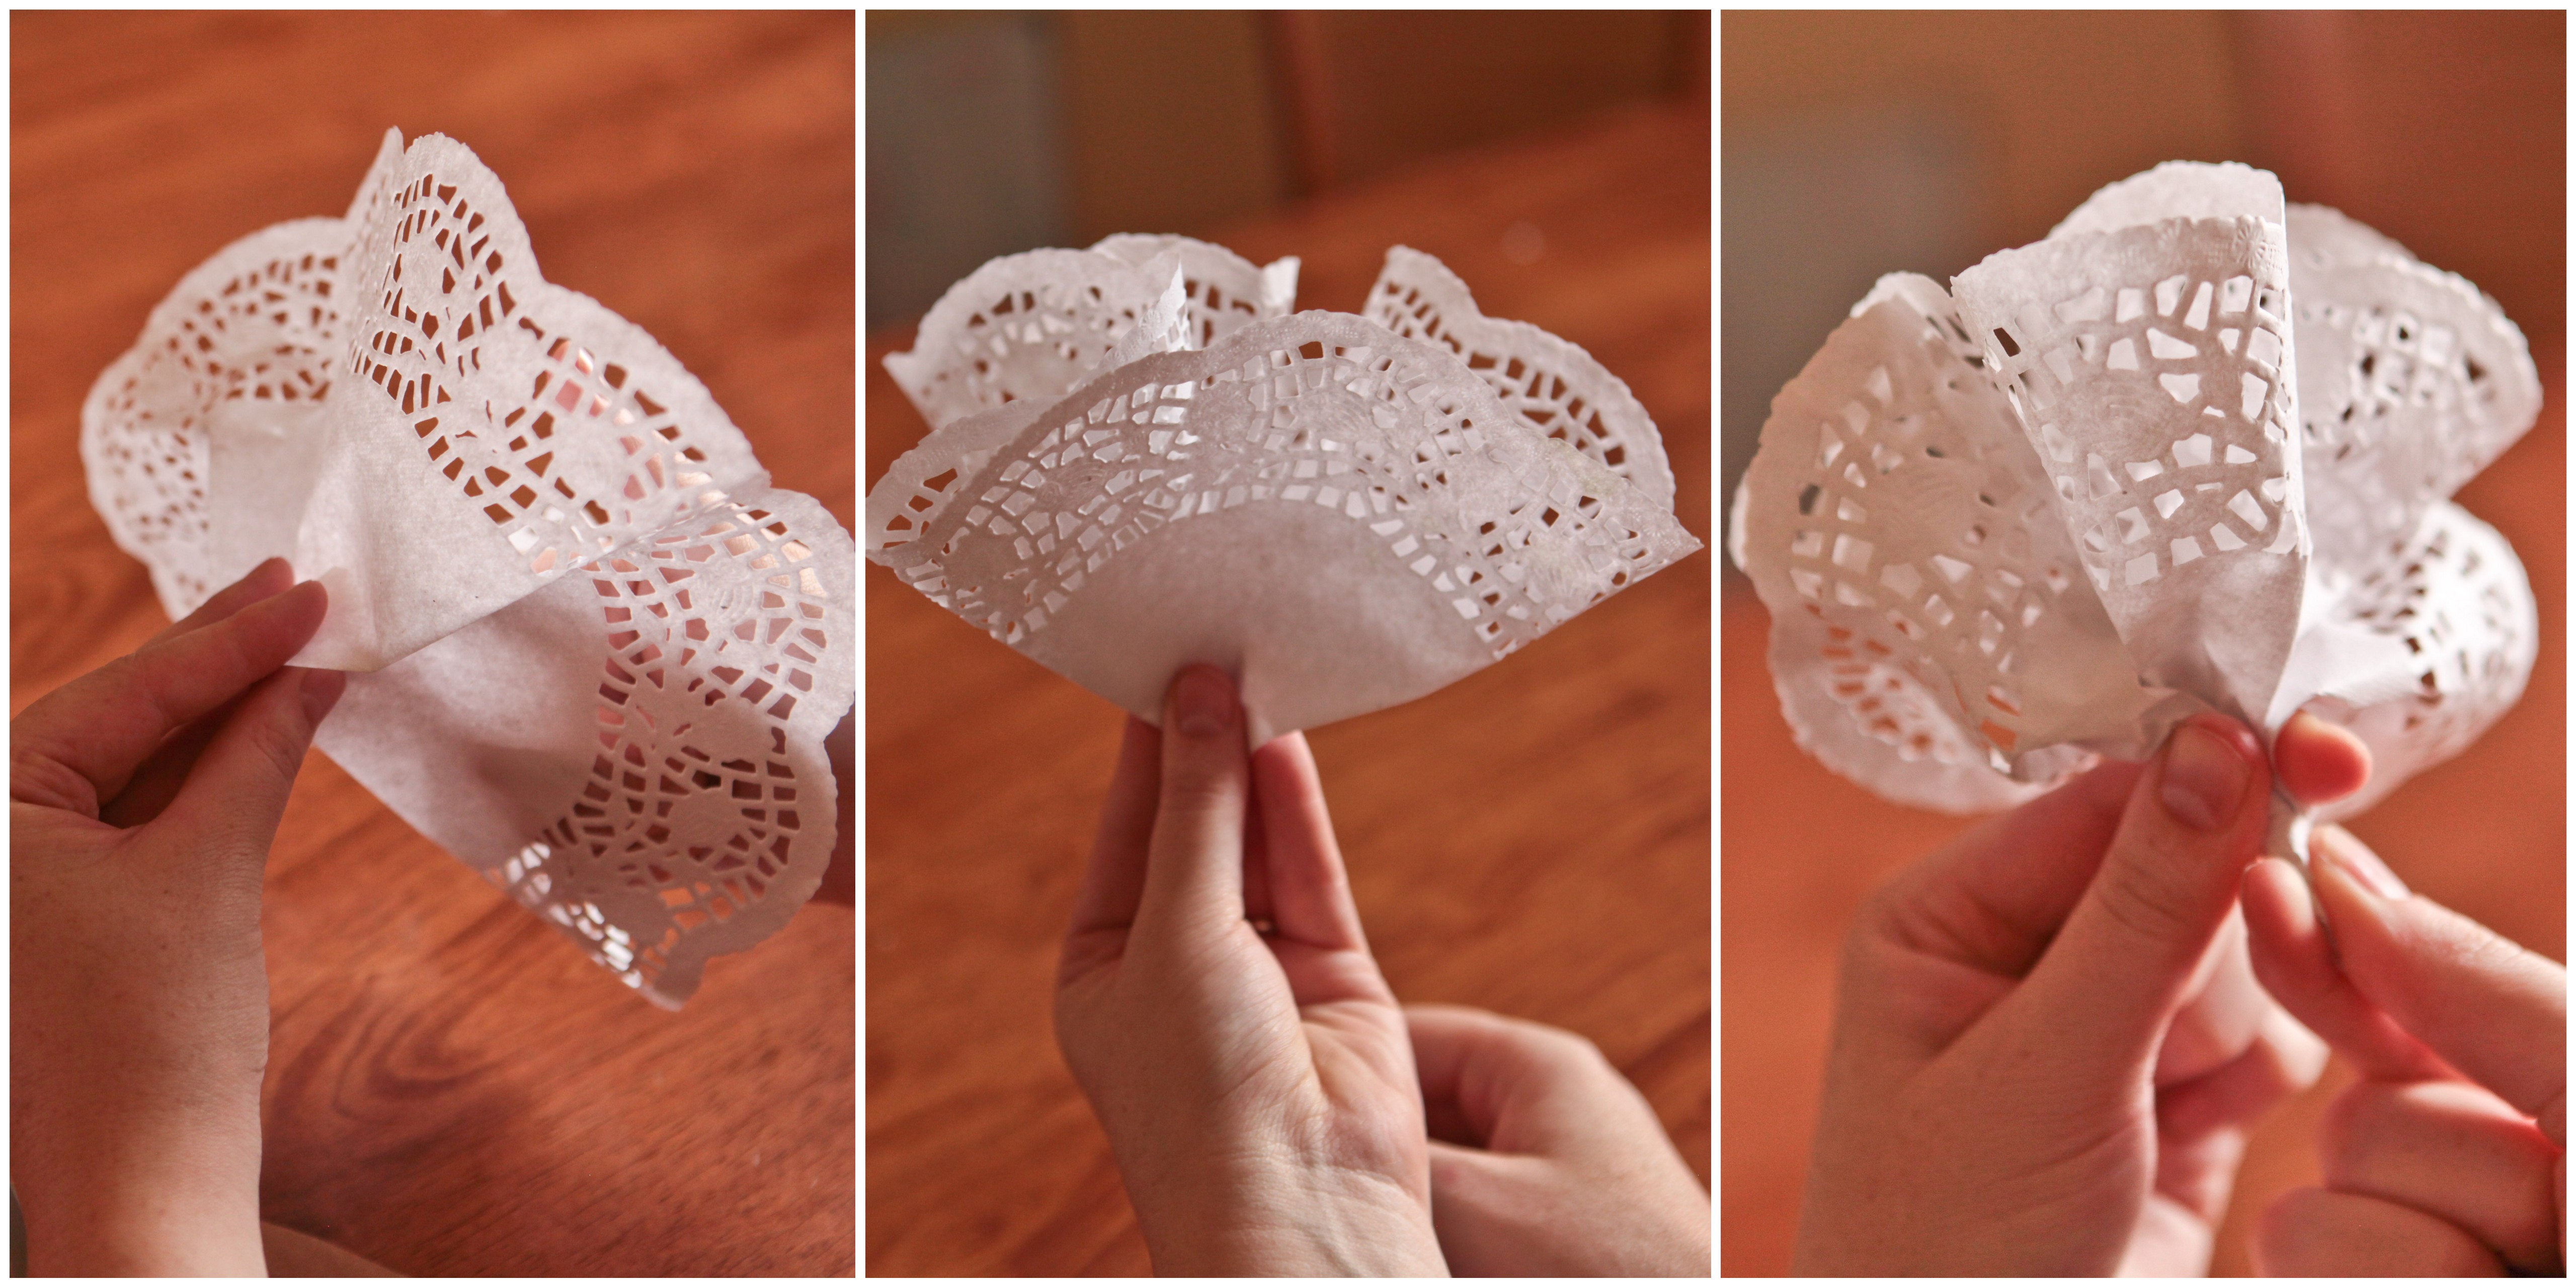 Lift up the doily, flip it over and pinch the center of the doily. Twist to make a doily ruffle flower thingy.
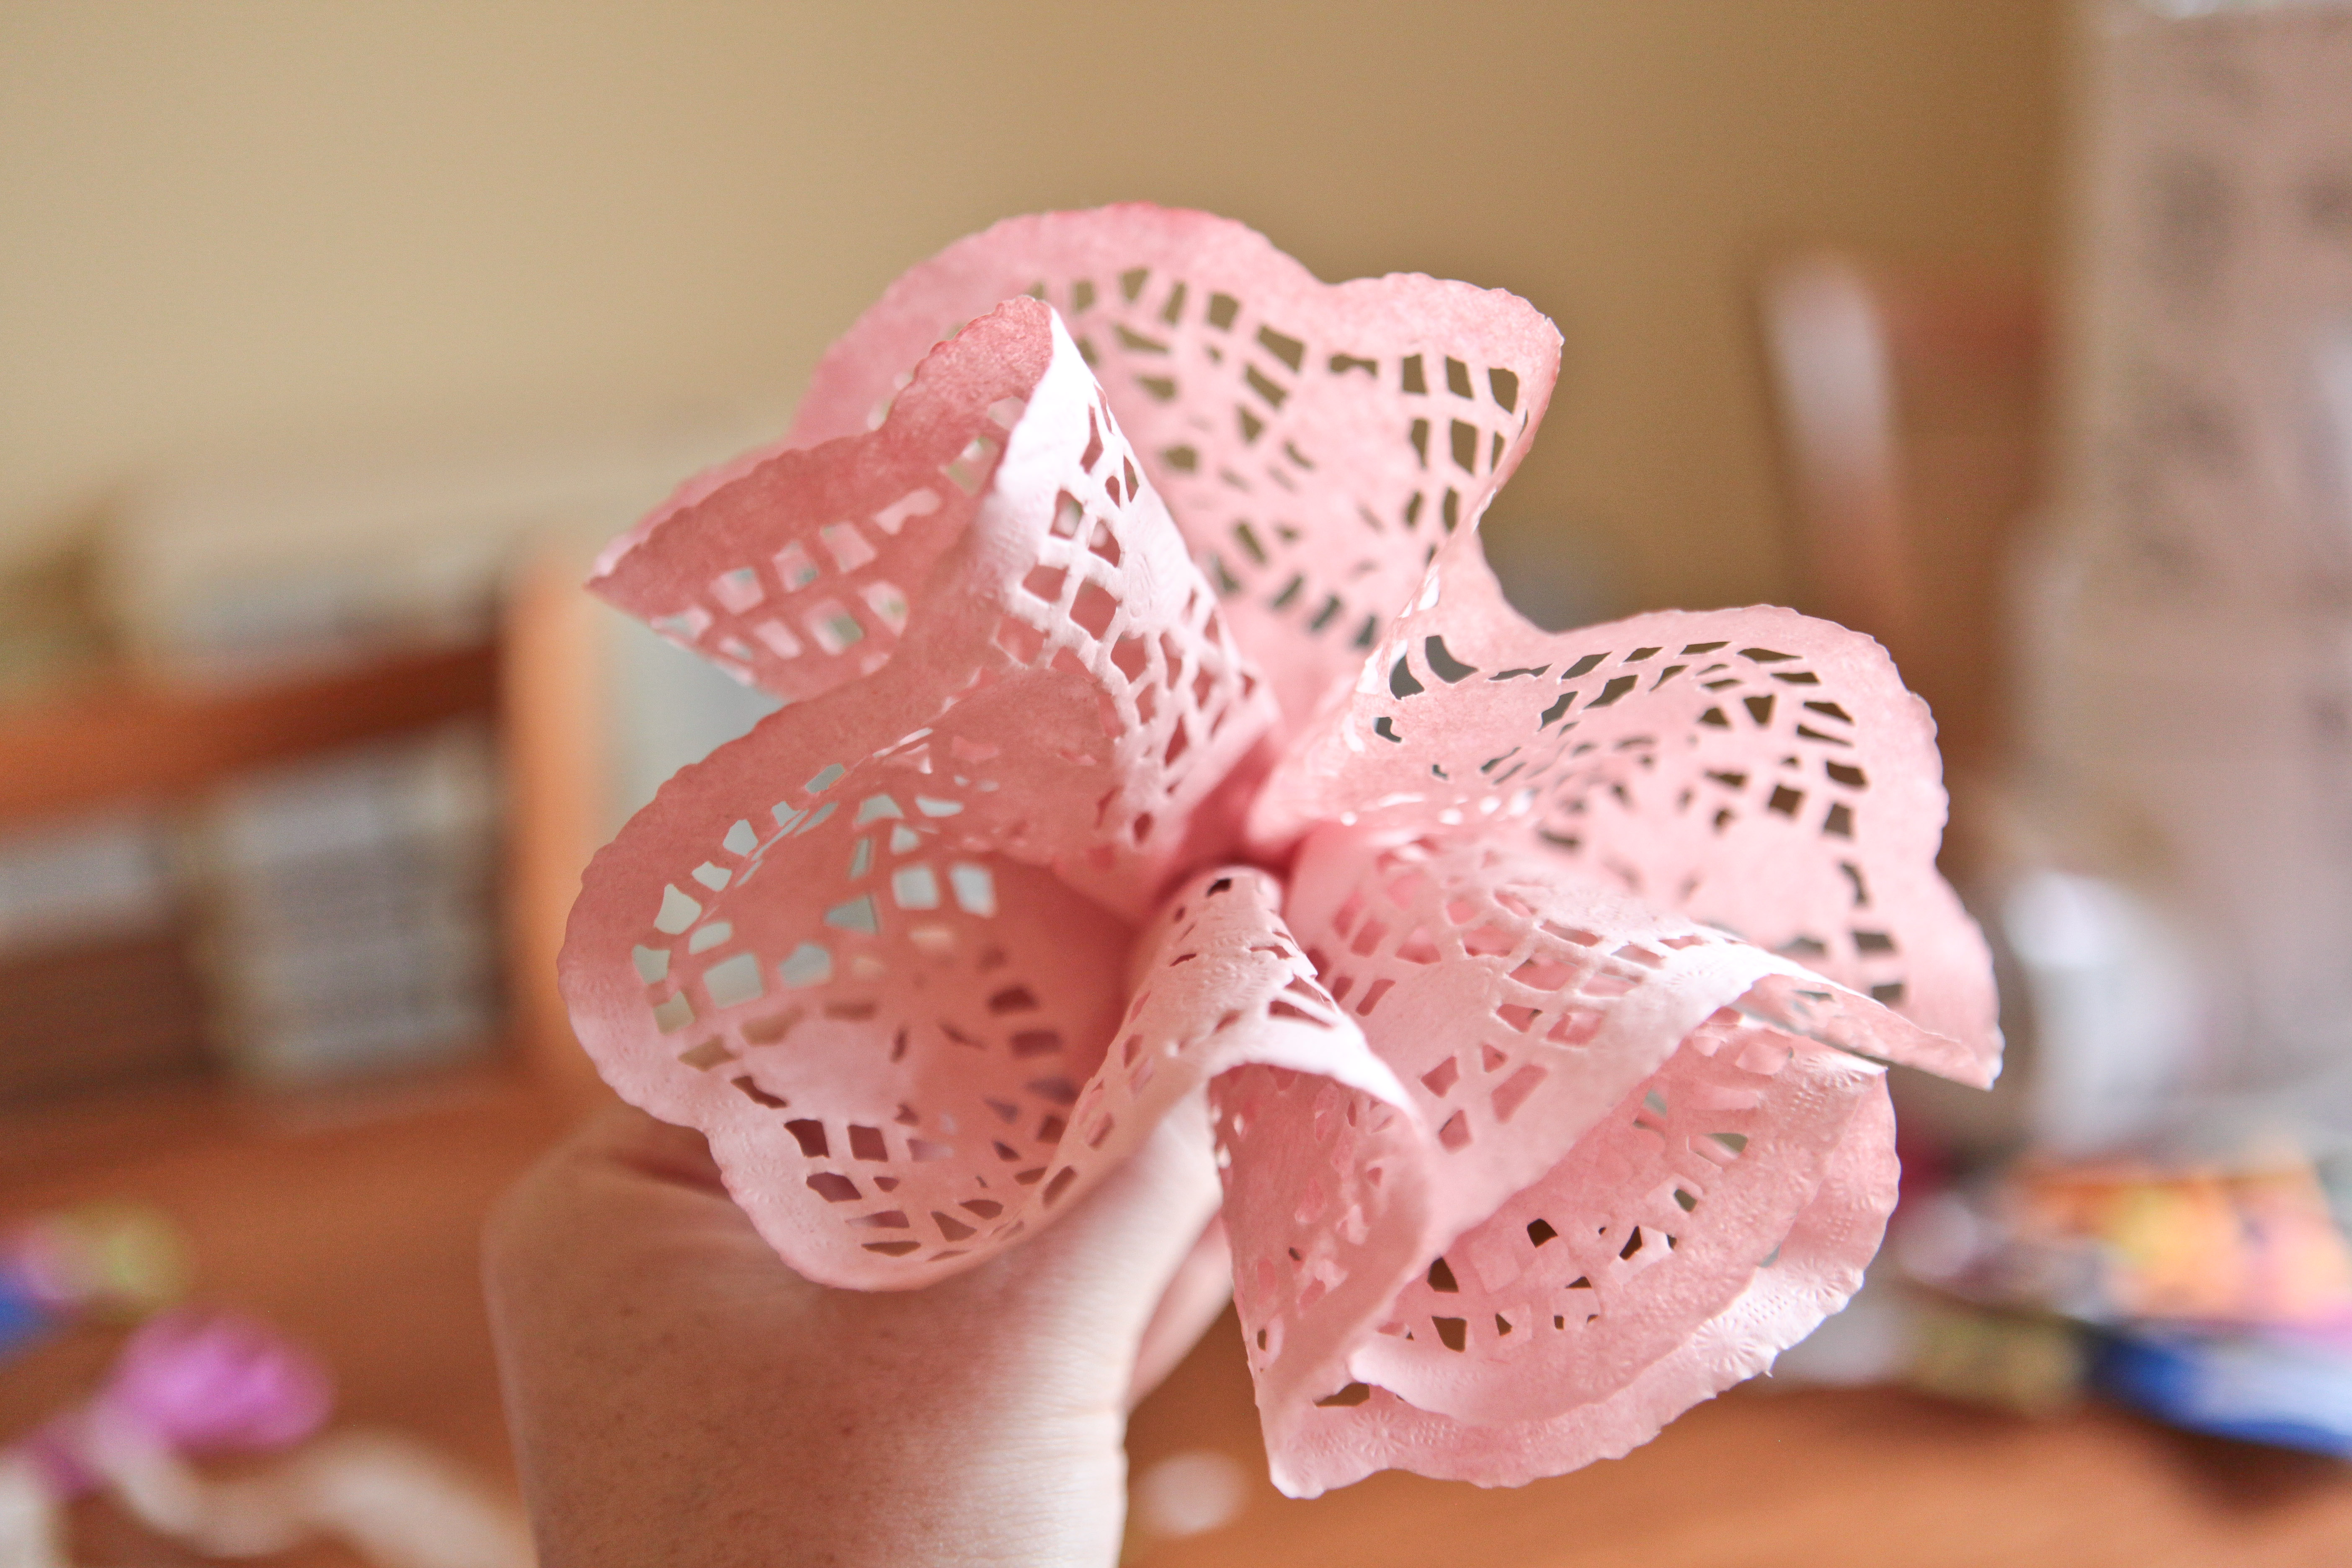 See? A pretty doily ruffle flower. Now make about 40 of those. Once you have your doily ruffles, follow these steps:
Step One:
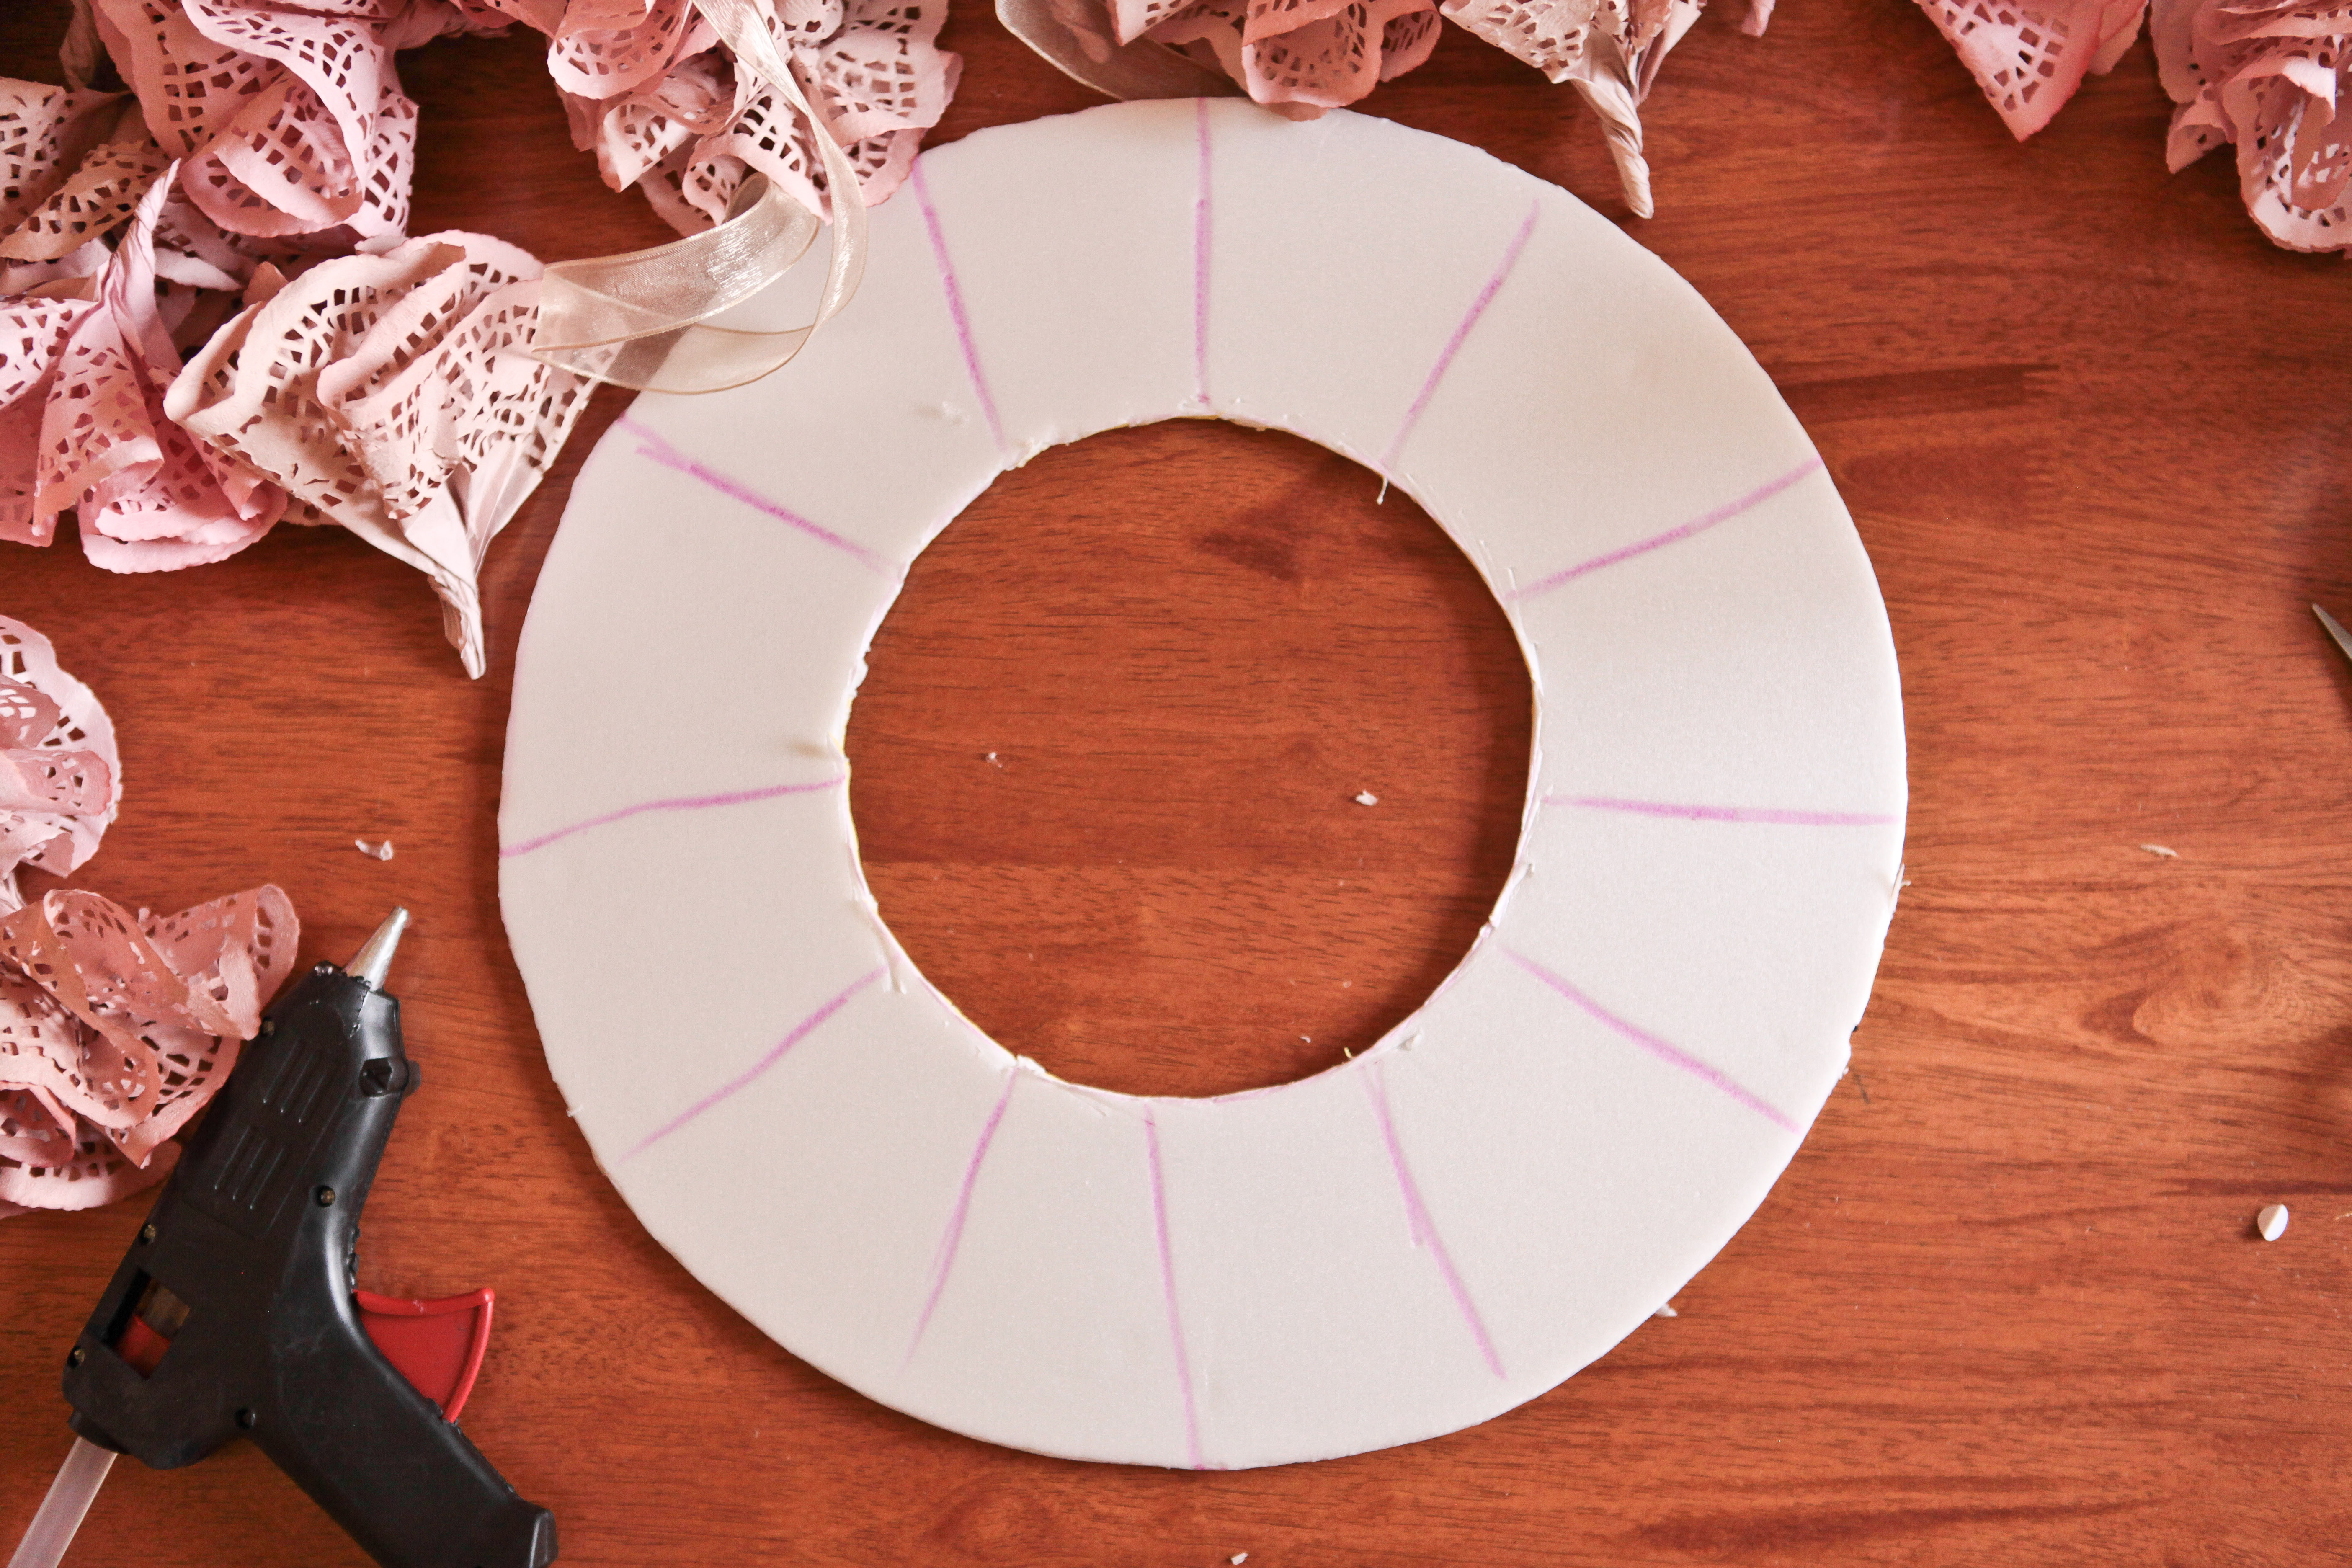 Cut a wreath shape out of cardboard, and attach a ribbon. Draw guidelines on the wreath so that it looks like a clock.
Step Two:
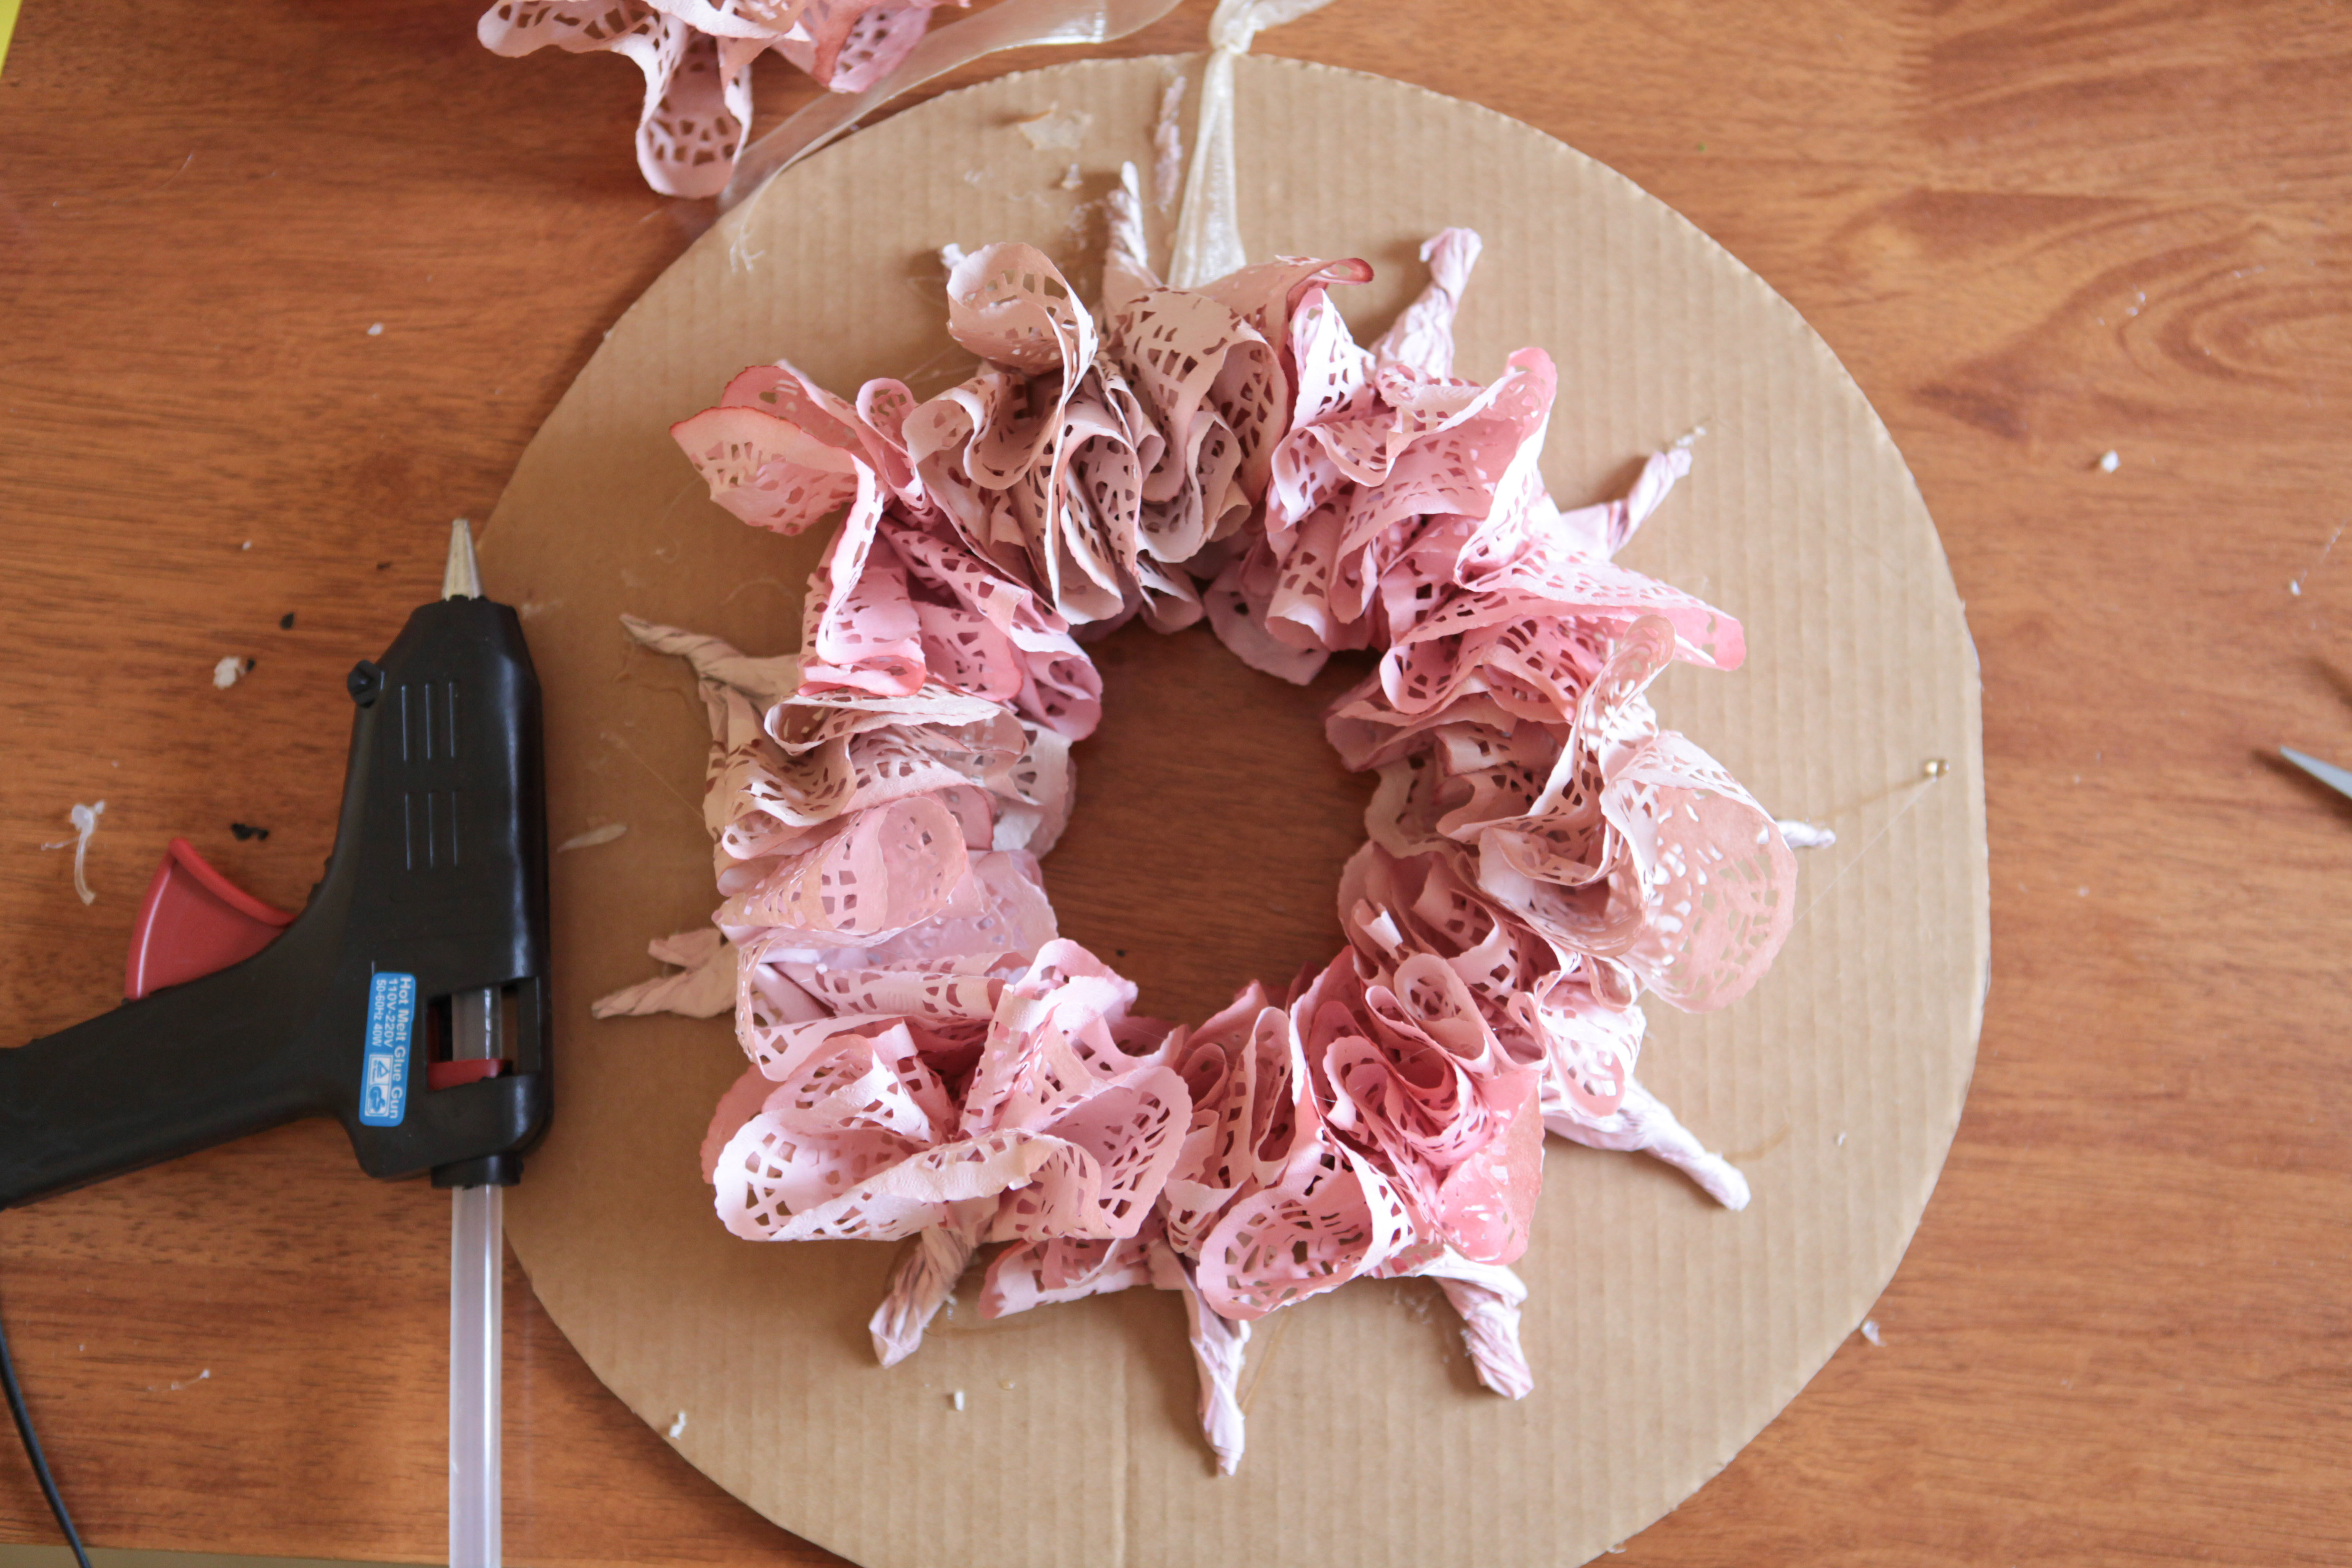 Using the clock as a guide line, glue twelve ruffles onto the inside of the wreath, one at each “hour”.
Step Three:
 Again, using the clock as a guide line, glue twelve ruffle onto the outside of the wreath, then go back and fill the in the spaces with about 10-12 more ruffles until it looks full.
Step Four:
 Glue about 12-15 more ruffle to the middle section of the wreath until all the cardboard is covered and the wreath looks full!
 Hang up your wreath and enjoy a bit of spring! (Even if you live in a desert that seems to forget about spring and moves right on to summer…)
ps- The drop waist beach dress tutorial should be up tomorrow (still putting it together and sewing like a crazy woman to try to finish up my ‘charity week’ projects).

so pretty!! i love the colors
Thanks Kate! 🙂
So cute! I love doilys and I used a similar technique with Kool-Aid to create a fun wall hanging. I’ll have to try a wreath next!
koolaid- love that!
oooo- how cool! I totally love this, and so easy! I will make this for sure- do you mind if I share a link on my blog to your tutorial here when I do?
Thanks for sharing….
share away my friend- thanks! 🙂
Ooh, this turned out SO pretty! Love it!!
I would love it if you shared this at my {nifty thrifty sunday} linky party, starting Saturday night! 🙂
xoxo,
Vanessa @ {nifty thrifty things}
Love this! I’ve got a thing for doilies and I may have to make this 🙂
Shannon- totally with you! Love those things! 🙂
yay! Making this with my girls this weekend. What a fun project- thanks!
Tanya, love that! Send us a pic when you’re done!
Just wondering, what size is the form you cut out for the wreath?
Approximately 12″ wide/tall (since it’s a circle, the measurement is the same). Hope that helps!
thank you so much! I really love this, and I wanted to make sure that I would have enough dyed to finish the project!
Oh, do you possibly remember what width of form is after you cut out the middle?