As an Amazon Associate I earn from qualifying purchases.
 Y’all are going to love today’s guest, Emily, and her fabulous skateboard sling tutorial.
Hey kojo readers! My name is Emily and I blog over at The Boy Trifecta. With one husband and three sons, my world is pretty much all guys, all the time. I’m so excited to to part of the Gifts for Guys series! People are always asking me what to get/make for the guys in their lives, so thanks to Kirstin and Jordan for creating a series to answer those questions!
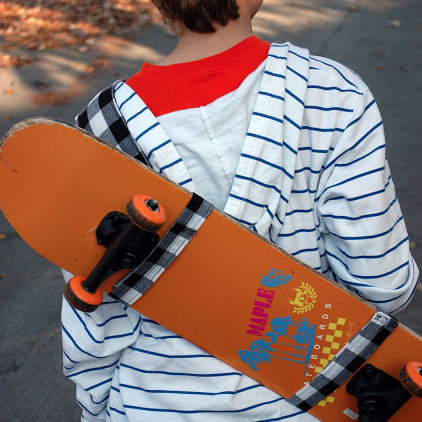
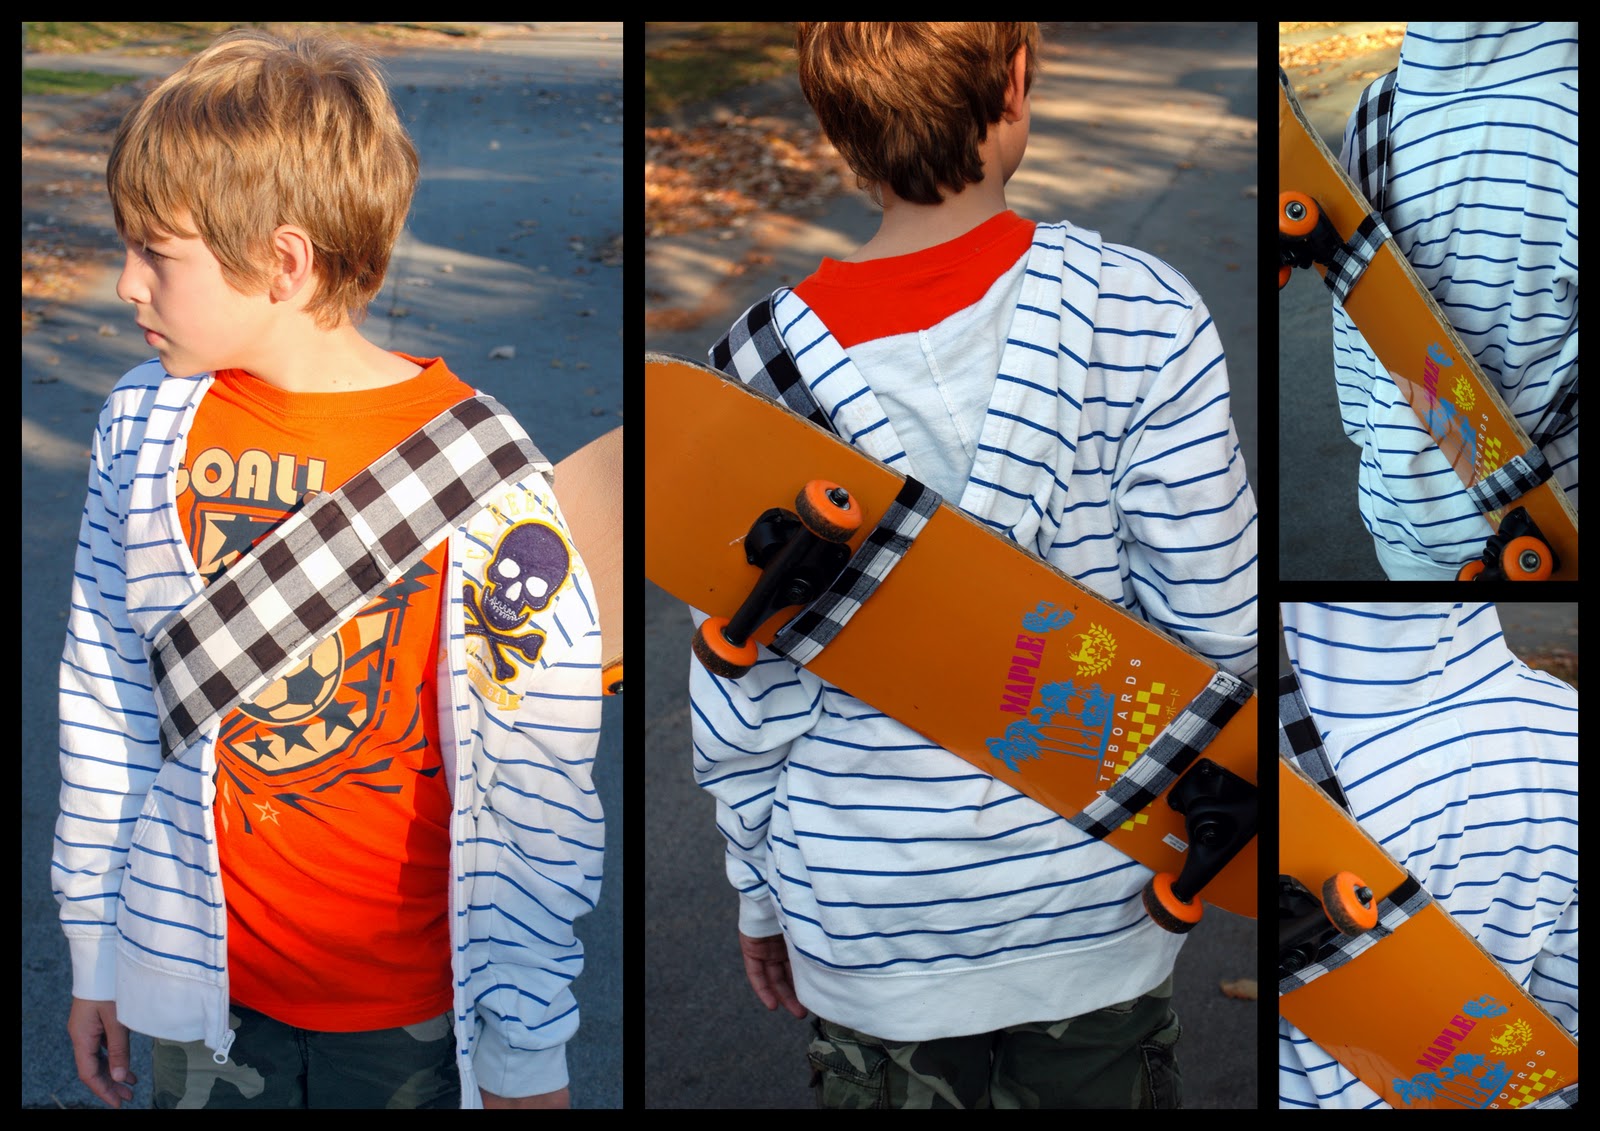
Guys are hard to craft for. And they don’t get nearly as excited about handmade goodness as women do. For these reasons, I like to include a handmade accessory that goes along with store-bought gifts, rather than trying to make their entire gift. Today, I’m going to show you an example of this – the Skateboard Sling!
My oldest son thinks skateboarding is “awesome”. I created this skateboard sling to help him get his skateboard to and from the skate park. You could make this out of scraps, and pick up a skateboard (Riley’s is from Target, and was only $10.00!) and some safety equipment, and have a great gift for any tween or teenage guy in your life!
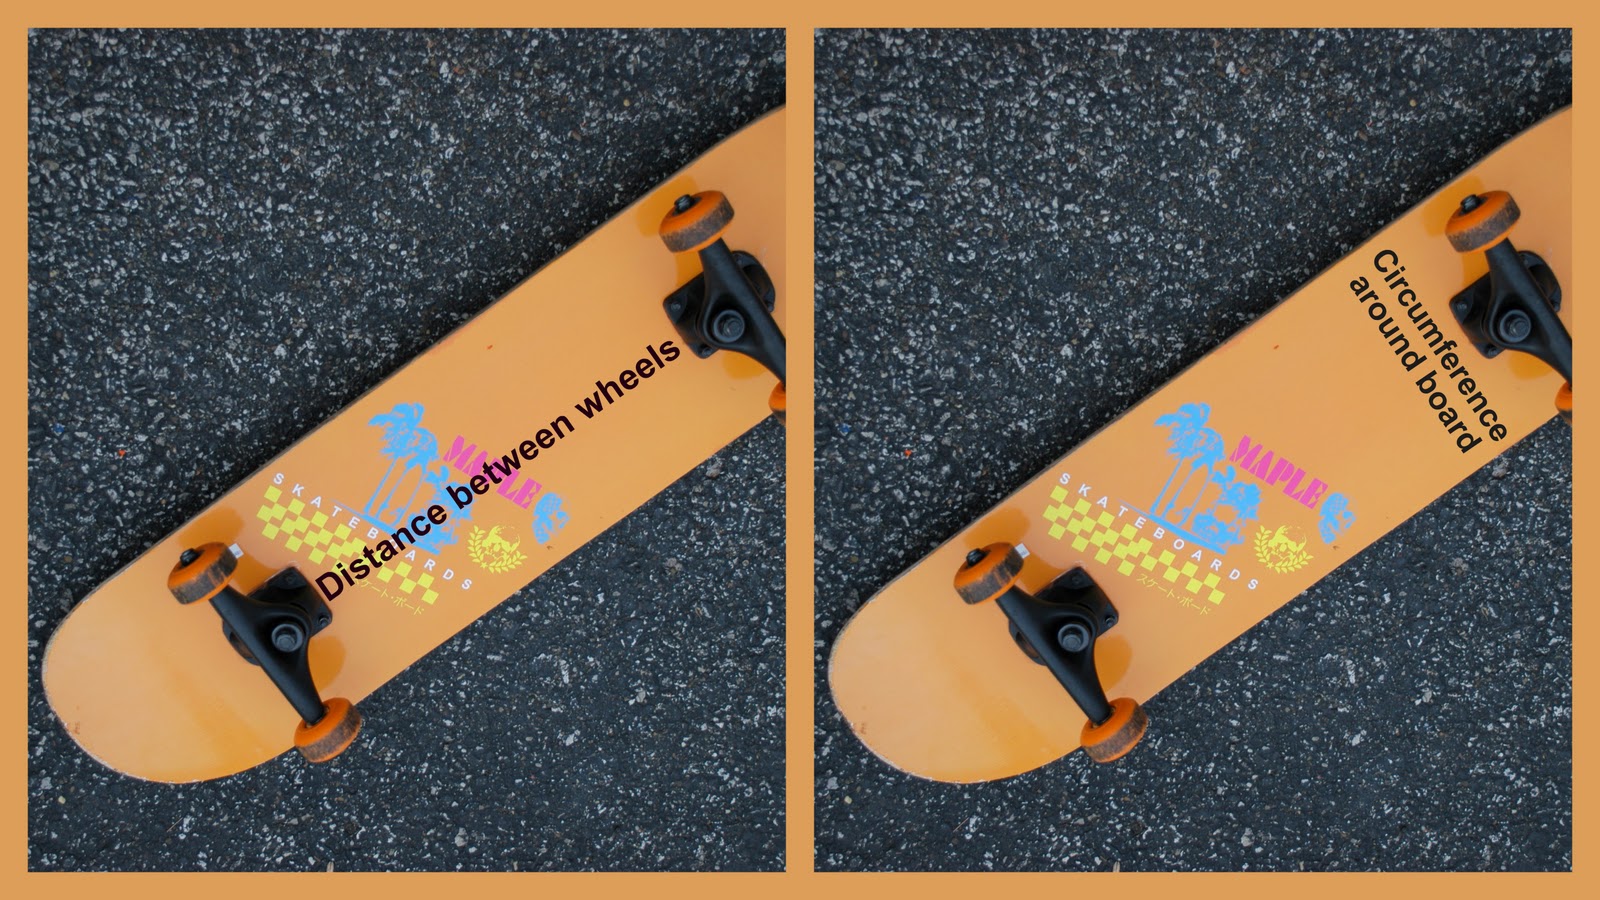
This project is super easy and suitable for a beginner. You do need a couple of measurements from your skateboard before you get started. You need to know the distance between your wheels, and the circumference around your board. If your board is a different size than mine, adjust the length of the fabric strips accordingly.
In case you don’t know these measurements, just use the measurements I provide here.
Supplies: Long strips of scrap fabrics, or you could piece fabric together
Fusible fleece
Sewing machine
Velcro (about 30 inches of half-inch wide Velcro)
Coordinating thread
Cut two pieces of fabric that are 5 inches by 55 inches (for the main strap), and two pieces of fusible fleece that are about 4 inches wide by 54 inches long. Apply the fusible fleece to the wrong side of the straps.
Then, cut two strips of fabric that are 5 inches by 22.5 inches (to wrap around the board). You can adjust these measurements as necessary to fit your board measurements.
Cut your velcro into 5-inch segments.
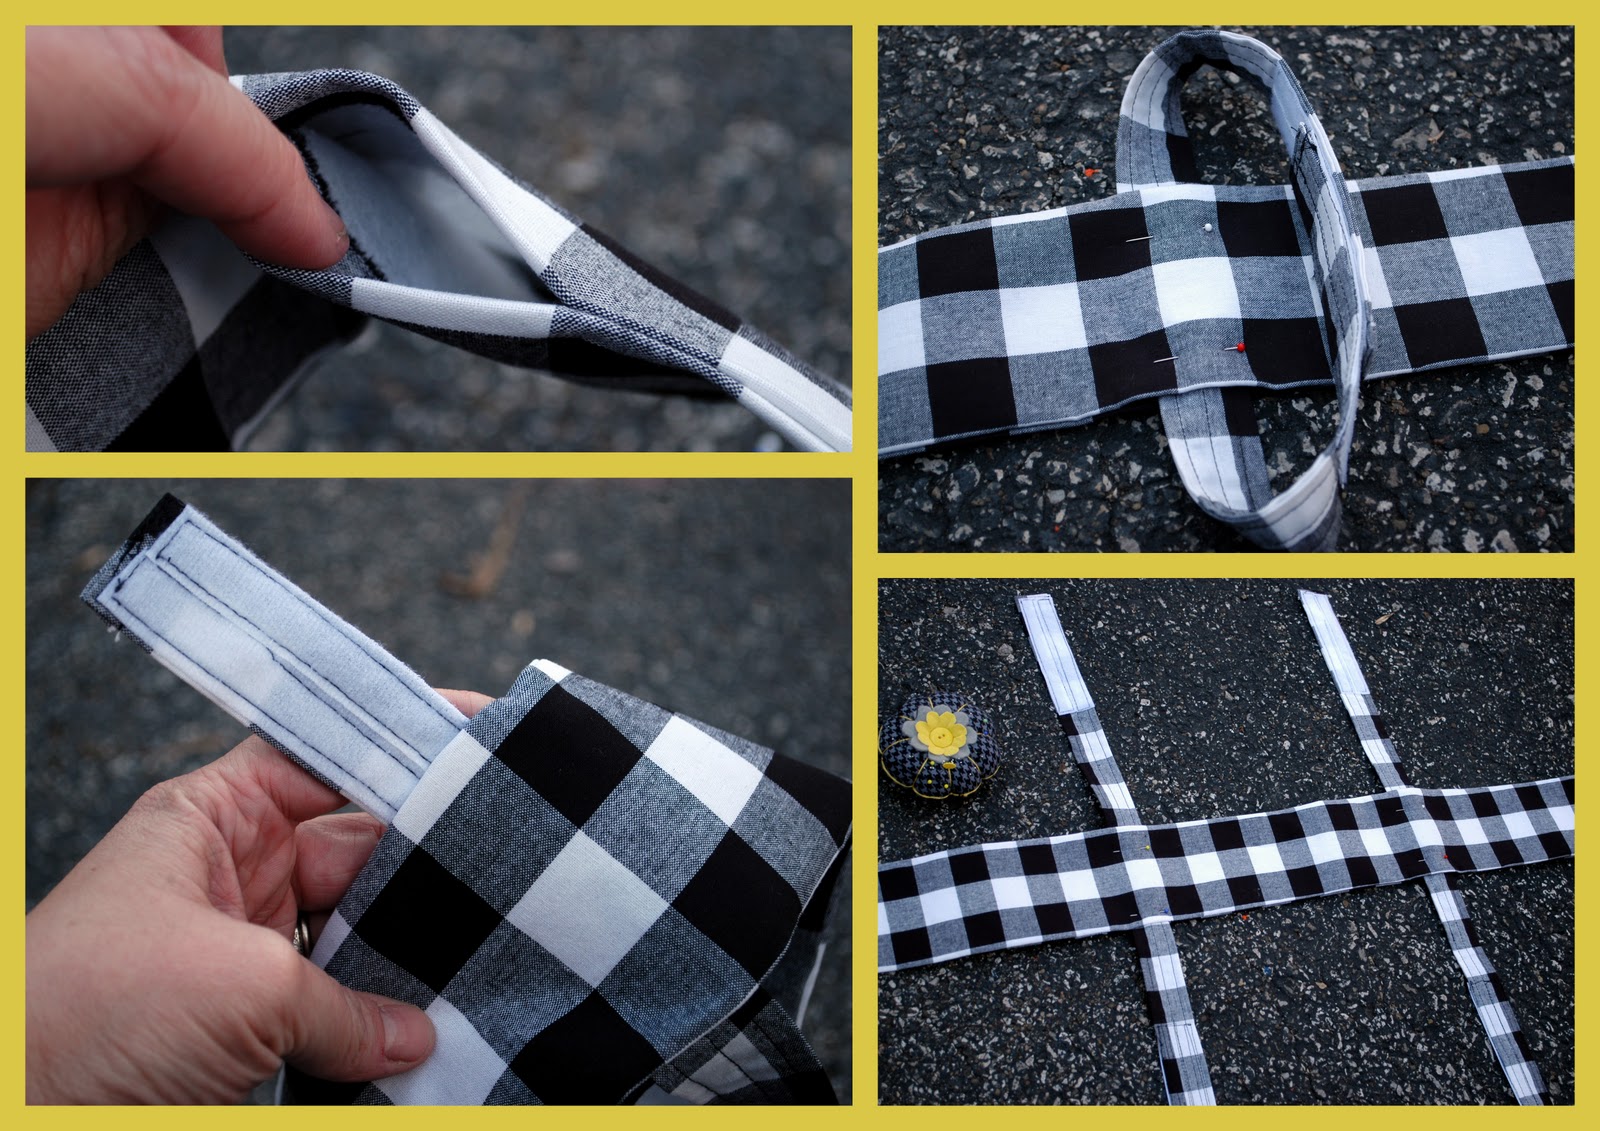
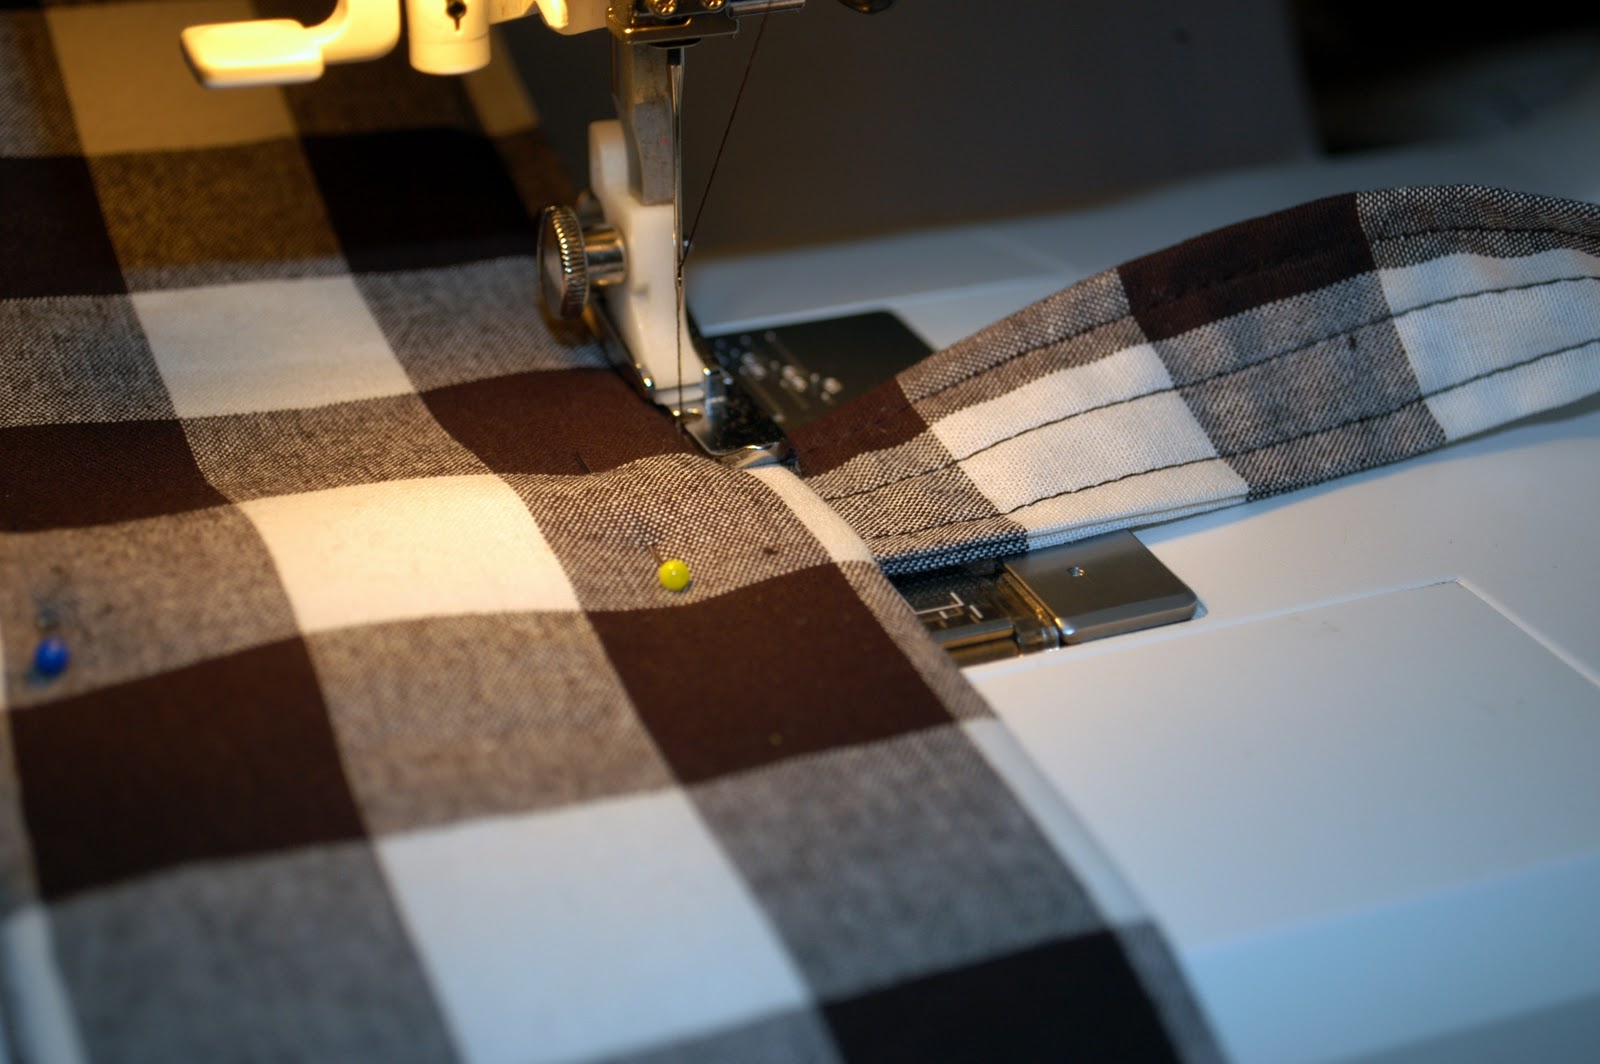
First thing we’re going to do is make the straps that wrap around the board. To do this, we’re basically turing our shorter fabric strips into bias tape and stitching them closed.
Press your shorter strips in half along the long side, then open your strips and press the edges in towards the center crease. In the first picture on the left, you can see both of the long edges press in towards the center. Make sure to fold the short edge in about half an inch to enclose the raw edge of the fabric.
In the middle picture, you can see that I stitched a few rows along the short edge of the strip to keep those ends folded in, and then sewed parallel lines about half an inch apart all the way down the length of the strip.
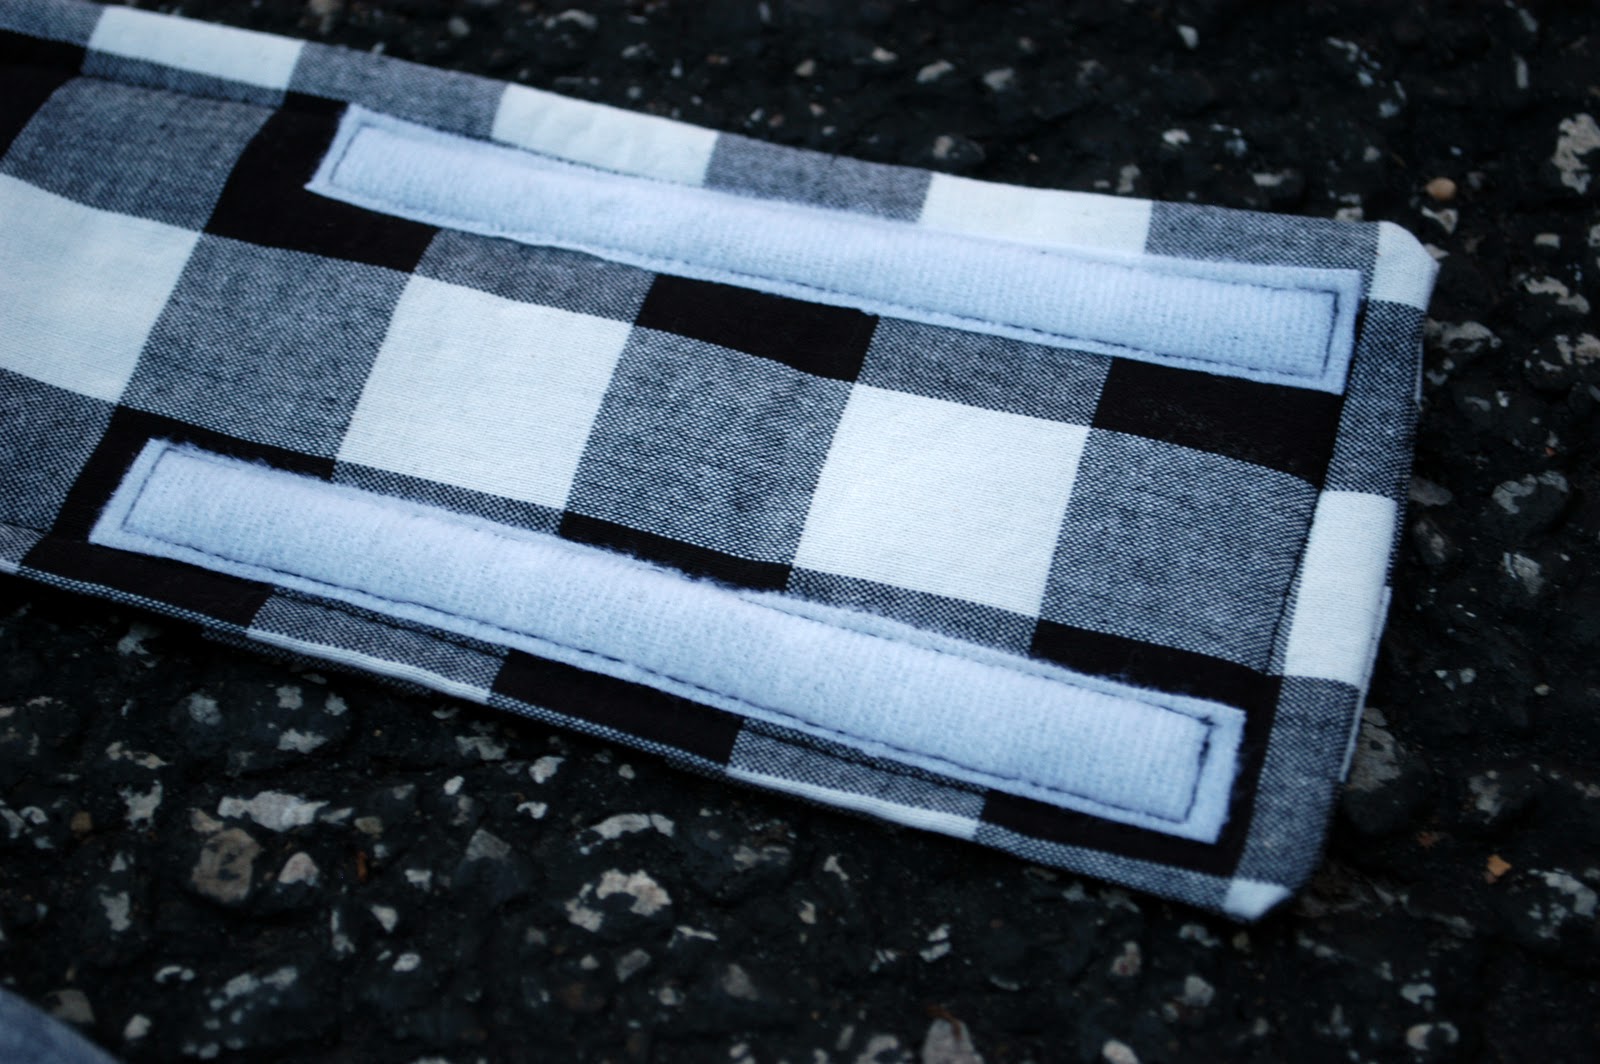
Finally, on the right, you can see that I attached two 5-inch velcro segments to each strap end. Make sure that you attach the soft Velcro piece and the rough Velcro piece to OPPOSITE SIDES (and ends) of the strap. So, apply the soft part of the Velcro to one end, and then FLIP and ROTATE the strap to apply the rough part of the velcro to the other end.
Repeat for the second strap.
Next, take the measurement for the distance between your wheels, divide by two, and mark that distance on either side of the center point on your 55-inch-strap. We’re marking where our short strap will attach to our long strap.
Or, if you have the board available, do what I did. Wrap your straps around the board, and then lay the board on the ground. The center point on your long strip (so 27.5 inches) should be in the center of your board. Use pins to mark where your board strap will attach to the long strap.
Place your long straps right sides together, and stitch together, making sure to SKIP the places where your pins are (for you to insert the straps later). I recommend starting your seam on a long side, wrapping around one short end, and the back up the other long side.
Turn your strap right side out and press. Make sure to fold your open edge inwards and press that in place too.
Nest, grab your short straps. Find the openings you left in the side seam, and slide your short straps through the openings. Pin in place.
Topstitch all the way around your strap. This will secure your board straps in place.
I went ahead and made a box stitch across the place where the board straps attach, just for added durability.
Grab your remaining Velcro strips and apply them to opposite ends of the main strap. Remember to apply the Velcro to opposite ends AND opposite sides (so that when the strap wraps around the body, the Velcro pieces are facing one another).
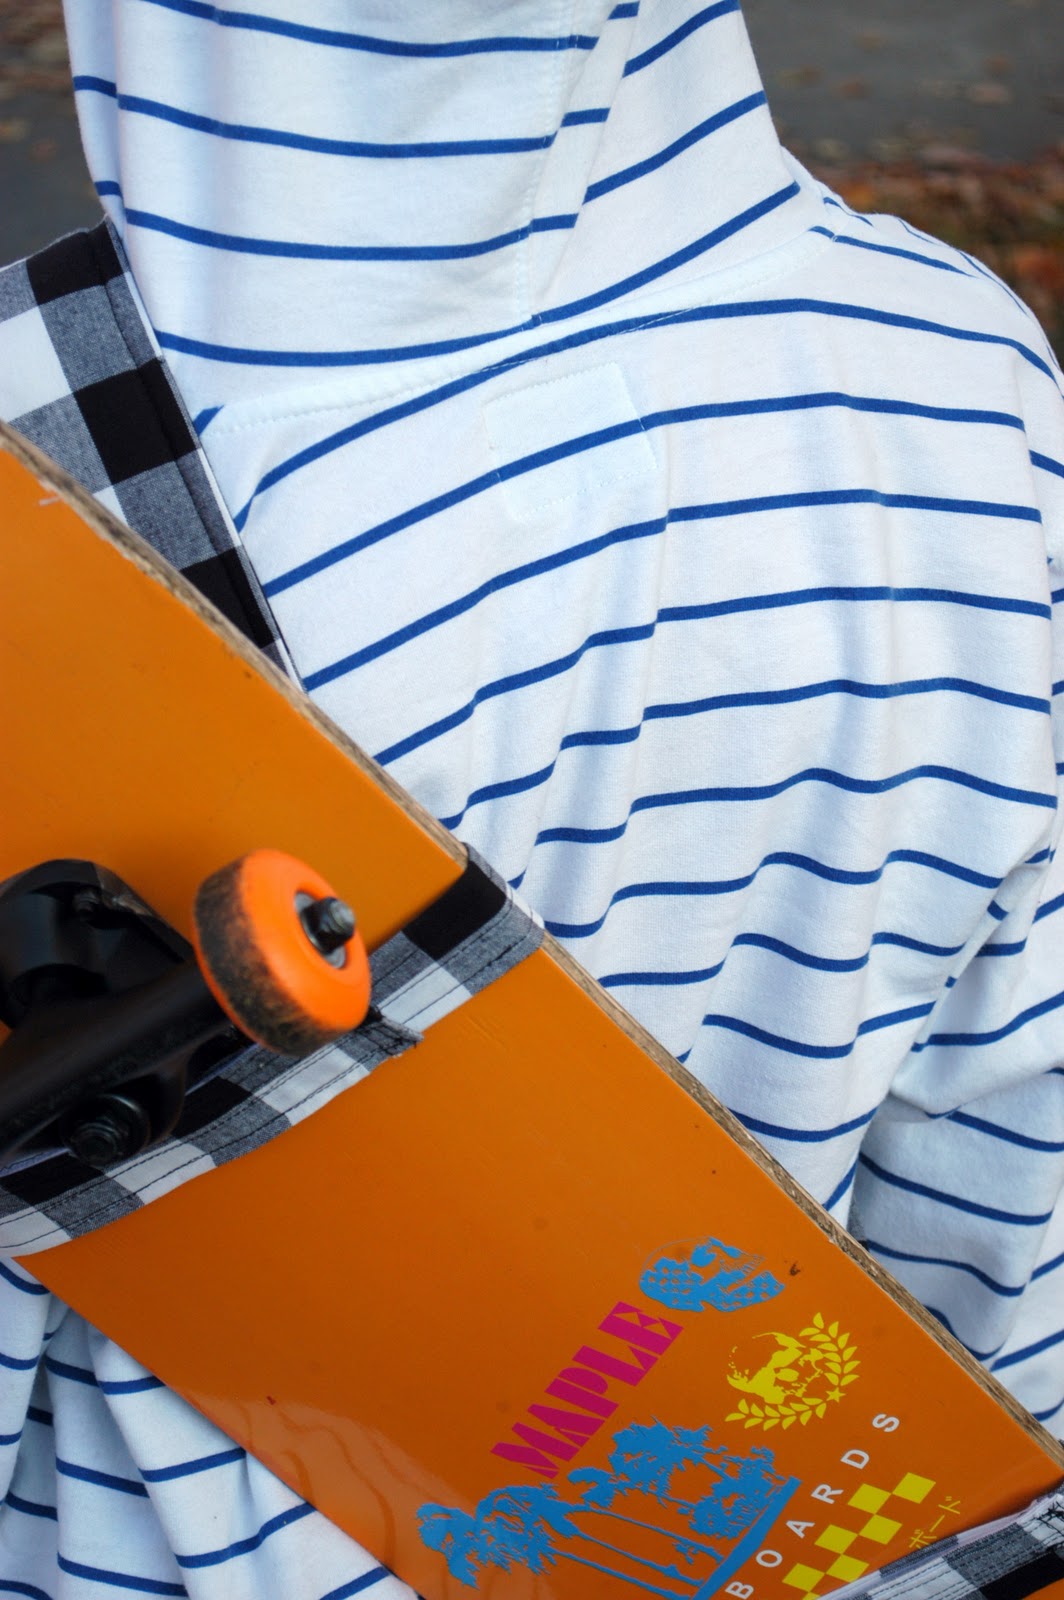
And you’re done! You’ve got a great, handmade gift for any skateboarding guy in your life.
Need another guy project? I’ve got lots of them over on
my blog.
Here’s my hubby modeling this manly cowl I made him. You can find the
tutorial here.
Or here’s a
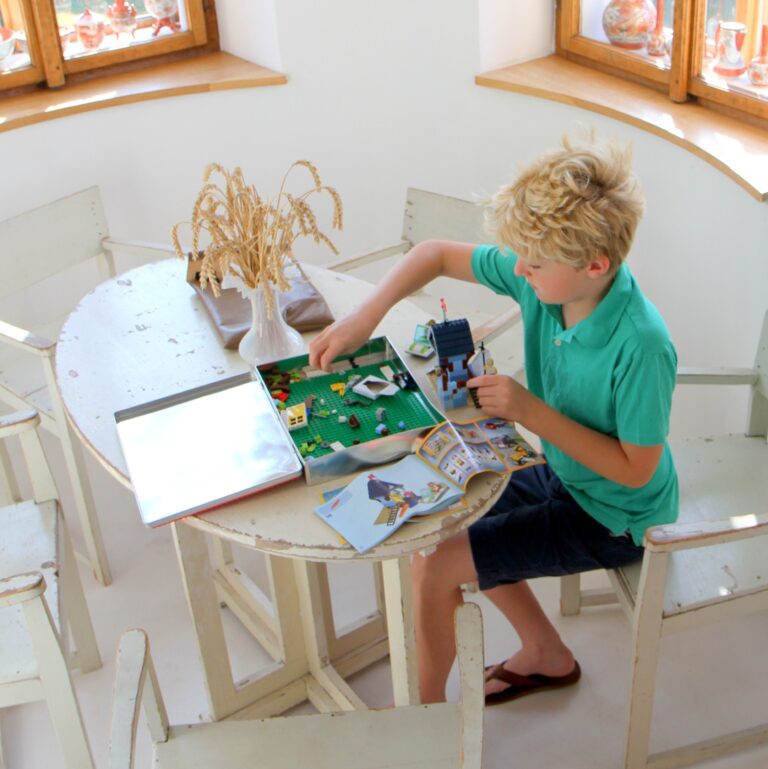
hoodie pattern I made for my oldest boy. Hoodies are my go-to boy clothing project. My oldest son, Riley, is all about the Legos this year for Christmas (you can also see some gift suggestions for my 9-year-old
here), while my middle son (age 3) wants a cupcake kitchen. My husband’s request? That I not spend too much money. 🙂
Thanks so much for having me over, kojo ladies!
And a few more of my favorite Boy Trifecta project??? Not only does she make the best boy stuff for her sons, and knit the most adorable hats ever, she also makes gorgeous purses! Talented, much? I am not kidding when I say that, if you’re needing tutorials for boy gifts, she is your girl!


Its such a nice home made things you done i like all specials the steps for skateboard tutorial is very interesting.
I just finished this sling. It took me a couple hours (including breaks and procrastination) to finish. It looks great! The directions took me a little time to understand, but overall, it was a fun easy project. I’m tempted to keep it myself (I longboard), but I’m sure my little cousin will enjoy it as well. I guess I’ll just have to make another one for myself!
I love this! Sometimes I make things as a gift and go back and make another for me. 😉
Hi,
Are there any copyright restrictions with pattern?
What a great tutorial by the way
Can I sell them.
Regards
Cathy
Hey Cathy! I think it’d be fine if you made these and sold them. 😉