
big boy belts- a how to
As an Amazon Associate I earn from qualifying purchases.
Today’s Gifts for Guys guest, Cheri from I Am Momma, Hear Me Roar, is a pretty much an expert in crafting for guys.

Her upcycled hats are the quintessential awesome-little guy-project and every boy I know would love the superhero room she designed. She also rocks the girly projects she tries (like this autumn bloom belt and this “I’m big in Europe” headband!). And I love her Wake Up Wednesdays (what a great idea!).
I can’t wait for y’all to see what Cheri made for Gifts for Guys-

Hello Kojo readers! I’m excited to be part of this rocking’ series. Who doesn’t need help with guy gifts? Seriously. Well, my gift idea today is for little guys. I wanted to think of something my boys would want and not just something I want for them. These are my little guys.

My boys think anything “big boys” do is super cool and that includes belts. My oldest son has been begging to wear belts, but they are too tricky for him to get on and off himself. So, I made him a Big Boy Belt that he can handle on his own.

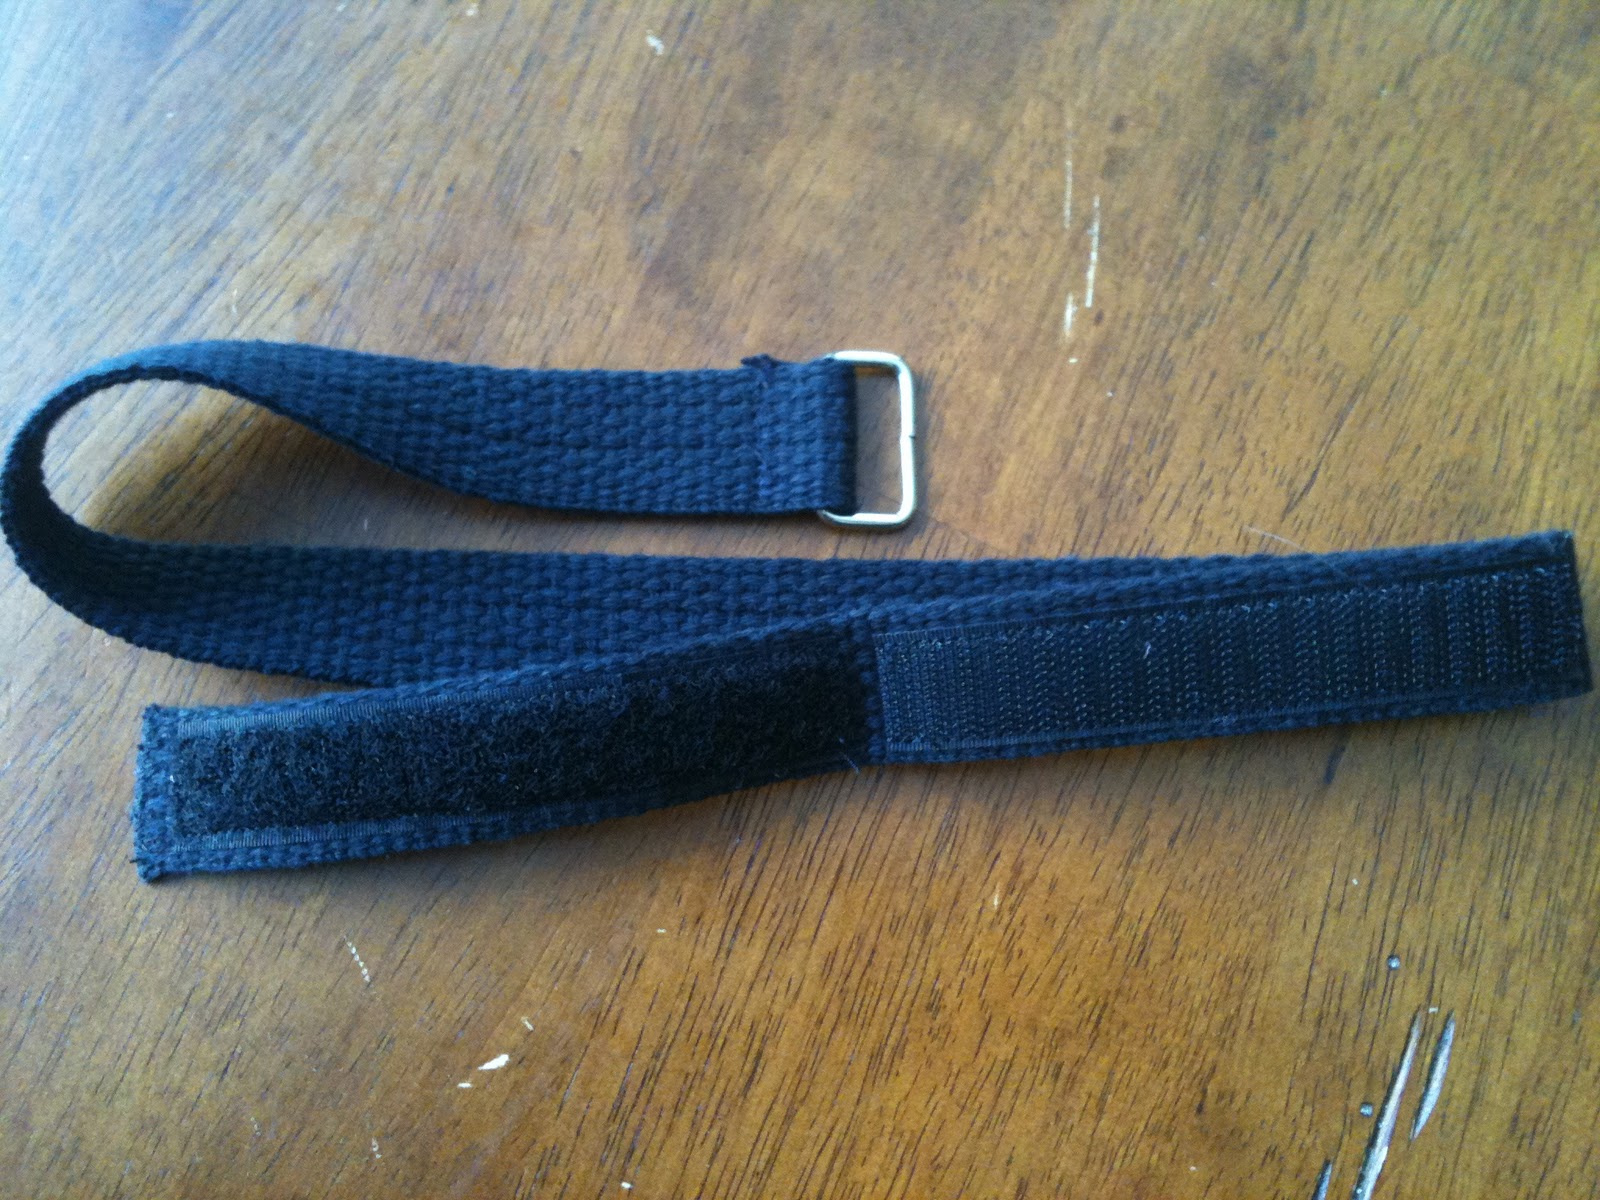
There’s one ring and the belt goes through it and then folds over on itself. It uses velcro, so it’s super easy for him to take on and off. The strap can even velcro right over the loop when closing it. No need to fuss with lacing it through the loops there. And, it will not only fit him now, but he could grow three inches and it’ll still work.

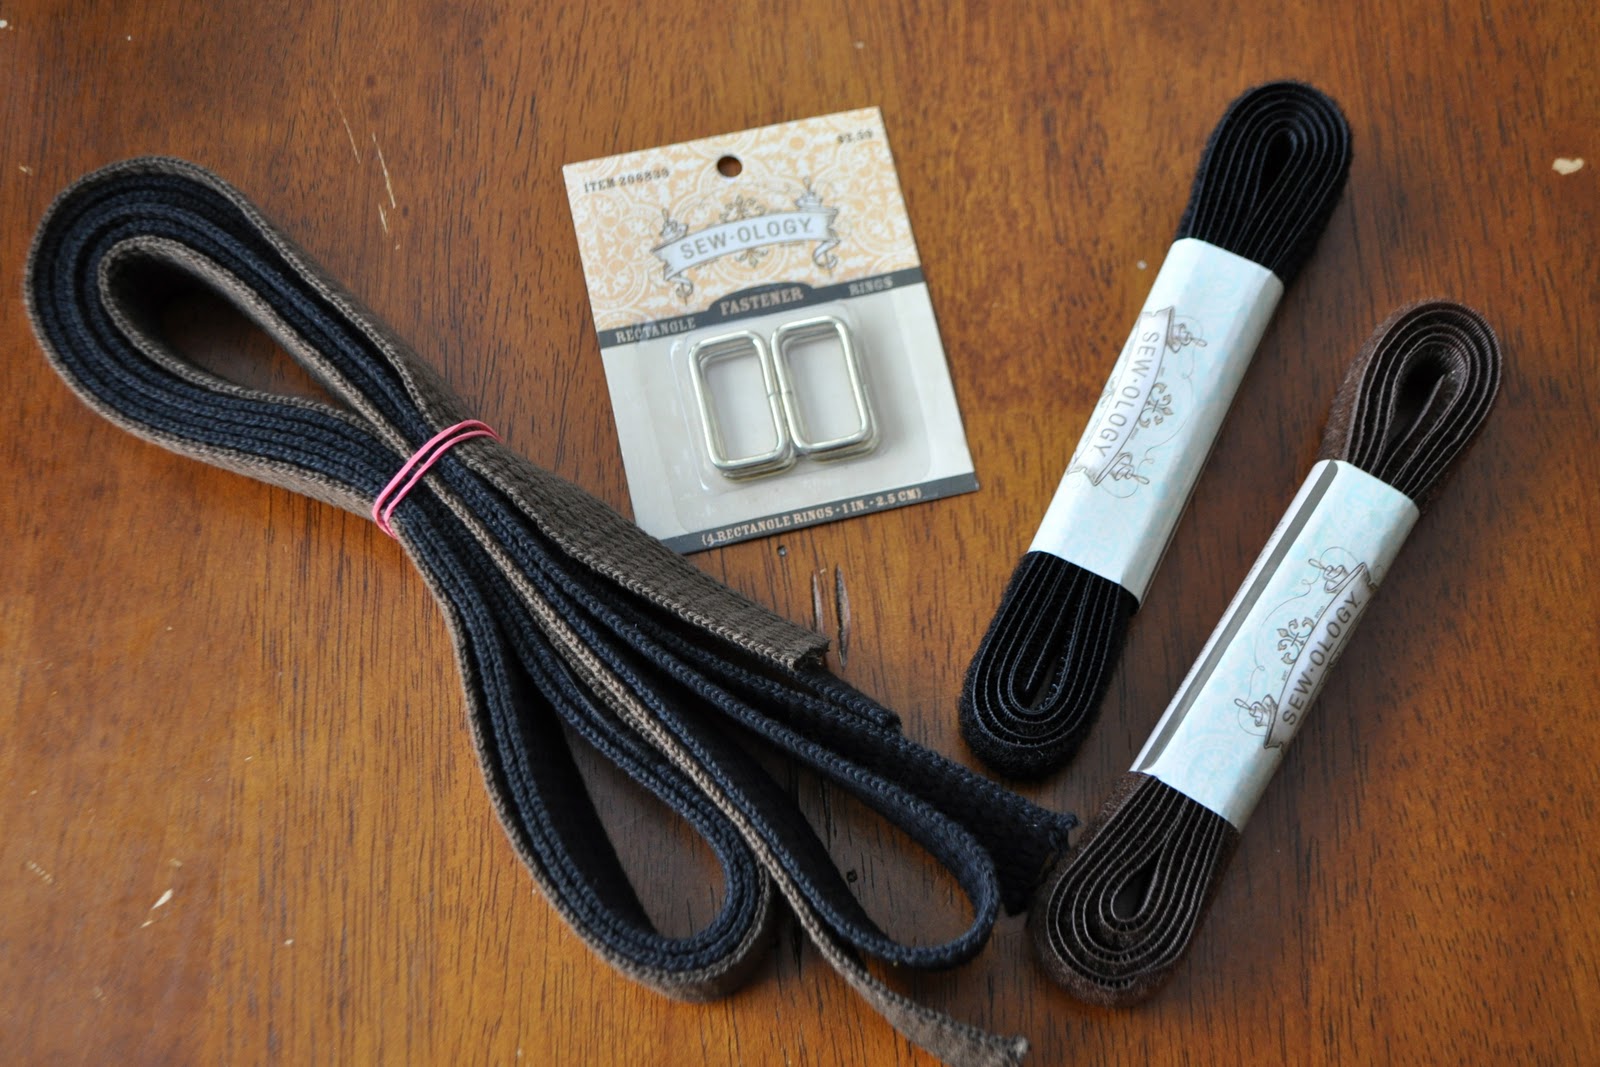
So here’s the low down. I bought all the following supplies from Hobby Lobby. The belt material is about $1.20 a yard and a yard was a lot more than I needed for these little guys. I also bought velcro to match and then these rings. They are by the D rings in the store, but they are rectangular. They were $2 something, but there were four in the pack. They were exactly what I needed and I was excited to find them.
To begin, I zigzag stitched the end of the belt because this stuff frays like crazy. I go back and forth a couple times to really finish off the end.
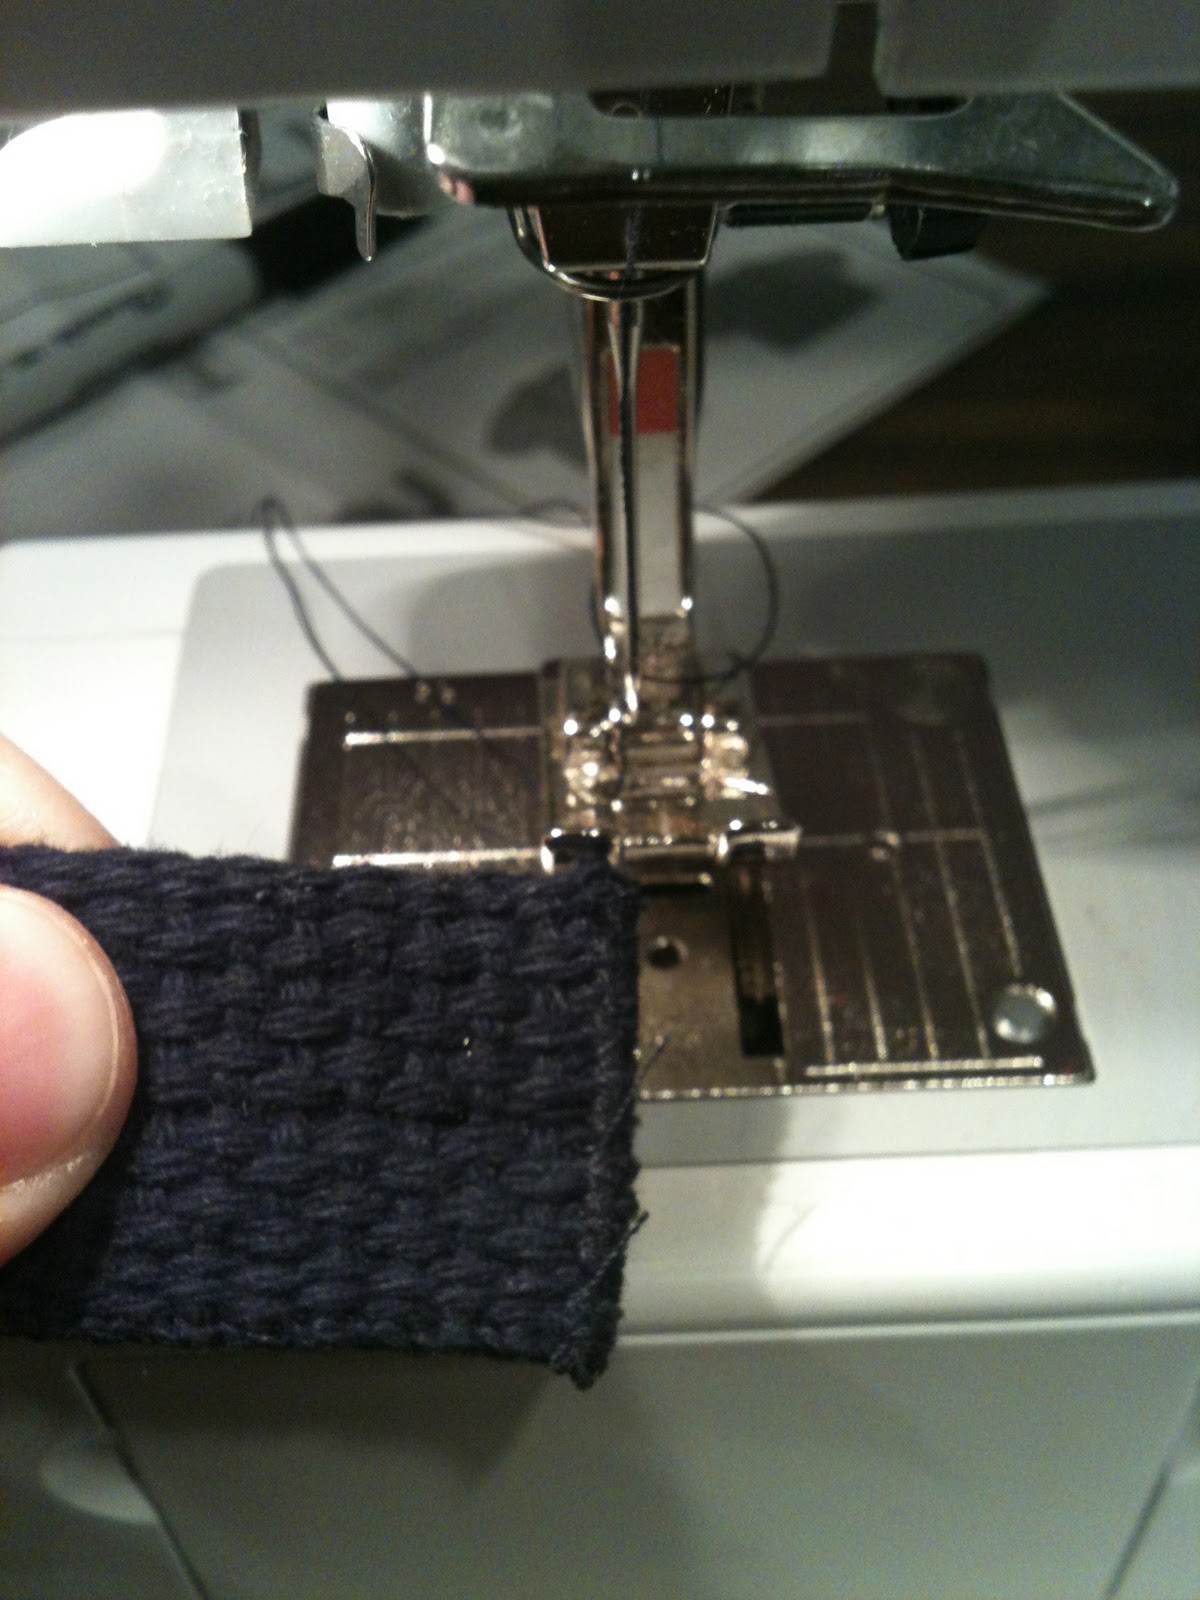
I wrapped the belt around the loop and sewed the loop down as shown.
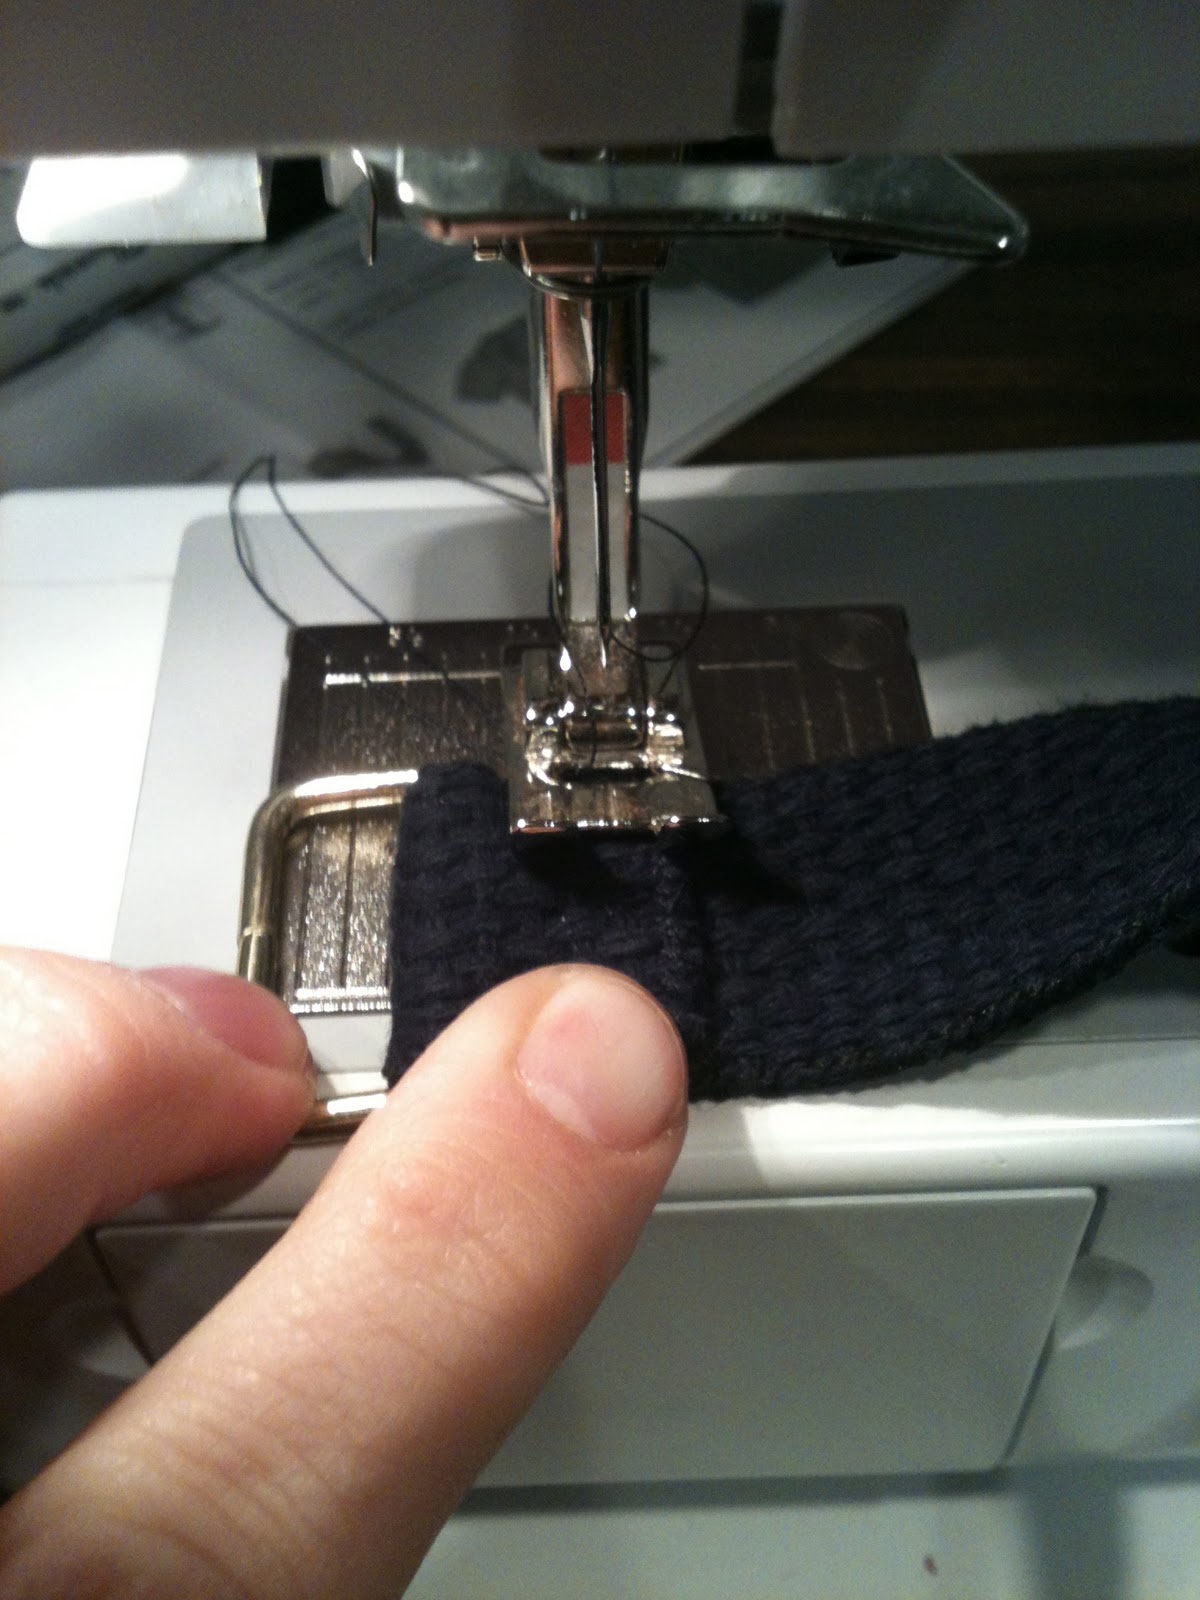
Next I measured my son’s waist. I like to make sure to measure it with pants on, since that’s how the belt will be used. That way I don’t make it too small. I made a mark for myself right where my thumb is….
….so I could stitch on about 4.5 inches of velcro on one and side and then sew the other side of the velcro on the other side of it.
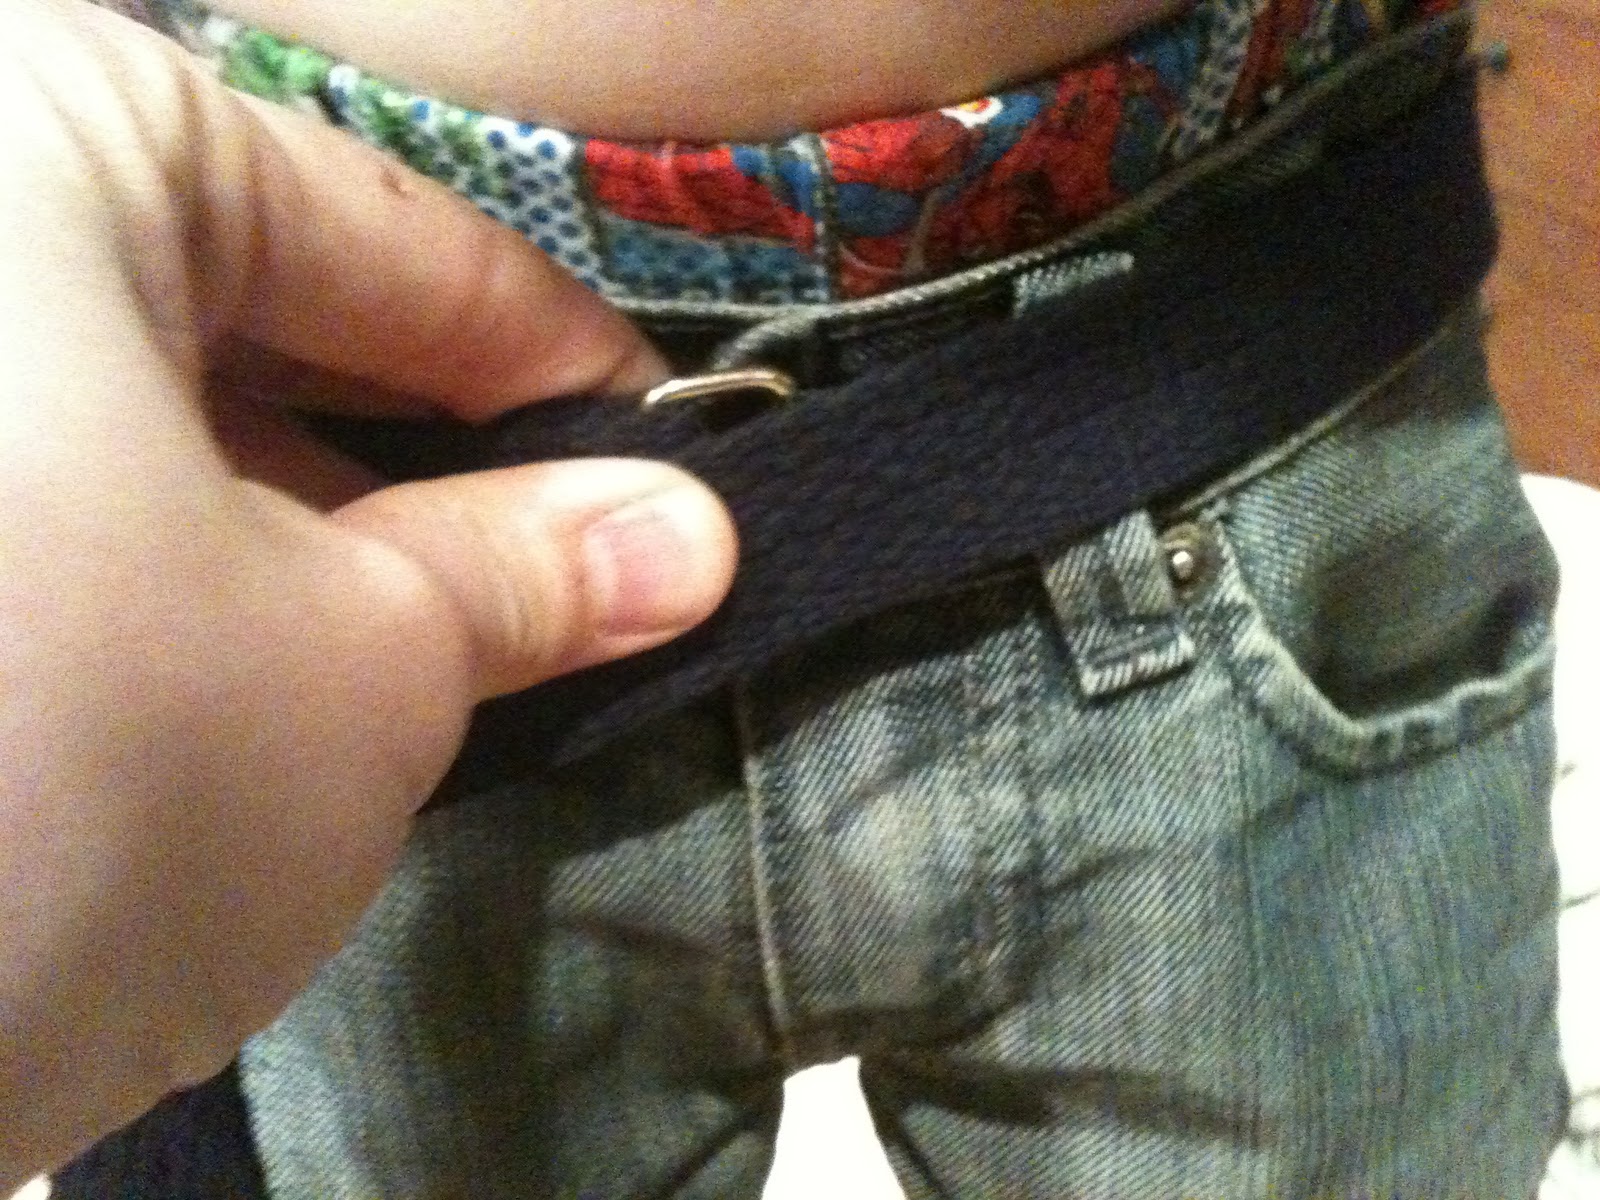
That way the belt goes through the loop…

…and closes over itself. Then I cut the belt off a quarter inch after the last piece of velcro and zigzag stitched the end.

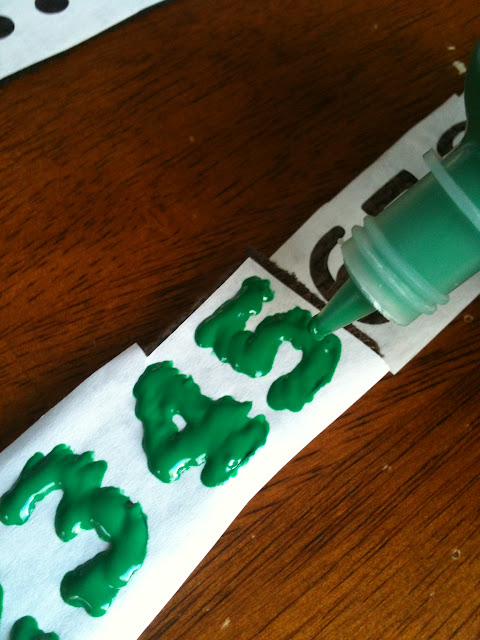
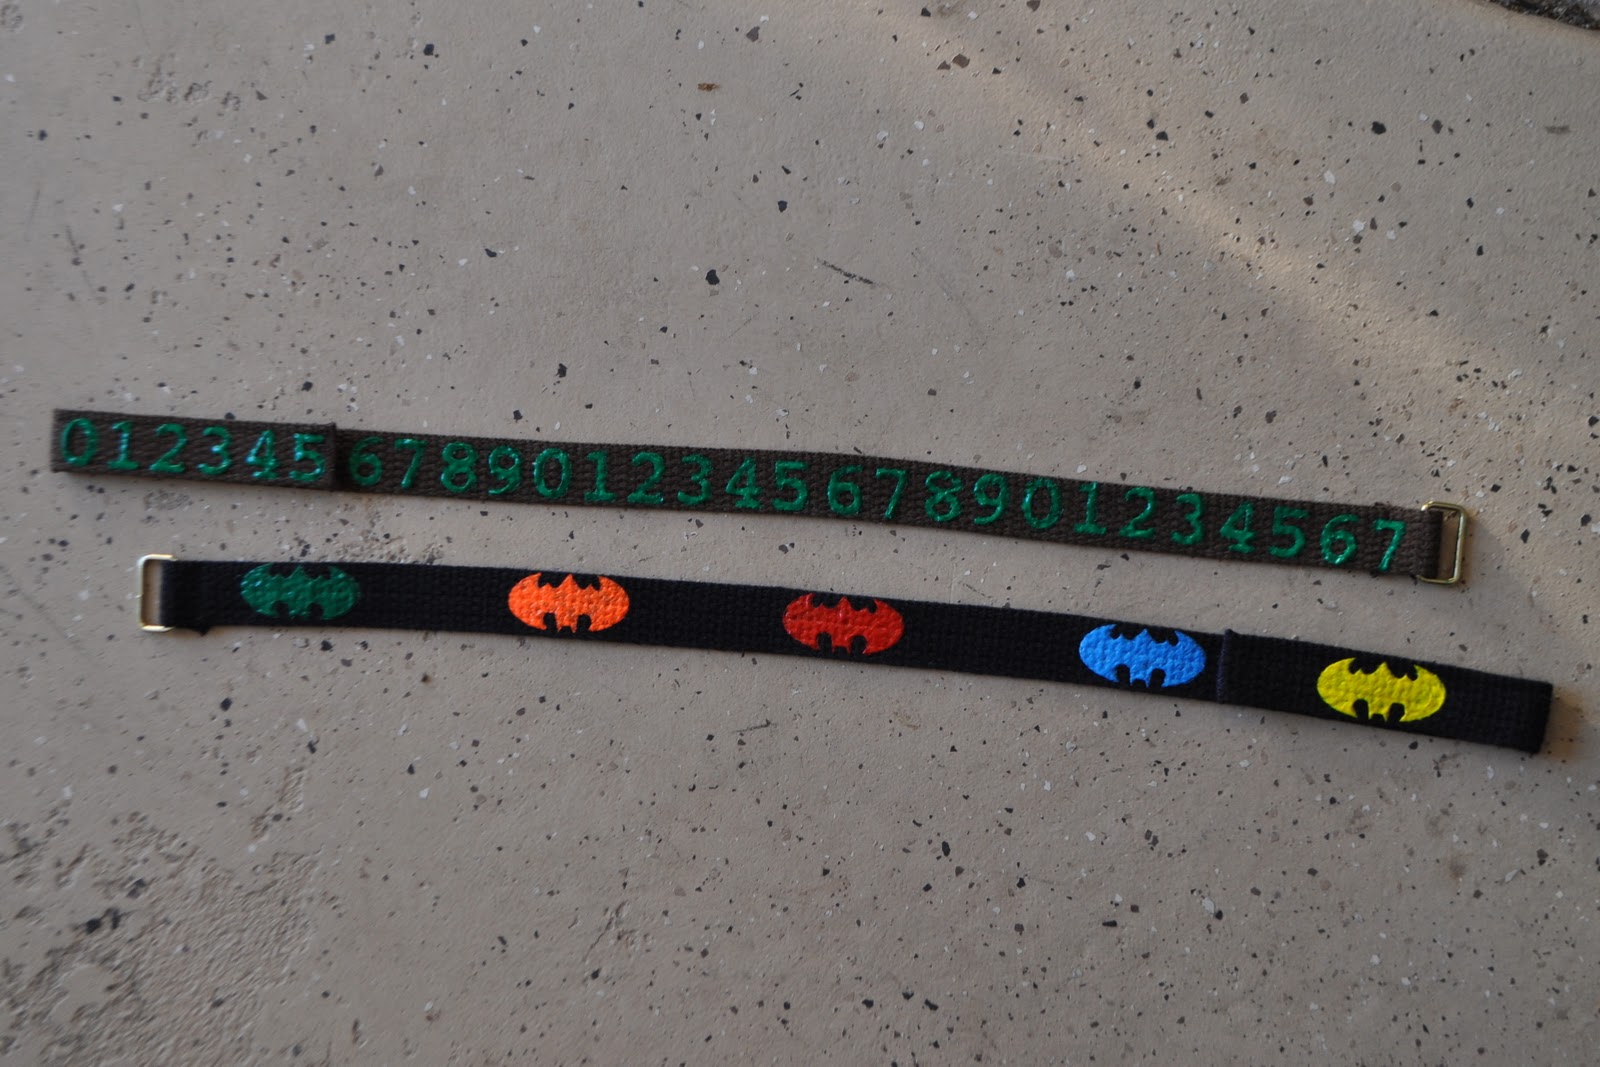
Now, I wanted to make the belts extra cool, so I did a little freezer paper stenciling. If you haven’t tried freezer paper stenciling, you can find my video tutorial of it HERE. (You could also sew a cool ribbon over the top of the belt if you had a fun one.) I cut out bat signs and ironed the paper onto the belt. I did numbers on the other belt.

Usually I use regular fabric and paint and brush it on, but this time I tried something different. I used my 3-D paint that squirts out. (They used to call it puffy paint.) I squirted it out as I moved the nozzle back and forth quickly (as if I were coloring something in with a marker). I removed the stencil really carefully while it was still wet. You’d think it wouldn’t work, but the paint is pretty thick so it doesn’t bleed. It worked well and it gives the images a fun 3-D look.
And there you have it. The belts ended up costing a little over $2 each. You can personalize them and best of all your little guys can take them on and off all by themselves when that urgent potty time arrives.
And that’s the end.

Thanks for having me ladies!
Brilliant, right? Burke would LOVE one of these belts…
Don’t forget to go say hi at I Am Momma, Hear Me Roar today!
