
how to make a reading nook using two wooden palettes (part 1)
As an Amazon Associate I earn from qualifying purchases.
 I love palette furniture. Actually, I think that I love it for the same reason that I am so intrigued by Anthropologie’s window displays- the idea of taking something that no one wants and turning it into something useful and/or beautiful resonates with me. An ostrich made out of book pages? Lovely! A giant wreath made from old books? Fabulous!


Which leads us to… a reading chair for Burke’s playroom made from a palette and other materials we had on hand! Yes please!
Since the assembly of this little gem was a little… mmmm… involved, I’m going to break this tutorial into several parts. Today, I’ll give the info you need to platform of the ‘chair.’ In part 2, we’ll make and attach the sides of the chair.
To make a palette reading nook yourself, you’ll need:
-2 wooden palettes (check the back of home depot or lowe’s… we asked first…)
-scrap pieces of a 2 x , cut into six squares
-3 rolling casters
-sander and sandpaper
-nails

1. Choose your palette. Three tips for this process-
a- Choose the most sturdy palette you can find
b- Find a palette that is a square
c- Try to find one with slats that are as close together as possible.
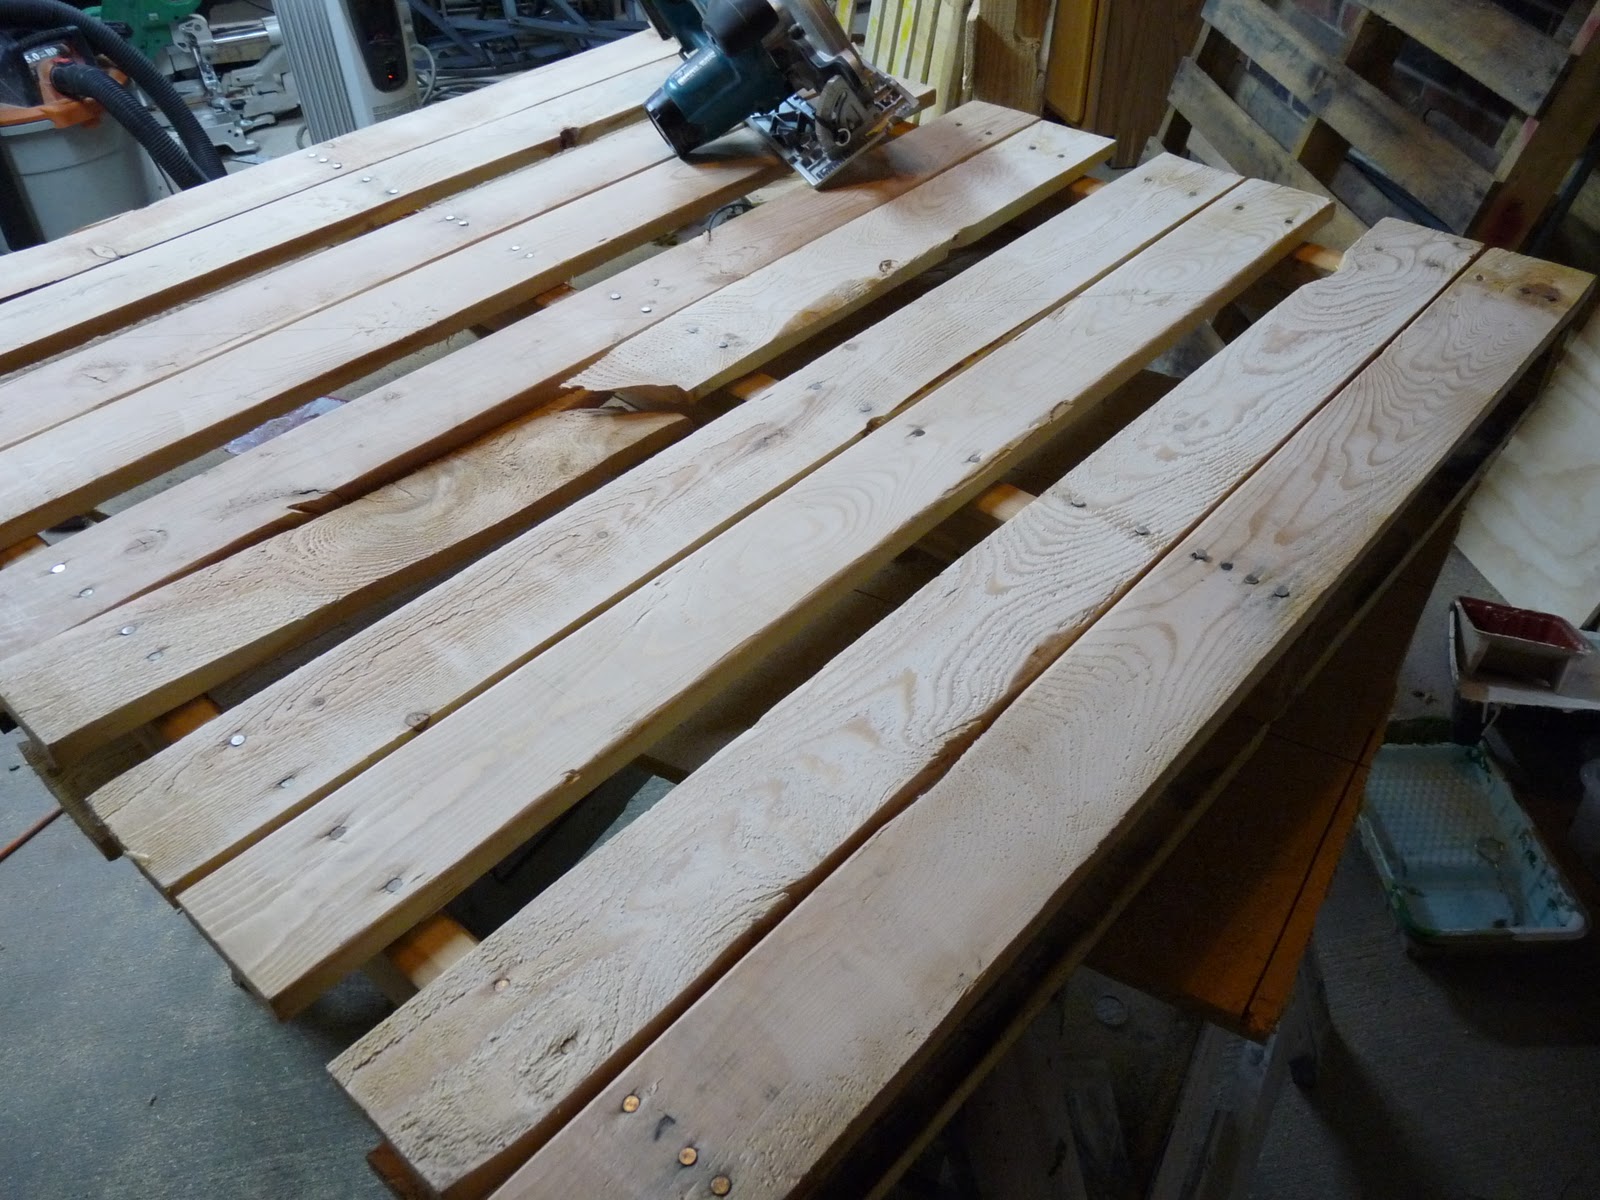
Sand down the palette to the raw wood. Then draw a diagonal line from one corner to the other corner with a pencil.
*Note- The palette we used had a broken slat. We just used the side without the broken slat for the chair.

2. Cut along this line. We actually used a circular saw to cut along the diagonal line on one side of the palette, flipped the palette over and cut along the same line on the other side of the palette.
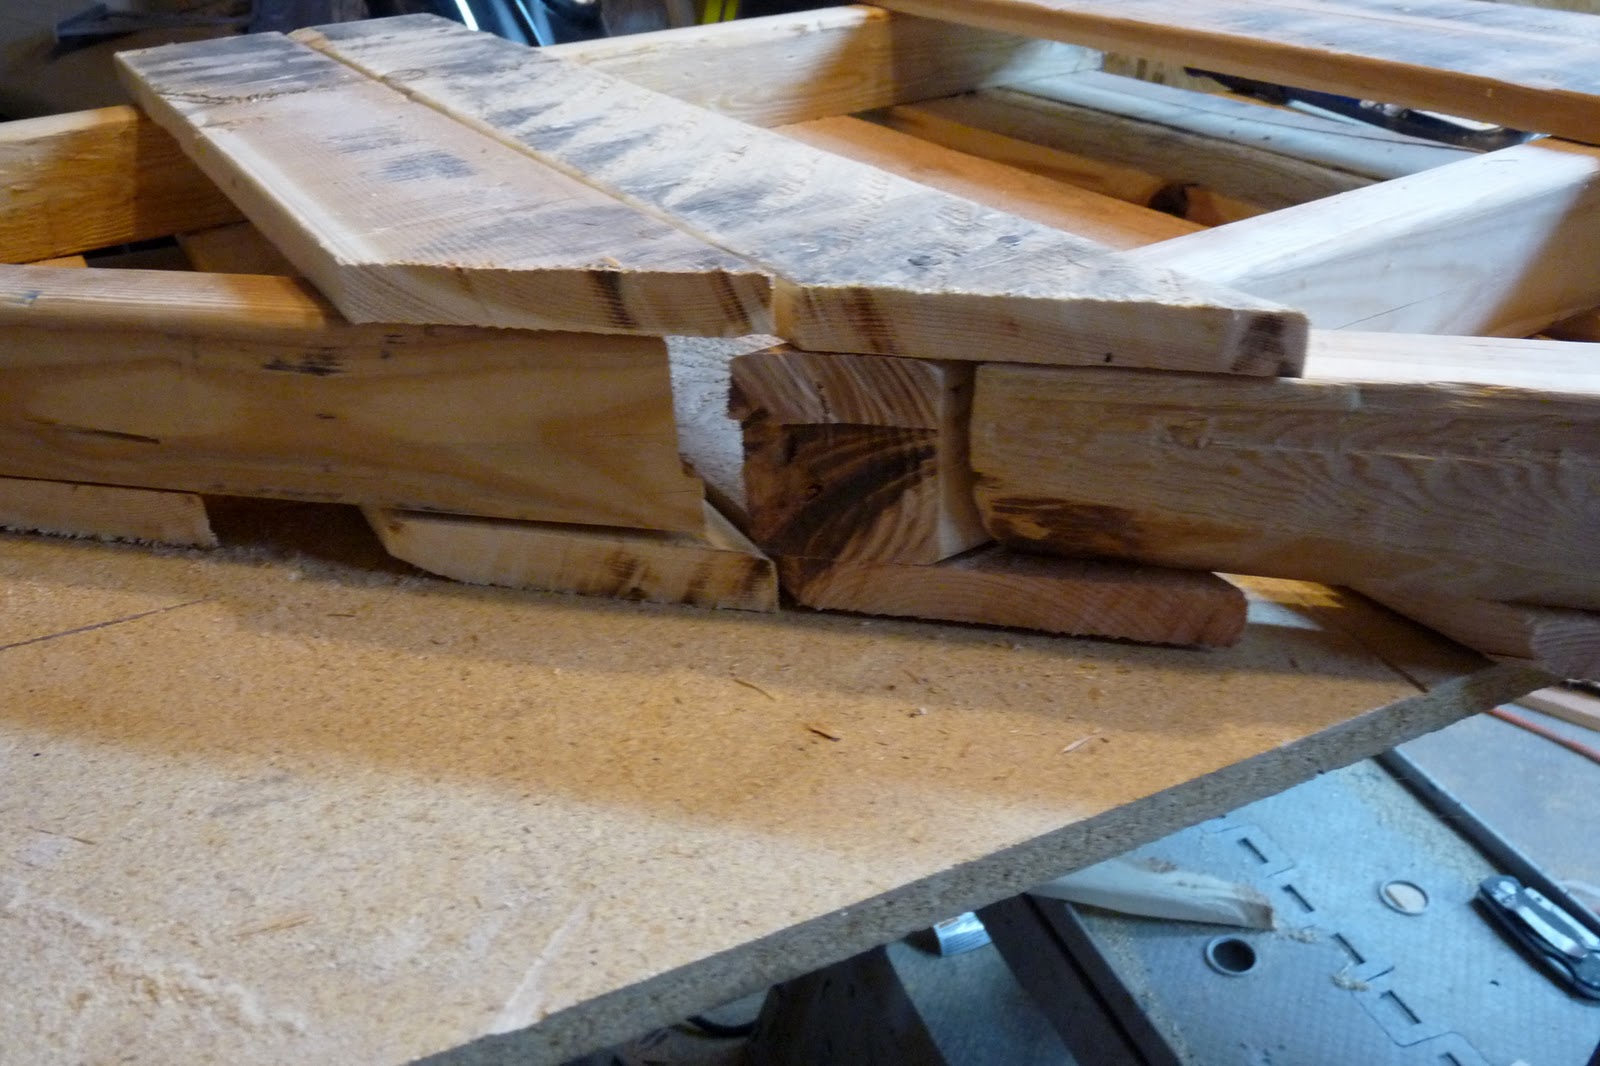
3. Reinforce your ‘front’ edge. Use leftover wood from the side of the palette you discarded (there’s already a piece of wood wedged in between the top and bottom layer of the palette, so use that piece since it is already the right size) to place an extra reinforcing piece on each side of the middle board, sandwiched between the top and bottom layers. Nail your reinforcement pieces in place.
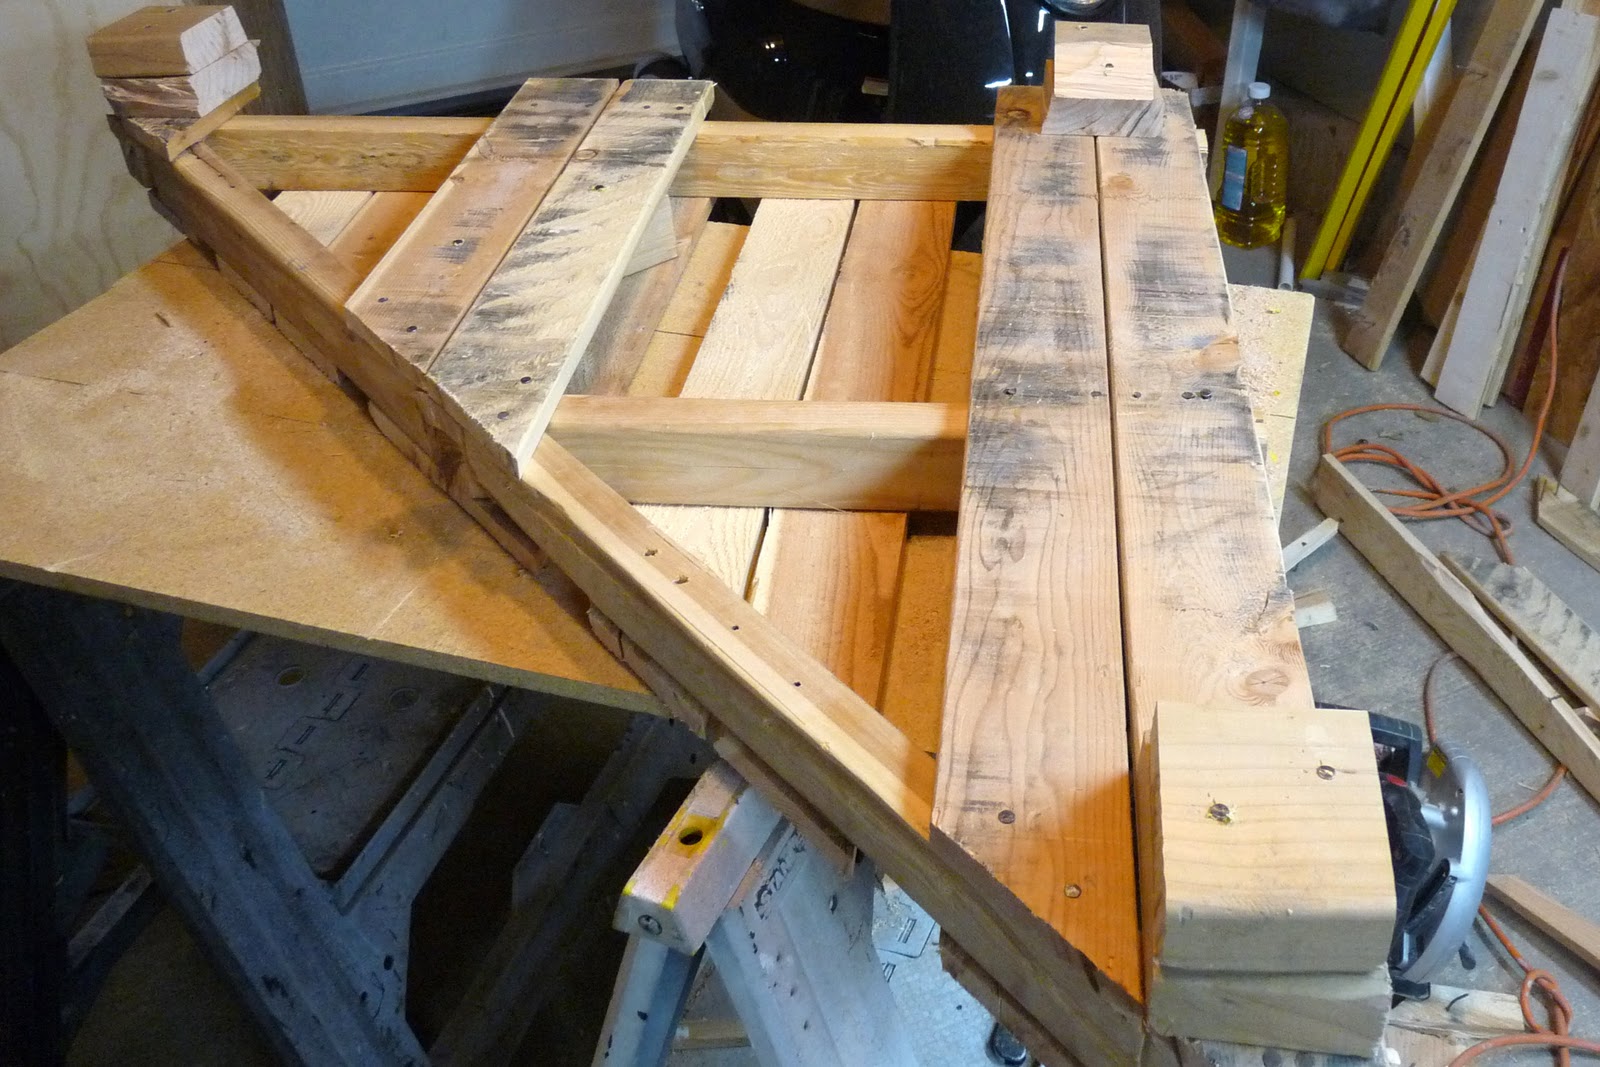
4. On the bottom side of your platform, build up all three corners with squares of scrap wood. These will make your chair sit higher off the ground. Attach the casters to each corner ‘tower.’ Flip over and admire! You’re done with part 1.
Remember, this is what you’re making-

I just love this bench! It's adorable.
I really, really like this. My husband and I always say we will try "palette furniture" but it seems too daunting. Your tutorial made it look easy! 🙂
Fabulous!!! Thanks for the tutorial!! Keep it coming cause I am building along with ya!
Just a quick note to let you know that a link to this post will be placed on CraftCrave today [06 Dec 01:00am GMT]. Thanks, Maria
Just a quick note to let you know that a link to this post will be placed on CraftCrave today [07 Dec 01:00am GMT]. Thanks, Maria
OH EM GEE! I love this! I just sent this to my husband with a whole lot of begging attached!! 🙂
me again! just spotted this lovely cup!
can you please tell me where is it from?
thanks a million
@eva
The cup is Orla Kiely… I got it at Target last year sometime. 🙂 I'm sure you can find one on ebay, etc.
@eva
The cup is Orla Kiely… I got it at Target last year sometime. 🙂 I'm sure you can find one on ebay, etc.
Wow! awesome!! I do also like working with palettes (if you have a minute have a look at macarenabilbao.blogspot.com) but I've never seen such an original idea, in corner! congratulations
This would be great in a classroom too giving the sense that reading is special.
This is TOO cute!!! So happy to have found your blog (Layla P. tweeted this post 🙂 Will be stopping by often…lots of great inspiration for me here…
I think this is really awesome! I love pallets, although I asked the home depot around here and they have to send them back.
I love this!! Adorei a idéia.
http://cintillantealvarenga.blogspot.com
I fell in love with this… but I am not seeing part II of this tutorial. Thanks, Nicole
Hey Nicole- here’s the link to part 1- http://www.kojo-designs.com/2010/12/kojotutorial-reading-chair-made-from-two-wooden-palettes-part-2/. I’ll update it in the tutorial as well. 🙂
Send over pictures if you make one, ok? I’d love to see your take on it.
ps- I never made a tutorial for making the cushion. Essentially, you make foam triangles to fit in the nook and sew a triangular cover. I used egg crates for the foam (the mattress topper kind) and a sheet for the cover. Fingers crossed that I get to an actual tutorial someday. 🙂
Love this!! It’s brilliant! Definitely on my “to do” list.
Thanks Joni!
what did you use for the mattress? or what went on top of the bench part
Hey Stephanie! I used foam, cut into a triangle and doubled over. Then I made a cover using sheets.
Hopefully that helps!
A very nice piece of furniture
I like this. My daughter is very interested in palette furniture. Your tutorial made it look easy!
Keep up good work.
Thanks Cristina!
Wow cute baby also appreciate efforts for making this.
Your work is very nice. Nowadays this is great to share on the internet. keep it up thanks for sharing with us such nice content.
Wow, I wish I had your carpentry skills. This is really great!
Thank you for sharing this.