
kojotutorial: upholstered, tufted headboard for a toddler bed
As an Amazon Associate I earn from qualifying purchases.
I always get jealous because Jordi’s girls will actually craft with her. Despite my best efforts, Burke just isn’t into crafting with me (not yet at least). However, he is possibly the best person in the world to make things for. Seriously. He is so proud of his Big Boy Room, gives a tour to anyone who will follow him in there, knows which items we made just for him and gets so darn excited about all of it. If he won’t craft with me, his utter amazement (and constant affirmation) at the things I make for him is a good consolation prize.
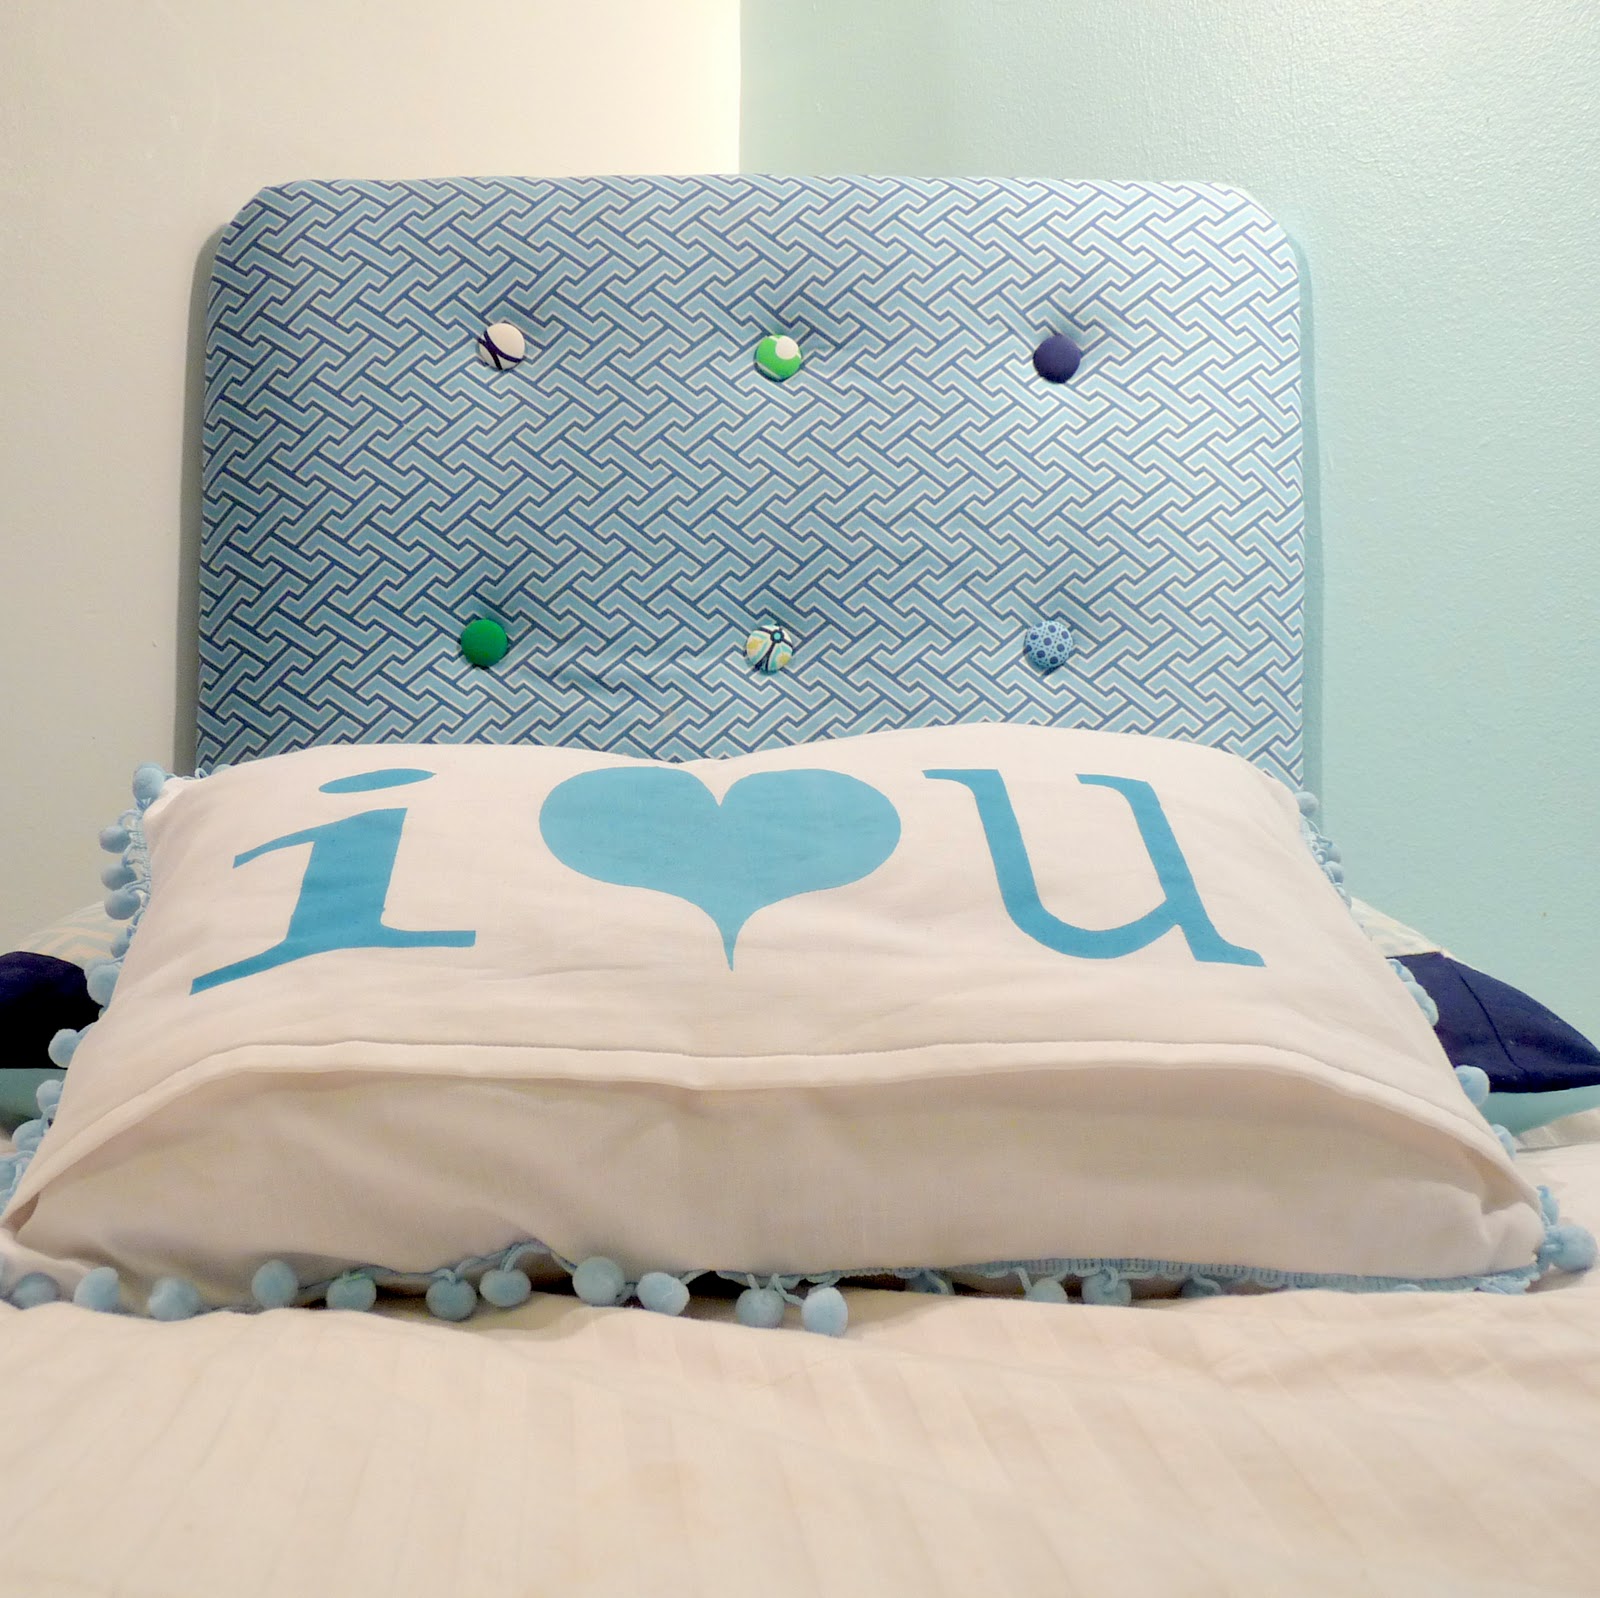

His toddler bed is one of those items. We followed the tutorial here for the upholstered bed itself and then put together a tufted headboard to match. To make said headboard, you’ll need:
-a piece of particle board (the width should be the same size as the width of your toddler bed… and the height is a matter of preference)
-fabric with 3 or 4 inches around the perimeter of your wood
-batting to cover your board
-a staple gun and staples
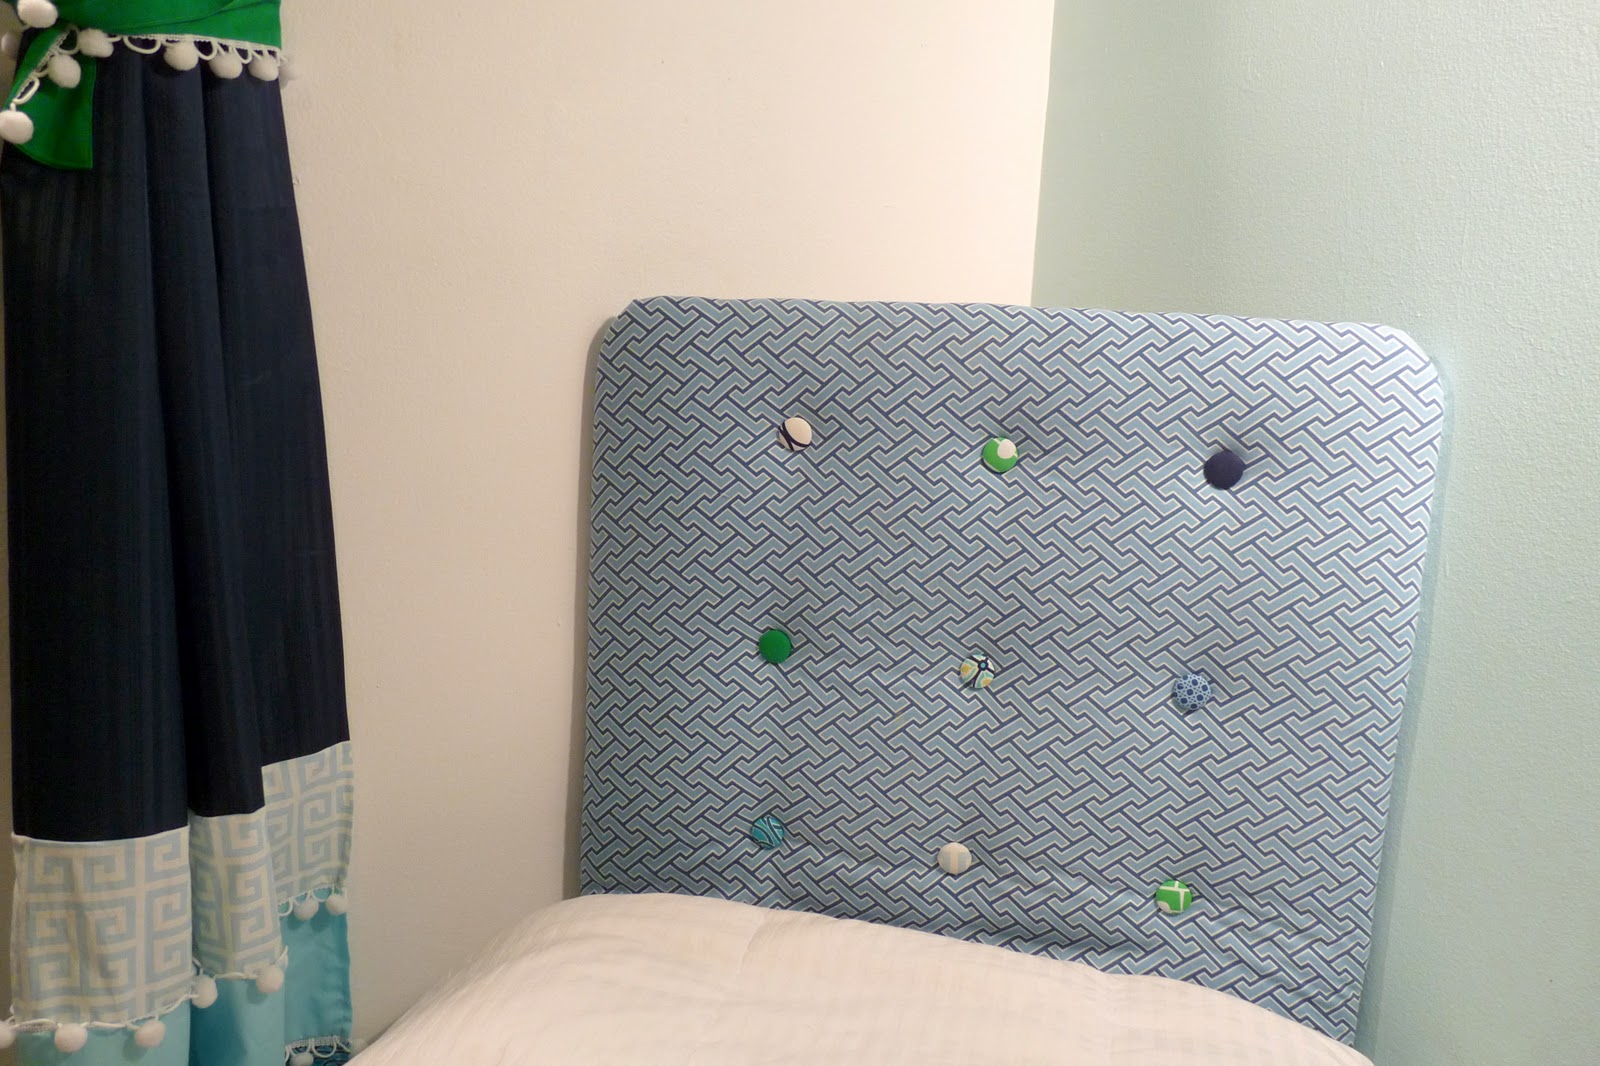
-9 fabric covered buttons
-thread
-hot glue
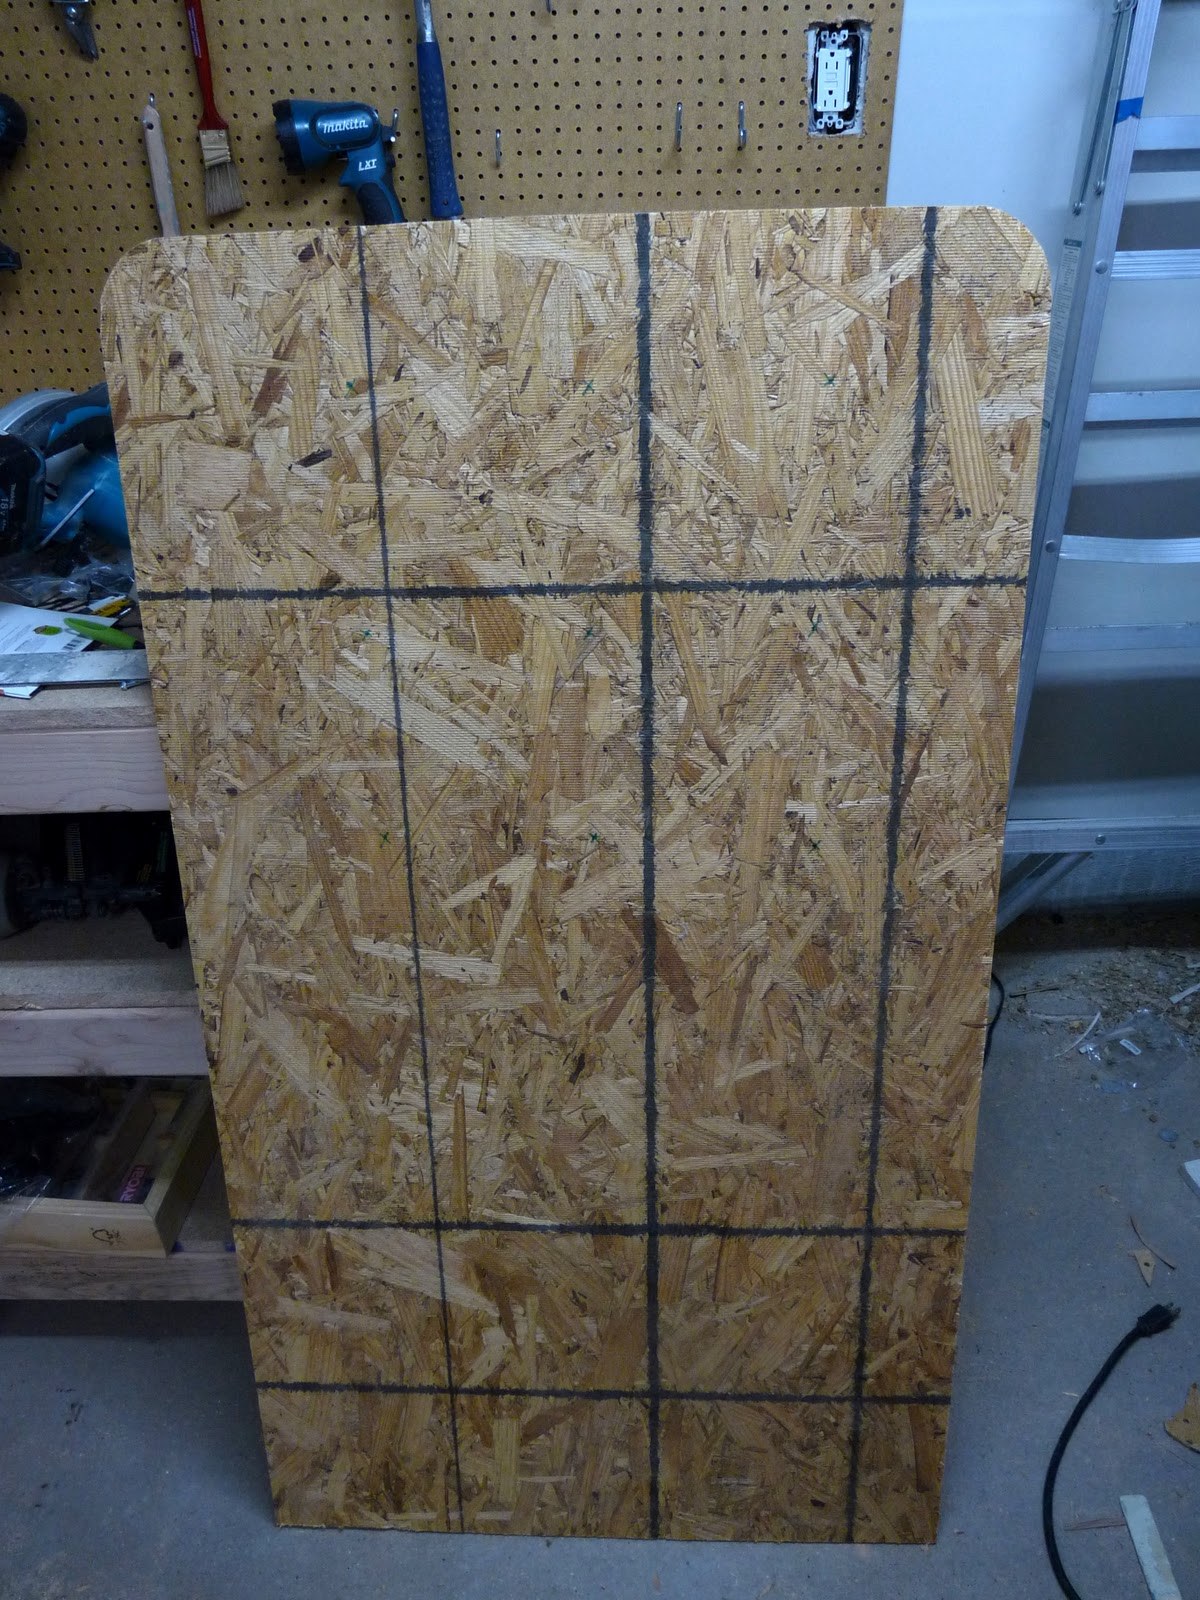
With a jigsaw, round the corners of your board. Sand off rough edges.
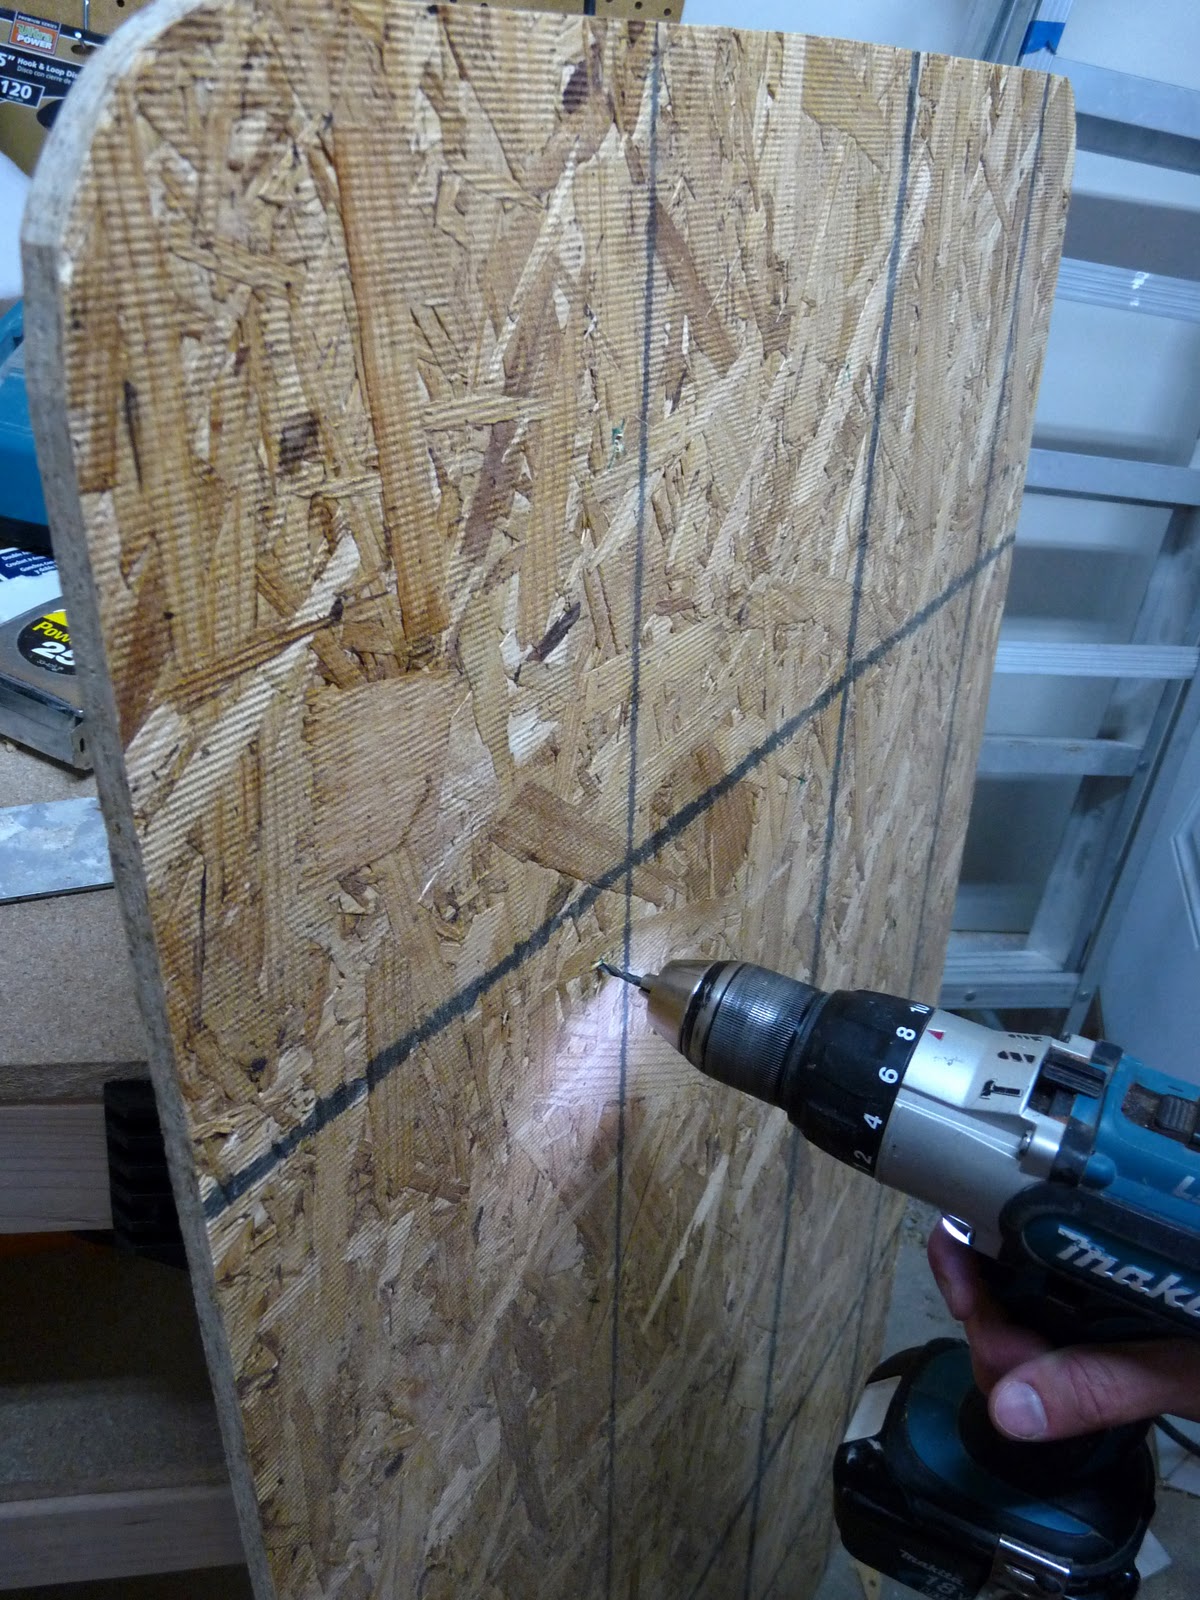
Measure out and mark the places for your nine buttons. Drill holes in those nine places.

Wrap the front of your board in batting- staple around the back.
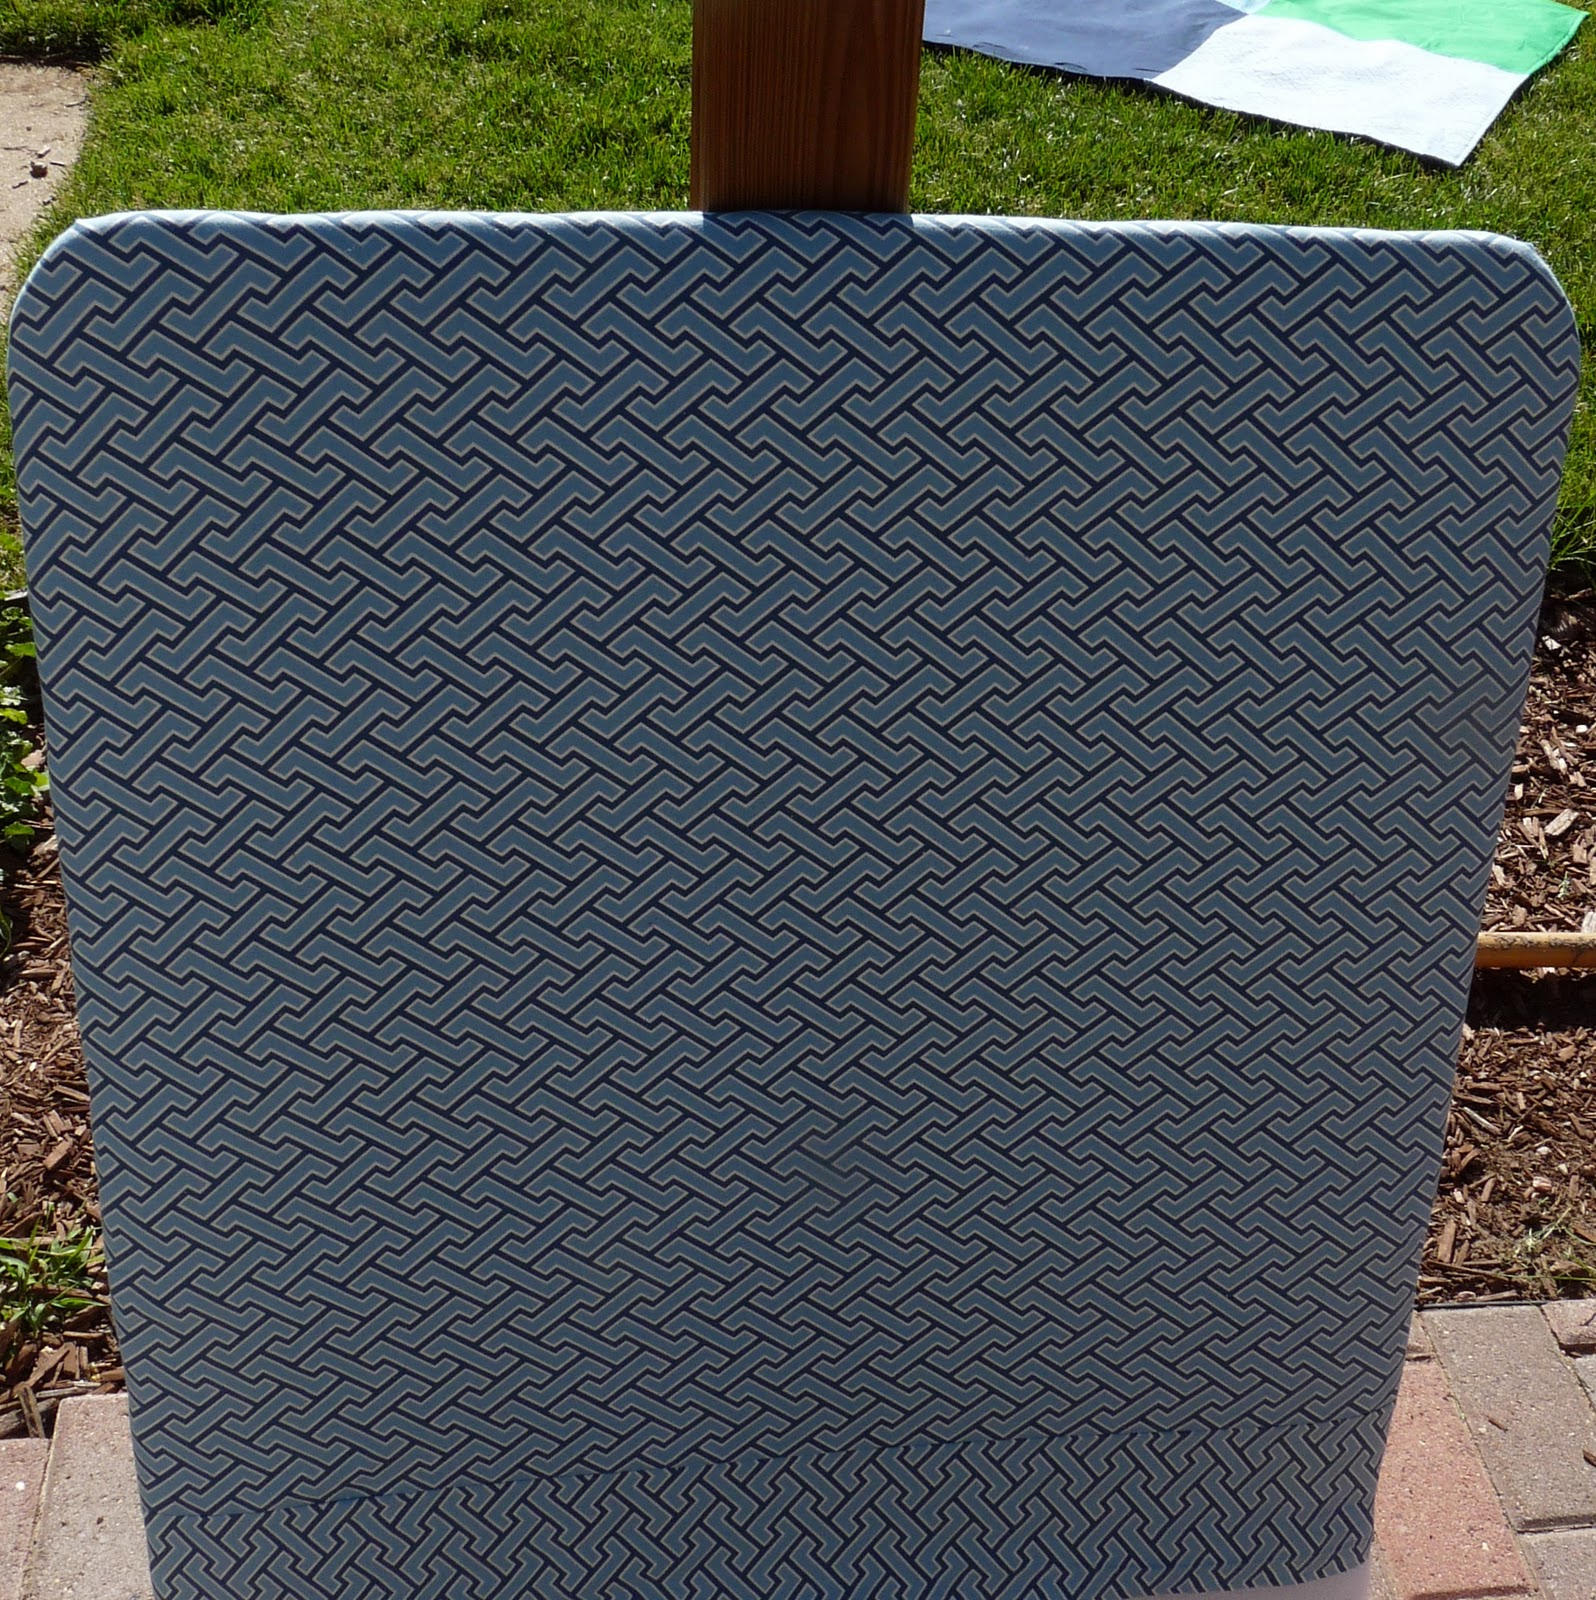

Wrap your fabric around the batting covered board, staple around the back.
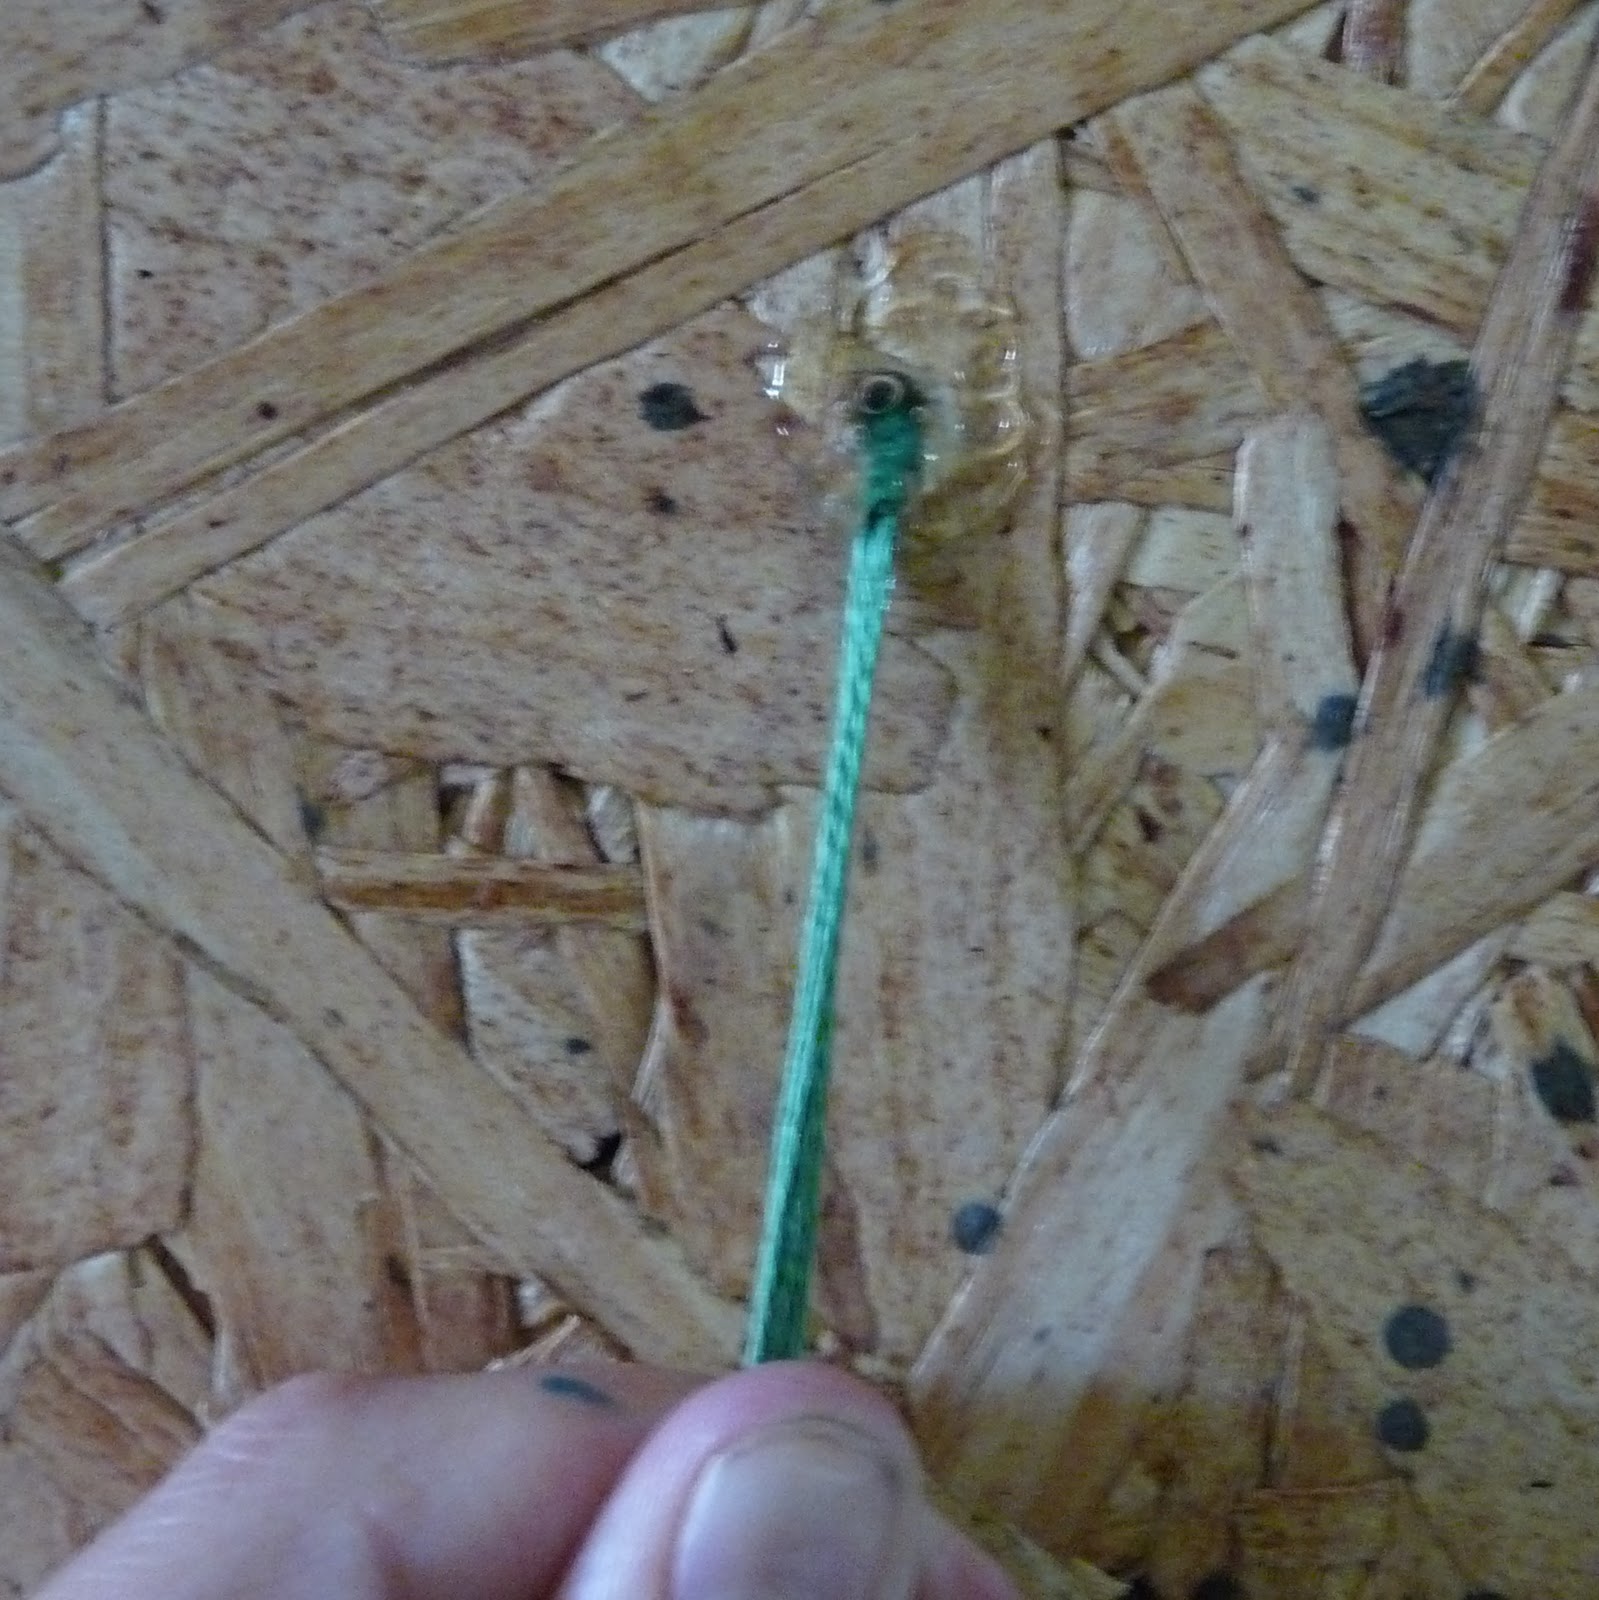
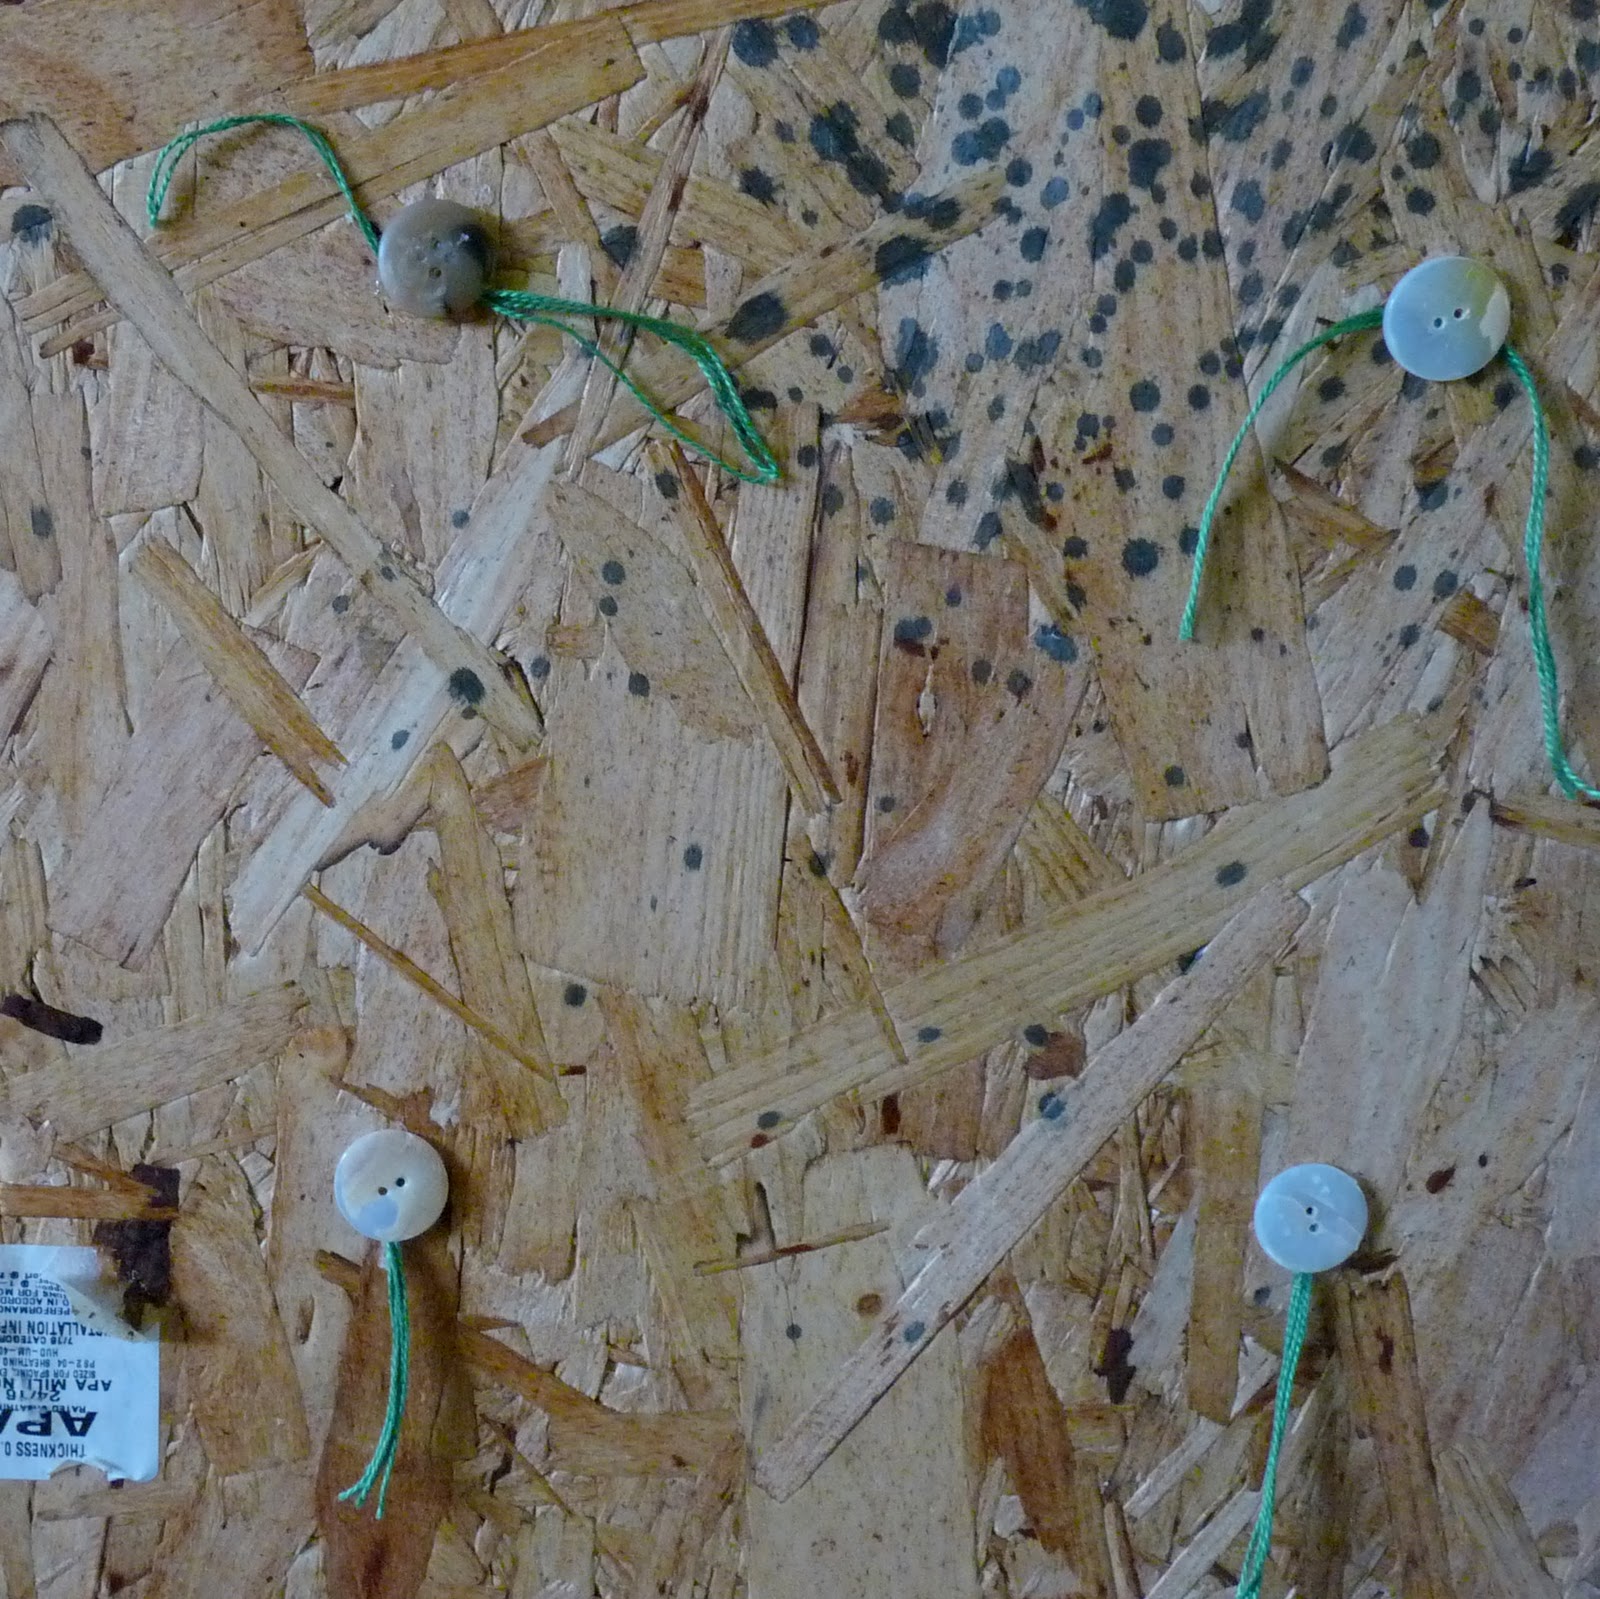
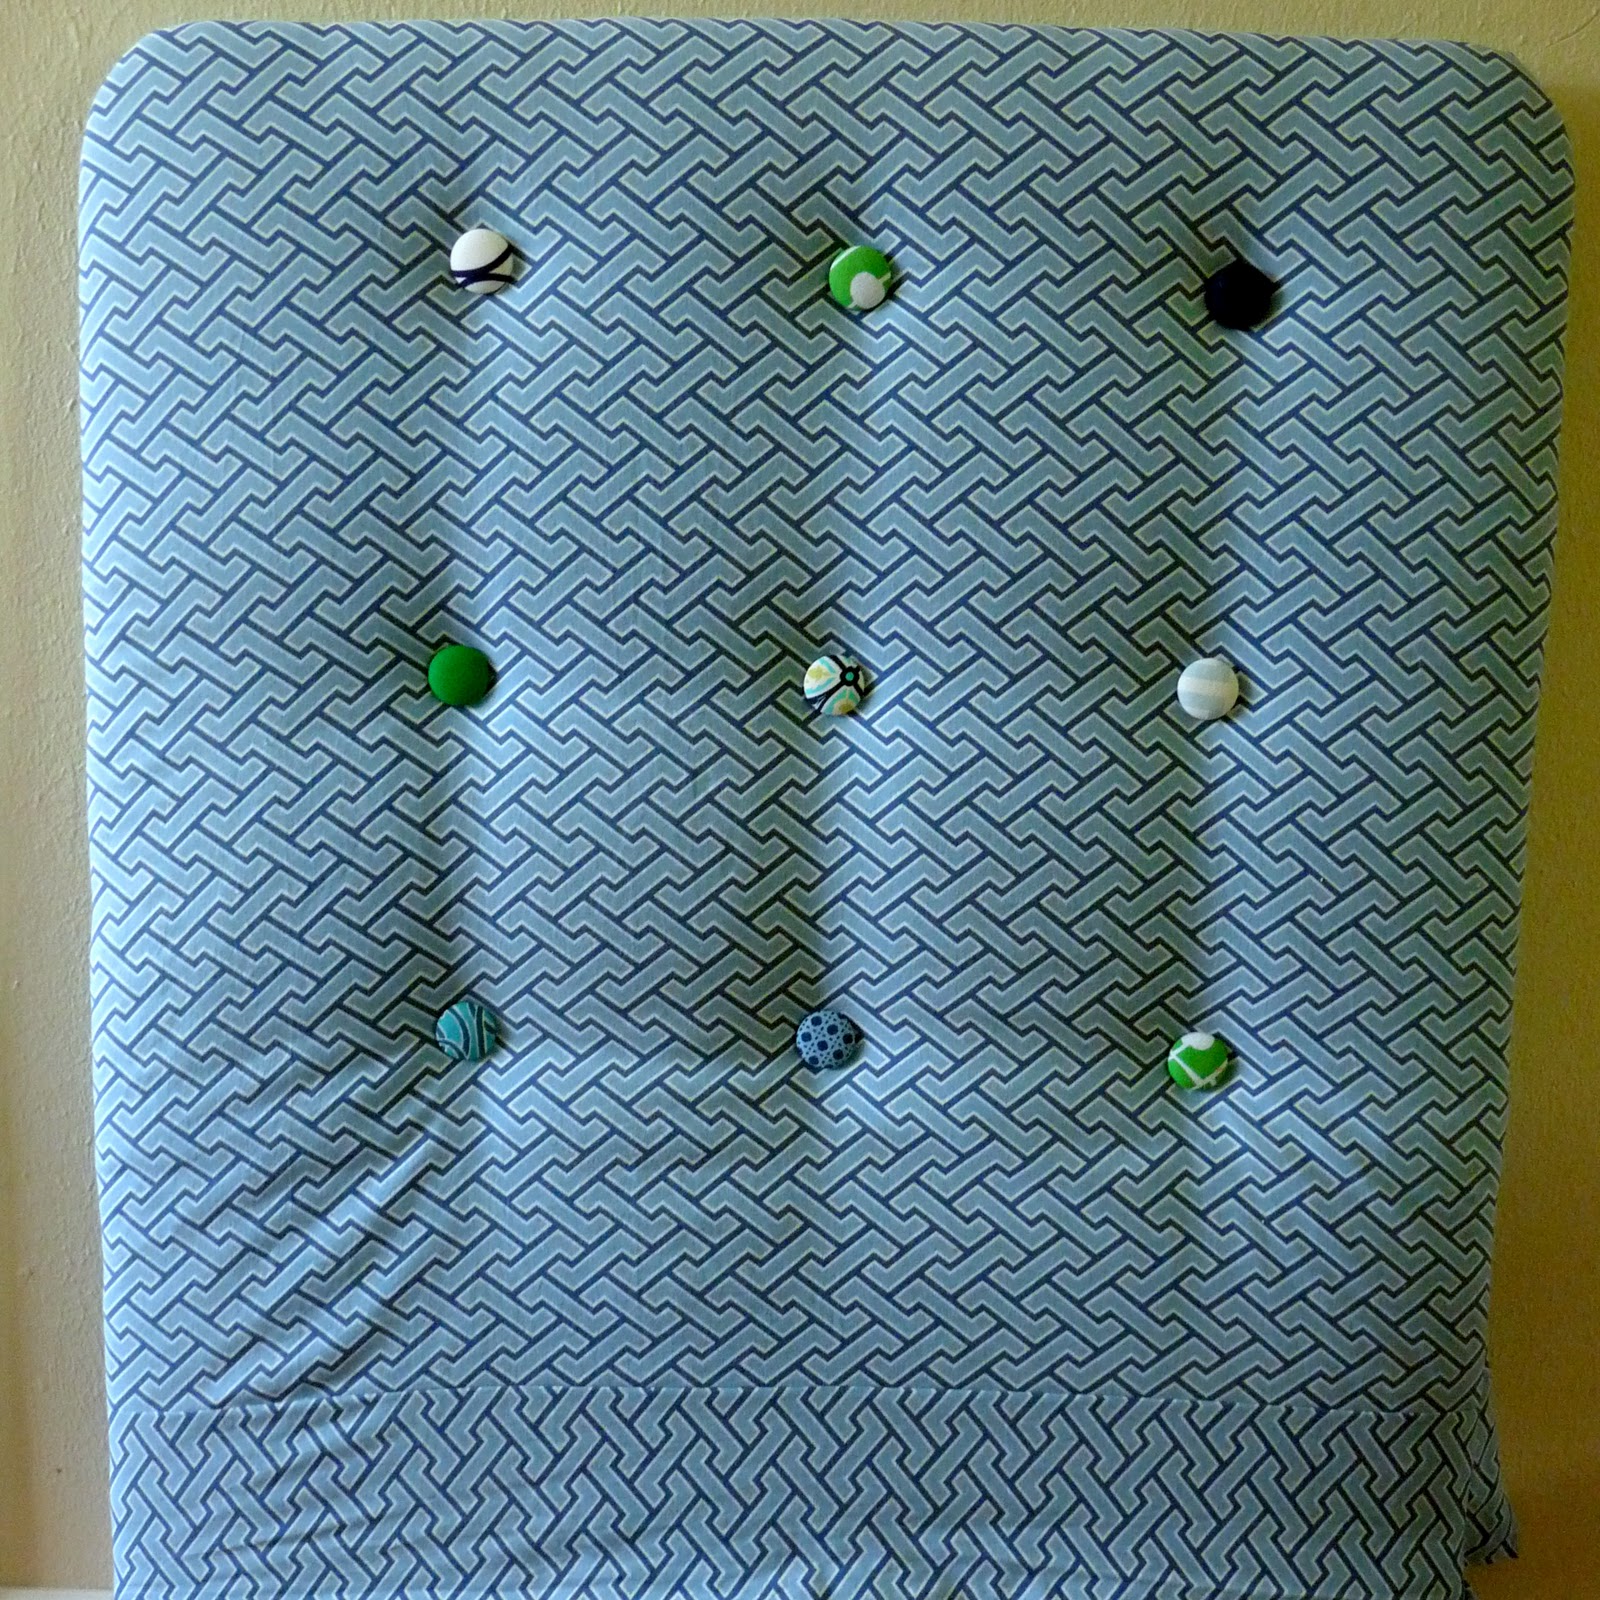
Thread embroidery floss through the back of each covered button. Poke through the holes you’ve drilled. Hot glue a button on top of the pulled-taut thread (if you just put a dollop of hot glue on the thread, it won’t stay taut, so the button helps it stay put and gives you the tufted look).
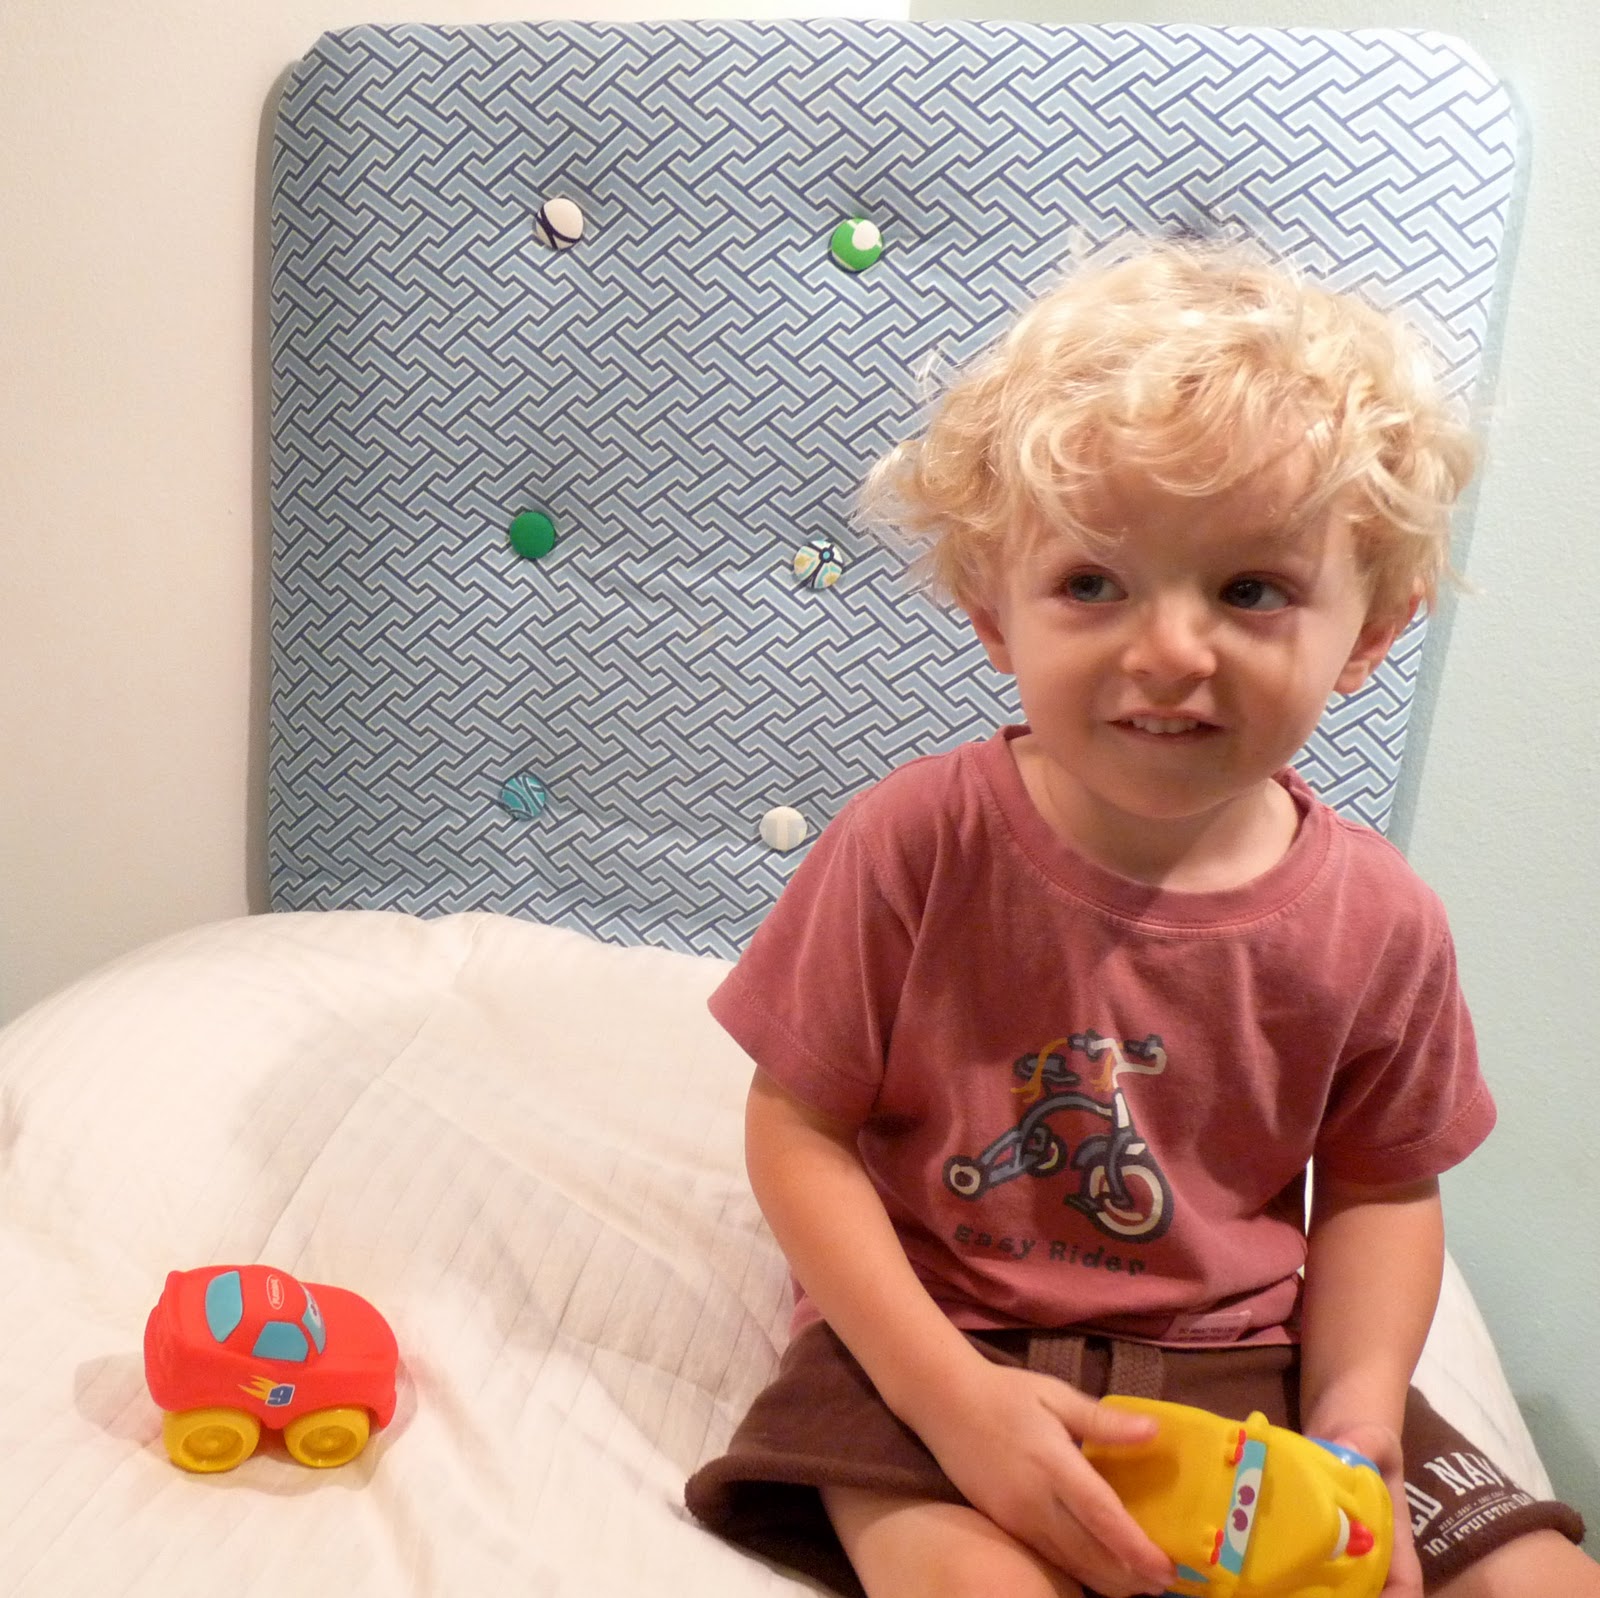
Use screws to attach to the base of the front of the toddler bed. Put in your little one’s room (hopefully he or she shares Burke’s sheer delight in your creation!).
That came out so cute, I love the buttons! Thanks so much, I'll be linking.
I thought you were supposed to tie the thread through the button on the back? So it can't pull through? I'm confused!
I love your site, and enjoy your sister love.
so cute! i love the pillow too!
I think I might be brave and try this for our queen size bed… you made it look so easy. (which means I will surely mess it up-haha!)
That is pretty awesome. Thanks for the tutorial!
I love this…someday I just may have to try it!
adorable!
~selina
LOVE it! the buttons are awesome. Nice work!
I totally have that tutorial bookmarked – and on the to do list for next month! LOL I love the headboard you paired with it!